

Alexander Grabovetskiy, woodcarver, School of Woodcarving · Published 2020
Why does a sharp carving tool still struggle to cut?
Quick answer: A struggling carving tool is one that won't slice easily even with a good edge. In Venice Room 41, part 10, I was cutting uphill, more than just against the grain, and my really sharp tool still struggled. Then a number 11 went in, and I said it was a good idea to take my time.
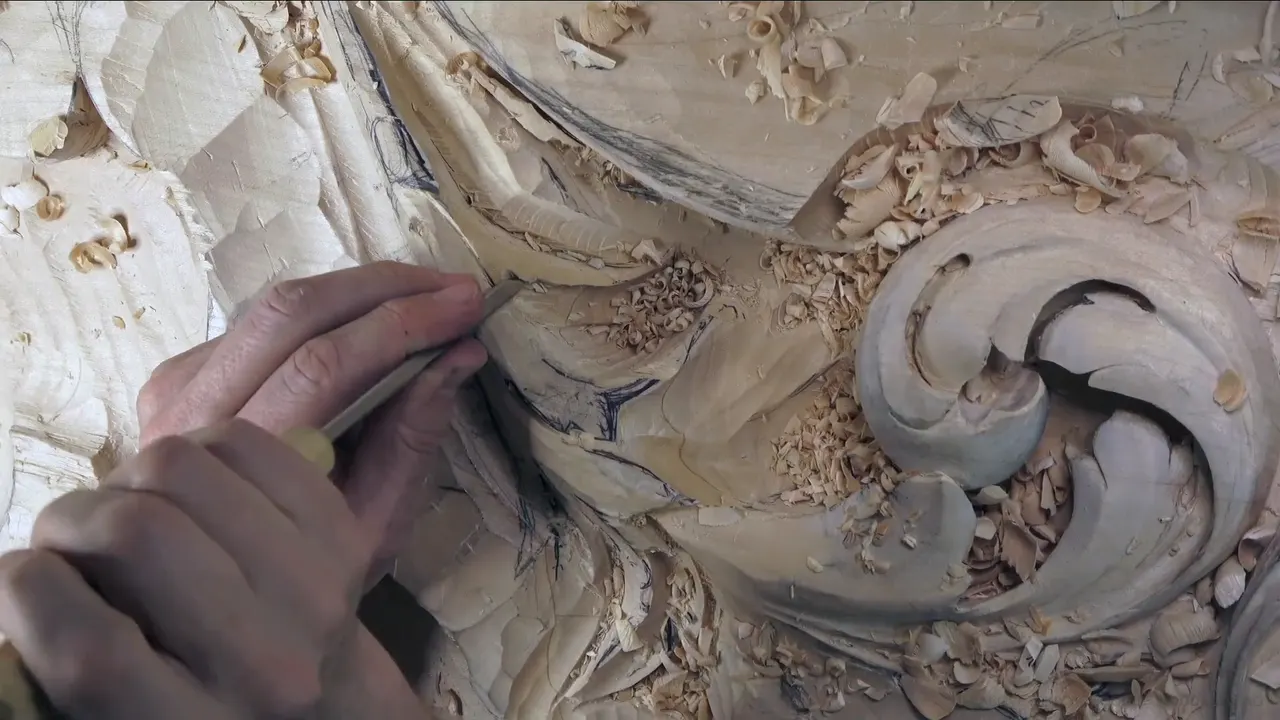

Struggle is the word I use when a tool won't slice easily, and in part 10 of Venice Room workshop 41 it happened with an edge I knew was sharp. I took a number eight and tried to go in. I was cutting uphill, not just against the grain, more than that. A tool must be really sharp for it, I said, and mine was really sharp. It still struggled to slice.
Have you ever pushed a gouge you just honed and felt it stop in the wood? Did you look at the edge and find nothing wrong with it? Then look at what else the tool was up against, the way I had to on camera.
Part 10 is short, about seven and a half minutes. Everything else here comes from the parts around it and from other workshops and courses where I used the same word, and every lesson page I link is public, so you can check the moment.
Six times a carving tool struggled on my bench
- Going uphill in workshop 41, a really sharp number eight still struggled, and an 11 followed it.
- A sound came from a really low bevel in workshop 54.
- A router plane struggled in a tiny spot on my furniture panel, and in cavities it couldn't get inside.
- A dull tool in workshop 28 got sharpened off camera, and I said that takes only a minute.
- Walnut is a little harder than lime, so I kept my knife shallow there.
- One hand pushing and the other braking only looked like a struggle in workshop 102.

What made my gouge struggle in workshop 41?
One spot I couldn't leave alone. I went at it again with the number 11 and said I had to be careful this time. Then it still bugged me.
A number eight went in next, and that was the sharp tool that struggled.
Part 9, right before this one, had the other problem. There I still needed to clean uphill, I wasn't too careful, and my tool was not too sharp either. I didn't like how it went, and I had to move the eye farther over. In part 10 the edge was good, and the tool still struggled.
For a moment I called the eight an 11 and then caught myself. Eight, I'm sorry. A nine or an 11 could work, I said, and I went in with the 11. After that I wondered if a quarter inch (6.35 mm) number nine would be too big, or okay. It went underneath, just like that.

I still tried not to break anything. But I really wanted to go deep, and I really wanted that shadow.
Uphill again, with the 11. Here I said it's probably a good idea to take my time and not force it, and excavate little by little. Against the rules, I said.

Which tools did I talk about for that spot?
Two more ideas came up as options. One was to switch to the number nine, because it gives more wiggling ability. Number nine is actually half a round, I said, and I thought it would be better. The other was a smaller number nine, about an eighth of an inch (3.2 mm), to make a complete plug, drill that in and move it out.
I know you don't see it, I said. But the spot looked clean now. Clean and deep, and that was what I was after.

Does a mallet help when a gouge is too big to push?
It did for me. In a livestream from April 2020 I said I was having a little bit of a struggle. What I was doing was a rotation, just like drilling in, and a tool that's a little too big just doesn't work like that by push. A mallet would help me, I said. I rotated and went in, changed the angle a little, gave it a bump, and the plug flew out. About a quarter inch (about 6 mm) came out, and I said I'd probably start with a smaller one there.

How did I blend the cuts after the struggle?
First I lost the idea of how it was supposed to be. A small undercut was coming, not much, so I could safely outline that side, and I said that wouldn't be a mistake. Then I needed to blend all those cuts together. A lot of them ran against the fibers, and they didn't look clean.
I could take it to the extreme if I wanted to, shaving more and more and more. But there's always a point when you can't do any more. It's going to be too weak, and that would be a big mistake. More mess came next, and I had to take care of it and take it out.

For the blend I stopped to think which tool was the right one. I tried a number 11 at 10 millimeters (0.39 in), and it worked just fine. One little region still needed the smaller one, seven millimeters, a little bigger than a quarter inch, as I put it. When I was done I had almost a tube effect, exactly what I wanted.
One last bit I said I could take care of later. Actually, you know what? I could do some of it right away.

Can a low bevel make a gouge struggle?
It did in workshop 54 of the Venice Room, and you could hear it. I asked if you knew what that sound was, and I told you it was my tool struggling. The bevel was really low, and that wasn't the best tool for the job right then, though I was still able to grab some of the material. I had to be careful, because I could break my tool.
So I needed to change either my position or the tool. My plan, I said, was to just change the position and go toward the hole on the inside.
Right after this one, part 11 shows the other side of a low bevel. That tool was really, really thin, I said, and it slices really easily through the fibers, but I had to stay really mindful of how deep I went. With the harder woods you really can't use too low a bevel, or you're going to break it. So having low bevel tools and higher bevel tools is always a good idea if you're able to afford it, even for a hobby if you work with more than basswood and limewood.

Why would a router plane struggle?
Tight places did it on the furniture panel, a tiny spot once and cavities another time. In lesson 18, one spot was kind of tiny, and it felt like my router plane was a little struggling. I'd probably need to remove a little more material there, I said, and after I got in it was much better.
Later in that lesson I had a 16th of an inch (1.6 mm) blade in it, and it looked like it was struggling in one area. I cleaned that with a one millimeter (0.04 in) tool, a little closer to the final depth, and it was much better now. Some places were impossible to get all the way into, but at least a small cut showed me what the final depth was going to be.

Two lessons earlier, in lesson 16, I was really close to depth. But I was struggling to get inside those cavities, so I said a grounding tool was better there, and it wasn't the final finish anyway.
You can also head it off. In lesson 15 I hoped I was ready for the router plane, and I said let me try a couple more times down first, so there would be a lot less struggle for it going around. The blade was 1/8 of an inch (about 3 mm) then.
Do a dull edge and harder wood add to it?
Both did on camera. In Venice Room 28 one tool felt a little too dull, or maybe not a little, maybe really dull. I sharpened it off camera and tried it again. Much nicer. A lot of people make that mistake, I said, they keep carving with a dull tool, when it only takes one minute on the leather, a wheel or a strop, and you can carve again without the struggle.

Wood counts too. On the furniture panel I wasn't going deep with my favorite knife, and I gave reasons. The first was that I didn't want to struggle with the harder wood. Walnut is a little harder than lime wood and basswood, not that hard, but still harder. And when you press, the fibers smush both ways, and later they pop back even after a nice clean-up. All I needed was a line to set a gouge in later.
When is a struggle only the look of control?
Much later, in Venice Room 102, I said it felt like I was struggling, but I wasn't. I was just trying to control my tool, because the direction of the grain changes in that area, and it's easy to make a mistake there. One hand is pushing, and the other hand is braking.

In a question and answer video on carving with the grain, I said that in the style of Grinling Gibbons there's no such thing as carving with the grain. You have to come at it from some angles, and the only solution is to keep your tools sharp. Then someone asked if after all these years I still struggle, or if I feel the wood by now. I feel it, absolutely.
What do I do when the grain runs a strange way?
Break it up into steps. In workshop 61 I was going around a spot with a quarter inch (6.4 mm) tool, pointing toward the inside. If it has some struggle, I said, just do multi-step, and I did one that way to show you. Careful, though, because with grain like that you're working in a really strange direction. I needed that shadow. Later my plan was a number nine of one-eighth of an inch (3.2 mm).
| Where | What the tool was up against | What came next |
|---|---|---|
| Venice Room 41 | A really sharp number eight, going uphill against it | Then an 11 |
| Workshop 54 | Really low bevel and the sound I asked about | A new position |
| Furniture panel 15 | Router plane with an eighth inch (about 3 mm) blade, ready to go around | Go lower first |
| Furniture panel 18 | A sixteenth inch (1.6 mm) blade in one area of the background | Clean with 1 mm (about 1/25 in) |
| Same panel, lesson 16 | Getting inside those cavities with the router plane | A grounding tool instead |
| Workshop 28 | Too dull, maybe really dull, and much nicer after | Sharpened off camera |
| Venice Room 61 | Grain like that, and a shadow I really needed | Multi-step, I said |

A beginner can hit the same wall. On my curly kitchen cutting board I said I usually go in one pass, but when you're just starting to carve that isn't always possible, and you can struggle sometimes. So I showed the triangles. Go in from two sides, take the triangle out, then come back and finish the detail.
Rolling a leaf under is another one. For the tray of blessing I used a number two and said some people do struggle to roll it, so they can grab a smaller tool and start undercutting, just not too soon. On a modern acanthus leaf the finer work took somewhat smaller tools, and if you struggle with that, I said, keep working on it or just get over it.
Is every struggle about the tool?
One of the struggles I had when I started to carve, as a young boy, came from drawing. On paper I could draw really beautiful designs, and I knew some of the laws, the movements and the rhythm. But drawing limits you to a two-dimensional world. My teacher would come over when I'd just drawn something and say, "Think. How are you going to carve it? What kind of tools you're going to use?" My livestream on modeling shows how a piece of clay solves that, because you can check your gouge against it.

Some of it is me. Carving my lily box, I went all the way through after telling you not to do it, and I said yes, I struggle with that, I'm always trying to overdo it. On that same box the glue, which is supposed to hold any type of wood, had a struggle with olive. And in one of my October livestreams I said I'm also struggling. Work and speak at once, it's not that easy.
Is there a spot like that on your bench?
Is there a place on your relief where the edge is fine and the tool still won't slice? Is it uphill, or tight, or harder than the rest? Then change the tool or your position, and take it in more than one step.

Right before this one comes part 9, with part 11 right after, and the workshop 41 lesson page is public, next to workshop 40 and workshop 42. Workshops 38 through 49 make up Part 4 of the Venice Room, and tuition gives you access to every part of it.
How it's done
- Check the edge first. A minute on the leather, by hand or by machine, is all a dull tool needs, I said.
- Notice which way you're going. Going uphill, even my really sharp tool struggled to slice.
- Try a new position or tool. When my tool struggled in workshop 54, I said I'd just change the position.
- Bring in the mallet. When a tool was a little too big to push in, the mallet helped me rotate and go in, then a bump took the plug out.
- Go multi-step. If a pass struggles, break it up and go multi-step.
- Don't force it. Take your time and excavate a bit at a time, the way I said in part 10.
Frequently asked questions
Will a really sharp gouge still struggle going uphill?
Mine did, on the Venice Room panel in workshop 41. The number eight I took uphill there had a really sharp edge, and it still struggled. A number 11 went in after it, and then a number nine a quarter inch wide (6.4 mm) went underneath.
Can you hear a carving tool struggle?
You could hear mine in workshop 54, where I asked if you knew what a sound was and told you it was my tool struggling. The bevel was really low, not the best tool for that job. My tool could break like that, so I said I'd change my position and work toward the hole.
How do you help a router plane that struggles?
Before the plane, I said let me try a couple more times down on my furniture panel, so there'd be a lot less struggle for it going around. Where it still struggled in one area, I cleaned that with a one millimeter (0.04 in) tool, a little closer to the final depth.
What to carve next