

Alexander Grabovetskiy, woodcarver, School of Woodcarving · Published 2020
What does a wood carver mean when he says big tools are always a plus?
Quick answer: Calling big tools a plus is my way of saying that a bigger gouge carves cleaner and quicker, and can still do a small tool's job. I said it in Venice Room 41.7 while admitting I could manage without them. Other lessons add my conditions, a super sharp edge, light pressure and small tools on the back of a carving.
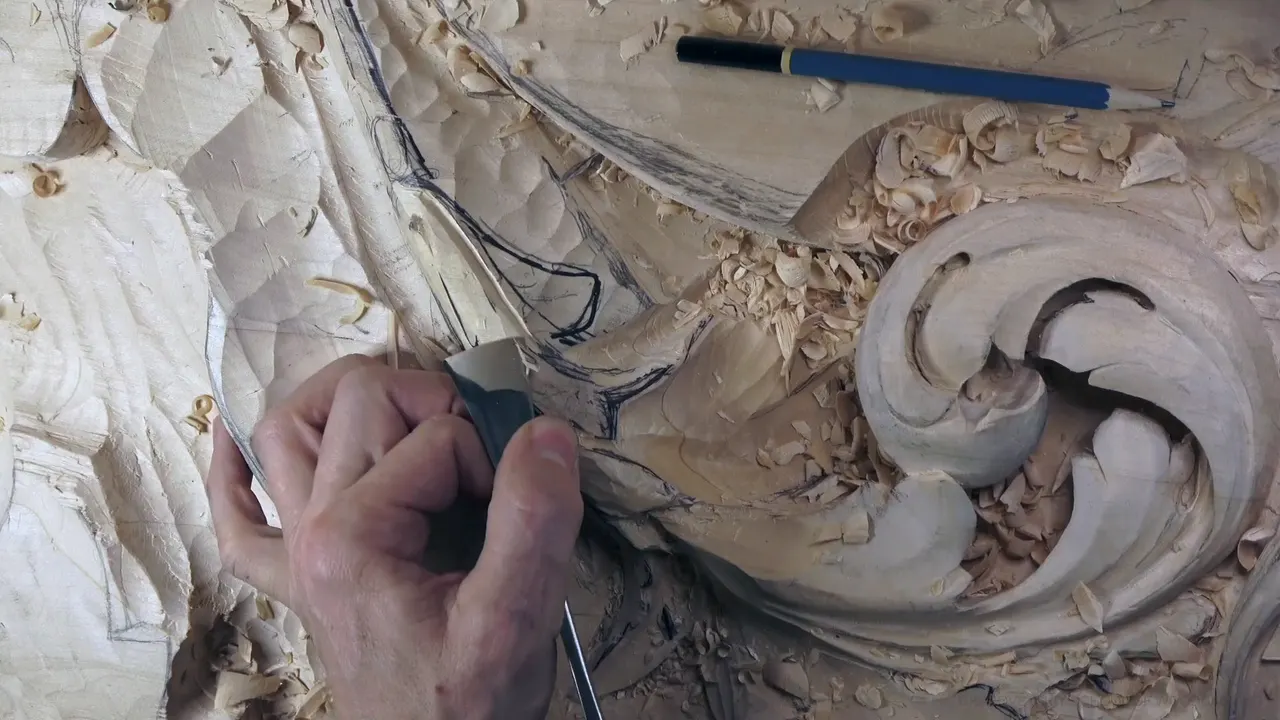

Calling big tools a plus is my way of saying that a bigger gouge leaves a cleaner surface, gets the job done quicker, and can still work like a small one. In part 7 of Venice Room workshop 41 I put it in plain words while I carved: I know I'm using big tools, I don't have to, but I think big tools are always a plus.
Have you ever watched a carver take a huge gouge to a small leaf and wondered why? Would you like to know where that pays off and where it can break the wood? Then read on. Every answer below comes from my own lessons, this part or another one.
A small gouge is a lot easier to control, and I've said that myself. It also takes much longer. Here you'll see why I still reach for the big ones in wood carving, how lightly I press them, and where I put them down for something small.
Six short lines about big gouges
- In 41.7 I said I could do without big tools, and I still think they're a plus.
- A bigger tool gives a cleaner surface, so there is much less cleaning later.
- One big gouge can do a small tool's job when only a section of its edge touches the wood.
- On a fragile piece I barely put any pressure on a big tool, and I keep slicing.
- Carving from the back and tight flipping spots call for small tools, and a weak end gets a careful approach under the mallet.
- Sharpness matters more on a big tool than on a small one.

What did I say about big tools in workshop 41?
Part 7 opens with a blend. I'd just made a new shape there, so it needed blending in, and the number three did that job. Then came the sentence this page is built on, and I repeated its last words before I moved on.
Next came a question of depth. Maybe I could get a little deeper underneath right there, maybe not. I wanted that spot to feel like a round movement, and if I excavated too much, I'd lose it.
What I could do instead, I said, was take another part with exactly the same idea, make a separation, get rid of the wood around it and make that flipping motion again. I thought it would be really good. The tool I named next was a big number 11, to excavate around.

Frames from that stretch show a gouge with a pale handle digging into the marked area while shavings pile up. Then I tried to get rid of one side right away. Oops. That is no bueno, I said, too much stress to the wood, and stress against the grain is what I had just done. At least I could see what was going on.

After that I repeated what I'd done before and created my concave cut. One part of that movement, I guessed, probably needed a much better outline. Later on I'm going to undercut anyway, I said, so that's why I'm not afraid of doing it.
I had lost a line too. I developed that detail later, so I lost my line, the flow or tangency line in a three-dimensional world, and I had to fix that first. Really nice and smooth now, I said once it was done.

The end of the part is plans. This spot has to be rounded later on, and I could give it some roundness now. A part will flip, another gets a separation, and I could get another one, with one piece going underneath the other. I didn't want to make it too wide, because that won't look nice, and it will be undercut later.

The parts on either side of this one talk about tool size too. In 41.6 the first step, I said, would be just to go underneath, and a 4 mm (5/32 in) number 11 was the tool I was using. I could blend with the bigger number three, I said. Over in 41.8 I called one tool maybe a little too big for that operation. Near its end I wondered if a little bigger spoon would work, because it would give me a much cleaner and quicker result, and then I said it looks like it does.

Why is a bigger gouge a plus?
A bigger gouge carves cleaner, and that pays off later. On the Hashemi flowers I said the bigger tools you use, the cleaner the cut, so there's much less to clean later. At the start of Hashemi lesson 12 I said I'd probably take about a number nine at the beginning, maybe three-quarters of an inch, which would be 20 millimeters. Use the big tools as much as possible, I told you, because it's much quicker and easier, and you can go back and clean with the smaller tools.

Speed is the other half. Making a preliminary shape on the Venetian flowers rosette in rosette lesson 4, I said let me do it right away with the same number seven. Big ones are always helpful if you have them, I said, so I can do it much quicker with the bigger tool. My reason for taking such a big tool in workshop 140 was plain. See how quickly I can get to the final depth, I said.

A big tool can also act small. Bigger ones are always better, I said on the furniture panel, because a bigger tool you can use as a small tool, and that tool gave me a really quick excavation. My big tools versus small lesson puts it another way. You can take a section of the tool and carve with just that section.
A favorite shows up in workshop 74. If I have a better tool for cleaning, I'd use it, I said, and there it was a large number seven, one of my favorite big tools.

Do you need to buy big wood carving tools?
You can manage without them, and I said so on the furniture panel. If you don't have big tools like that, the small tools would give you exactly the same result, I said, so don't panic, you don't really need to buy one, and if you do, it's only a plus.
On the Roman acanthus I drove a big chisel, a number one of three inches (76 mm), straight down on a line. Because I have that big chisel it's really quick, and it makes a real straight line, but a smaller chisel will get you the same results too, I said.

The same trade shows up again in workshop 41. Part 11 had a 10 mm (3/8 in) number 11 that was a little too small, and it would take me forever, I said, so I can use 30 millimeters (about 1.2 in). After I said I got to stop, I said I'd use a smaller tool now, which is still big, an 18 mm (about 0.7 in) number 11.

How hard do you press a big gouge?
Lightly, once the piece gets fragile. The piece in Hashemi lesson 10 had become really fragile, and even with the big tools I barely put any pressure on it, though maybe it doesn't look like it. I was still trying to slice in lesson 28, even with big ones, and in lesson 12 I made sweeping cuts, rotating the tool, without forcing it.

Big tools also push back. The bigger the tool you have, the more resistance you'll feel, I told you in workshop 140, so you have to be strong to push it, or just use a mallet.
Speed has a price in the fibers too. In workshop 34 I said that when you take big tools the quick way, you're creating pressure on both sides of the fibers. The cut spreads them apart, and after a couple of days they come back and the edges get really rough. My opinion is that it's better to do relief cuts, just the outline and setting in.
Where do I put the big tools down?
First, on the back of a carving. In a short tip on back cutting I had a piece lying on soft foam, and I said if you want to carve from the backside, don't use big tools. Big tools create a lot of force, and you can still break it, no matter how soft the foam is. Small, tiny tools did that job, one of them 5 mm (3/16 in).
In tight details too. I said in furniture panel lesson 15 that I would probably encourage you to use smaller tools on details like that, because a couple of flipping movements were coming later and really you can't use big tools there. Even my eighth of an inch, three millimeter tool felt a little too big.

And in areas like one on the leaf in my Roman acanthus lesson 9. Carving straight down there from both sides with a 1/4 inch (about 6 mm) number five, I said any other tool will work as long as it's not that big. The bigger tools there would just create damage, and I would not use any big tools in areas like that.
Near a weak end. In workshop 45 I said I should use a heavier one, because it would be much quicker, and then I warned you. When you work with the mallet and big tools, make sure you don't go all the way to the end, because that end was just weak. It's always better, I said, to approach from the end itself, or you can break it easily. I should say I can break it easily.
And at some stages. Digging underneath in Hashemi lesson 20 with a 1 inch (25 mm) number 8, I said just don't overdo it with big tools right now in this stage. I've done that many times, trying to use bigger tools. It's much quicker, that's true, but it's also much less control right now, though I could still control it and use just the edge of it.
End grain asks for care too. In Venice Room workshop 16 I had to be careful when I was using big tools, and I didn't want to overdo it. A number 11 spoon gouge of 4 mm (5/32 in), working my way in little by little, was better there, especially on an end grain like that.
Does a big tool need a sharper edge?
It does. On my grape onlay in lesson 9 I made a clean pass with a big one and said try to do that with the small ones if possible, but it just takes too long. The one catch, I said, is that big tools must be super sharp. All the tools must be sharp, but with the big ones it's even more important. If it's not sharp, it'll be really hard. Then I said let me switch to a smaller one, 10 mm (0.4 in), a number 11.

The edge comes from sharpening, and in workshop 69 the bevel on a big one was still too high. I'd started taking it down but hadn't finished, and I said maybe I should take care of it pretty soon, sooner the better, because I really like big tools.
Small tools first, or big tools first?
It depends on the spot. Maybe it's a good idea, I said in workshop 70, to use the smaller tools first and then clean with big ones, because a smaller tool is a lot easier to control. That takes much longer, and I'm okay with that if it gives me much better control. My plan was a 10 mm number nine, roughly three-eighths of an inch, and careful excavating.
Workshop 76 has me saying that sometimes, for work like that, smaller tools are actually better than the big tools. Around end grain in Hashemi lesson 16, I took a smaller tool because it takes smaller material, so there's less fight with the wood. Sometimes it's better to have the big ones, sometimes the small ones, I said.

One more warning comes from Hashemi lesson 30. When I try to get as much done as possible in one day, I tend to make a few more mistakes, because with big tools you try to rush everything and make quick movements. Then you take tiny tools in your hands, and your hands have already done the big stuff.
And when I have a big one, I reach for it first. Grabbing a number seven for the acanthus over moldings in lesson 3, I said the bigger the number seven you have, it is always better, and that goes for bigger tools in general. Mine was an inch and a quarter (32 mm). It doesn't have to be an inch and a quarter, I said, but a bigger tool goes really low. A huge number seven was going to be tool number one in workshop 124, and probably a 30 mm (1 3/16 in) number 11 after it.
Eight clips side by side
Here they are with the words I used and the tool that was in my hand or in my plan.
| Where | What I said | Tool |
|---|---|---|
| Venice Room 41.7 | I don't have to, but I think they're a plus | A big number 11 |
| Hashemi lesson 12 | Bigger tools you use, cleaner the cut, less to clean | Number nine, about 20 mm |
| Venetian flowers rosette | If you have big tools, it's always helpful | The same number seven |
| Back cutting tip | No big tools on the backside, they create force | Small tools, one 5 mm |
| Furniture panel 15 | Flipping movements coming, so really no big tools there | Even 3 mm felt big |
| Venice Room 45 | With the mallet and big tools, don't go to the end | A heavier one, planned |
| Grape onlay 9 | They must be super sharp, even more than small ones | A 10 mm number 11 next |
| Workshop 140 | See how quickly I can get to the final depth | Such a big tool |
Read the tool column as the tool I named. Several of them were still plans when I named them.

Which tool will you pick up next?
Would a cleaner surface help your next piece? And would you like to see where the big tool stops and the small one takes over? Then open workshop 41 and listen for the moments I name a tool and give the reason.
You'll find part 7 with the other parts of that workshop, and the Venice Room course for workshops 38 to 49 holds the whole run. For all my lessons in one place, start here.
How it's done
- Reach for the bigger tool. Grab the bigger tool when there is one, I told one class, and keep the smallest for the details.
- Keep the pressure light. On a fragile piece I barely press, and I keep slicing.
- Keep big tools off the back. Carving the back, I leave the big tools out because of the force they create.
- Stop short of a weak end. With a mallet and a big tool, don't go all the way to a weak end. Approach from the end itself, I said.
- Keep the big edge super sharp. Without a sharp edge a big one makes for really hard work, I said.
- Clean with the smaller tools. After the big tool, go back over it using the smaller ones, the way I said on the Hashemi flowers.
Frequently asked questions
Is a big gouge harder to control than a small one?
At one stage of the Hashemi flowers I said a bigger tool is much quicker, that's true, but it's also much less control. A smaller tool gives much better control, as I put it in workshop 70, so maybe it's a good idea to start small and clean with bigger ones after.
Can you carve a piece from the back with a big gouge?
I told you not to, in a short tip on back cutting, because big tools create a lot of force and the piece can still break on soft foam. I picked up small, tiny ones instead, and one was 5 mm, about 0.2 in.
Which tools did you call big in workshop 41?
The number 11 I said I'd use in part 7, to excavate around a new spot, was a big one. Later, in part 11, I said I can use 30 millimeters, about 1.2 in, and I called an 18 mm number 11, just over 0.7 in, a smaller tool that is still big.
What to carve next