

Alexander Grabovetskiy, woodcarver, School of Woodcarving · Published 2020
What do you see in a wood carving when you look at it from far away?
Quick answer: From far away in the room, I said in Venice Room 41.5, the overall movement of a carving shows. On a bed, you would miss a spot on the leaf, though that spot produces some shadow. Other videos of mine say the same about details.
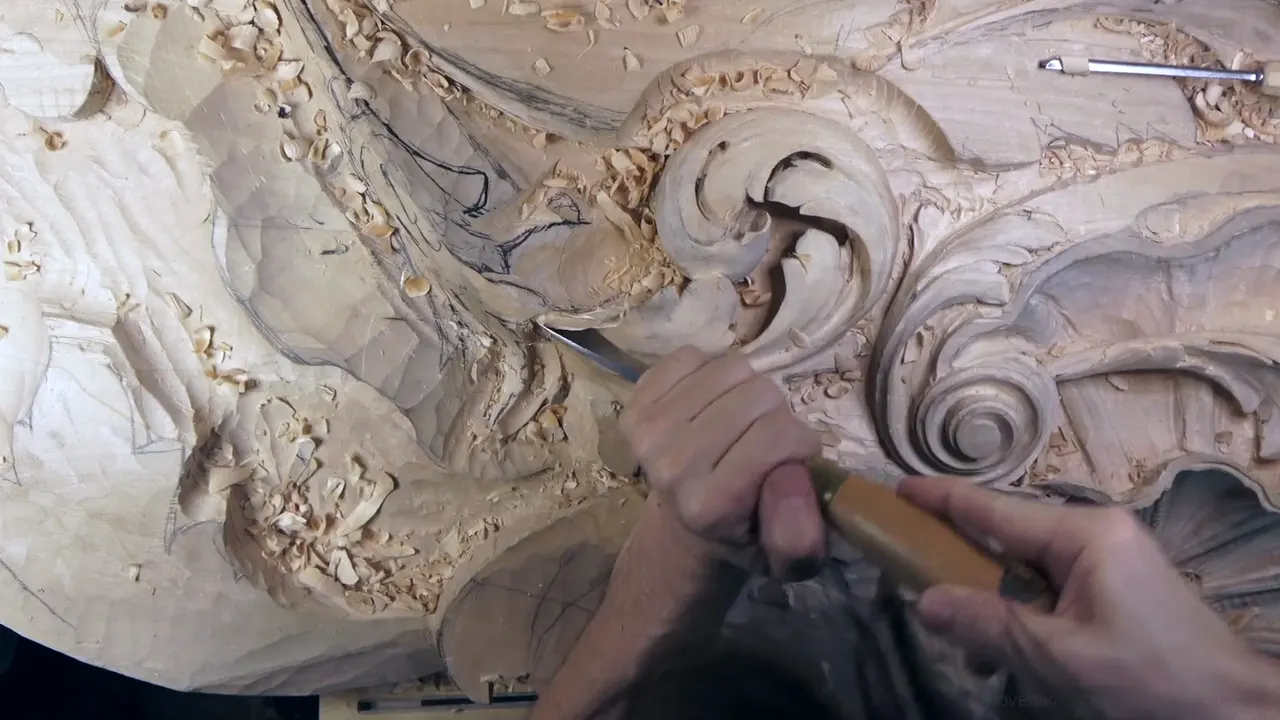
In Venice Room 41.5 I said what you get when you stand far off in the room: the overall movement. Someone lying on a bed, I said, would not see one part of that leaf, since that spot will stay out of sight. Even so, it still creates some shadow.
Ever worked one spot of a leaf for a long time and then stepped back to find it was the spot you could hardly see? Below you get this part in order. After it come other videos where I said "from far," "from afar" or "from a distance," and what I said next.
What was the leaf doing in this part?
The part opens in the middle of a thought. One element ran this way, and I did not want to lose it, design-wise. So it had to go down underneath of that one, "really gradually." A really interesting transition, I called it. One leaf goes underneath another.
Together, I said, the two give me that effect of a same movement, even with one growing upward and the other growing downhill.

Near 01:20 I called it deep enough, I think, since I can't go too deep. Otherwise, overall movement is lost again. I know I repeat that. Of one part I said it was really important, going that direction. Proper form was what I wanted for it, I said at 02:10.

What came next in the carving?
The end of this movement came next, at 02:25, with an eye, a separation eye. "Here is going to be my flipping motion," I said. It goes underneath. Outlining was my next job, I told you.
Close to 03:21 I warned myself to be careful, and I also wanted to excavate kind of deep and make a beautiful shadow line. My reason was the light. It would come from the side and cast really nice and beautiful shadow.

A center line followed. "Let me put the center line right here, so that's going to be the movement." I needed a really big concave in that area, I said, and for it I started with a downhill cut and the bigger number 11. The tool was 18 millimeters, which I called almost three-quarter of an inch (18 mm is about 0.71 in). "Get this way also," I said at 04:19.

Who sees what, and who sees nothing?
By 04:32 I was back on something I had said before. It will be more visible, I said, when you stand in a far part of the room, where you will see the overall movement. This part you will not be able to see if you are laying on a bed or so, I said, because it will not be visible. Still, it will create some shadow.
Next, at 05:25, I called it good. Overdoing it was not what I wanted, and I still wanted some movement on the inside anyway. A couple of ways to go at that inside movement were open, I said, and I named one: maybe just a little bigger concave in the middle.

Then came the outline. Around 05:52 I said I could now move on and create it around this movement. It starts from this eye and flips all the way, I said. That makes one part of this division, I said, and there is another part. Two parts, pretty much, opening up.
I hoped it made sense, and I said, again, let me think. Maybe I can place this eye a little farther. I think it would be a little better right there. I would indicate that eye with a number 11, "that's what I'm using." Next I said I have to be really careful how I create that movement. The last cue in the part reads, "This doesn't work. I'll just use a marker."

Do I check my own carving from far too?
The lessons below say how far back I step, and what I look for when I do. Furniture Panel 6, part 1, starts with advice. Once in a while, I said, it is a good practice to step away and look at your composition from just a little distance and see how the overall development develops. From there I told you I liked the arch, or movement, as of now. It looked organic to me, and it felt organic.
Part 1 of Furniture Panel 9 has a cousin of that. Stepping back, staring for a few moments and checking whether you like it is a really good idea, I said. In my opinion the area I had just developed was not looking too good, so I thought I should develop a little different movement.
Workshop 8 of the first Venice Room course, part 1, is a different case. My verdict at 05:04 was that it looked good, and I would not remove too much. Then, at 05:17, I would look from far and maybe add something. Whether to add anything, I did not know yet.

Over in workshop 5, part 4, I said I could probably start a concave with the number nine and would not touch beyond that line. Around 00:49 I wanted to double-check how nice it looked from afar, and it looked okay, then fine. My cuts with the number nine needed more care after that.

Down in workshop 31, part 11, I said near 01:46 that I could start excavating one area, and at 01:51 I told you a little view from far was coming. Attacking the side of it came up too, and it has to go from underneath at that point, I said.

On the panel, lesson 22, part 5, I said at 05:45 I wanted to restore the original movement, and at 06:04 I hoped it would make much more sense now. I would show you from far. So from far, you can probably see much better how it's supposed to look. My next plan was a 1 mm (0.04 in) number 11, to undercut under the line I had just created, but carefully, with my lamp magnifier a little closer.
Roman Acanthus lesson 16, part 1, at 26:38. I thought it looked good, and I would show it to you at a distance. That is how it looks, I said. I hoped it made sense, and light was the next thing I mentioned. Trying different light angles would create beautiful shadows, I mentioned, and that is simple to do.

One more from the panel, lesson 22, part 2. Somewhat happy, I said. A different angle was still to come. Even from afar, I said, you can see it nicer, more fluent.
Which details did I expect to show from far?
Several, and each time I said what you would not see from above or from below. A skew comes up in Venice Room 42, part 1, as the best tool to start a rounding. By 01:45 I said you won't see much from above, but you will see it from the far point of the room, and it will still be readable, I should say, visible. A concave cut sat on that part, and I could keep it there. Rounding it completely was not needed.

Venice Room 49, part 8, has a point I would not roll too much, because I did not want to lose it, and it has to be visible from the bottom. It belongs to the room too, I said, so you have to see it from the far point of the room and see the overall picture. So I was not rolling it. The tool I named was a normal number 11 of 7 millimeters (0.28 in), which I called slightly bigger than a quarter inch.

Venice Room 56, part 10, opens with a plan. I was trying to develop a better idea around a middle line, and I thought I could bring one of the movements pretty much in one direction. From below it would be invisible. From another spot in the room, a far point, you would still be able to catch it, I said. The decision I had to make came next. I cannot have T-stops, I said, and I thought I would just end up going right in the middle between those two movements. The lesson page lists its other parts.

Over in Venice Room 33, part 7, I said near 05:23 that it gives me really good movement on the inside. Directly below it, I said, that would not show, but it would from other points of the room. From a distance, I should say.
Part 6 of that lesson says it from the digging side. I thought at 06:21 I could go deeper underneath of one part, to create more of a depth feel. That gives more dimension, I said, when you look from farther. Then once more, from far.

Next up, Venice Room 27, part 5. A little deeper separation, more pronounced, was my plan to excavate. Closer to 07:27 I said one area needs a little more roundness, and that it is almost impossible to see from beneath. From far, it will be detectable, I said.

Still debating a detail, I said in Venice Room 13, part 9, that I would clean the overall movement a little, slightly in one direction, and not much. Yes, you will see that point from far, but not as much, so I did not have to take it too much then.

Back in Venice Room 69, part 4, I asked a question. Should my middle line end about an inch (25 mm) below and wrap, or go down and return the other way? The visible position matters, I said, which in my case is from the bottom, mostly. On the other hand, someone standing really far away at another point will still detect that movement. My lean was toward a point about 20 millimeters (0.79 in) below.

One from Venice Room 155, part 3. Near 02:58 I said you can see, even from afar, a dark shadow already forming. Happy with that, I said, and really happy with this movement.

Workshop 45, part 7, has a thick piece. I said at 06:21 it is not visible only from a far point. I named ways to develop its end. Leaving it as it was came first, and a flip, like flipping over, with a concave, was the other.
Which details show only up close?
The other side of the story sits in these four videos. Lily Box 2, part 8, near 18:17. Really tiny details, I said, and hard to see, and I apologized for that. Small details make all the world of a difference, I said. Almost impossible to see from far, but when people look really close, they will like what they see. A flip I wanted to make came next.

A smooth transition mattered in Venice Room 17, part 2, with beautiful shadow wanted, since that area would be seen from below. Not necessarily from far, I said, but if you get really close, you will see that. So I needed to take care of how clean the transition inside looks.

Furniture Panel 23, part 12, near 06:41. Up close it does not look as nice. A little farther away, I said, it looks really beautiful, actually. Overall design will make more sense. The lesson page lists the parts around it, and there are more.

The first Venice Room course has workshop 7, part 1, near 07:39. Clean on this side especially, I said, since it will be visible from that direction, and every little bit of it will be visible. A distance would show it too, I said, but still.
How do the passages line up side by side?
| Where | What I said shows from far | What came with it in that part |
|---|---|---|
| This part, 41.5 | The overall movement, seen at a distance | Some shadow from the unseen part |
| Lesson 42.1 | A rounding that stays readable and visible from far | A concave I could keep |
| Lesson 49.8 | The overall picture, with the room around it | One point I left unrolled |
| Video 56.10 | A movement that is invisible from underneath | My plan, ending between two movements |
| Video 33.7 | Movement inside, seen from other points of the room | My verdict, really good movement |
| Lily Box 2.8 | Almost nothing from far, so tiny are the details | A flip I wanted next |
Each row is a different video. The middle column is the thing I said you would see from far, and the right column is what came with it in the same breath or right after. A dictionary would not give you more.
What do I take to the bench from this part?
In this part I did not tell you what to carve for a far view. I told you what I hoped you would see. Standing far off, you get the overall movement, and a spot you can't see well still makes some shadow.
The rest of Venice Room workshop 41 sits around this part, and wood carving with a gouge, a chisel or any other hand tool fills the rest. The whole course is Venice Room, workshops 38 to 49, and the Access page opens every part of it.
How it's done
- Start with the leaf going under. In 41.5 one leaf goes underneath of another one, really gradually.
- Hold the depth. Going too deep would lose overall movement again, I said.
- Outline the end and the eye. The end of this movement has a separation eye and a flipping motion that goes underneath.
- Dig the big concave. A downhill cut with a big number 11, at 18 millimeters, made it.
- Think about who sees what. Far off, the overall movement shows. Someone on a bed would miss that part, though it still adds shadow.
- Place the eye. Maybe a little farther, I said. Indicating it with a number 11 was the plan, and the part ends with a marker.
Frequently asked questions
Which view shows the overall movement of the leaf?
Standing far from the leaf, in the room. That is the view where I said the overall movement is more visible. On a bed, you would miss a spot on the leaf, though that spot makes some shadow.
Did light matter to the plan in 41.5?
Close to 03:21 I wanted to excavate kind of deep and make a beautiful shadow line, because the light would come from the side. In my words, that light would cast really nice and beautiful shadow. The hidden part makes shadow.
What tool made the big concave in 41.5?
A number 11, the bigger one, started it with a downhill cut. The size I named was 18 millimeters, almost three-quarter of an inch, which is about 0.71 in. Later in the part I named a number 11 again, for indicating the eye.
What to carve next