

Alexander Grabovetskiy, woodcarver, School of Woodcarving · Published 2020
What does "don't get too excited" mean when a wood carver says it?
Quick answer: Getting too excited is, in my words at the bench, the pull to take more wood than this stage needs. In Venice Room 45, part 10, I said it over a volute. Expose some, but not much. In my other courses it guards depth, edges, thickness and undercuts.
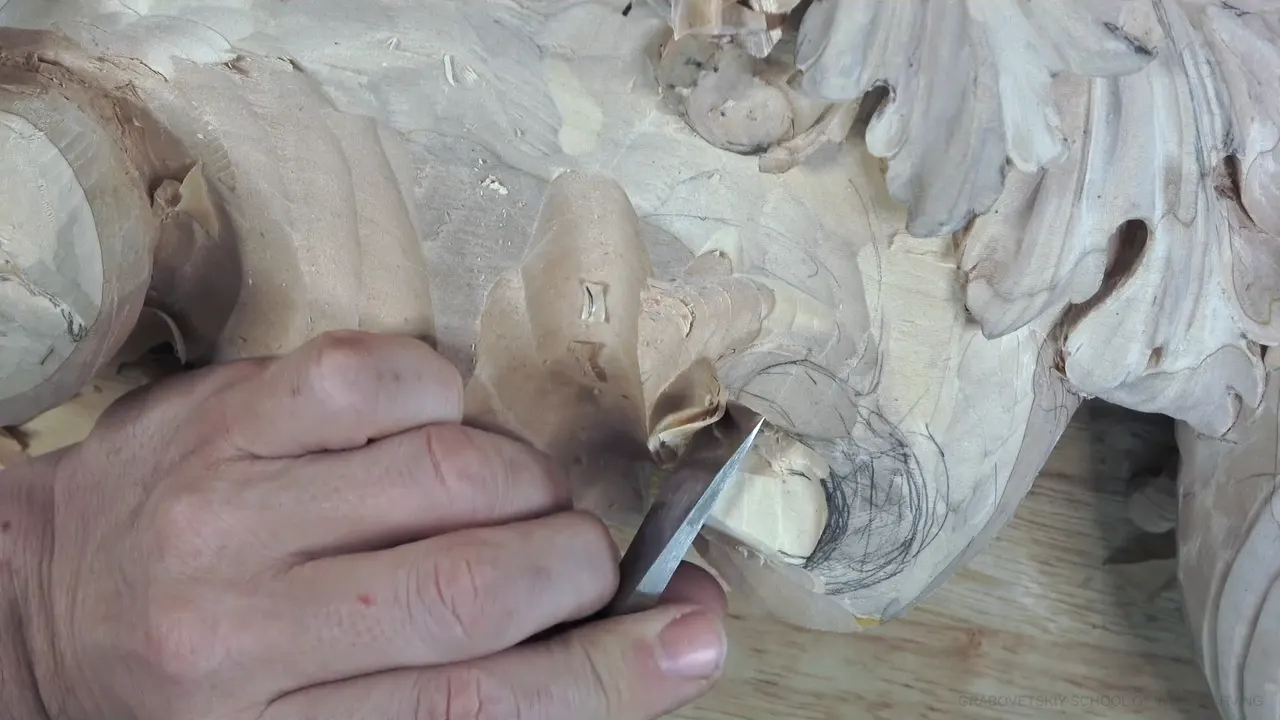

Being too excited, at my bench, is wanting more wood off than this stage of the carving needs. It's a wood carving tip I give to you, and to myself. It came this time in part 10 of Venice Room 45, over a volute, where only a little of the form should show.
Have you ever watched a shape start to show under your gouge? Did one more pass look easy right then? Then this page is about that pass. Take a little of it, and leave the rest where it is.
Below is the line from part 10, and the other times I said the same thing in my courses, about depth, edges, thin wood, scraping and undercuts. A couple of times the excitement got me first, and you'll see how I fixed it.
Five spots where the warning came up
- A volute in part 10.
- A long leaf in workshop 132 that I could not take too low, because it runs on both sides.
- The thickness of a tray.
- Scraping, because the tool can catch the fibers and destroy the work, and a carved surface is not like a flat one.
- Undercuts, made in small passes that still slice.
What did I mean by it in workshop 45, part 10?
I meant show a part of the form, not much, while the volute was still finding its shape. The part opens on the barrel, which is how I call that part of a volute. I could twist the overall movement that way a little bit, and I thought it would look a little nicer, I said. Maybe this way, slightly.
I needed it somewhat parallel right there. It is still looking sideways, which I think is going to be more logical when you're looking. It would look nice if I didn't do it, but I think it's going to look much nicer this way.

After that I wanted to start developing. The slope would go, go, go, with some excavation going on inside. Get rid of right away what I don't think is looking good, I said, and the next plan was the same approximate slope on this side.
One spot didn't need that big of a chunk of material, because logically I had that going all the way, and it needed to be just kind of repeating. Let me remove a little bit, I said, and then the idea, which is to take your time and not rush anything. That's the idea.

My tool was just a number three, for now. Then came the line this page is about. I need to expose some of that, but not much, okay? Don't get too excited. Not much, I said, and create better shape.
It was probably good, although not the final look yet, but we are on the right path, I said. You already should see some of the movement, at least some of it. And let me clean it a little better, I said.

There will be some excavation, I said later in the part, but I need to make it really beautiful. Hope it makes sense. It will make sense, and I know it will. For now my plan was a number 11 again, probably five millimeters (about 3/16 in), to start excavating a little.
I know it's looking a little confusing at the beginning, I said, but all will make sense. The barrel needs to be fixed inward. What I did first was just preliminary, like a square block, and now it has to make sense and follow the movement. From a different point of view, I said, I have to show you that.
So in part 10 the word was about one pass on one volute, where some wood comes off to show the shape and the rest stays where it is.
Why would a carver say it to himself?
I say it to myself when one more push could break a part. One spot in workshop 39 of the Venice Room would be really deep. I didn't really need it as deep, because it would be visible from the bottom, but deep enough. Just deep enough.

To create that depth I could use probably a number nine, a quarter inch (about 6 mm), excavate straight down and rotate. Then, well, actually, hold on, I said. Don't want to be too excited, don't want to break it. And in the next breath, but quickly, I can get really deep.
Workshop 50 shows the other side of it. A part of that area would go underneath, deeper, until it just hits the bottom. So my shell part would be the highest spot, which means, for me, it's safe to remove a lot more. A lot more, but not too much, okay? The same warning came next, about me this time, and then really don't need to. A number seven, one inch (about 25 mm), was the tool I named next. That board is in workshop 50.

I needed a bunch of relief cuts in workshop 132. One whole area there would be gone, and I could take a bigger tool, like 12 millimeters or so (about 1/2 in), and start chopping out. But I had to be careful not to get too low, because that wood was part of a long leaf going on both sides. That spot got the same warning, and it was aimed at me.
Where does an eager pass take too much wood?
Depth on my furniture panel, and thickness on a tray. The furniture panel, in lesson 21, had one area I could probably attack a little more aggressively. Aggressively, but not too aggressively, okay? I still have to keep an eye on overall depth. With a please in front of it, the same warning followed.
A smaller tool came next in my words. I'll use a number three, but this one only five millimeters (about 3/16 in).

Thickness was the tray. That was lesson 6 of The Tray of Blessing, the Cabernet Sauvignon one, and I was constantly checking how much thickness I had. I had plenty right there. Just make sure you check how much thickness you got. So what I'm trying to say, don't be too excited when you're carving like this.

My smaller number nine, a 10 mm (about 3/8 in) one, was the next tool in my plan. From approximately 10 millimeters away, about three eighths of an inch from the edge, I would start making that knife edge look.
Grapes were the subject on my grape onlay, lesson 3. Don't make those too small, by the way, I said. Then I named a common mistake. People let the excitement run, and they just chop too much, too quick. Also, don't make that mistake.
And don't go straight down at 90 degrees, I said, or you won't be able to clean underneath, so keep an angle at the connection points. I know you see those voids when you look at real grapes in real life. But think about how you're going to carve that. Do you really have the tools to get right underneath of that?

A mallet came up in lesson 2 of my floral and molding course. Pretty much any flat tool still works there, a number two or a number three, I said, and you can even use a mallet to help yourself with that one. The same warning came right behind it. Soon I had lots and lots of mess on the side, but that was probably my stopping point. So I shouldn't push it too hard. Okay, that's enough.
Can a finishing pass or an undercut be too eager?
A scraper can do real damage, and I said so on the furniture panel. One part before the depth line, in that same lesson 21, I needed a little bigger scraper and said let me use a different chisel. Be careful when you're scraping, okay? You can actually damage your work with scraping.
The warning followed, because you can catch the fibers and destroy it. It's not like scraping a flat surface. You really have to feel it, I said, and then I fixed my own words. I have to feel it, how I'm supposed to press on it, how it's supposed to feel.

Blending came first on my chamomile and bow rosette, lesson 4, with a number 11, maybe slightly bigger, maybe one eighth of an inch (about 3 mm), for a really smooth transition to a deeper concave. On a bigger petal of that rosette my plan was a double concave. It won't be a really exaggerated one, I said, so the warning again, and then some concave on both sides with maybe a number three or so.
Undercuts are the last case. On the grape onlay, lesson 14, I could probably start kind of undercutting, I said, and the warning came with it. I'm after really good shadow, but even with the number 11 the passes stay small, small, and I still slice. Really important to slice it.

What happens when the excitement wins?
My Roman acanthus took an extra subdivision, and my Lily Box took some redrawing. Lesson 15 of my Roman acanthus course has the words. I got too close to the edge, I got too excited, but if it happened, like I said before, it happened on purpose.

In cases like that we could just create an extra notch, or an extra subdivision, I should say. The number 12 carving knife was my plan for that extra subdivision, because I messed up. I got too carried away, too much. Carefully refine it, I said, and a little later, it looks absolutely fine.
My Lily Box, lesson 11, the one with the Lily flower, is where I had to tell you I lost some parts. I put it down to the drawing and to the same word, with an I guess after it, and it does not look too good. Maybe I have to just be creative and redo some of the stuff.

So I was looking at the layout and just trying to redraw, and I really don't need to be too accurate to my drawing. If I'm pretty close, or close enough, I should say, I should be okay. The part I lost came from drilling too big of a hole, really close to the edges, and I essentially created a problem for myself. I should think ahead when I draw it the first time.
Is getting carried away the same thing?
Close enough that I used both words in that Roman acanthus lesson. Size was the trouble in workshop 13 of the Venice Room. Let me think, I said. Maybe I just got too carried away and made that too big. I think I need to move this line this way a little bit, because it's just outside of the main movement, and that should not be outside.
A little later it was still a little too big, I would say.

In workshop 35 it was a count. I thought maybe I had too many separations in one spot. I'd got too much carried away, I said, and made too many separations, which I should not have. I love those separations, but too many is a problem. The only way back was to lower that down even more and get rid of one separation, and the plan was to make it one single part.
Here they are side by side, each with my own words from that spot.
| Lesson | What the warning was about | My words, as I said them there at the bench |
|---|---|---|
| Part 10, here | Showing more of a volute that was not its final look yet | Create better shape |
| Venice workshop 39 | A deep spot, planned straight down with a quarter inch number nine | Well, actually, hold on |
| Room 50, Venice | Taking a lot off, with the shell part kept highest | Safe to remove a lot more |
| Workshop 132 board | Chopping out an area that belongs to a long leaf | Careful not to get too low |
| Furniture panel, 21 | Attacking one spot harder while the depth still mattered | Attack a little more aggressively |
| Tray of Blessing | Carving a tray while checking how much wood was left | Plenty right there |
| Grape onlay, 3 | Grapes chopped out too small and too fast by people in general | Don't make those too small |
| Roman acanthus 15 | An edge I went too close to, then an extra subdivision | Because I messed up |
Is this a wood carving tip only for beginners?
My own passes got it as well, in workshops 39, 50 and 132 of the Venice Room. The grape onlay is where I called it a common mistake that people make. And in part 10 the idea came before the warning, which was to take your time and not rush anything.

Part 11, right after this one, carries the same care. I did not want to take one side too low at the beginning, I said, because it's becoming weaker and weaker. Later in that part I wanted to keep some of one chunk for movements still to come there, so I need to make sure I'm not taking out what I want to keep.
Where can you watch this part?
In the workshop 45 lesson, with all twelve parts, inside the Venice Room Part 4 course, which holds workshops 38 to 49 of the same relief board.

Is there a spot on your board right now that you want to finish in one pass? Could it wait for one more look? Then take a little of it today, not much, and carve the rest along with me. The tuition opens every workshop in the room, and you can start here.
How it's done
- Give the pass time. That was the idea I gave in part 10, a little before the warning about the volute.
- Show only part of the form. Some of it, not much, was what I said to expose over that volute in part 10.
- Watch the overall depth. Even where I could attack harder on the furniture panel, I still had to watch the overall depth.
- Check the thickness. Make sure you check what thickness you have left. On the tray I checked it constantly, and there was plenty.
- Chop out less at a time. Too much, too quick, is a common mistake, and I said not to make it.
- Slice the undercut. Small passes, even with the number 11, and still slice. Really important to slice it, as I put it on the grape onlay.
Frequently asked questions
Can you get excited about a carving tool?
Maybe, with rasps, in workshop 14 of the Venice Room. I said maybe I got too excited about those rasps, but I think it's a really good tool now. With one I could clean that line into a really nice, smooth transition, and later I asked myself why I didn't use that before.
Can a deep slip be fixed?
Mine was, on lesson 29 of my furniture panel. A really deep dig with a number 11 turned into what I called a huge mistake. I owned up to getting carried away, but that's okay, I said. I have meat and I can fix it, though somewhere else it would be a big mistake.
Why stop when a detail already looks good?
A 1 mm (about 1/25 in) number 11 was the last tool I named in workshop 64 of the Venice Room before I said I'm going to stop now, because, again, I can get carried away, but I really don't have to. I was really happy with the outcome right then, and my plan after that was the divisions.
What to carve next