

Alexander Grabovetskiy, woodcarver, School of Woodcarving · Published 2020
Why do wood carvers leave space for later cuts?
Quick answer: Leaving space is taking wood out, or holding it back, now so a later cut has room, like an eye, the undercut and its shadow, or one clean last pass. In Venice Room 45, part 1, another eye was coming, so I needed to undercut and open up room for it.
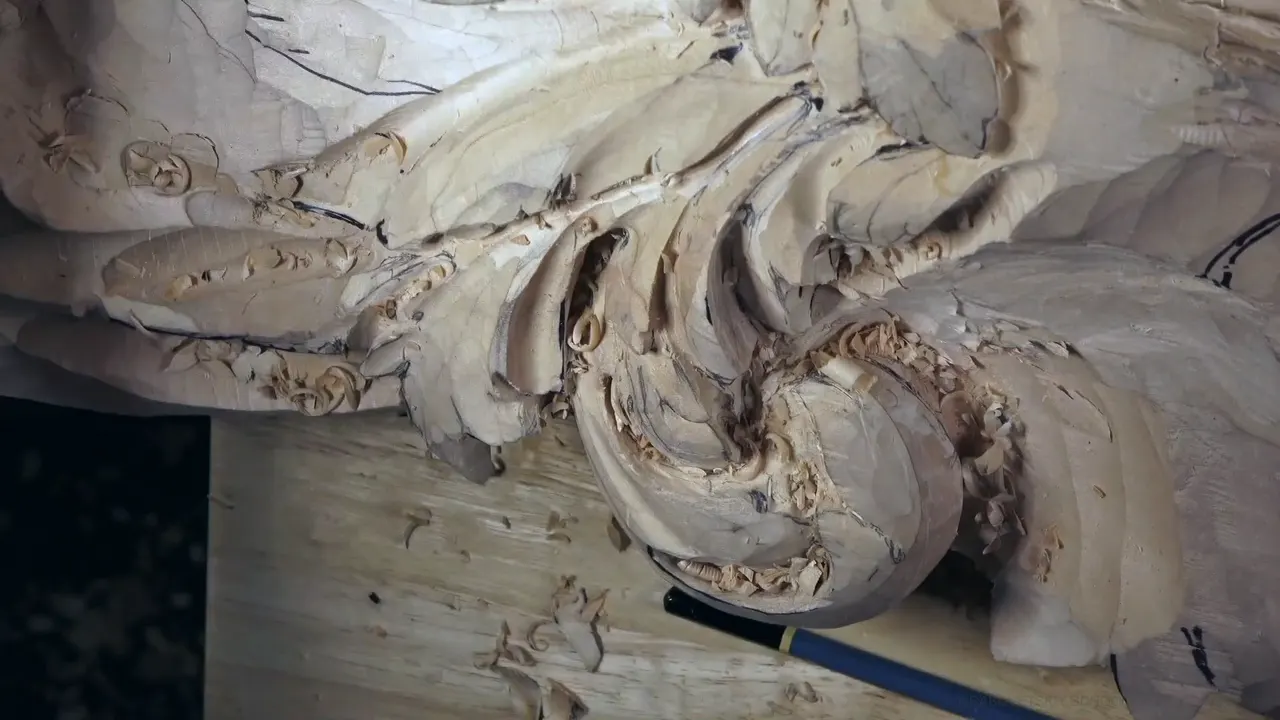

Space for a later cut is room I keep, or carve open, before that cut happens. I keep it for an eye, for an undercut and its shadow, for one last clean pass, and sometimes just so the tool can move. In part 1 of Venice Room 45 I stopped about a minute in. Okay, hold on, let me think, I said. There's going to be another eye. I need to undercut and create space for it.
Have you ever carved right up to your pencil line and found nothing left to clean? Or tried to slide a gouge under an edge, and the edge was in the way? Then you already know why I keep a little room. Part 1 is the first video of workshop 45 and runs about seven and a half minutes, so next to it I put other times I talked about space in my wood carving lessons, and I name each lesson as I go.
What I make room for in my lessons
- An eye that comes later.
- The undercut, so a shadow can sit under an edge.
- A last clean pass, so the rough work stops short of the line.
- The tool, so it can get in at all.
- Parts that come later, like flowers, beads or a corbel joint.
- The next division on a layout.
What did I carve in part 1 of workshop 45?

The video opens on one spot of this acanthus board that I wanted much deeper. I could excavate much deeper, I said, and yes, I could actually use two millimeters. Number 11 now, and get even more shadow. One millimeter came up as well, as a tool that would do in this case.

After that came the stop I wrote about at the top, the eye and the undercut. My next words went to a separation. Make that separation right here a lot more pronounced, I said, although it's not clean yet right here, so I have to clean it. And maybe that is not the right tool, would have to use number seven.

A depth was next. I've got another layer, which means from this point to that point it's about two inches (about 51 mm), I said. So how deep it is. Which visually you almost don't see.
Let me get that separation before I lost it, and then I have to remember again what I've done. Clean that little better. Little, little better.

A pipe was the next thing I named for that spot. Number three, that's what I'm using, pretty much just trying to clean that surface and get more underneath. The pipe itself could wait. Now I needed a really beautiful line, gradually moving downhill, and with two millimeters again I said I can go a little deeper.

Another separation was in my plan after that, and I said so more than once. A correction followed. Actually, this needs to be going down, so that's not the right way, what I've just done. It has to go down like this.

An eye would go there as well. Maybe I should give that eye a little farther and a little bigger, I said. I thought it would be better that way, and I went again underneath like that.

A ridge came after it, and this ridge should not be there. Again, number 11, and take out all that mess I just created.

About six minutes in I said I still have to give nicer divisions and so on, but at least I know what is going on. One spot was probably in the wrong place. I think I should do exactly the same what I've done right there, I said, and then maybe yes, maybe no, because it doesn't have to repeat everywhere. Otherwise it would all look too much alike.
When is more space not worth carving?

The end of the part asks it out loud, twice over. Maybe I have to create a much bigger opening, I said, just to create the opening. Do I have to? If I'm going to create the opening, then I have to take care of the piece underneath. Should I? Let me think about this one first. I don't want to create what I don't have to do and spend long time just cleaning up in a spot. That is where the video stops.
It comes back in part 2. There I thought about a bigger opening, which you sometimes see in original work. Get the eye, I told myself.
One spot in workshop 89 had a plain answer. Not much could be done with the eyes there. There was absolutely no space for them, and I said I really don't need it.
Why stop short of the final line?

In my acanthus over moldings lesson, a leaf over a molding, I could get really close to the line, but I didn't want to go all the way. I said I need some space. It would be a big mistake. So I went almost there and left approximately a millimeter and a half, maybe a 16th of an inch.

The furniture panel gave the same reason. My straight down cut stopped short of one-eighth of an inch (about 3 mm), and that's exactly what I wanted, since I needed room left for cleaning. I was really close to the final eighth. Then came one of my favorite ways to clean it, a one millimeter number 11 to remove whatever is waste.
My Greek acanthus lesson puts it as a warning about any detail that is too small. Leave room for a clean cut there, and finish before you hit the wall.
Does undercutting need its own space?

I said so at the very start of one video in my floral and molding course. I'm going to leave some space for the undercut. I always do undercutting, even on those volutes, even on the panels, because it's going to cast some shadow and look much better.
Of course, I need to still undercut a little bit, I said in workshop 75. I need to create some space for the shadow.
Order can matter too. In workshop 51 I did not want to undercut underneath yet, and I called that a mistake. Undercutting would be done after I made the hole inside, and to make that hole I needed room first. A 3 mm number 11 went in, and after it a number nine of a quarter inch (about 6 mm), which I called the hole-making tool.
One part in workshop 32 had to stay above. Going down was fine in one place but not there, and I still needed room for undercutting. Around the other areas I went deeper, about 20 millimeters in, about three-quarter of an inch deep, and I think it's deep enough.
What if there is almost no room at all?

On the furniture panel background one detail gave me nothing. I really don't have any space for undercutting, I said, because it's a really tiny detail. But every little bit will help. A small knife came next, with my cuts on an angle, leaning a little toward the inside.
One video later I said it the other way round. Even with almost no space, you're still able to undercut. Half a millimeter would not fit, since the space there was a lot smaller, so it was a small knife or a number one. I used one side of the tool, not really deep, and that still undercuts on a micro level. And yes, it will be visible.
Depth can run out the same way. On what I planned as a really deep excavation in workshop 16, I stopped to check how deep I could go. Oh, I don't have too much space right there, I said. I can't go more than three quarter of an inch (about 19 mm).
I took one concave on my Byzantine acanthus much deeper, but not all the way, because some room had to stay. I really wanted to see a raised part there.
Does the tool need room too?

Sometimes the room is for the tool itself. Over in workshop 57 I was just preparing space for my beads on the left-hand side, with 2 millimeters again. I could use 3 millimeters, I said. Nothing wrong with 3 millimeters too. I only worried about how much room I had for a big concave spot. If your project has a little wider spot, 3 millimeters would be really good. More space for you to work.
A side in workshop 8 needed to be excavated a little deeper, so it would look like it's flipping even more. But for that, I need to create enough space, I said, and I was using just number 11. You could use number nine.
A skew number one made a 90-degree cut on the lily flower of my lily box. Look from the side and you see it, because I made myself some room there to work around.
And sometimes the straight tools just do not fit. Back in workshop 2 the straight tools had too little room. That's okay, I said, and went to outline another part with a number nine, 20 millimeters, three-quarter of an inch.
What happens when you forget to leave space?

You fix it, if you can, as I had to in my hazelnut lesson. Two hazelnuts sat pretty close to each other, and I did not leave the husk enough room, since it has to wrap each nut on its own. So now I have to find a way how to fix it, I said.
Luckily I had left plenty of material. About one inch, maybe 24 or 25 millimeters, which is more than I think I told you I'd leave. The husk needed its room, which meant blending this part of it somehow. Hope it's not going to look ugly.
A drawing can run short too. On my Greek acanthus layout I was dividing one section in five, with the main curl as number one. Two, three, and I don't have space. I didn't leave enough space for number four. So I moved one a little farther and counted again up to five.
The layout of my furniture panel design had the same question. I had to decide how much room to leave to the main border, and I want to leave more space around before I start carving. About 20 millimeters or 3/4 of an inch should be really good, I said. It's going to give us plenty of space to work with.
Can you save space for parts that come later?
I have done it on purpose. In one spot of workshop 43 there were going to be flowers inside, so I didn't worry about what was going on in there. That gap was left for flowers, and I did that on purpose.
I wanted to make sure, in workshop 53, that I'm leaving enough space for a connecting point, where a corbel would be attached. That section is about two inches, approximately about 50 millimeters, as I put it.
This same lesson has one more. In part 9 I wanted to see the movement from the side, so I had to create some room for the upper part. And in workshop 48 I needed some space, and I had left about 10 millimeters (about 0.4 in) from the outside, with a line placed there.
Which lessons left room, and for what?
Eight of the passages above, one per row, with my words beside each.
| Lesson | What the space was kept for | My words, as I said them |
|---|---|---|
| Part 1, here | Another eye still to come, so the undercut had to go first | Create space for it |
| Venice workshop 75 | A shadow, with a little undercut still to do | Still undercut a little bit |
| Furniture panel, 21 | A cleaning pass, so the straight down cut stopped short | That's exactly what I want to do |
| Room 51, Venice | A hole inside, carved before any undercut went underneath | So that would be mistake |
| Hazelnuts, lesson 3 | A husk that has to wrap each nut on its own | I made a mistake |
| Greek acanthus 1 | The fourth of five divisions on the drawn layout | Move this one a little farther |
| Bead side, 57 | Beads on the left-hand side, with 2 millimeters again | Preparing space for my beads |
| Workshop 43 flowers | Flowers that would go inside that spot later on | That's what I did on purpose |
My words stay in the last column just as I said them, plans included.
Where can you watch this part?

The workshop 45 page has all twelve parts of this lesson, and the Venice Room Part 4 course holds workshops 38 to 49 of the same relief board. Right before it comes workshop 44, and workshop 46 comes right after.
Is there a line on your board right now that you will carve to later? Will something else have to fit beside it? Then leave it a little room today, and carve along with me. The tuition opens every workshop in the room, and you can start here.
How it's done
- Pick the deep spot. Part 1 opened on a spot I wanted much deeper, with two millimeters, number 11, for even more shadow.
- Stop and think first. Here I stopped to think, since another eye was going to sit right there.
- Undercut to make room. The need came out in one line. Undercut, and make room for that eye.
- Make the separation clearer. I wanted that separation a lot more pronounced, though maybe the right tool would be a number seven.
- Secure the separation. My plan was to get that separation in before I lost it.
- Go under with a number three. A number three was my tool there, just trying to clean that surface and get more underneath. The pipe could wait, but I needed a really beautiful line moving gradually downhill.
- Think before you open more. Before a much bigger opening I asked if I had to, since the piece underneath would need work too, and I left it to think about first.
Frequently asked questions
How far from the final line do you stop roughing?
About an eighth of an inch on my Roman acanthus, two or three millimeters away from the final design. Don't get too close, I said, and stay above the rough background line for now. A little later I gave it as a couple of millimeters, three or four, an eighth or 3/16 of an inch.
Why do carved grapes need extra room?
On my grape onlay I said not to make the grapes too small, and then said it again, just to make sure. Once you clean up everything, they're going to look like berries, so you really need some room for the cleaning up.
Is a slip still fixable if you left extra wood?
On the curly kitchen cutting board from my beginner course I made damage in a couple of spots. I had enough space, about a quarter inch (about 6 mm) down, to come back and make a couple more passes until it looked clean. I don't want to sand anything.
What to carve next