

Alexander Grabovetskiy, woodcarver, School of Woodcarving · Published 2020
What does "overall flow" mean in wood carving?
Quick answer: In Venice Room workshop 45, video five, I said I was afraid I would lose it if I went lower. In other lessons I said I needed to fix it, told you to follow it, and said I would see it.
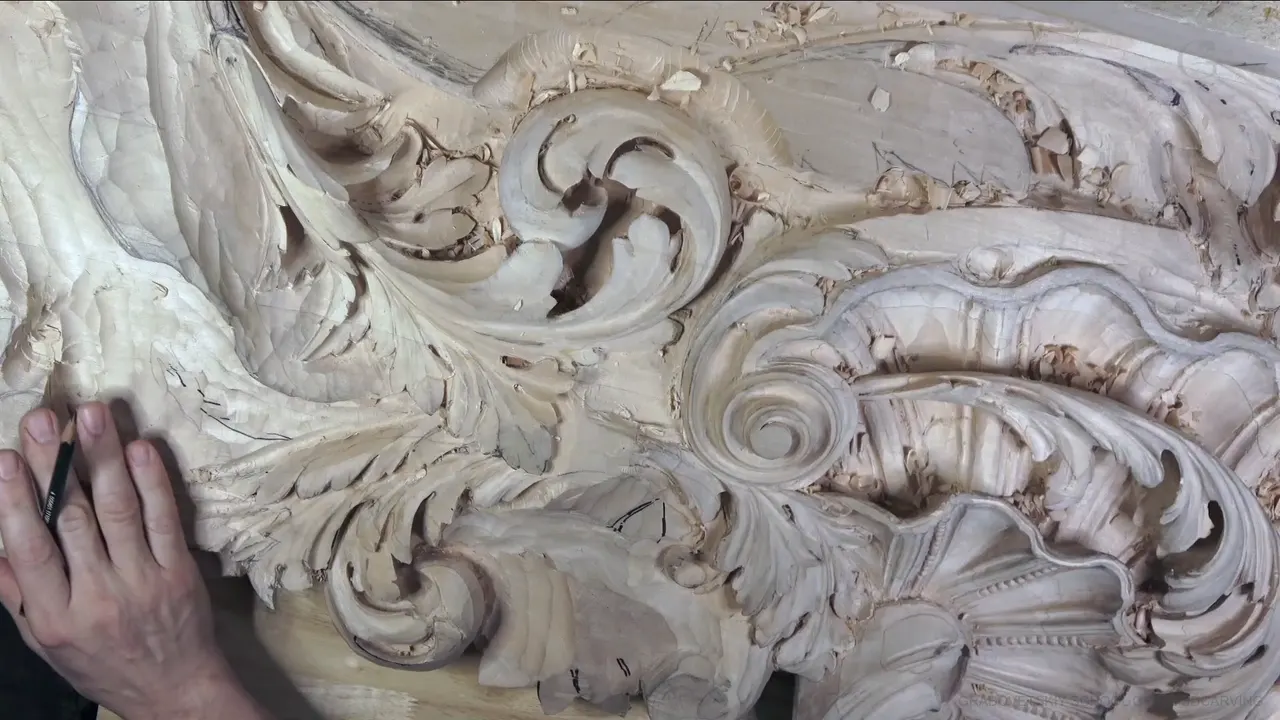

Overall flow comes up in my lessons: I say I am afraid of losing it, I say I need to fix it, and I tell you to follow it. You hear it in Venice Room workshop 45, video five, and in other lessons of mine.
Have you ever worked a small detail and wondered what it did to everything around it? Did you take one more pass anyway? Walk through these passages with me, one at a time, in my own words from the bench.
How did I try to keep it while I carved an eye?
In video five my plan was to try one part underneath a line first, and the eye did not need to go very deep.
It starts by choosing an element. One side was probably not getting much of my touch yet, until we get ready for a development of that part. First I could develop this element, give it a lot more details, and work on some of the details around it. Then we could jump to another area. Right then I needed to make sure I was doing the right thing right there.
A couple of ways to approach that element sat in front of me. I called it a kind of challenge, took the word back, and named it a decision to make. One part could go underneath one line. On the other hand, it could also go underneath another. Logically, I said, I have to repeat this side, which means I could go lower.

Then comes the sentence. I could go lower, I said, but I'm afraid I'm going to lose overall flow, okay? The first try would be getting this part underneath of this line.
An eye came next. I was going to do an eye, and right away, pretty much, get underneath, just like that. A really deep dig is not what I need in this case. Overall shape matters here too, and getting too extreme with that was so important for me to avoid. Still, there is going to be an eye.

Blending came after that. I needed to take care of a spot and blend a little, otherwise it won't look right. The blend had to run inward the whole distance. I needed a really readable, distinguishable shape, one that looks like it grows right underneath and goes in that direction.
That's why I'm blending it. That's how I call it: I take care of the ridge. I'm actually removing those ridges.

Right away you can see a really beautiful area for another division, and I can implement it with no problem. Probably I could do it right away, in what is a really, really nice area. A letter S was already possible this way, and it's not big. Still, it's a really nice detail.
Where did the invisible line go?
Divisions were still on my mind, and so was how this one would grow. One way is the whole run like that, with divisions like this, and a curl. The other is to go to this point, which I think will be better; in that case the carving continues the invisible line going that direction.

Check that, I said. Then I gave the reason. It's better just to get the attention for the human eye, the direction like that, going around. So that's the reason why I've done the way I've done it.
Next I said, get a little deeper. Little divisions could go right there too, which is going to give me a more detailed look. A number 11 was going to make relief cuts right inside of those divisions. Just like that. Yes, I could refine everything.

Near the end I said that, right now, I needed to give a shape to even this small detail, and I needed to create concave, concave, and maybe convex.
What do the neighbor videos add?
Video six opens on a decision: how pronounced something will be. Too much movement is what I don't want. On the other hand, I could raise this side a little.
A mistake came into it, a small one and still what I wish I didn't do. In my hand was a number seven at 4 millimeters (5/32 in), and carefully, I would create that concave. Maybe I had to take the convex all the way there. It would make more sense. The feel I wanted was that one part grows from underneath of the other. Then: Oh, okay. That was unfortunate, but it's okay. After that happened I was not sure the feel was even possible, and I left it at we'll see.

Too fast, probably, I said. The seven isn't always the best idea that close to detail. It hits with the corner and breaks away, so proper tools are better. Not the end of the world.
Next came the plan for a little division, since logically it doesn't look too appealing. A much smaller tool was the plan to finish them, and I was using just a micro tool. Really sharp, nice tools mean you don't need to sand anything, pretty much. A number four at a quarter inch (about 6 mm) was in use, and at least you can see the ridge.

Next I needed to blend whatever I created, using the same tool and trying it upside down. I kind of like it, what I see. Later I'll hit every edge and every point and make much cleaner passes, then inspect everything, and redo some stuff if I don't like something. That's a normal routine, I would say.
The routine has a reason behind it. When you work in a detail, you don't really see the final picture, not 100%. There's a saying in the Russian language, soaping the eye. After a while your eye is used to the detail, and you don't see if you're making something wrong, so it's better to jump to another area and continue your work.
Video four ends close to the same idea. I love overall development, how it develops, I said, and it looks not bad at all, in my opinion. Earlier a hair dryer was my plan, then: got a lot of junk inside. I think I've got a really good result, I said, except one part needs to be cleaned.
When am I afraid to lose it?
The sentence from video five has a twin in workshop 17 of the same room. That lesson sits in the Venice Room course, workshops 13 to 25, and a line there is almost straight. That's not good, I said, though of course I hadn't finished it yet.

Two options came up. An extra eye right there would give an extra separation, which would be nice. But I don't want to lose the overall flow, I said. So I decided on a long concave, because it's going to be seen from the bottom, and I think it will look much better that way.
Probably a number six, at maybe about a quarter inch (about 6 mm), would start that concave really far out. It would still leave some ridge, and I'd move toward the inside, maybe even more downhill. Some details were lost, since I had already chopped from the inside, and that was absolutely okay. I thought I should get a little deeper concave, maybe a number eight at a quarter inch (6.35 mm), starting far out again, carefully.
Please understand, I told you there, I'm not trying to confuse anybody. I'm just trying to develop the idea.
Later in that video I said, carefully, that I did not want to destroy the line. I stopped there, since I was creating an extra ridge I didn't want. Back to the number eight was next, and a little blending pass would help me. Then how it looks in the overall picture needed fixing, because right now it doesn't look too appealing. Some of that had to be chopped out, and my pencil needed sharpening too.
Which line did I say needed fixing?
The Venice Room lesson 9, in the first Venice Room course, has me saying I also had to probably fix, before it's too late, the overall flowing line, which was not so good as of now. It was just not looking good. A smaller number nine came next, with a pass from the opposite direction, so that it's concave on the side of the pipe. Gradual was the word for the blend there, since a deep dig the whole way was not what I wanted.

The Hashemi Flowers course gives the same thought a slightly different name. Lesson 11 has me still disliking the overall flow line, so how it looked at the edge was not my worry yet. I will have to look from different points of view, I said, and fix that flow line.

Lesson 13 has it in a short sentence. The same number five went even deeper, and then: let me fix my overall flowing line. After that I'd get back and clean that from this side with the back bend, and let it go down.

Lesson 44 has it on a petal. This petal needed separating from the one beside it, followed by the smaller tool. Looks like this one is on my way, I said, and I need to fix overall flow. Beyond that, I really like that idea, it curls inside, and some of them we can curl outside, which is also going to create beautiful movement.

The flow line shows up in other lessons of that course, too. Lesson 22 has me not too happy about the flowing line, so it had to be fixed, refined, and made right to the point. Next video: I'm not going to destroy my flow line, I said, with a number eight in my hands, without forcing. Lesson 14 had a ribbon. I didn't like the flow line, then said looks better, and then, so the flow line is good.
How do I follow it with a tool?
Furniture Panel lesson 34 has a small skew cleaning the work. Don't forget another concave right on the inside, I said, with the small tiny tool, because it will be readable, with the shadow it creates. Really important right there. Make sure you also don't create just a straight cut. Follow the movement, okay, and with it the overall flow.

Feel comfortable undercutting right away? Then go ahead, and there are multiple ways. My skew can start it, then any small tiny tool, in this case a number nine or number eight, or a number 11, and half a millimeter (about 0.02 in) would be even better. Force is out, and so is a deep undercut, because it's furniture. Go too deep and you create two fragile parts, and you can break it.
The Grape Onlay course says it about stems. When you introduce the ones that connect things, I said, make sure you just follow overall flow. I wasn't sure which grape to work on, and one probably looks better, just because I will introduce that motion, and the grape becomes a little smaller, which is okay. Not all the grapes are supposed to be the same.

I said I'd grab a number 11 at two and a half millimeters (about 0.1 in) and outline first. Pay attention to how I am holding my hands, I said. My tool sits right on the middle finger, a finger goes on top, and my pinky gives support. You don't really see it, I said, and then I have a lot better control. I also realized I had to make a much deeper pass close to the previous grape, because it's supposed to go from underneath.
Design lesson 14 of the furniture panel course puts it another way. For me it's really important just to follow the main movement, I said, the main movement of, if you wish, the energy. It's not really energy, but the flow. On a round section I really want to replicate the overall movement, and that way, I believe, it will look more organic.
Lesson 6 of that design course says there is no such thing as a T-stop. One line hitting another that way is breaking the rule of the flow, and it will not look nice or organic. A tie between those lines with a curved line is still needed. Lesson 4 adds that everything has to interweave, and this has to flow with this side.
Can you still change it after digging deep?
Lesson 7 of the Carving Hazelnuts course has a preliminary undercut underneath a bunch, where I can see where the leaf is supposed to be. Even if this bunch is not done, at least I'm going to see overall flowing. Keep a thick enough material, I said, because later on we'll work on that bunch, and that material should not all go.

A 5 millimeter (about 0.2 in) number 11 veiner got named next. Don't go too deep, I said, because it's much harder to clean up even later. Then I said let me get a number seven; what I would like to do is a concave motion of that leaf, so it just flows. Just blend everything.
In the same video the other sentence comes. Excavating too deep underneath is out for now, I said; a little later, yes. A big mistake is the thing to avoid. If you want to change, for example, overall flow, but you already excavated too deep, changing it later gets hard. Inside here, though, I said I was safe to excavate.

Where else do I say it?
Each row has my own words from that moment at the bench.
| Where | My work at that moment | My words |
|---|---|---|
| Venice 45.5 | Getting this part under that line first | Afraid I'll lose it |
| Workshop 17.11 | Starting a long concave far out, probably a number six | Don't want to lose it |
| Lesson 9.7 | Using a smaller number nine from the opposite direction | Probably fix it before too late |
| Hashemi 13.3 | Digging deeper with the same number five | Let me fix it |
| Hashemi 44.6 | Separating one petal from its neighbor | Needs fixing, it's on my way |
| Furniture 34-3 | Cleaning with a small skew, adding a concave inside | Don't create just a straight cut |
| Grape Onlay 13-1 | Introducing stems that connect things | Follow it |
| Hazelnuts 7-2 | A preliminary undercut underneath a bunch, number 11 | At least I'll see it |
Where can you watch this part?
The video sits inside the Venice Room 45 lesson, in the Venice Room Part 4 course. The lesson before it is workshop 44, and workshop 46 comes next. Is there a spot on your board right now where you are afraid to lose a line? Could a look from the other side be your next move? Then take your gouge and carve along with me on any wood carving piece you have going. The tuition opens the whole room, and you can start here.
How it's done
- Start with the part under the line. My plan in video five was to get a part underneath a line before going lower, since losing the overall flow worried me.
- Keep the eye shallow. A deep dig was not needed for that eye, and overall shape was something I wanted to keep.
- Blend inward. I was blending all the way inward to get a really readable, distinguishable shape that looks like it grows underneath.
- Skip the straight cut. In Furniture Panel lesson 34 I asked for the movement and the flow, not a lone straight cut.
- Keep material before you undercut. Hazelnuts lesson 7 asks for thick enough material, so none of it is gone when the bunch gets its turn.
Frequently asked questions
Can you carve an eye and keep the overall flow?
Video five of Venice Room 45 shows an eye going in where I said a deep dig was not needed. Alongside it I wanted to hold on to overall shape, and staying away from anything too extreme mattered to me there.
What do you do when a flow line looks wrong?
In Hashemi lesson 11 I said I would have to look from different points of view and fix that flow line. In lesson 13 the number five went deeper first, and then came the plan to fix that line.
Is it too late to change the flow after you dig deep?
A Hazelnuts lesson of mine warns that changing the flow later gets hard once you have excavated too deep. I called that a big mistake to avoid, and in the same lesson I asked to keep the material thick.
What to carve next