

Alexander Grabovetskiy, woodcarver, School of Woodcarving · Published 2020
What does a wood carver mean by "frame"?
Quick answer: A frame is my word for the shadow around a main element, or for small details set beside a big part. In workshop 54, part 2, I compared the shadow to a picture frame that just frames the main movement. Other lessons use the same word for other jobs.
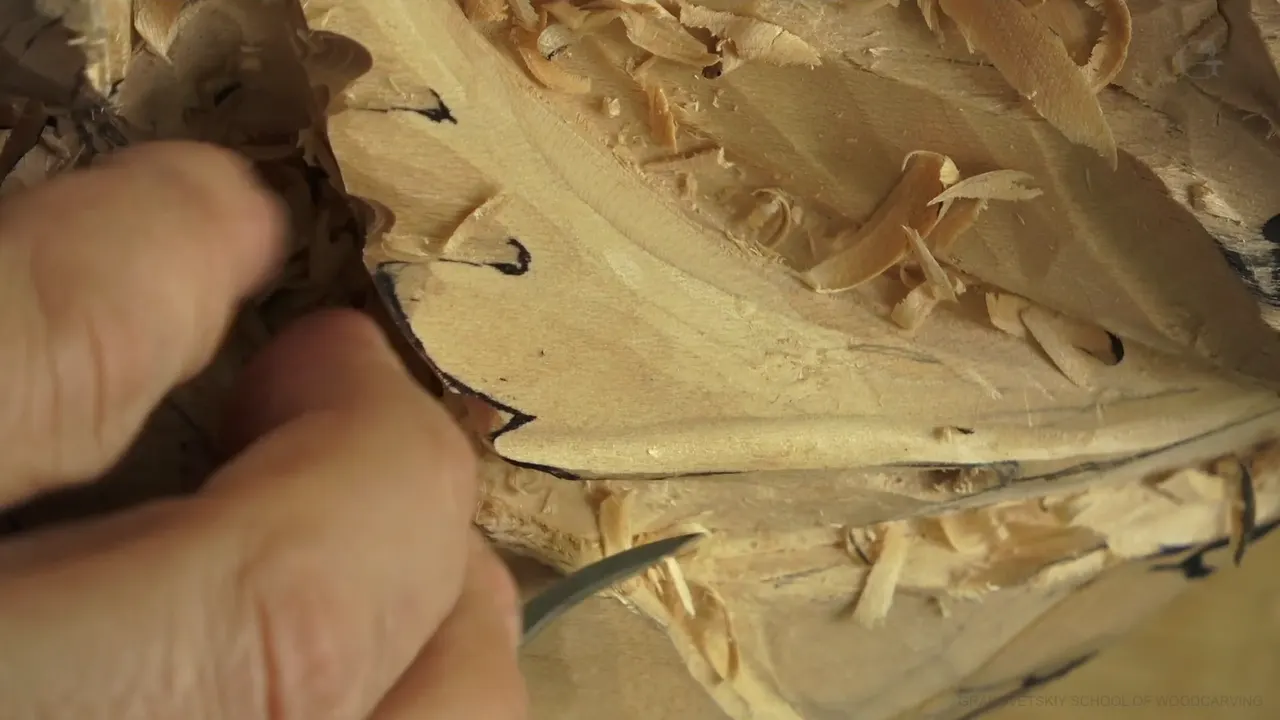

A frame, in my carving, is the shadow around a main element, or a small detail set beside a big one. In part 2 of workshop 54 I said the shadow around the main element works like a picture frame. It just frames the main movement.
Have you ever carved a leaf that looked dull on the board, even with a beautiful detail on it? Would you like to hear what I put around a big shape? Part 2 gives you the cuts and the tool sizes, and the lessons below give you the same word again, in my own mouth.
What does frame mean when I say it at the bench?

Frame is my word for what surrounds the main idea, and in that part the thing around it was shadow. A smaller tool was needed, maybe five millimeters (0.2 in), since seven millimeters (0.28 in) was a little too big. Five millimeters is perfect, I said. Going all the way to the hole came with that, and I pointed out how it opens up and creates beautiful shadow around this main element.
This side could take exactly the same idea, "just because it works like a frame, if you wish." See? Shadow on this side.
My light source was hitting too hard and you can't see. In real life, I said, there will be a good shadow. I also wanted to remove a little more on this side, and that would create deeper shadow also.
How did part 2 get to that shadow?

I asked if you could see this, and I called it a really close-up shot. Probably the best tool for that operation is a back bend. I love back bends, and even just a number one would help me a lot in this case. I could go to the eye and take care of this ridge.
It's huge before your eyes, I said, and that's why you don't see the overall picture. My plan was to change the camera so you could see how it rolls back. It just rolls back nicely, I said. Extra level of detail, I called it, and yes, of course, more details could go right there.

This edge could use a little cleaning, and by the way, a little deeper cut on this side would be possible, with a number nine, maybe. The nine looked dull, and I said I needed to sharpen it. That nine was a little too small. I planned a quarter-inch (6.35 mm) number nine, to get rid of this part and kind of roll it a little bit in this direction. "Yes, I can always fix the movement." It's not a big deal, I said, and I thought it gave me extra dimension.

I started to say I would excavate, then said I needed to fix the movement right there, since it was not appealing at all. I took a number seven. It's 14 millimeters (0.55 in), about half an inch, and from a French brand, beautiful tools, not cheap, but beautiful. Losing the height of this point was something I didn't want. My plan was to blend the overall movement and develop the idea afterward.
"I need to make sure it's just gradually going from underneath and grow and go up." Up, then down, and again up. Even if you don't see that clearly yet, that's the idea.

Too much junk sat on the inside, and I wanted to clean that area. For it I wanted a relief cut, or whatever the excavation cut, and the idea stays the same. A 7 mm (about 9/32 in) number 11 was the plan, and I said I'd attack it just like that.
Care was needed because a division of this movement goes clear across in that direction, and I didn't want a cut so deep that I'd lose the boundary, which sits right there. "That is my boundary of this movement." Right here I easily can excavate, and it's actually another deep spot.
"And I just made a mistake." Not a big one, but one I could avoid. One of the cuts went too deep and I created a tool mark, which I called no bueno. That's okay too, since the movement isn't established yet. Still, "I really have to be a lot more careful."
You can't see what I'm doing, I said, but I'm pretty much right away undercutting. See this triangle? I could get rid of that too, but I need to use a smaller tool.
Where else did I call a shadow a frame?

Workshop 56, part 2, has the same idea, and I needed deep shadow on one end. You may remember what I explained, I said, the role of shadow in wood carving is like a frame for the fine art. "You're actually just surrounding. It's a shadow frame." The main idea, the main piece, needs framing, and that piece was only part of a bigger picture. Those shadows had to go all around.

Part 4 of Venice Room 56 has a framework. I just created a framework around this piece, and I need to continue my framing all around. I hoped you understood the concept, that the shadow around the big idea is exactly the same as a framing for a fine art piece. So it just surrounds. Shadow is really important, especially on this huge composition. Without deep excavations and shadows, it would look bad.

In Venice Room 65, part 7, I said "All I need is just a shadow." I said I could do a plug cut from this side and another from that side. "It's going to give me a frame." Anyone who watched previous segments should understand what I mean by frame. Every element is supposed to be framed with the shadows, or it's not going to look nice.
Seen overall, the deep excavations all around are framing everything. Another spot looked kind of dull. Even the detail was beautiful, but "it's dull because we don't have any frame around." Two main things to keep in mind, the light and the shadow. For that spot I planned a quarter-inch (6.35 mm) number nine, since it just rotates beautifully, a half-round true number nine.

Part 9 of Venice Room 64 calls it extra frame. The convex was on one side, so I had to concave upward, which pops really beautiful shadow in this area. "So it's going to give me extra frame, if you wish." Care was needed in how I do it, and I said I'd use a number nine.

On my April 2020 livestream I told the members of my school that I'm really big about shadows. Looking at the overall picture, those sections were framed around with shadows. One section had no shadows yet, and I needed to work on it, because shadows are really important.
I wanted to show how I frame it. A deep excavation was needed, since I really needed to show those shadows. They work like a framing around all of those details, and a lot of times people don't realize the importance of it. A number nine of about half an inch, 14 millimeters, did the digging, and my goal was approximately one inch (about 25 mm) from that point down. Another time in that stream I called the shadow a framing, "like I said before."

The Tray of Blessing, workshop 6, has a number seven getting rid of the ridges. It looked much better, I thought. You can really see the shadow. That's actually just like a framing for this piece.
Where did small details do the framing?

Part 8 of Venice Room 72 gives a rule I'd mentioned multiple times. A really massive part right around, I said, wants tiny details in the round area. That area will frame the massive part. It meant I could create more separations right there in that area at least. Two millimeters (about 5/64 in), I think, number 11, was the plan for the cut. Damaging the part of a shell was the danger, and the line on that was "Really important not to damage it."

The shell was huge in Venice Room 73, part 6, so the details near it are small. Those small details, I said, would serve as a frame, like I said before. Just small micro tools, and care in how I approach that, wiggling it slightly and going in without damaging that part of the shell. One-eighth of an inch (3.2 mm), a number three micro tool, was the probable tool for small notches. "I know it's a really tiny notch, but every little detail helps." Maybe it's overkill, I said. At least I'm going to know about that, and that's the most important, even if people are not going to notice it.

Over in Venice Room 110, part 3, the big idea sits in the flowers. Those flowers are big, and I needed to frame it somehow. To make a frame I place smaller details, a lot lesser details than on the flowers. "That's going to just work as a frame around." A half-inch number nine, about, made a cut like this, "just a little bit." Just indication.

Part 1 of Venice Room 111 wants only a frame around those flowers. "The purpose is going to be just a frame, but I'm still going to spend some time." The acanthus movement there is kind of interesting. I'd start approximately 10 millimeters (about 3/8 in) away from the wall line, with a bigger number 11, maybe 20 millimeters (about 0.8 in). It has to be a concave.

For Venice Room 113, part 2, I said what I want to see inside would be close to a frame. It would go underneath, with that part a little lower. Only a little lower. The depth would be about an eighth of an inch, about three millimeters, and I said it gives a feel that's really architectural. The tool was a number three spoon gouge of 12 millimeters (about 15/32 in), with a smaller one of five millimeters (0.2 in) and one of three millimeters (1/8 in) after it.
Part 3 of Venice Room 119 gave a simple acanthus movement the comparison once more, a frame. Overall, what will be detectable is pretty much the edge of the acanthus. More organic, I said, and I hoped it would look organic.

Workshop 107, part 2, has a part that goes much lower, with its detail developed later. A really beautiful architectural detail, if you look at the overall. His plan there was that it is going to be a frame, with "some stuff" inside. I kind of like that design, and you can use it for mirrors. Workshop 106, part 3, has me saying I could add one more leaf, just kind of surrounding, a frame again. Both lessons, Venice Room 107 and Venice Room 106, are inside the school, where you can watch the full parts.
Tiny leaves in Carving Lily Box 2, part 7, are not really the focal point. More or less a frame, I would say, for the main idea. A lily flower is going to go in that section.
On Venetian Flowers Rosette 4, part 1, too many concaves and convexes on the inside would take attention from the main flower cluster. That cluster is the main idea. The other parts are secondary, "just serving as a framing," so they don't get many details.

Carving Furniture Panel 19, part 6, has flowers that aren't really roses, but kind of. Some kind of rose, I said, maybe peony or something like that. To make them look nice and big, something goes inside of those leaves that makes sense, a frame for those movements. The sense of overall movement stays. The middle spine does not sit in the middle. Divide that section in 10, I said, and move it slightly to this side, about 6 out of 10 parts. That is my middle part.
Is a frame ever just rough work?
In Venice Room 68, part 6, the word meant something else. I just damaged a little bit of the piece, and that's why I wasn't finishing completely until I'd done all the roughing in, like rough carving, like rough carpentry. "So don't finish until you frame it." Frame that, and finish everything after. Rough carving, I called it in that same part, like butchering almost.
Part 4 of Carving Lily Box 10 has "a rough stage, roughing out stage." Framing, I called it. With the main movements being framed, there's no reason to pay attention to the final details.
Which lessons use the word frame?
Here is each place in my words, with the lesson named as the school names it.
| Lesson | My exact words on that day | What framed it |
|---|---|---|
| Workshop 54.2 | And I also want to remove little more on this side | Deep shadow |
| Workshop 56.2 | You're actually just surrounding, it's a shadow frame | A shadow frame |
| Workshop 56.4 | Shadow is really important, especially on this huge composition | Excavated shadow |
| Workshop 64.9 | That's going to pop really beautiful shadow in this area | Extra frame |
| Workshop 65.7 | Even the detail is beautiful, but it's dull | Plug cuts |
| Workshop 72.8 | A round area is supposed to be with the tiny details | Tiny details |
| Workshop 73.6 | Just because that shell is huge, so those are small details | Small notches |
| Workshop 110.3 | Those flowers are big, and I need to frame it somehow | Lesser details |
| Livestream April 2020 | A lot of times, people don't realize the importance of it | A deep excavation |
| Lily Box 2.7 | The main idea, a lily flower in this section | Tiny leaves |
Some of these lines are about shadow, some about small detail next to a big part, and some about the rough stage. The full Venice Room 54 lesson and the whole Venice Room Part 5 course are inside the school. Start here to watch the videos.
How it's done
- Blend the movement. Blend the overall movement, develop the idea afterward, and don't lose the height of the point.
- Clear the junk inside. Make a relief cut, or whatever the excavation cut, with a 7 mm number 11 (a little over 1/4 in).
- Protect the boundary. Don't cut so deep that you lose the boundary of the movement.
- Go down a size. Where seven millimeters (about 0.28 in) is a little too big, five millimeters (3/16 in) is perfect.
- Take the cut to the hole. Undercut, and take the cut right to the hole.
- Let the shadow do the framing. Shadows all around the main element are what frame it.
Frequently asked questions
Which tool size did I call perfect in part 2?
Five millimeters (about 3/16 in), once seven millimeters (about 9/32 in) proved a bit too large for the triangle. I also had to go all the way to the hole, which gives a beautiful shadow around that element.
How deep did I want the livestream shadow?
Approximately one inch from that point down, about 25 mm, was the goal. The tool was a number nine at 14 millimeters. I really needed that shadow, even if I was destroying the piece above, and I planned to recreate it afterward.
Does a frame need many details?
Fewer, and smaller. Around the big flowers in workshop 110 I planned lesser details than on the flowers themselves. In the rosette I wanted few details on the secondary parts, because I didn't want to take attention from the main flower cluster.
What to carve next