

Alexander Grabovetskiy, woodcarver, School of Woodcarving · Published 2020
What does a wood carver mean by "outlining cut"?
Quick answer: During part 4 of lesson 54 I named a number 11, four millimeters (0.157 in), and said "let me chop, chop." Then I said "I shouldn't say kind," and gave the name in my words: "It is outlining cut." Other lessons carry the name, and one calls it a relief cut.
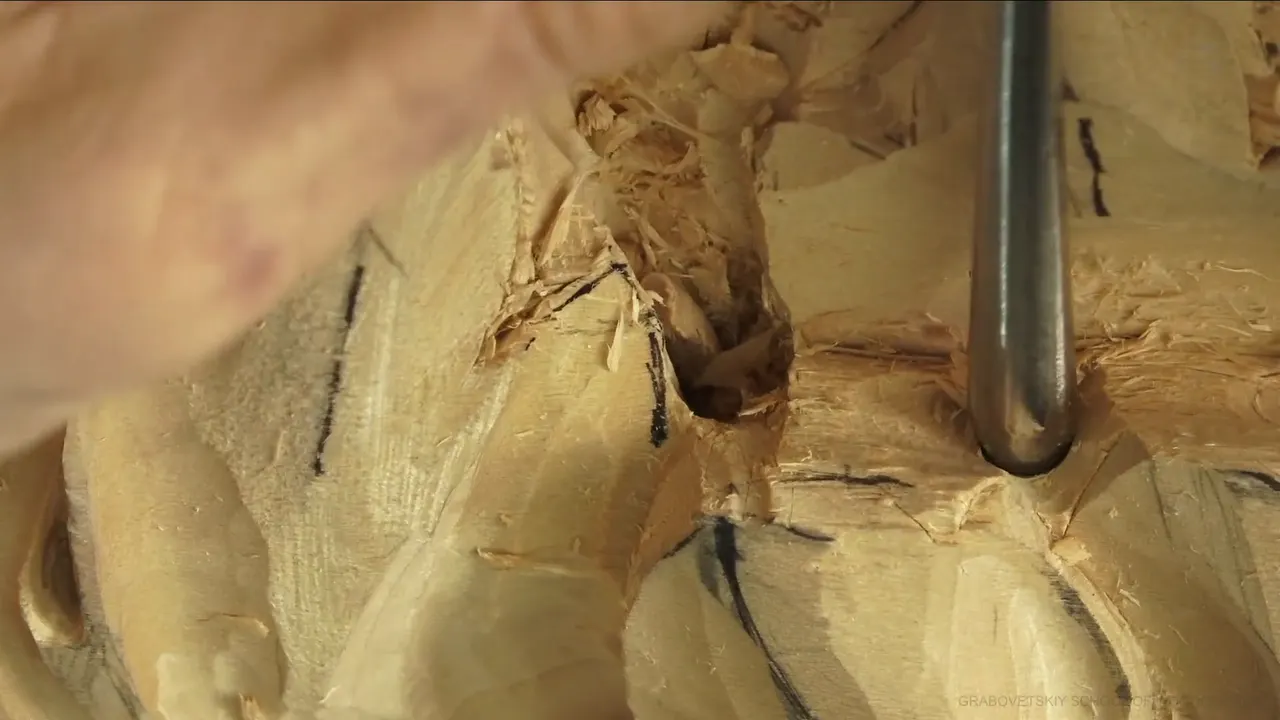

In part 4 of Venice Room 54, I give the cut its name: "It is outlining cut. That's exactly what it is." Tools named on the way include a quarter-inch (6.35 mm) number nine, a smaller number nine at an eighth of an inch (about 3 mm), and a number 11 at four millimeters (about 0.16 in). Other lessons carry the name too, and the table below says which.
Have you ever caught yourself reaching for a vague word at the bench, when the right word was already in your head? Would you like to hear which word I picked, and which tool I named when I picked it? This part gives you the hole, the junk inside it and the name. Lessons further down show where else I say it.
What did I do in part 4 before I named the outlining cut?
The part opens with my plan: a quarter-inch (6.35 mm) number nine. "That's what I'm going to use." Right there sits a triangle. You really don't see it, but it's there. Right here is the spot, I said, and I planned to place the tool on an angle, go in, and start my excavation.

"You really don't see the true picture," I said, because you are looking through the lens, through the angle. My camera position is a little away from me, otherwise my head would always be in the way. That's why you look from a different perspective, a little bit, and you can see the hole much better than I do. I don't see that hole or that plug, but I can look on the screen, and I can see actually there is a plug.
I can actually excavate deeper, and deeper, and deeper. "And that's time to remove the plugs." It will give me beautiful shadow, I said, and I asked you to look: "See that? It's deep, but I can go even deeper if I wanted to."

Some spots can take just a drill, if you don't want to do it that way. Not always possible, because you do have a limitation with the drill, the angle limitation, how you can do it. Now I'll take a smaller tool, still a number nine, at 1/8 in (about 3 mm), and continue my excavation deeper. My words for the motion: "Just drill it. Just drill it. Drill it, drill it."
I planned the cleaning inside for later. "I don't need to do that now because I need to see it, and I don't see it." From a little bigger picture, it already gave me some shadow. "All I need to do, just excavate the wall a little bit," I said, and it will cast really beautiful shadow.

"Let me use just a skew and chop little bit right away." My shadow is continuous, I said. Now I need to excavate, and "I could actually use, and I probably should use my back bend." Maybe a number three back bend, I said, to excavate even deeper.
I'm still leaving approximately three millimeters to five millimeters (about 1/8 to 3/16 in) of thickness right there, because I need that for the development of the upper part. While I'm here, I can kind of blend a little bit the upper part. Underneath of this side, I can probably right away chop a little bit. "Beautiful development. Beautiful."

"Don't pay attention. It looks chunky right now, but I'll fix it just in a moment." It will look different, but I need to sharpen my pencil. Looking again at how it looks overall, I think it looks really nice, and "personally, I think it looks really beautiful."

That movement needs the right direction. That will be the end point, I said. You don't see how it looks, I know, and hopefully it looks better this way. Maybe I have to bring that a little farther, and that will be a big chunk. Maybe there's another division going underneath like that, which makes sense, I said. "I've got so much junk inside of this hole."
How does part 4 give the cut its name?

Maybe I should use my hairdryer and clean it a little bit, and maybe bring this one a little farther to create extra detail on the inside, which is not the easiest part to do. Or maybe just forget about it and create deeper excavation this way. At least I know I can take out the left side, get rid of this triangle, and refine a little bit those movements right here. "Great."

The number 11 I said I'll use is four millimeters (5/32 in), of course. I said "let me chop, chop." "And yes, I can go deeper." I started on "let me get this side also," and the word "kind" came out again: "I shouldn't say kind." The name follows in my words: "It is outlining cut. That's exactly what it is."
What did parts 3 and 5 say around it?
Part 3 has the same word. I said I have to forget about the word "kind of," and called what I was doing "a true undercut." My tool there was five millimeters (0.2 in), number 11. "Five millimeters is little too big," I said. The four millimeters (0.157 in) is what I planned instead, and part 4 names number 11 with four millimeters too.
Over in part 5, the opening is "maybe number five," and I said I don't have to, by the way. The tool hits that curvature: "It just gives me a perfect cut in one movement." A knife or something else would do it. "Boom, and it's already gone." That saves me time.
Where else do I say outlining cut?
Each line below is in my words, and each course carries the name the school gives it. The cut has more than one name, and the rows show it.
| Lesson | My words | What I was doing when I said it |
|---|---|---|
| Venice Room 54.4 | It is outlining cut | Going deeper, number 11, 4 mm (0.16 in) |
| Venice Room 55.3 | call the name of it Outlining Cut, or Setting In | Outlining my head of acanthus |
| Lily Box 2.1 | Another name for that type of cut, outlining cut, is a relief cut | Explaining fine lines later with a sharp tool |
| Acanthus over Moldings 6-1 | Create the outlining cut | Working on a petals layer, number 11, about a quarter inch, about six millimeters |
| Furniture Panel 21.5 | I need to create preliminary cut right here | Separating my future flower from the volute, number 11, 1 millimeter (1/25 in) |
| Furniture Panel 21.9 | just make an outline cut with the number 11 | One millimeter (0.04 in), carefully, around a middle part |
| Floral and Molding 1-2 and 1-3 | outlining cut closer to the line | Cutting at about 18 mm (0.7 in) for 1-2, and number nine for 1-3 |
| Hazelnuts 3-1 | I'm going to just get my outline cut | Working against the grain of the wood, number 11 veiner |
| Workshop 43, part 8 (Venice Room) | a couple separation cuts, outline cuts | Separating my idea, probably at 15 mm (0.6 in), number 11 |
| Flower Rosette 5.1 | I establish my outline | Holding a knife like a pencil and pulling it toward myself, straight down |
| Grinling Gibbons Maine 3-1 | with that outline cut | Outlining those future flowers, looking at the picture |
Why do I call it setting in?

Part 3 of Venice Room 55 has me talking about a mallet. If I use the whole body to bang on a mallet, I said, I would get tired really quickly. Now I need to change the direction and outline my head of acanthus, I said. "So this cut, what I just did, call the name of it Outlining Cut, or Setting In if you are in England. Setting in."

Acanthus over Moldings 6, part 1, puts the same cut in a relief carving. I took number 11 in about a quarter inch, about six millimeters, and said "Create the outlining cut. We're gonna set that in, that's the name for it," adding "setting in if it's relief carving." Lower layers, lower details: "we have to work on each layer separately," and here I was setting in my petals layer. A professional term, I called it, a woodcarver's term.
"I need to take smaller," I said. Still number 11, but two and a half millimeters (0.1 in), "exactly the same what I use previously." I'll create a little deeper cut.
Why do I call it a relief cut?
Carving Lily Box 2, part 1: "Another name for that type of cut, outlining cut, is a relief cut." My reason, in my words: "because you can always make your fine lines later on with a sharp tool, just going straight down like this. But the fibers is going to be already relieved." That makes it much easier to establish the final form, I said. Same part: "we are almost done with outlining."

In Carving Furniture Panel, lesson 21, part 5, I need a preliminary cut right there, to separate my future flower from that volute. Use number 11 and 1 millimeter (about 0.04 in), I said. The outline is all I need. I'm almost happy with it, I said, and I'd check if some of the tools will fit. That one is a number eight, by the way, at 25 millimeters, or about one inch. It gives me "beautiful curvature without any waviness." I know it's not pressing any fibers in "because I had that preliminary relief cut."
Carving Floral and Molding for the Panel 1, part 3, describes a triangle area on the inside of a division: "you really have to relieve it first, and that's how I call it, relieving cut." A straight-down cut goes in the triangle area. "When I'm saying triangle, you should understand what I mean by that." The same word, triangle, is in part 4 as well, where I said I can get rid of this triangle.
Which tool goes with an outline cut?

"Again, that is not the final line." My goal right now, in part 9 of that panel lesson, is not to establish the final line. Concentrate on the flower, I said: "just make an outline cut with the number 11, and one millimeter. Just one millimeter. Carefully." That millimeter is 1/25 in, and I outline that middle part. And "this flower, I can make it a little deeper if I wish, because I do have a depth."

In the floral lesson, part 2, I said this part will be much lower. For an outline cut, a number 11 will work at about 18 millimeters (0.7 in), I said. A little smaller comes next in my plan, about 15 millimeters (0.59 in). "And yes, this tool has to be sharpened." I know I will not lose this line. Number nine shows up in part 3: "I guess I used too much to number 11s," and the cut is "outlining cut closer to the line."

Carving Hazelnuts 3, part 1, calls for a number 11 veiner, to get the outline cut. Against the grain, "which in this case, I guess it's okay." A preliminary cut all around is my plan, and "I don't have to be super accurate." I have to keep an eye on what the grain of the wood does.

In Venice Room 43, part 8, I said "a couple separation cuts, outline cuts," probably at 15 millimeters (0.6 in), number 11, "just to separate my idea."
How deep did I say to go?

In Grinling Gibbons, Maine class 3, part 1, I'm outlining those future flowers. "If you would ask me how deep I'm gonna go," looking at the picture, "we can go maybe about quarter inch" (6.4 mm), "or even a little more, maybe 3/8 of an inch deep" (9.5 mm), "with that outline cut." And: "Don't create too deep of a cut that's gonna create a problem later on."
Every cut I'm doing is like scooping out, I said, and even on a short cut "I'm still creating that slicing cut, and that's important. That is the most important." I'm doing short cuts, and "I'm not creating really long cut." About one side, I said I will set that in, and that side will be a little deeper, because we have a flower which is hanging up upside down.
The Hazelnuts lesson gives the depth in my own words: maybe one-eighth of an inch, about three millimeters deep.
Can a knife do the outlining?

Carving Flower Rosette 5, part 1, has me working with a knife. "Just straight down, make my outline cuts." I used primarily gouges to establish my form in the previous workshops, "and I prefer gouges. I think that's actually more accurate and looking nice when you're using gouges." Mostly a knife today, I said.
"This type of carving, I can call it carving on steroids, because it's actually a lot quicker." My knife is held "as like a pencil," and that's easy for me to create the pressure. Pulling the knife toward myself, I establish my outline. With basswood or limewood, same like I'm doing right now, "it should not be any problem. It's a soft wood, and it just digs really nicely."
In my first-cuts course for beginners (workshop 2, part 5), I said "looks like I have done almost all of my outline cuts." Knife plan: hold it straight down, with the second cut a low angle cut. That will create a really beautiful look, I said. Over in the kitchen cutting board course, workshop 13, part 3, I said I still have to finish the outline cut, and "let's do that."
Would I leave an outline cut in the wood?

"I could even leave that cut right there because it's architectural, and that's going to be all right, but I want to be authentic, and they didn't leave those outline cuts." That quote comes from Venice Room 100, part 9.
The full Venice Room lesson 54 and the whole Venice Room Part 5 course are inside the school. Start here to watch the videos.
How it's done
- Place the tool on an angle. My plan: a quarter-inch number nine (about 6 mm), set on an angle, to go in and start the excavation.
- Excavate deeper. Deeper, until it is time to remove the plugs.
- Take a smaller tool. The smaller number nine, 1/8 in (3 mm), is the plan for continuing the excavation deeper.
- Leave thickness. Approximately three millimeters to five millimeters (1/8 to 3/16 in) stays right there for the upper part.
- Choose the size. Four millimeters (close to 5/32 in) is the size I named.
- Name the cut. I gave it a name in my words: outlining cut.
Frequently asked questions
Which tool did I name for the outlining cut in part 4?
Number 11 at four millimeters, which is 0.16 inch. That was my choice, and I added chop, chop, and I can go deeper.
What other names do I use for an outlining cut in my lessons?
A relief cut, in the Lily Box lesson. Workshop 55 gives Setting In as the name if you are in England, and the Moldings course gives setting in for relief carving.
Was there a plan for the junk inside the hole?
Maybe a hairdryer, I said, to clean it a little bit. I also said maybe deeper excavation this way, or maybe bring one part a little farther.
What to carve next
- Venice Room 54 lesson
- Venice Room Part 5 course
- Venice Room 55
- Acanthus over Moldings 6
- Carving Lily Box 2
- Furniture Panel 21
- Carving Floral and Molding for the Panel 1
- Carving Hazelnuts 3
- Venice Room 43
- Grinling Gibbons Maine class 3
- Carving Flower Rosette 5
- Beginner in Woodcarving Workshop 2
- Curly Kitchen Cutting Board 13
- Venice Room 100