

Alexander Grabovetskiy, woodcarver, School of Woodcarving · Published 2020
What does a wood carver mean by "uniformed"?
Quick answer: In part 7 of lesson 54 I called a concave I made with number seven uniformed. The depth was up to me, I said, but I needed to be mindful of the cuts around it. Other lessons use the word for a wall, a bevel and wood grain, and for a flower where I did not want it.
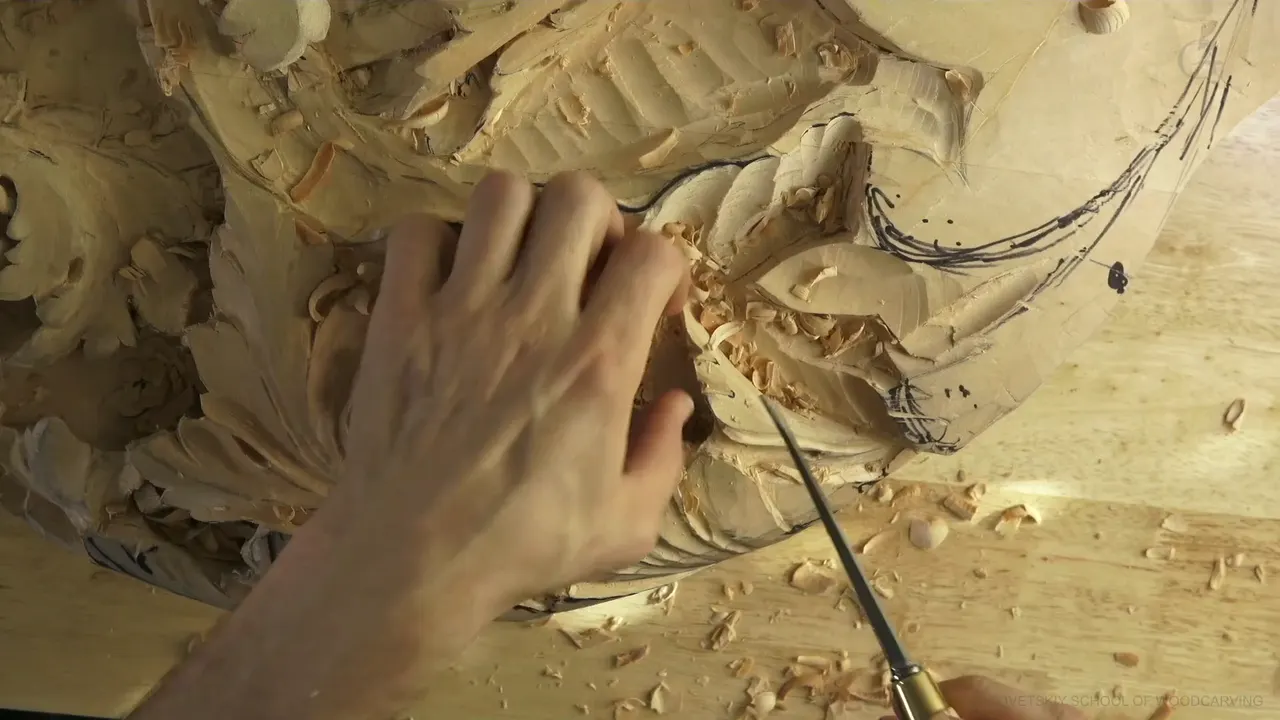

In lesson 54, part 7, I said: "I go in, and I created beautiful and uniformed concave, almost like a full round if you go like this." My other lessons carry the word as "uniform" and "uniformed," about a wall, a bevel and a wood grain, and also about something I didn't want. The table at the bottom says where, and each section tells it.
Ever carved a hollow that looked fine by itself, and then wondered whether it belonged beside its neighbors? Would you like to hear what I said about that in part 7, and in lessons from other courses? Part 7 has a concave and a few tools, then a marker and a circle.
What did the concave have to answer to?
How deep it goes is "only up to me," I said, yet I still have to be mindful to the other cuts. Then the line from the title: "It has to be uniformed and working together with the overall design."
Next, the inside: "But see, it just created that really nice movement on inside, like wrapping. This piece is wrapping." A small tool had made it, I said; a bigger one was on my mind.

The bigger tool was a test. Would a number nine at 5/8 of an inch fit? "Maybe yes, maybe no," I said, and gave the size as 16 millimeters (0.63 in). "And no, it's not going to work," I said. I needed something else, and chose "number seven, 14 millimeters" (0.55 in).
The seven did better. "Number seven is actually much better, and I can make really clean cuts." I worked "without rushing anything, without forcing anything." Then: "I go in," and I created a concave that was uniformed and beautiful, "almost like a full round if you go like this."

The hollow was not done. I said I could clean it and make it even better, and that I have to probably attack this side a little better. Once I develop this side, there is undercutting to do, nicer, and even more beautiful movements to create. "But you should be able to detect the main idea."
Why a number six after the seven?
A smaller tool was my plan: "Let me use number six and smaller." My guess was about 10 millimeters (0.39 in) or so, and I named it number six, "3/8 of an inch" (9.5 mm). It was for cleaning a little better.

If you asked me why the six and not the seven, I tried to explain. The seven is 14 millimeters, big, and its sweep is a seven. The six is smaller, 10 millimeters, four millimeters less (0.16 in), and its sweep is a six. Put one inside the other, and "they absolutely matching." My conclusion was short: "because of the size of the tool, it just changes."
Then, about the work: "Okay, that is good. I think it's good. Even if it's not the final development yet, I'm still going to put nicer details on it, and it's going to be soon. Really soon."

The movement goes from underneath, I said, and out. "And see how deep that shadow is. Beautiful shadow." I kind of like that future development, and I can probably now develop more detailed separations.
How did I plan the separations in part 7?
Showing you again how it develops overall was my aim, and I believe it looks good. My plan was to put on some final details, "not the final details, but more separations," so you would see a more or less final form. In my words: "It's not going to be final final, but semi-final form on this piece." For that I would use a marker, so you can see much better.

Here is one way to find the best place for a separation, if you want to be authentic to that period: you draw the circle, "like this." That gives you a "really good idea where the separation's supposed to be." Then: "one of my separations right there."
One point did not please me, how it points this way. I should probably point more toward a point right there, I said, and that would be my center line. Again I needed to draw somewhat like a circle, with a separation, another separation, and one more going on inside.

Not all of them were meant to have three; "Some of them could have two separations. Okay? Two divisions, I should say." On the micro level, I said, it will be like that too.
Before I develop those, the cuts for the eyes are still to make. I could easily attack the triangles right now and get rid of that, I said, though it would expose a lot more inner part. "But it's okay. That's fine."

Where does lesson 52 use the word?
A ridge is the scene in Venice Room 52, part 3. More divisions were planned on that edge, and I wanted one more right there. Then: "Okay, double check. But it has to be uniformed to the overall design. So for me, it is important. Really important."

Part 4 of that lesson has the word about a wood. I spoke of basswood and limewood, and said people from Australia in my school don't have basswood, and the only way to get it is to ship it. They have a different wood, I said, also softer. Of "this wood," I said the beauty is in the easy carving and also in the grain: "it doesn't have too much visible grain." It does have a grain, "but it's not distracting."
A wood with a lot of grain was the other side, like oak or other wood, "and even sometimes walnut, it just distracts. Too many stripes, too many lines, and it doesn't look too good." Then: "This is a uniformed look. Nice color. A color exactly the same like maple." You can stain it to any color, I said, and it still shows the grain, though it is less distractive than the other wood.

Which divisions and which tool get the word?
Venice Room 49, part 8, has divisions: a division, another division, and it will go all the way. Main divisions, just three right then. Whether you could see from the side, I was not sure. "And yes, I hope you can see, but you can see it's uniformed." Seen from the right, "that's a pretty much uniformed look."

A tool change, the one about a number eight, sits in Venice Room 50, part 8. It might be a little too deep, I said, and I have to switch to number eight. "Number eight is actually better here." And: "See, it's just nice and uniformed. Wonderful." A lot of mess was going on right there, I said. I needed to clean it.

Curls are the subject in Venice Room 56, part 1. Another division, I said, "to make it uniform and also curly." One division would go in from the eye, and another would go that way. Of the sections to come, I said I will subdivide even more and create even more micro movements, which gives me "even more curliness, I should say."

Over in Venice Room 7, part 2, I said I could actually use a little bigger tool, maybe a number seven and half an inch (12.7 mm). I think it will work out really good right here, I said. Then: "It just gives me really uniform look. Okay. Beautiful."

Does the depth of every spot on the panel need the same care?
Part 3 of lesson 54 has "uniformity." I was showing the composition, with several deep spots. If I wouldn't excavate too deep in those two areas, I said, "it would look different. It wouldn't look developed. It would look off." It still would look nice, but not "as it's supposed to look in overall depth."
And I said: "I'm always trying to get about the same depth." Some spots go about 50 millimeters (1.97 in), "about two inches deep" (50.8 mm), and some about one inch, "like 25 millimeters or so" (0.98 in). That is why I create those excavations at about the same level.

Then to Venice Room 82, part 7, where I said "Let me actually do prolonged cut right here," and then "I think it's looking more or less uniform." Next: "I don't like how it feels, overall movement downhill." I have to take the high spots, I said, and "make it more uniformed downhill movement. I'm talking about 3D movement, okay?" I need to use probably number seven from this point on.

Part 8 of that lesson has me wanting to clean a section so it would not distract me. "And it has to look really uniform, okay?" My concave cut would go on one side of the movement, and I would carry it on in that direction. I asked: "And where's my number 11, seven millimeters?" (0.28 in) It was not the best position to carve, I said, and you should not cut toward yourself, though locking your hands really solidly "should not create any problem." The second concave is meant to go in that direction too.
What about other courses?
Carving Greek Acroterion 2, part 3: a number seven at one inch (25.4 mm) was "doing a really good job to make that cut really clean and uniform." Because it's a single cut, I said, "I don't need to take any ridges," and you can see it takes care of itself. "So that's the goal." I'll keep that gouge because I like how it works.

In Carving Hazelnuts 3, part 1, I said I need to get a little bigger number 11, and that I would use a "12 millimeters number 11" (0.47 in). "I'll kind of round, make it somewhat more uniform shape this way," I said, and I would take out some of that material. The aim was connecting that part to the overall husk. "Maybe it's too small. I'll get 14 millimeters. Little bigger than half an inch" (0.55 inch). Then: "That's much better."

The word is on a gouge edge, too. In Sharpening Straight Gouge 2, I had gone too close to the edge, but "I still have some meat in the center." That means going to the edge is not needed, and I concentrate on the middle section for a "uniform bevel." Further on: "I concentrate only on the center part."
In V Tool Sharpening 3, I called it a step: "this is step number one, and you can see right now just a uniform. If you look at this side, it just transfers to that side." That is how the tool's supposed to look, I said. Further on I said I'd do that until I get exactly the same bevel this side and that side.
A wall is in Carving Dining Table Apron, workshop 8. "Moving toward, like making a step." That way, I said, the wall will look uniformed.

In Curly Kitchen Cutting Board 10, part 4, the work was cleaning passes, "until it looks really uniformed, without too many ridges." I wanted to come back to that center line and make my cleaning cut from that side. "Like I said," I do not want to sand anything. The aim was as little ridges as possible, so it looks like it's already sanded and smooth.

When did I say I did not want it uniform?
Lily Box 12, part 1: "Let me get the number 8," maybe about one-eighth of an inch (3.2 mm). Even with eight petals, I still wanted movements, "some kind of interesting movements on inside." And: "I don't want to make it uniformed concave." I still wanted "some really nice movements."

Last, Venice Room 98, part 6: "I don't want to do too uniform, okay?" And it would look fake, I said, if it went a little too uniform. Before that I planned to start by establishing my convex and see how it looks, and "maybe I'm going to like it." After that: "may attack that from another direction."

Where else do I say it?
Each line below is in my words, from the lesson I name. The tools change with the lesson, and the last column says what the work was.
| Source | The words I said | The work in front of me at the time |
|---|---|---|
| Venice 54.7 | Beautiful and uniformed concave | A concave opened with a number seven |
| Venice 52.3 | For me, it is important. Really important. | A ridge, with more divisions wanted on that edge |
| Venice 52.4 | This is a uniformed look | A wood without too much visible grain |
| Venice 49.8 | A pretty much uniformed look | The main divisions, seen from the right side |
| Venice 50.8 | Nice and uniformed. Wonderful. | Number eight, after I wondered if the cut was too deep |
| Venice 56.1 | Uniform and also curly | A division going in from the eye |
| Venice 7.2 | Really uniform look | A bigger tool, a number seven |
| Venice 82.7 | More uniformed downhill movement | The high spots of a transition, with the overall movement going downhill |
| Venice 82.8 | It has to look really uniform | A concave cut planned along a movement |
| Greek Acroterion 2.3 | Really clean and uniform | Single cut with a number seven, one inch (25.4 mm) |
| Hazelnuts 3, part 1 | Somewhat more uniform shape | Rounding toward the husk, number 11 at 12 mm (0.47 in) |
| Sharpening Straight Gouge 2 | Uniform bevel | The middle section, with some meat still in the center |
| V Tool Sharpening 3 | You can see right now just a uniform | Step number one, with this side transferring to that side |
| Dining Table Apron, workshop 8 | This wall is going to look uniformed | Moving, making a step |
| Curly Kitchen Cutting Board 10, part 4 | Until it looks really uniformed | Cleaning passes, without too many ridges, on the cutting board |
| Lily Box 12.1 | Some really nice movements | On a flower with eight petals, number 8 at about one-eighth of an inch (3.2 mm) |
| Venice 98.6 | A little too uniform | Starting by establishing a convex, to see how it looks |
The full Venice Room lesson 54 and the whole Venice Room Part 5 course are inside the school. Start here to watch the videos.
How it's done
- Decide the depth. How far down the concave goes is mine to decide, I said.
- Test the bigger tool. I wanted to see whether a number nine would fit. The answer was no, and something else was needed.
- Go in without rushing. With the number seven, I worked without rushing and without forcing anything, and made the concave.
- Plan the smaller tool. My plan was a number six and smaller, about 10 millimeters (0.39 in), to clean a little better.
- Draw a circle. To locate a separation, you draw the circle, and I planned to use a marker.
- Allow two divisions. Not all the separations are meant to be three. Some could have two.
Frequently asked questions
Who decided how deep the concave in part 7 went?
Mine to decide, I said, and the concave needed to be uniformed.
Which gouge worked better in part 7?
Number seven, 14 millimeters (0.55 inch). The nine at 16 millimeters (0.63 in) I ruled out, saying no. With the seven I could make really clean cuts.
Did I want every concave uniform?
Not in every lesson. In Venice Room 98, part 6, I said too uniform would look fake. In the Lily Box lesson, part 1, I wanted some interesting movements on the inside, and I said no to a uniformed concave.
How were the separations planned in part 7?
What to carve next