

Alexander Grabovetskiy, woodcarver, School of Woodcarving · Published 2020
What does a wood carver mean by "overkill"?
Quick answer: In part 1 of workshop 54, I picked a four millimeter number 11 for a leaning cut and said maybe it was overkill, but it was okay. Other lessons of mine use the same word about gouges, a pointing machine, tape, paper, a mallet and a tiny notch.
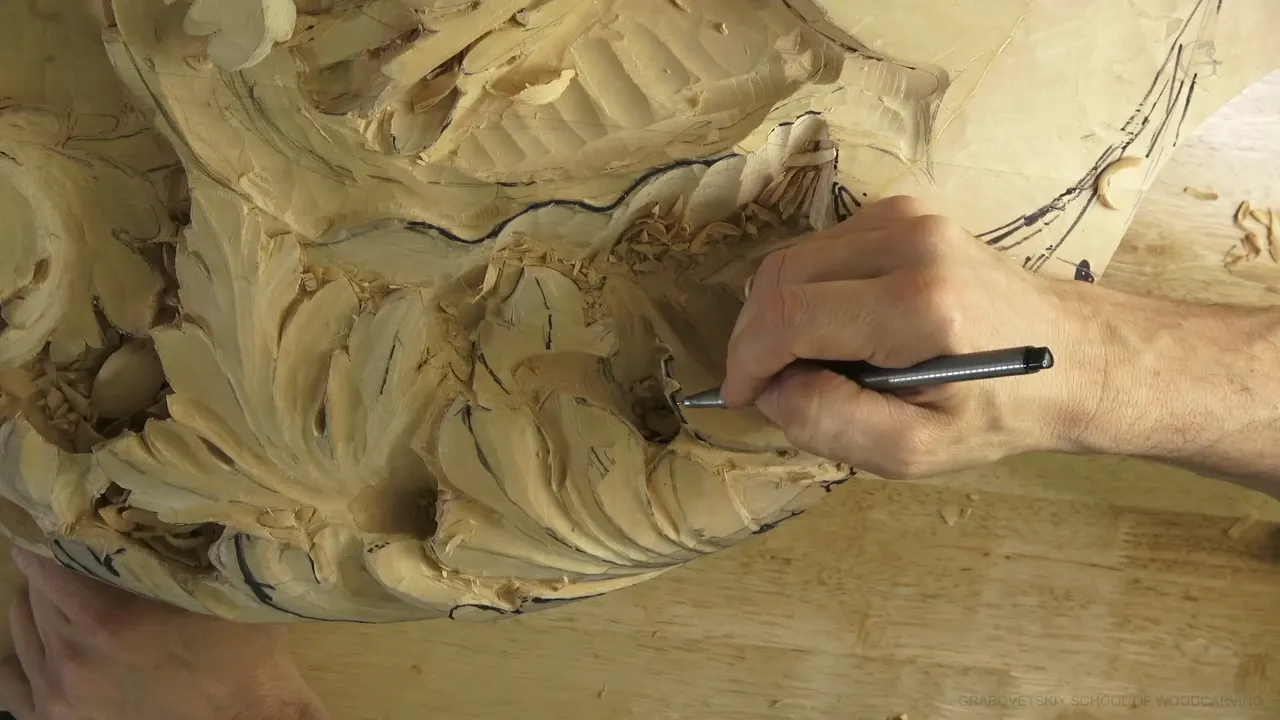

In Venice Room 54, part 1, I said four millimeters and, in the same breath, the word overkill. The same word comes up in my other wood carving lessons, about gouges, tape, paper, a mallet and a tiny notch. Here are the places, each with the lines around it.
Ever stopped in the middle of a cut and wondered if the tool in your hand was too much for it? Would you like to hear how I talk myself through that at the bench? This page goes through workshop 54 first, then the other lessons where I used the word.
What was I carving when I said it?

Divisions were coming at a couple of spots. I now had to create those separations, and create them nicer somehow. "I need to make subdivisions," I said, and that is going to be a beautiful subdivision. Maybe I could bring that eye closer in this direction, and exactly the same right here. That way I kind of have some curliness.
I asked myself how I was going to do that. The movement rolls this way, and the section is originally lower than that section. One has to overlap a little bit of the next part, and that part has to overlap a little bit of the farther part, so my cut had to lean toward the right.
Why did I call four millimeters overkill?

"Four millimeters, that's what I'm using." That works out to 0.16 in, and a moment later came the line this page is about: "Although maybe four millimeters is overkill in this case, but it's okay."
My next words were "let me relieve this one also," and again, relieve it. Blending came after that, and a tool would help me. Beautiful, I said, and even without the final form it was already looking not bad at all.

I planned to hit it from the opposite side, from the bottom of this movement. I'd clean a little of this ridge, I said, and in the same breath I changed my mind: "Although, no, that's not what I'm going to do."
What did I mean by a roll back and a micro level?
A roll back, I believed, would look really nice. "I know you don't see that, but you will understand." A concave cut on the inside that rolls slightly backward would look actually really awesome.
I tried to explain it better. No dome undercut on the inside right there. The round was to go in, and for that I needed to raise the ridge I was pointing at with my pencil. One concave would do it, and that's easy. But there was another really interesting detail I could create: a detail on the inside of a detail. I could roll this in, with the same effect I had made overall, on a micro level.
That would give me a beautiful movement, almost undetectable, but people who are looking for those details really will appreciate it. The line I had just made did not make sense yet. It would.

Which tool did I take for the small cut?
Four millimeters again, a number 11, to start my preliminary cut. I wasn't sure about it, though. Maybe my four millimeters is kind of dull, I said, and I need to spend time and sharpen it. The concave was going to go like that. The beautiful thing about a number 11 is that I can lean it over and create a U cut without making too big of a concave in the area.
Only a number three sweep concave, yet I can create really beautiful shadow underneath this rolling back detail, and around the eye. I could continue it to the pipe cut. That pipe was not in the right position, and I needed to fix it later.

"Let me create even deeper cut. It's a really small detail, but that detail going to give extra level. Extra level, extra shadow, if you wish." It's still going to cast some shadow. Now I needed to blend that side and roll it back.
I can use just the upside down, any gouge which will fit, and this is number five. That way I don't have to undercut too much, and I'm still creating extra detail, extra beautiful detail.

What did the next two parts of workshop 54 add?
Parts 2 and 3 carry more tool talk. My number nine looked dull in part 2 and needed sharpening. It was also a little too small, so I would use a quarter inch (6.35 mm) number nine and roll it a little bit in that direction.
My number seven, at 14 millimeters (0.55 in), was about half an inch. Next I would use a seven millimeter (0.28 in) number 11, and I warned myself to be careful, because a division of this movement runs all the way that way and I did not want to cut too deep and lose the boundary. Then a mistake. "Not a big mistake, but mistake I could avoid." One cut got too deep and left a tool mark, which is no bueno.
To get rid of a triangle I needed a smaller tool. Maybe five millimeters. Seven was a little too big, and five millimeters (0.20 in) was perfect. The shadow around the main element works like a picture frame. It just frames the main movement.
In part 3 I wanted to see if a quarter inch (about 6 mm) is too big or it's okay. Then three millimeters (0.12 in), one-eighth of an inch (3.2 mm), and as deep as I wish. All the cuts around it will go to the same hole.
Five millimeters was a little too big for the undercut, so let me use the four millimeters. "Everything's supposed to go to the same hole." I'm always trying to get about the same depth, some spots about 50 millimeters (2 in), some about one inch (25 mm) or so. That's why I create those excavations about the same level.
When did I say overkill in other lessons?
A few of these lessons are about a gouge, a few about a measuring tool, and a few about plain tape and paper. Each place below carries my words and the course it comes from.

In Hashemi Flowers lesson 7 I said let me take a small number nine, maybe about 10 millimeters (0.39 in), and make this cut. "Again, I know I already said that, but the reason why I'm doing that, it's just for the light's sake." Then the word: "I know some of you probably would say it's maybe overkill, and I probably have to agree with you." For me, it makes sense.
Next, my plan was a bigger number eight, maybe 20 millimeters (0.79 in), which I called three-quarter of an inch. The marks had to go, without hitting my main structure, although I was still going to undercut even those.

In Furniture Panel lesson 18 the word is about a tool, not a cut. There are lots of different ways to measure the depth of the background, some complicated and some easy. A pointing machine in your workshop is probably the easiest. Sculptors use it, and I also use it in carving when I'm doing a full 3D in the round.

Even for flat panels it's easy to use, because it has a needle, and I attach the base so I can place it flat on the panel. I adjust the needle, touch the area, and check the depth. I can easily check if the depth is exactly the same, and here it's absolutely the same.

"That's the complicated way, I guess. I really don't need to, and I'm probably not going to use it. Maybe in some small areas, but not everywhere, because it's almost overkill for this project." Still, I liked the tool. A 3D duplicator in your hands, or whatever you prefer to name it, because you can duplicate anything pretty much. You measure the original and translate that to the workpiece. A sculpture made from clay first can be carved in limestone or other stones the same way.

Floral and Molding lesson 6 needed space for my convex, and I thought number five would do. A check showed pretty much the same number five, a quarter of an inch (6.4 mm), which I also called six millimeters (0.24 in). I tried to round it a little bit. "Maybe number five is overkill, most likely."
That needed to come down slightly, because I really wanted it to follow this direction. Most likely I also needed a back bend, a flatter one, maybe about a number three. The aim was to make sure that part is actually convex.

Two small ones come from Lily Box lesson 2. Blue tape comes first, and I said it was just to mark my position. "You don't have to, but I think it's a good idea. Again, maybe just overkill." I would mark both sides, and later that tape would come off.

My next job was to position the paper layer I'm supposed to glue on. I'd draw some triangles just in case. "Again, that could be overkill, but for me, it's better to be safe than sorry." Glue would go on the backside of the paper, not on the surface.

A mallet is the subject in Lily Box lesson 3. Undercutting is not a necessary step, but I really like to undercut in all areas where I can reach with my tools. A stubborn area is almost impossible to control by hand, and with a mallet I can gain much better control. Any mallet will do. With small tools, though, I don't like to use a bronze one. "I have a small bronze mallet like that, but it's overkill."
A rubber mallet is my other choice, because it is lighter and I can control much better. I hold the mallet by the head, not by the handle. It helps on the harder woods. I'm happy, and I will not overdo it.

There is another way to undercut, if you don't have a number 11. You can always use a small number three, or even a bigger one. "Let me prove the point." Number five, about a quarter inch (6.4 mm), goes in upside down, with just the corner of the tool, and cuts on inside. I named the same move in part 1 of workshop 54, with the upside down gouge.

A question came up in Venice Room 73. Do I do those two separations or not? Although maybe I should. A smaller tool, probably just 1/8 of an inch (3.2 mm) number three micro tool, would create those small notches. "Every little detail helps," I said, though I knew it's a really tiny notch. And then: "And yes, maybe it's overkill. I don't know. But at least I'm going to know about that, and that's the most important, even if people are not going to notice it."
I planned to relief two sections before my final cut with the number 11 and the 1 millimeter (0.04 in), and again a really small, tiny number three.

Too much space in one spot, I said in Venice Room 163. With two millimeters (0.08 in) I'll do another cut, I said, and it will still give me a shadow and really good separation. One millimeter (0.04 in) was possible too. "I'm not sure if I should, but let me try." Then: "Maybe it's overkill in this area. Really don't need to. But it gives me a beautiful shadow."
Later in that part I came to the divisions of an inner acanthus leaf. Three main divisions, and inside of those I will subdivide, maybe into smaller ones, to make it more curly if I need to. "Sometimes it's just overkill also." I'm probably going to leave it like that, without too many subdivisions. We'll see.
Which lesson held which line, and what was I doing?
Side by side, here are the places.
| Lesson I named | What I was doing there | My words |
|---|---|---|
| Workshop 54 | A four millimeter number 11 for a cut that leans right | but it's okay |
| Hashemi 7 | A small number nine, for the light's sake | I probably have to agree with you |
| Furniture Panel 18 | Checking the depth of the background with a pointing machine | almost overkill for this project |
| Floral Molding 6 | Rounding a convex with a number five | most likely overkill |
| Lily Box 2 | Blue tape to mark my position, then triangles on the paper | again, maybe just overkill |
| Lily Box 3 | A bronze mallet with small tools | but it's overkill |
| Venice 73 | A tiny notch with a number three micro tool | a really tiny notch |
| Venice 163 | A one millimeter cut to add a shadow | a beautiful shadow |
Where can you watch these lessons?
Each one sits inside a course of mine. Venice Room Part 5 holds workshops 50 to 61, and Venice Room 54 is the lesson for this page. The Hashemi Flowers course and the Furniture Panel course hold lessons 7 and 18, and the other courses are one click away if you start here.

How it's done
- Name the cut you need. In workshop 54 I needed a cut leaning to the right, because one section overlaps the next.
- Pick the tool. My pick was a number 11 at four millimeters (5/32 in), and I said maybe it is overkill.
- Relieve and blend. I said I would relieve this one also, and then I had to blend it.
- Add the small detail. A roll back on the inside could give a detail inside a detail, I said, at a micro level.
- Turn the gouge upside down. A gouge that fits can go in upside down, and I named number five.
- Pick the mallet for small tools. In the Lily Box course I said the bronze one is overkill and a rubber one is lighter.
Frequently asked questions
How big was my first tool in part 1?
A number 11 at four millimeters (0.16 in). I said maybe my four millimeters was kind of dull and I needed to spend time and sharpen it.
What does a roll back mean in my words?
A concave cut on the inside, rolling slightly backward. Awesome, I said, and I could roll it in on a micro level.
Which gouge did I name for the upside down move?
Number five. One that fits can go in upside down, I said, which means less undercutting.
Why did I skip the bronze mallet in that lesson?
What to carve next