

Alexander Grabovetskiy, woodcarver, School of Woodcarving · Published 2020
What does a wood carver mean by "let me think"?
Quick answer: I say it in part 8 of lesson 54 before naming a concave to excavate and a number nine gouge, quarter inch (6.35 mm). Lessons from other courses carry it before I pick a gouge, name a size, set a depth, or show you what I am doing.
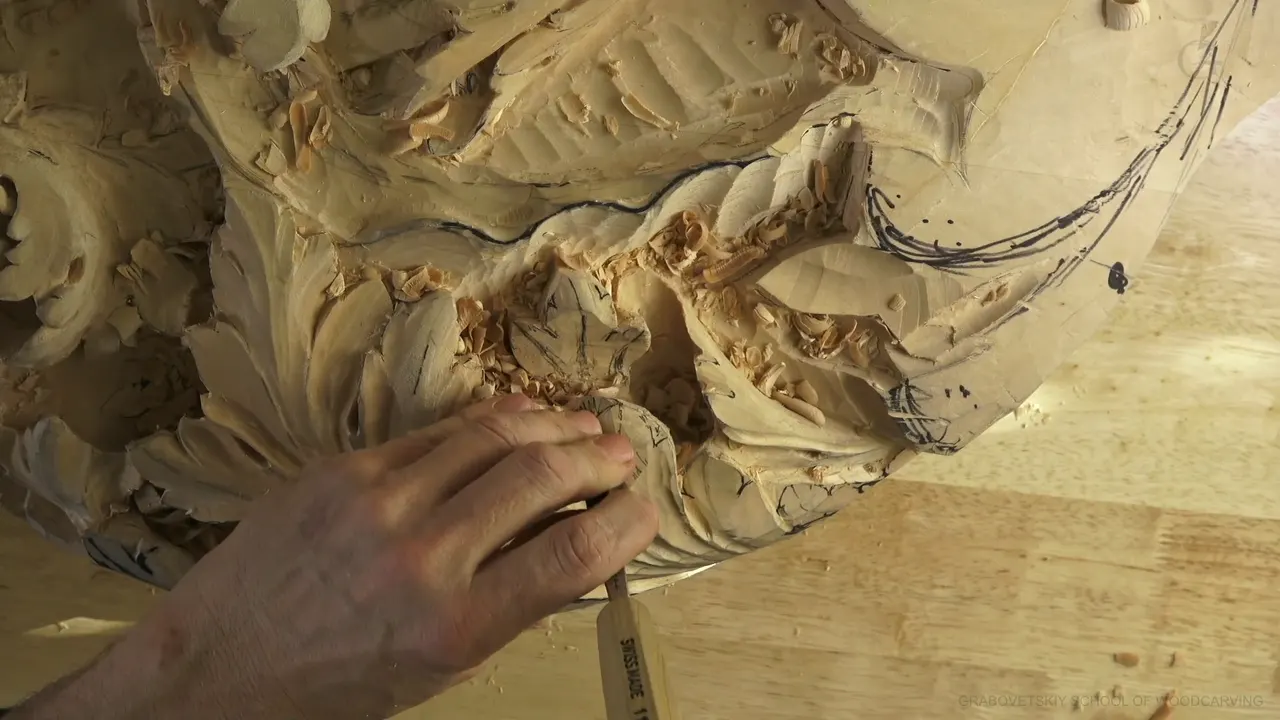

In lesson 54, part 8, I said: "Okay, let me think. So now what I have to do, now I have to excavate on the side right here, and I need to create a concave." My lessons in other courses carry that line before I pick a tool, name a size, set a depth, or show you what I am doing. The table at the bottom says where, and each section tells it.
Ever held three gouges over one spot and not known which one to pick up? Would you like to hear what I said in those minutes, in part 8 and in lessons from other courses? Part 8 has a skew chisel, a quarter inch nine, and work that waits for later.
What came before that line in part 8?
"And yes, I do have doubts sometimes," I said. What next? Relief cuts first, and I know you don't see that when I'm showing you a big picture. Closer was the plan: "Let me get closer to you again. You can see that I'm just doing relief cuts, okay?"

Relief cuts once more, and and that sight, I said, was the one I was after avoiding. Next: "I could pretty much lose this part, and I probably should. I should use a little bit smaller tool." Still, it was okay: "See? I'm able to actually still create nice movement."
My plan was a smaller gouge, four millimeters (0.16 in), attacked from the side. Relieve first, I said, and go in after that. I said a separation would come, and then: "Just like that." I asked, "And you know why it's happened?" and answered: "Because I too early cut inward with my skew chisel."

"So I took too much material out before I created those separations," I said, and I called it another lesson for myself: "Don't cut behind the ears before you're finished with the face." Another separation followed. I planned to get rid of those areas.
Number five came next. I said "I use just number five," and then, "Create my somewhat final shape. Not the final shape, but semi-final shape." I asked if you could see that, and answered myself: "I know you can see that." Later on: "It is already getting dark outside, but I still want to continue to work on my piece."

Excavation was wanted on one side and a little more on the other, plus a little better separation right there. "And maybe just get a little deeper, but deeper but not too deep." One side also needed rolling better. "You don't see that, but it is really important. Just make it smooth transition. Otherwise, it's not going to look good."
What did I name right after that line in part 8?
A concave, and a tool for it. "To create the concave, I need probably a small tool first. I need to use a number nine." I called it "number nine," and a quarter inch, about 6 mm. I added: "Although we attack that from the right position also."

The movement pleased me. "This movement is a really nice movement. I really like it and don't want to mess it up." All the way underneath of the separation, I said, was where it would run.
"Unfortunately, it's hard to see on the camera, but let me create that separation carefully," I said, with just my skew chisel. A later step would cover those: "Later on, of course, I'm going to establish pipes and eyes of this separation. But as of now, like that. Let me clean it a little bit."

"Okay, that is good." A direction followed: "And gradually, I'm going to move that direction also." The last line in this video is "So I just gave that really round look."
Which gouge followed my line in the other courses and lessons?
Start with Acanthus over Moldings 4, part 1. Number 11 would be a really good choice, I said. The next question was which one would be the best in this case, and I answered seven millimeters, "a little bigger than quarter of an inch." That size is 0.28 in. Carefully, I would make the concave cut with it.

Acanthus over Moldings 5 has a caution of its own. "I really want to be safe," I said, and a mistake was what I wanted to avoid. I picked a spoon veiner and asked "which one I should grab." The answer: "number 11 and 7." For the cleaning that followed, I wanted to be safe again, and a back bend would be probably the best in this case.

Moldings 7, part 1, has a blend: "I have to blend now." Number three or number five would do, I said, and I would take number three. I did not want to see those really harsh ridges.

In Hashemi Flowers 10, part 5, that line brought a tool question, "which tool I can use." Probably a number five, I said, "about three-eighths of an inch" (9.5 mm), maybe a little bigger, "about seven-sixteenths" (11.1 mm). Then, still on that tool: "The light going to catch that ridge, and it's going to create beautiful shadow movement." Then: "I don't worry about all that. I can always take a V tool and clean that."

Venice Room 112, part 3: I planned to get a spoon veiner and asked myself which one to take. Two millimeters, probably, and I said it was number 11 at 2 millimeters (0.08 in). After that I thought I was nearly through, and I needed a flatter gouge, something like number three, for the mess underneath.

Which size came after it?
Venice Room 117, part 3, names three sizes. The smaller tool, I said, "is going to give me lightness. It's not going to look as heavy." Going even deeper was possible too: "Maybe I could use three millimeters, then I'll switch to two millimeters, and maybe all the way to one millimeter." Three millimeters was one-eighth of an inch (3.2 mm). Of the result I said "beautiful, beautiful, deep, really, really deep shadow," and I would probably use one millimeter as a final depth.

I went bigger in Venice Room 118, part 1. "You know what? I could actually get even bigger," I said, to 12 millimeters (0.47 in). A bigger number followed: "Maybe even 15 millimeters, like 5/8 of an inch," which is 15.9 mm. I tried it. It "actually worked really good, except I have to attack that from two sides because the grain of the wood and the property of a tool, one side is always going to be clean and another side is always going to be somewhat messy."

Lily Box 7, part 1: "Okay, let me get a bigger gouge." The line came, and after it: "Maybe about quarter inch and be a little more aggressive." That is about 6.4 mm. Later I said I didn't want to lose my high spot.

Lily Box 5, part 4, was a wall. "I need to dig out this wall right now." Which approach could I take? Number three, I guessed, or maybe number seven, to "remove what I don't need." Further on I wanted a concave cut inside, with a small gouge like number eight, and carefully. "I apologize if you can't see what I'm doing."

A plan changed in Lily Box 8, part 3. That line came with a question about developing this part, and we could move on to the next detail. A flip could be a little bigger, and I would use probably just a knife for the beginning. Of the other side I said there was not much space: "So I thought I'm able to do bigger, but no, I'm not." A number seven at 14 millimeters (0.55 in) came next in my plan, to work on rounding.

How deep or how low did I go after it?
Depth was the question in Venice Room 123, part 2: "how low I want to go." Maybe about five, six millimeters from a high spot down, I said, "maybe even lower." Those figures are 0.2 to 0.24 in. I wanted to see how it would look from above, and I said "I don't want to lose it on the other hand, but I also need some depth in this area." The next figure: "10 millimeters" from the highest spot, "so about three-eighths of an inch." Ten millimeters is 0.39 in, and 3/8 in is 9.5 mm. Later I said "I need to switch to a smaller tool," and my plan was 12 millimeters (0.47 inch) for it.

In Carving Furniture Panel 19, part 2, I said "Later on, we're going to take care of that." Then came a question about doing it right away or not. One step had to wait: "because I didn't excavate my background in those areas, I really can't make that cut." Those areas were set to be one-eighth of an inch deep, about 3 mm.

Another question concerned a depth map, and I answered "yes, absolutely I will," once all my decisions are final.
Choosing a look is the matter in Venice Room 130, part 3. "Now I have to make the decision, what am I going to do with those guys?" Right behind that line, I wanted the best look. The main concave was first on my list. An edge had to come down, "no more than a quarter inch" (a little over 6 mm), and a secondary concave on one of the sides would give "beautiful shadow casting." For the main concave I would take number seven, "big one."

What else did I stop to think about?
A yes or no, in Venice Room 143, part 1. One section could be excavated with a smaller gouge, "let's say, 12 millimeters or so" (0.47 in). Should I do that or not? "Maybe yes, maybe no. Maybe even now with the 10 millimeters and creating deeper shadow right here" (0.39 in). After that: "That's enough, I guess." A spoon veiner, "same, like, 10 millimeters, let's say," was another idea, and then a smaller spoon, "like maybe seven millimeters" (0.28 in), to go deeper even more.

Showing a cut was the problem in Venice Room 122, part 2. I had planned to clean one side off camera. Then I asked: "But how am I going to show that to you?" The line followed, and so did "Right there. Okay. So it's much better." Next came a plan: start sloping nicely, keep it gradual, and not do the final slope.

A start, in Lily Box 4, part 1. "Okay, let's start." Next, what else I could say. "I don't think there's anything else, but let's start." My first tool would be a number nine, 20 millimeters (0.79 in), "three-quarter of an inch." It could be smaller, I said, half an inch, "like 14 millimeters" (about 0.55 inch), or a quarter inch (a little over 6 mm). The wood was olive wood, with "absolutely different property from a bass wood or lime wood."

Where else do I say it?
Each line below is in my words, from the lesson I name. The tools change with the lesson, and the last column says what the work was.
| Source | The words I said | The work in front of me at the time |
|---|---|---|
| Venice 54.8 | Excavate on the side right here | Excavating a side, nine at a quarter inch (6.35 mm) |
| Lily 4.1 | What else I can say | A nine, 20 mm (0.79 in), on olive wood |
| Lily 5.4 | Which approach I could take | A wall to dig out, with a three, seven or eight in mind |
| Lily 7.1 | Maybe about quarter inch | Plan for a bigger gouge, a little more aggressive |
| Lily 8.3 | How I can develop this part | A flip I tried to make bigger, then a plan for a seven, 14 mm (0.55 inch) |
| Moldings 4 | Which one is the best for this | Eleven at 7 mm (0.28 inch) for a concave |
| Moldings 5 | Number 11 and 7 | A spoon veiner, then a back bend to clean |
| Moldings 7 | Three or five would do | A blend with a number three, no harsh ridges wanted |
| Hashemi 10.5 | Which tool I can use | For a shadow, a five of about 7/16 in (11.1 mm) |
| Venice 112.3 | Two millimeters, probably | Spoon veiner, number 11, at 2 mm (0.08 inch) |
| Venice 117.3 | Maybe I could use three millimeters | Then two, and one millimeter for the final depth |
| Venice 118.1 | Maybe even 15 millimeters | Trying a bigger gouge, then a two-side attack |
| Venice 122.2 | Show that to you | A slope to make gradually, then a number four spoon |
| Venice 123.2 | How low I want to go | Five or six millimeters, then 10 mm (0.39 inch) down |
| Venice 130.3 | The best look for it | A main concave with a big seven, and a secondary one |
| Venice 143.1 | Do that or not | A 12 mm gouge (0.47 inch), or 10 mm to dig a deeper shadow |
| Furniture Panel 19.2 | Do it right away or not | Background spots 1/8 in deep (about 3 mm) |
The full Venice Room lesson 54 and the whole Venice Room Part 5 course are inside the school. Start here to watch the videos.
How it's done
- Name what the spot needs. In part 8 I said I needed to excavate the side right there and create a concave.
- Start with a small tool. For that concave I said I needed probably a small tool first, a nine of 1/4 in (6.4 mm).
- Work carefully where the camera cannot see. On the camera it was hard to see, and I would create the separation carefully, with a skew chisel.
- Leave the detail for later. Pipes and eyes of the separation came later. For now I would clean it a little bit.
- Keep the movement. I liked the movement and did not want to mess it up.
Frequently asked questions
Which tool did I name in part 8 after the line?
Number nine, a quarter inch (about 6 mm), for the concave. A small tool came first, and I needed to use a number nine, I said.
Did I use a four millimeter gouge in part 8?
That was my plan. A smaller tool was called for, I said. I would use four millimeters (0.16 in) and attack from the side. First I would relieve it, then go in.
Which lesson did I call another one for myself in part 8?
Don't cut behind the ears before you're finished with the face. I had taken too much material out before I created the separations, and I called it another lesson for myself.
What to carve next