

Alexander Grabovetskiy, woodcarver, School of Woodcarving · Published 2020
What does a wood carver mean by "that feel"?
Quick answer: On my Venice Room panel, in workshop 63, I planned to roll a ridge with a back bent, to give "just the feel of it like it is convex." A number three was the first tool I named. My other lessons use the same word for wrap, roll, pipe and slope.
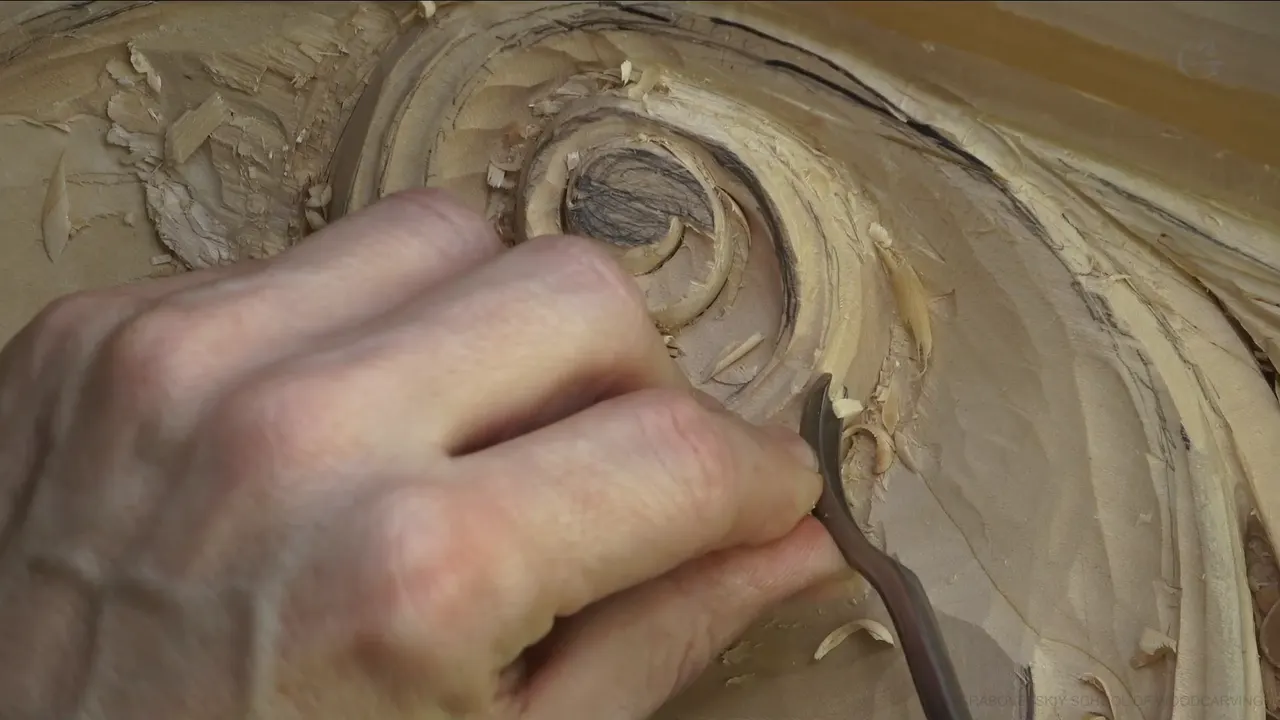

In part 4 of Venice Room 63, I said I was going to roll a ridge with a back bent gouge, and the first one I named was a number three at a quarter inch (6 mm). My other wood carving lessons use the word feel for wrap, roll, pipe and slope.
The ridge comes first, in order. After it come the places in my other courses where I say the same word, sorted by the shape each feel belongs to, and every passage comes from the lesson I name.
What did I say about the ridge in part 4 of workshop 63?
I say "Now it is a lot better," and then a second "Yeah, it is a lot better." What I needed next was to get "even deeper with this concave." Before that, though, I told you my plan: "before I'm going to do deeper, I'm going to roll a little bit this ridge." One word stood alone after it. "Convexing."

For the tool I named a back bent, "a number three," and I added a note: "Don't pay attention to zero after, it's just number three sweep and a quarter inch, six millimeters." A quarter inch measures 6.35 mm, so my two figures sit close.
Next I said "It just gives me that feel of, it's like starting convexing." Little by little, I added, with a reminder to "pay attention to the grain of the wood."

A bigger tool was only a maybe: "maybe number five and 3/8 of an inch," which is 9.5 mm, "just give a little better convex." Digging was on my mind too. "Even if I have to dig a little bit inside of the wood, there's still going to be another concave, even deeper later, which is okay, but I need that feel, that is convexing."

Of the opposite side I said "it's not that convenient for me." Then: "See, it's like ballooning almost, just the feel of it." Another concave on the bottom could wait: "I'll do that later," and the aim was "So right now, all I need is just to give that balloon effect. Or, again, convex."

Next I said "I'm still not too happy about this convex," and I named another tool: "Maybe number five, and I'll try to use a one inch, 25 millimeters." One inch is 25.4 millimeters. My verdict on that size: "Oh, 25 millimeters is a little too big. Unless if I going to go deeper, okay? Nothing stops me from going deeper." My plan was to "roll it a little bit in."
"Let me take out some of that mess," I said, and I apologized for "covering that with my hands."

The end of the part is plans. Cleaning "that around, off camera" would use "the same tool pretty much." The concave would follow: "all of this area has to be concaved." But "before that, I need to double-check my curvature."
My last lines name a tool and a worry. Chopping out one side might "establish curvature in three-dimensional world," and I wanted it "like a fluent." I would use number 11 again, "Just want to make sure I'm not undercutting. That's really important for me." A straight tool might do, and the one in my hand was "Number 11 and 7 millimeters, little bigger than a quarter." That is 7 mm, about 0.28 in.

Do I ask for that feel when a part wraps, rolls or grows from underneath?
Little material was left in workshop 70, part 6. I still wanted this part "wrapping around that element," and I needed to "start my cut somewhere right there." Later in that part I said I would rotate my tool toward the left, "slowly, slowly, slowly." It was against the grain, but "the goal is to make that feel like this part growing from right underneath." That tool was "a little too big," so I thought of "five millimeters or even smaller" and said I would start with a number 11 at 5 mm (0.2 in). Here is the workshop 70 lesson.

Workshop 45, part 6, has "That was unfortunate, but it's okay," and then my point about how "this one is growing from underneath of that." After it came "We'll see." To myself I said "Get a little bit inside," after "Get the number 11." Then came "That is not what I was planning, okay?" and "I was just probably too fast."

Over in workshop 51, part 6, I named "number seven" and wanted it to feel "like it's wrapping." Cleaning came into it as well, with "that little bit" going to the number three and the "mess" going to the number 11.

A transition opens workshop 72, part 11, one that "still has to go underneath," with a feel that "rolls and going all the way that direction." One side made me happier and the other did not, and I admitted being "kind of limited to what I can do." Still, "I still want to create the feel." I was unsure ("Maybe yes, maybe no, but let me start") and added "Hope I'm not making mistake." Part 2 of that lesson asked for "a little more roundness" and "it curling down."

The Furniture Panel course, lesson 23, part 11, plans an excavation with "the same tool." Even "not really deep undercut" would "give me that feel." In the next lines: "that's already giving me some shadow."

How far can a roll go? The Modern Acanthus course, lesson 4, part 1, answers: "If you want to go a little farther, you can create the feel like it's rolling backward." Next came the tool, "the number 7 and 14 millimeters," about 0.55 in. My own piece was "too late," but "I rolled slightly no more than one millimeter on the camera," about 0.04 in.

Hazelnuts 4, part 3, has a motion that "can just be raised up and then go downhill slightly." Seen "from the side," I thought it would "look much nicer," with "the feel, like a full 3D feel." That course lives in the Hazelnuts 4 lesson.

Part 12 of this workshop had me "really mindful of the grain," so I was trying to "attack it from different positions." I said maybe I could "lower this down slightly" and "give a motion downhill a little bit," to "create that feel," and I was using number three. Soon "it feels more organic, I would say." The full set of videos sits in the workshop 63 lesson.
Part 5 of this workshop gives a check by touch. Of a transition I said to "ride on the edge and hit the high spots, and feel it if it transitions nicely or not."
What shapes do I want the feel of?
Workshop 40, part 9, planned "another convex on another side." That would be "going to give me the feel of the pipe of this ridge," which I called "not really pipe." I also wondered if the tool was too big, and I said I should try "a flatter maybe."

Workshop 72, part 10, had me thinking of a convex "not as high." My aim was to "exaggerate this part as a pipe and create also the feel a little more of a convex," and my plan was "the smaller number 11, maybe about 7 millimeters," about 0.28 in. Part 4 ends on that same pair, a number 11 and 7 millimeters.

Workshop 70, part 1, has me not wanting to "hit my shell," yet I still needed "that feel of a continuous convex" that "wraps up that way."

In workshop 68, part 11, I said "maybe a convex feel like this," and I needed another concave on that side, with a "micro pipe" going "all the way to the center." Other "micro divisions" would help me "a lot." That lesson is the workshop 68 lesson.
Tools were not the point in the Roman Acanthus course, lesson 2, part 3. My point was "how you establish the form," and "you can have thousands of different tools, but without the feel of a three-dimensional world, you can't really do anything."
Workshop 59, part 3, ties deep excavation to the word: "that's going to be deep excavation just to give that feel like it is flipping."
When do I hold on to that feel?
In workshop 62, part 9, it was a barrel: "I don't want to lose that feel that this transitions upward." I added that "the goal is not to just destroy that barrel." Part 10 planned number 11 "around this element on inside," a pass that was "preliminary" and not "my final cut," done "just for me," so I would hold that feel.

Grain matters in workshop 71, part 8, where the left side was "chopping off that grain," which I called "expected." Even so, "I don't want to lose the feel of that overlapping" (I said I did not know how to say it), and I mentioned "the area of the eye."
I planned a concave "a little softer" in workshop 91, yet I held on to "the feel of the concave." Workshop 94, part 3, had "a changing slope," which still had to be "more like smooth." Its feel mattered to me too.
Part 3 of this same workshop has me saying I had to chop "a little bit of those guys," but not too much, so the feel would stay.
Furniture Panel lesson 23, part 9, planned "three main divisions" and a middle line, with "a lot less division" on one side. I wanted to keep that feel, and relief cuts followed in my plan, with "the same number 11" at 3 millimeters (about 1/8 in).
My warning for a roll is in the Floral and Molding course, lesson 6. For that type of cut, "don't roll it too much," and if you go too far, "you're going to lose that feel." Next: "It's going to look like a straight line." The way out, in my words, was "you can just lower that down little bit, but not as much." I show the move in that molding lesson.

In Furniture Panel lesson 32, part 3, I gave a depth, "Millimeter and a half up to two millimeters in some of the spots" (about 0.06 to 0.08 in), and a limit: "don't go too deep if you're gonna lose, uh, the feel."
Not every feel is a shape. The Grape Leaves vase course, lesson 3 has a translucent color, and "you will be able to see all the grain of the wood, which I really want to see." My aim was "the feel that is the wood. Okay? So it's not ceramic or plastic." In lesson 4 oil would "give me a really good luster" and the area would show "a real wood."
Does that feel come from my hand?
Depth with no measuring is the case in workshop 37, part 12: "all by feel." I was "pretty sure" I would be close, and the match came "without any measurement." After that came "I guess I just developed that over the years," then "Depth feel," and a doubt about whether I should "even say that that way."
Roman Acanthus lesson 6 asks for equal sides: I was making "sure both sides equal." You could measure, I said, "but you can't always just spend your time on measuring and measuring," and then "Try to develop the feel." If it is not perfectly the same, "that really should not bug you."

Hazelnuts lesson 3, part 3, put the feel on the grain: "the way you attack it, you really have to feel." "Just go by the feel." My tool was "number five, one-eighth of an inch," which is 3.2 mm.
Which lessons give a figure or a tool?
Eleven lessons sit in one table, this one first. Some rows carry no figure, because the lines I quote give none.
| Lesson | The feel I asked for, in my words | Tool or figure |
|---|---|---|
| This lesson | A ridge, and a little better convex | number three back bent, 6 mm (1/4 in) |
| Venice 70.6 | Growing from right underneath | a number 11, five millimeters (0.2 in) |
| Venice 72.10 | A little more of a convex | number 11, maybe 7 mm (a bit over 1/4 in) |
| Venice 51.6 | It's wrapping | a seven, then a three and an 11 |
| Modern Acanthus 4 | It's rolling backward | number 7, 14 millimeters (0.55 in) |
| Hazelnuts 4 | A full 3D feel, seen from the side | nothing measured in that line |
| Venice 40.9 | The pipe of this ridge, which is not really pipe | none given |
| Molding for the Panel 6 | A line that turns straight if rolled too much | no number |
| Furniture 32 | The feel, kept while going deeper | 1.5 to 2 mm (0.06 to 0.08 in) |
| Hazelnuts 3 | Go by the feel, against the grain | number five, one-eighth of an inch (3.2 mm) |
| Furniture 23.9 | Three main divisions | number 11, 3 mm (nearly 1/8 in) |
Where can you watch the full video of each lesson?
Every lesson named above lives inside one of my courses, and workshops 62 to 73 sit together in Venice Room Part 6. Each lesson I quoted shows the work in real wood, whether it is acanthus leaves, a relief panel or a small hazelnut. To watch the full videos, start here.
How it's done
- Say the aim before the carve. I stated my plan first, a little roll on the ridge before any deeper hollow.
- Pick a back bent. I picked a number three, with a note to ignore the zero after it.
- Watch the grain. I reminded myself what the wood does as I work.
- Weigh a bigger tool. A bigger number five might give a better convex.
- Go deeper if the tool is too big. My biggest try looked slightly too big, unless I went deeper, and nothing stopped me from going deeper.
- Check the curvature. I needed to double-check it before I carved the hollow.
- Make sure you are not undercutting. That was really important for me, and I said I could probably use a straight tool.
Frequently asked questions
What did I say about ballooning in this part?
I said "it's like ballooning almost," and that all I needed right then was "that balloon effect." I added "Or, again, convex."
Did I carve the second concave in this part?
A second concave on the bottom would come later, I said. Continuing that hollow off camera was part of my plan, along with cleaning the ridge.
Which back bent did I name?
My first came in at number three, six millimeters wide. Then came a maybe, a number five at 3/8 of an inch (9.5 mm), and a try with number five at one inch (25 mm), which was slightly too big for me.
What to carve next
- Workshop 63 lesson
- Workshop 62 to 73 course
- Workshop 70 lesson
- Workshop 45 lesson
- Workshop 51 lesson
- Workshop 72 lesson
- Furniture Panel lesson 23
- Modern Acanthus lesson 4
- Hazelnuts lesson 4
- Workshop 40 lesson
- Workshop 68 lesson
- Roman Acanthus lesson 2
- Workshop 59 lesson
- Workshop 62 lesson
- Workshop 71 lesson
- Workshop 91 lesson
- Floral and Molding lesson 6