

Alexander Grabovetskiy, woodcarver, School of Woodcarving · Published 2020
What does a wood carver mean by "channel"?
Quick answer: In part 2 of workshop 63, I likened the number 11 concave to a channel and held it to three millimeters (1/8 in). In other lessons of mine a channel is a narrow cut I sink first, dig deeper, or hide, and in some lessons I say I don't want one to show.
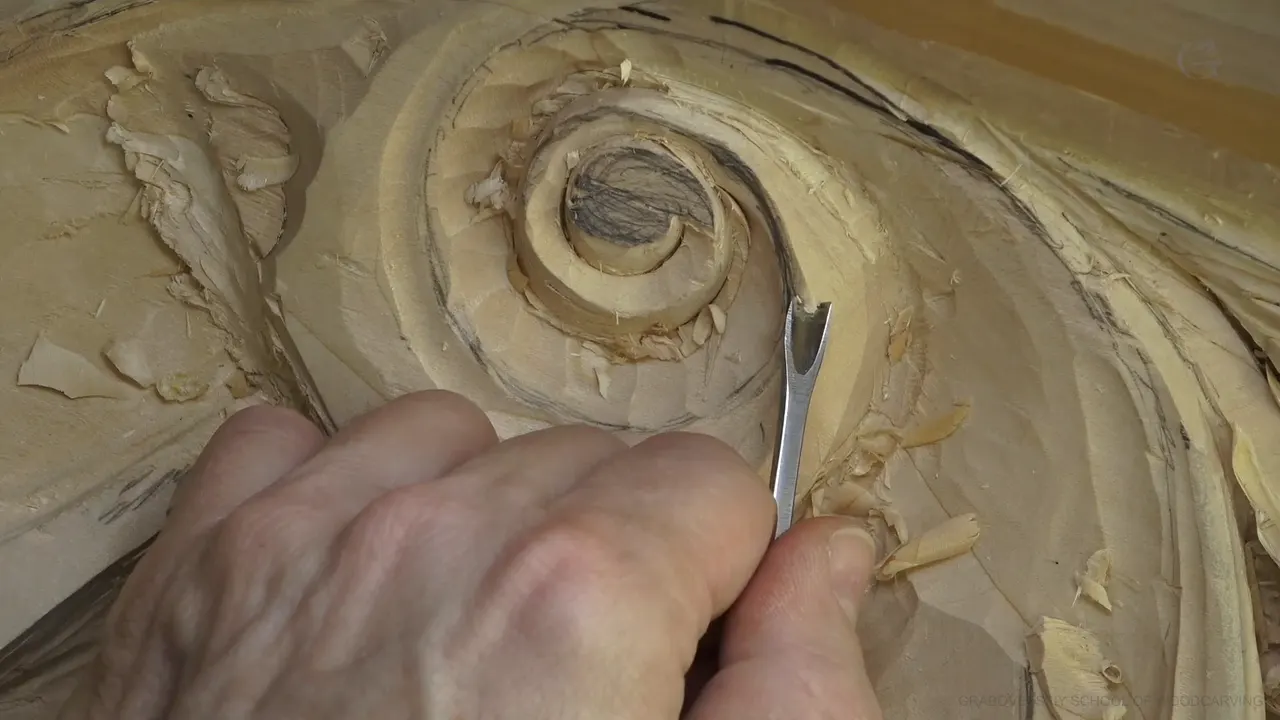

In part 2 of Venice Room 63, I compared the deep concave I was about to carve to a channel and gave it a limit of three millimeters (about 0.12 in). Other lessons of mine use the same word for a narrow cut that I sink first, dig deeper, hide, and sometimes keep out of sight on purpose.
A concave is a hollow. On one relief panel I said my next hollow was "like a channel." Below is that moment, then many places in my courses where the word comes back, with the tool and the size each time.
How did I describe the channel in this lesson?
The first thing in part 2 was a slope. When I approached that area, my concave would sit "on a side of this slope," moving gradually toward that direction, and for that "I could actually use number nine." So I tried one: "Let me try to use number nine. And quarter inch" (about 6 mm, since an inch is 25.4 mm). A few seconds later the idea fell apart. "Although, you know what? I can't do that because of that transition."
One tool in my hand was a problem too: "this one is not that sharp." My answer was a smaller, different number nine. I did not want to ruin that transition, and I said where it would end: on the backside, where it would "disappear right there." One more point: "But I need that ridge a little higher."

Nothing here was final. A cleaner cut would come later, and for now it was "just pretty much indication of that movement." Next came sizes. The distance I had was "approximately quarter inch, little bigger than a quarter" (6.35 mm), and the widest spot was "about 10 millimeters or so" (a little over 3/8 in, 0.39 in).
Three times I said "there's going to be another concave," and I would go up from there "just like that." Behind, somewhere, it would vanish too. A pause followed, with one point to settle: "This concave has to continue a little bit on top of it, which is okay, so not too late to fix it."
How big is a channel?
This is the passage that gave the page its word. The concave about to be carved would be "much deeper concave." Then: "It's going to be number 11 concave. It's like a channel and no bigger than three millimeters." About six seconds later I came back to the size, and this time I put it more plainly: "just approximately three millimeters. No more than that." And once more, with both units: "Number 11, three millimeters, one-eighth of an inch."

The route was "just all around with this concave." A straight tool would do at one place, but not on the way up. Then came a doubt about one direction, "which I doubt I'll be able to use too much of it." And then the tool change, which I put as a need: "I need to switch to a spoon, three millimeters." It would be number 11R at three millimeters, though "I could actually use two millimeters, or actually I could start with four millimeters, just a little less push in" (about 0.08 in and 0.16 in).

So in part 2 the channel came from a number 11, much deeper than the first concave and held to three millimeters. Where the route went upward, a spoon was needed, and the pressure was to be a little less.
What came after the deep concave?
Then: "Which gives me right now good idea that I need to get rid of some of this. It just not nicely transitions down." And then, of the rough look: "It is looking rough yet," and it was "just a preliminary." After the last pass up came the summary: "So that was deeper concave."

"And now the fun part." The choice was between two orders. "There is a couple of ways I could approach. I could convex it right away or actually get the whole thing below my concave and then convex it." From where I stood, one thing blocked me: "I really need to see this ridge, and right now that is in my way. This chunk, it's in my way." Number three was the tool to remove it, and a deeper concave stayed on the table: "if I need to recreate even deeper concave, I will."

What did the other parts of lesson 63 say about concaves?
Part 1 is where I first named a concave and a size. "So next, what I have to do, I need to create the concave movement, okay? Right on the side of this line." Staying "approximately one-eighth of an inch, about 3 millimeters away from this line" was the plan. That figure is a distance from a line. I wanted to see it as well: "I really need to see a shadow of this concave."
Out loud, I weighed the tool. Probably a number 11, "and maybe even 7 millimeters (about 0.28 in), or maybe actually even bigger than that." A moment later I said I would try 10 millimeters (0.39 in) first. The tool would go in place and move a little to the left, a little away from the line just created. The gap had a short explanation: "it's just preliminary concave."
A later part returns to a concave. "I'm still not too happy about this concave," I said, and I planned to create "a little better version of it." Then: "All there is, it was just preliminary anyway." Nothing there says it is the same concave as in part 2, so I leave that open.
Where else do I say channel?
The word turns up in many lessons, for different jobs. Some channels are the first cut, some are the deepest, some are small, and some I want to hide. Each one below comes from the lesson I name.
Is the channel the first cut?
Greek Acroterion 3, part 4, opens with the order: "I created enough channel. Now I need to take a gouge and create my concave cuts." The reason follows: "I need to make initial cuts because it's going to dig inside."
The goal for workshop 76 (Venice Room Part 7) comes in part 11: "My main goal is just to create the channel on inside." The order comes next: "But first is channel. That's what I need." With the grain in mind, I said "Again, I am carving with the grain," and added, "Have to be really careful." About 20 millimeters would stay, "like three quarter of an inch" (0.8 in), and another 19 millimeters (0.75 in) or so on "this side."

That workshop goes deeper in part 12. "What I want to do, I want to get actually that channel as deep as possible to my opposite side." My explanation was the leaves, which go both directions, with "some waviness also on inside." The main stem, I said, would sit somewhere on inside. "So that's why I need to get as deep as possible that channel."
Older Venice Room workshops keep the same order. From the Part 5 course, workshop 50, part 5: "Again, the same idea." My first channel cut would come first, then "exactly the same on this side, a little deeper." Part 9 of workshop 60 starts with "Just create the first channel cut," and about three minutes in: "going opposite direction this way and create that channel cut."
How narrow can a channel get?
Butterflies plate 13 needed one element parted from another. "I'm going to create a small channel, about 1/16", maybe about 1.5mm, just like that." The two figures match, since 1/16 in is 1.59 mm. Hashemi Flowers 22, part 3, puts it shortly: "Create a small channel, small cut."

Flower Rosette 5 gives a plain definition. With the outline done, the same tool could go around "and create channel cuts. It's what I'm calling them." They were "not really necessary in most of the spots." The gap: "I'm about 16th of an inch away from the main form" (about 1.6 mm).

Venice Room 77, part 1, comes after "approximately what I want to see." Then: "Although, I still have to create a little deeper channel. I think I need little deeper channel." I could not find my 5 millimeters (a fifth of an inch), "but 7 millimeters will do" (roughly 0.3 in).

From the twelfth Venice Room course, workshop 143, part 2: "Let me use actually a smaller number 11, maybe 3 millimeters, and excavate a little better channel right here" (about 1/8 in). Next, the plan was to take that reach and blend it underneath.

Which tool makes a channel?
The number 11 comes up most here, but other tools make one too. In Hashemi 35, part 2, I said, "This number nine is just a quarter inch" (about 6 mm), and then, "I'll just create a deep channel. And even I can undercut the same tool."

Roman Acanthus 16, part 4, says I could take a smaller one, number 11 again, at "5 millimeters by length" (about 0.2 in) for an even deeper concave cut. Then a second thought on the name: "Or it is concave, but it's more like a U-shape, like a U channel."

A V tool is another option, as lesson 40 of Hashemi Flowers shows in part 3: "Definitely what I could do, I could take a V tool and create a center channel, and add even more detail to all of them, actually, pretty much."
Does a channel circle the whole shape?
I put it plainly in workshop 89, part 6 (Part 8 of the Venice Room series): "there's a channel, goes all the way around, and then ends right at the end of the volute right here." Two spots had none. "And here I don't have any channels. I apologize. And on this side, I don't have any channels." The same idea would go there, "But that could be done off camera."

Depth has a limit near an edge. Acroterion lesson 5, part 2: "I don't go too deep with my channel because I can easily break the outside, and I don't want to do that. That would be a huge mistake." It was "just taking my time to dig that channel." On feel: "You kind of have to feel it, how far your knife's supposed to go. Okay, I'm not going to force it." Where to start is in the fourth Greek Acroterion lesson, part 7, one point for each side: "I'll just create a channel this side. And also exactly starting in the same point, create my channel on this side."

Should a channel show?
My words change with the spot. Furniture Panel 24, part 6, had a section to clean: "I don't really want to see a channel between this leaf and that leaf. So I want to make it feel like this whole section is going to go underneath of the flower." I planned the small tool, with the method "little by little, cut by cut."

Back in the Part 5 course, I said "I really do not want to excavate a deep channel right here," and then weighed another way: "Maybe I can actually just flip this part above that part and that is going to go underneath." That was only a maybe.
The Lily Box course, part 2, gives a middle answer: "I don't really want to create a deep channel, although I still could." Its tool was turned a little to the left, using just one side of it and the beginning of the curvature of the sweep.
Byzantine Acanthus 7 shows a hidden one. "See that channel I created with the number 11 and three millimeters?" (a bit over 0.1 in) "And if you look close enough, you can see that line." From above, I said, you cannot see it, and "it just looks absolutely like a solid piece." The tool and size match workshop 63.

One more, from Roman Acanthus 12, part 3: "What I'm doing, I'm actually just digging a channel," and it would be "visible only when you look really close underneath."
Which lessons give a channel a size?
Ten lessons sit in one table, this one first, with the tool and the figure I gave. Two rows have no figure, because the lines I quote give none.
| Lesson | What the channel was for, in my words | Tool and size |
|---|---|---|
| This lesson | The deep concave from a number 11 | 3 mm, a number 11 (a bit over 0.1 in) |
| Workshop 76 | A first cut I wanted very deep | no size in those lines |
| Room 77 | Deeper channel wanted here | 7 mm will do (about 0.28 in) |
| Workshop 143 | A little better channel | maybe 3 mm, a smaller 11 (0.12 in) |
| Venice 89 | One that runs around and ends at the volute | none given |
| Butterflies 13 | A small channel that separates one element from another | about 1/16 in, maybe 1.5 mm |
| Rosette 5 | Channel cuts around the outline | no tool named, a 16th of an inch from the main form (about 1.6 mm) |
| Hashemi 35 | A deep channel, with an undercut from the same tool | quarter inch, a number nine (6.4 mm) |
| Roman 16 | A U channel | 5 mm, a number 11 (about 0.2 in) |
| Byzantine 7 | One that does not show from above | number 11 again, 3 mm |
Where can you watch the full video of each lesson?
Every lesson named above is inside one of my courses. This lesson holds all of workshop 63, and workshops 62 to 73 are in Venice Room Part 6. The wood carving lessons I quoted are linked where I named them, and each one shows its cuts in real wood. To watch the full videos, start here.
How it's done
- Start from the movement. My concave was going to sit on the side of the slope and move gradually that way. I tried a quarter-inch number nine, then planned a smaller one.
- Keep the first pass rough. I called it an indication of the movement, with a cleaner cut to come later.
- Set the size. Number 11, three millimeters, no more than that.
- Carry it around. The route ran all around the concave. A straight tool was fine at one place, and on the upward stretch a spoon was needed.
- Check the ridge. The ridge had to be visible. The plan was number three, with a deeper concave to recreate if needed.
Frequently asked questions
How big was the channel I carved in part 2?
Three millimeters at most. I gave that figure three times in part 2, the last time in both units.
Which tool did I plan for it?
The number 11. On the way up, I needed to switch to a spoon, three millimeters, number 11R. Two millimeters (0.08 in) could also work, or four millimeters (0.16 in) to start, with just a little less push in.
Do I want a channel to show?
It depends on the spot. In Furniture Panel 24 I didn't really want a channel visible between two leaves. In Lily Box a deep one was possible, but I didn't really want it. In Venice Room 76 I wanted a very deep one.
What to carve next
- Workshop 63 lesson
- Workshop 62 to 73 course
- Greek Acroterion lesson 3
- Workshop 76 lesson
- Workshop 50 lesson
- Butterflies plate lesson 13
- Hashemi Flowers lesson 22
- Flower Rosette lesson 5
- Workshop 77 lesson
- Workshop 143 lesson
- Hashemi lesson 35
- Roman Acanthus lesson 16
- Hashemi lesson 40
- Workshop 89 lesson
- Acroterion lesson 5
- Acroterion lesson 4
- Furniture Panel lesson 24