

Alexander Grabovetskiy, woodcarver, School of Woodcarving · Published 2020
What does a wood carver mean by "constantly checking"?
Quick answer: Constantly checking is my way of saying I look again at the shape while I carve. In this part of workshop 63 it meant several angles, and a spot that made no sense got redone. In other lessons I say it about depth, thickness, a line and my edge.
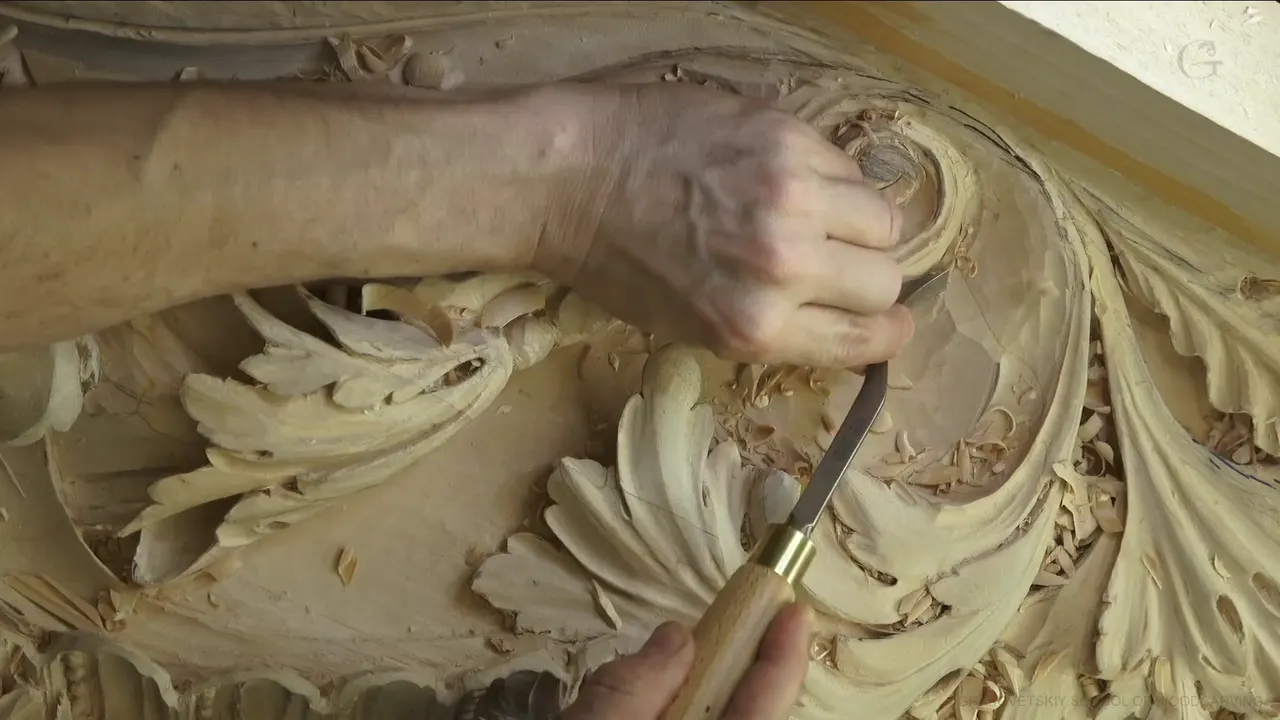

In part 3 of Venice Room 63, I said I was "constantly checking and rechecking from different points of view how it looks," and that if it didn't make sense, I was redoing it. Other lessons of mine use the same word for depth, for the thickness left, for a line, and for the edge of a tool.
Checking sounds small. This part comes first, in order. After it come the places in my other courses where the word returns, each with what I looked at and the tool in my hand.
What did I say in this part of workshop 63?
The part opens with a promise: "Little by little, we're going to get there." The second half came twice. Then I named the job: "It's more sculpture right now than anything else. We're just sculpting pretty much the main shape."
Next came the line that gave this page its word, and a slope. "Looks like I can slope a lot more right here." Of that spot: "just too bulky or bulking out too much." A bit later: "And even more."

Then a move: "Change the position." For the other direction I could probably use just a skew, and a short note followed: "much quicker I think." More slope was probably possible too. Of the transition, "I still got the same transition, but just because I sloped that, it just kind of makes sense."
One option I weighed: "I could do it even deeper excavation right here, but I don't have to." Something else was still ahead. "There's going to be another development going on with the flower. So all I need is just pretty much visible this chunk." Some leaves would sit in that area too, and I had to keep that in mind.

Does high relief have rules?
"Like I said, I'm just pretty much just sculpting it." I wanted it to transition up smoothly and do "whatever makes sense." Then came a line on high relief that I want you to hear whole: "If you know a little bit about high relief, you still have to follow some type of rules." My example was one spot. "I've got one side of this upper part exposed and the sides of it, it's not too much exposed, which means I have to follow the same rule and I have to chop a little bit of those guys." The lines I quote do not spell out the rule, so I leave it there.
A limit came with it. "But I don't want to do too much because I don't want to lose a feel of it." One part "could be chopped," I said, and then I corrected that with "Not chopped, but it just kind of moves in," which would make it more organic, "if you wish."
After that I told you what you are seeing. "Again, you're just seeing it from a camera above and you don't see from the side, but I see that from all of the sides and it makes a lot more sense." A second "It makes a lot more sense" followed. One more idea: "even I can go a little bit in to kind of create the illusion that it's rolling almost." For another spot, "exactly the same I'm going to do right here, but not as much."

Near the end came one more look. "So now it looks a lot more organic, I would say." One hollow still bothered me, and I planned a fix: "I'm going to recreate that concave," then, in the same breath, "Not recreate, but now just create a little better version of it." Then, of that first version: "All there is, it was just preliminary anyway."
Where else does the word turn up?
All over my courses, with a different object each time. I sort the places by what I was looking at, and every passage comes from the lesson I name.
Is the whole shape checked from every side?
Take workshop 69. I needed "a little more roundness," and a knife or a skew could "do exactly the same," even better. Not just any skew: "I really like that 22 and a half degrees skew." Then came the line "constantly checking from all points of view. And if I need to fix it, I'll fix it, but not too much." The final line was still ahead, because I had inner movements to establish first.

Part 5 of workshop 69 runs close to it. A number 7 at 14 millimeters (about 0.55 in) could carry on "until I'm happy with the overall shape." My words that time: "constantly checking from all the positions, how it feels in overall." The feel was not there. "And it still does not feel like it's supposed to feel, which is okay."

Venice Room 11 has it at the very start of part 7, along with an apology for mumbling, "because I'm working." It is "not the creation of just a lesson." You "pretty much like being with me in my shop," I said, and it is "exactly how I work on a daily basis."

The side view gets its own words in Venice Room 2. "So really important for me to look from the side." Something "could look really nice from above," yet a three-dimensional movement is supposed to "just move nicely" in three dimensions. Hence "constantly, I'm just checking from my side, and if I need to fix my movement, so I would do it." Later I planned to step farther and "again, look how overall movement works."
How do I keep track of depth?
Two short lines carry it in workshop 71: "constantly checking how deep am I going, okay?" and then, a few seconds on, "Constantly checking it." After that I added "Just like I said, I've done that mistake too many times when I got a little too deep."

Flower Rosette 3 carries the same worry on a smaller flower. I would take "just the number five quarter inch" (6.35 mm) and clean to the center without forcing it. And: "I constantly have to keep an eye how deep am I supposed to go."

In Venice Room 5 the check turns toward what is left of the wood. "I also have to keep an eye how the thickness of my material, how much I have left right there." Later: "Constantly have to check, and I have plenty." My next tool, I said, would be a number nine, a little bigger, a spoon gouge at 15 millimeters, "so that would be almost 5/8" (of an inch).
How is the thickness left behind checked?
One method sits in Hashemi Flowers 9. I needed a really tiny gouge, maybe an eighth-inch one (about 3 mm), a number nine. The work was "carefully, without pressing too much," with a constant check on the thickness. Then the method: "The only way to check that, just to look at the light, and if the light already penetrating, or if the light is already you can see through, I should say, then that's probably too much."

A backside comes up in Hashemi 28. My plan was a number seven, two inches (51 mm), to dig that even deeper. Then: "constantly, I have to check because I removed the material on the backside, and looks like I still have about quarter inch in this spot" (about 6 mm). "I got to be careful." A smaller tool was next in my plan, "number eight," and "one inch" (25 mm).
Over in Hashemi 11, the same job is dangerous. Material was short there, so I had to make sure I was not going through. The brief version: "Constantly check that on the backside." Over in lesson 8 of the Tray of Blessing, I put it this way: "I'm excavating, but I'm constantly, constantly checking how much material I have left. That is important for me."


Which side gets checked?
About one-eighth of an inch, about three millimeters, was what I had left before the first layer in workshop 68. "Let me chop this section also," I said, and I needed to check, because it has to be more or less a gradual movement. Then: "And I constantly going to check other opposite side, okay?" My reason? I did not want to mess it up. A little later it was still safe, "with no problem."

Two checks sit in workshop 78. One spot was "a big hump," and I really didn't need all that material. Next: "I am constantly checking the opposite side." Later: "I have to constantly check I've got no more than 16th of an inch right here" (1.6 mm). And in the middle: "no more than one-eighth of an inch" (about 3 mm). One more thought: "Of course, I'm just guessing, but you could measure that with the calipers. I really don't need to."
Does the line get a check, and the original drawing too?
The line comes first in Furniture Panel 15. "Straight down cut. Double check." A marking gauge was an option: "I could use a marking gauge." Later: "constantly checking the line," because I did not want to be off. Soon after, "got this line continuous right here."

The dining table apron makes a second case. "I have constantly checked my original drawings," I said, because "I missed that spot right here." The drawing sat right in front of me, and "I'm always checking that." In Roman Acanthus 6, both sides got the same care, and they "have to be symmetrical." A pencil was next: "Let me take a pencil and fix some of the lines." "You don't have to eyeball. You can just refer to the original drawings," I said.

Does my tool get checked as well?
Roman Acanthus 10 answers it: "constantly checking my edge if there is a wire check and detect. And if there is, then I just have to re-strop it, rebuff it, or even resharpen that." That happens multiple times daily, I said. A note to you sits in Hashemi 33: "constantly check if your tool is sharp, and if you need to buff it, if you need to strop it, just do it."

A concave in Furniture Panel 20 brought a short one: "constantly checking," and "I need to buff a little bit." Buffing happened off the camera. The spoon gouge sharpening video has a version for the sharpening itself. "I'm constantly checking if I'm taking more metal on one side or another one, and that way I know how am I consistent with my movements."

What does recheck mean after the first pass?
Venice Room 10 says it calmly. A notch was "not too appealing," and "I will go back and check and recheck. Okay? Check and recheck so it is normal." I was "always finding something else to do." Later in the part I said I had to "recheck again and see if I like it or not."

Roman Acanthus 13 puts a figure on it. About a quarter inch, roughly 6 mm, sat on each side, and I could go "just a slight, maybe 32nds of an inch" (about 0.8 mm). The advice there: a good idea to check, then check again. Hazelnuts 4 frames it differently. "I am eyeballing it," I said, and "Don't worry about too much to be exact like on a pattern." Still, "It's got to make some logic, okay?"

Some rechecks are plans for later. In Roman Acanthus 16 I planned to look again for "if I left any areas more rough or not," and to "clean it even more. Maybe. I'm not sure." Fit gets a recheck too. In workshop 77: "I need to probably recheck how it fits." "Double check, double check how it fits inside." And in workshop 161 a molding was "almost finished," then "just rechecked with my pointing machine, and I found out the height of it wasn't there." More had to come off, "just to shape the top of it, okay, to make it look the same both sides."

Which lessons give a figure or a tool?
Ten lessons sit in one table, this one first, and some rows carry no figure at all, because the lines I quote give none.
| Lesson | What I was checking, in my words | Figure or tool |
|---|---|---|
| This lesson | The main shape, seen from all sides | nothing measured |
| Skew job | The shape, when more roundness was needed | a 22 and a half degree skew |
| Room 71 | How deep the carving was going | no figure given |
| Rosette 3 | How deep I was supposed to go | number five, quarter inch (6.35 mm) |
| Venice 5 | How much material I had left right there | spoon gouge, 15 mm (almost 5/8 in) |
| Hashemi 9 | The thickness, by watching the light | a number nine, maybe an eighth (3.2 mm) |
| Hashemi 28 | The backside, after I removed material there | about quarter inch left (6 mm) |
| Lesson 78 | The opposite side, against two limits | a 16th and an eighth (1.6 and 3.2 mm) |
| Furniture Panel 15 | The line, so I would not be off | a marking gauge, as an option |
| Roman 10 | The edge of my tool, for a wire | none given |
Where can you watch the full video of each lesson?
Every lesson named above is inside one of my courses. This lesson holds all of workshop 63, and workshops 62 to 73 are in Venice Room Part 6. The wood carving lessons I quoted are linked where I named them, and each one shows the work in real wood. To watch the full videos, start here.
How it's done
- Look from several angles. A spot that made no sense got redone in workshop 63.
- Check the side view. A three-dimensional movement has to move nicely in three dimensions, I said in Venice Room 2, so I looked from my side.
- Watch your depth. I kept an eye on it in workshop 71, and I named going too deep as a mistake I had made.
- Let the light show you. The light was my test for thickness in Hashemi 9.
- Turn to the other side. The opposite side of the piece kept my eye in workshop 68.
- Test your edge. Hashemi 33 has my note to you: check whether the tool is sharp, then buff or strop it if needed.
- Go back once more. A second look in Venice Room 10 was normal, I said.
Frequently asked questions
What was I looking at in workshop 63?
The main shape. You are "just seeing it from a camera above," I said, but I see it from all of the sides. When something didn't make sense, I redid it.
How do I know a spot is getting too thin?
The light. In Hashemi 9 I said the only way to check was to look at the light, and once it was coming through the spot, that was probably too much.
Did I watch my depth in workshop 71?
Depth was one thing I kept checking, and the mistake came up too: I had made it too many times, I said, when I got a little too deep.
Which side did I keep checking in workshop 68?
What to carve next
- Workshop 63 lesson
- Workshop 62 to 73 course
- Workshop 69 lesson
- Workshop 11 lesson
- Workshop 2 lesson
- Workshop 71 lesson
- Flower Rosette lesson 3
- Workshop 5 lesson
- Hashemi lesson 9
- Hashemi lesson 28
- Hashemi lesson 11
- Tray of Blessing lesson 8
- Workshop 68 lesson
- Workshop 78 lesson
- Furniture Panel lesson 15
- Roman Acanthus lesson 6
- Roman Acanthus lesson 10