

Alexander Grabovetskiy, woodcarver, School of Woodcarving · Published 2020
What does a wood carver mean by "sharper"?
Quick answer: In my Venice Room workshop 73 video I called a sharper tool the only solution, since I could not attack from the opposite direction. I use the word in other lessons too, about tools, lines, separations and transitions. Each lesson is below, with my words and the tool I named near it.
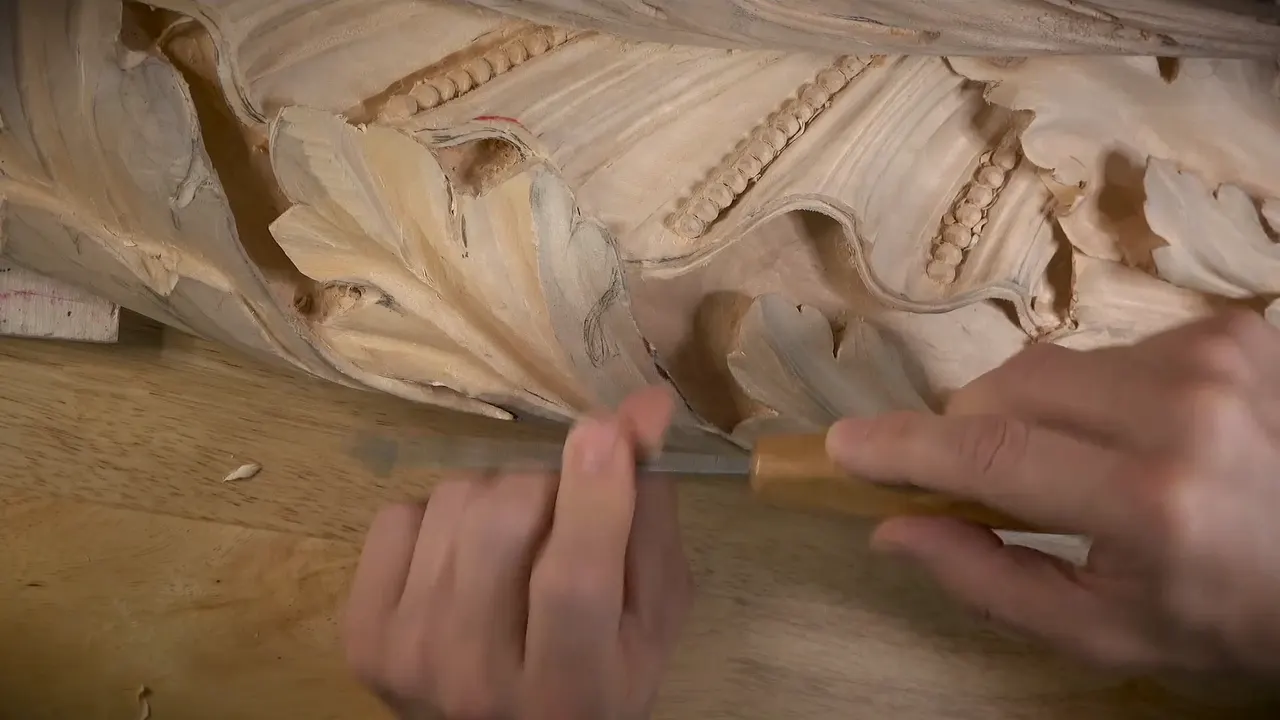

In Venice Room workshop 73, part 1, I called a sharper tool the only solution, since I could not attack from the opposite direction. I use that word in other lessons, about tools, lines, separations and transitions. Each one is below, with its lesson.
Does one side of your carving come out rougher than the other? Is there a spot you cannot reach from the other direction? Here is how I handled it in this video, and how the same word shows up in my other wood carving courses.
What did I clean first in workshop 73, part 1?
The part opens with me cleaning "a little bit on the inside because I've got just too much going on inside." The pipe was still there: "I did not lose this pipe, which I really didn't want to lose." Of the movements I said "That's exactly what I want to see." A convex stood out, too, a "really pronounced convex on the opposite side also," and "that's really good."
I described its run, "returns this way, and exactly the same like on another side."

How did I treat the messy section, and what could I still do with it?
"Of course, I need to fix whatever." Then: "This section is looking messy. But that's okay. So I can always clean it with no problem." I can hit that edge, I said, even with my tool upside down. And "go this way, too."
"There you go. So much better," I said, and a small chamfer was possible, too, "which was really common also." And "Maybe just a little more gradual."

What pulled the eye toward the center line?
Happy with that section, I said, even with "somewhat like a concave on inside." Another one was different: "it does not go to the center line." I needed the number 11 for whatever I had just marked, "and create the right movement." The section was "not that bad, but still it doesn't go the way I want to go."
A little later: "Okay. Now it's much better. Now it draws your eye toward the center line."

Why was one section humpy?
Next I would "concentrate probably on this section." The spot was "a little too humpy," and "It doesn't look too appealing." On the convex I kept a hedge: "I will try to keep my convex, I should say, but it's not going to be as it used to be."

Which side came out cleaner, and what was my answer?
"And left side is much cleaner cut than the right side." The right side was out of reach from the other way, "because you understand there is a main body." My answer: "The only solution is to make my tool a lot more sharper. That's what I'm going to do."
The skew was a second help: "skew also helps to make it much cleaner." "And yes, I can actually create beautiful transition," I said, but "this section is kind of messy. Messy and I don't like it."

So the part ends on a plan. "I have to hit again with the number 11," at 7 millimeters (0.28 in), to "create little deeper cut and maybe just lean that toward to the right side."
Did a sharper tool come up in my other lessons?
It did. Each time I said what the sharper tool was for.
In Carving Grape Onlay 12, part 2, I explained "my approach to the undercutting from the back side," and added "the sharper tools better result." Digging too much can mess it up, I said, and the goal is to take it all the way through the edge.

Carving Plate with Butterflies 10 has a tiny tool in part 2. "Don't need more than that. Only one millimeter deep," I said (0.04 in). My plan was to get "a small gouge. A really tiny small one." And "I need to probably make it a little sharper." A couple of strokes was the plan.
The stropping lesson of my tool sharpening course is next. "I can just hold by two fingers like this without a second hand. See? No hand, and I can already start carving." On a real piece, it "just gives me so clean cut," I said, and "I can actually break the rules of the grain with the sharp tools." Of a tool like that: "Literally, it's actually sharper than a surgeon's tools when they do the surgery."

Lily Box 11, part 12, was close to my skin: "I am working close to my skin." I stopped mid-sentence about my tools being "sharper than even the--" and then said "Well, I shouldn't say it's sharper. It's probably as sharp as surgery tools. So I can cut through the skin with no problem."

Where did I ask for a sharper line?
A smaller tool could probably clean "whatever's left," I said in part 6 of workshop 15. Then: "maybe create a sharper separation right here, and maybe clean a little bit this edge and create a little sharper separation right here." "Double check," I said, and "I'm still kind of not too happy how overall looks." Just ahead of that: "It doesn't look too bad at all. Actually, it looks pretty cool. Really good." A number 11, 3 millimeters (0.12 in), was next on my list.

Workshop 90, part 2, has "some small cuts like that," not big, but really small, tiny ones, and "That gives me a nicer, sharper separation." Just before that: "I'm really happy with that. Let me clean that edge." And "that's probably the stage, as of now, at least, I don't want to touch anymore." Of the work after it: "of course, I'm going to check and recheck later on."

Part 7 of that workshop reads "Now I can actually use a one millimeter, create a sharper line, clean a little bit." One millimeter is 1/25 in.

The view from above counted in Lily Box 4, part 11: "you're going to look at that box from above and from the sides, and it has to be visual from above also." Then "Let me give a sharper separation with the number 11 and one millimeter," so it would be "more distinguishable." That one millimeter is 0.039 in.

Workshop 30, part 11, had me wanting to "give it a nicer, sharper look to this division." The size gave me pause. I was not sure I could use "4 millimeters number 11, or I should switch to smaller one," and that size is 0.16 in. Lily Box 7, part 3, asks for a line: "I want to see this line really flowing, really nice curvature." Then "Let me make it sharper outline this movement."
Furniture Panel 25 has a quick one in part 3: I can "use the same tool to create little sharper line between those two guys to make it little thinner appearance." In Floral and Molding 11, part 3, my plan reached "even inside," for a sharper line. And about a pencil mark: "Maybe that pencil mark is a little distracting."
What about a sharper transition or shadow?
Going smaller, I said in part 5 of workshop 90, "Let me use one millimeter." Then "I need to use a half a millimeter," or 0.02 in. "It's actually going to give me a beautiful shadow," I said, and an "even sharper, nicer transition." Later in that part: "and I can start taking even deeper undercut."

Over in workshop 5, part 7, it goes the other way round. A sharper transition was possible, but "I really like smooth idea, and I would say even original idea." And "veiners and gouges, they create beautiful transitions, smooth transitions."

Two ways opened up in part 11 of Lily Box 6: "I could just make a really smooth transition, or I could actually get a number 11 and make concave cut and make it even lower and make it more for the shadow's sake." Then: "So sharper transition, I would say." I named a number 11, 3 mm (0.12 in).

"I like that concave right here what I created," I said in workshop 111, part 1, though "it's not the final yet." The next step was "a little deeper concave." And the point of it: "I need to get that shadow much sharper and nicer." Along the way I said "You can use just the side of the tool as a number three flatter tool."

Greek Acanthus Leaf 7 puts it on the middle line in part 1. "I would not divide that in equal space," I said, and I would move my middle line "either to the right side or to the left side." Then "the sharper shadow on this side," and "we'll take a V tool."

In Hashemi Flowers 43, part 4, I wanted "to chop a little more just to shape this side a little more," and the result was to be "more sphere right here and a sharper cut on this side."
Which edges did I want sharper?
In workshop 10, part 3, I wanted the edge close, but "still don't want to lose that smooth transition on inside." The tool was number 5: "I can create nicer, sharper cut." Before it, "it looks much better like that."

Roman Acanthus 11, part 3, has an edge in it. The number nine was not for going all the way, because "my undercut, it's much sharper edge." So a number five was my tool for "a kind of transition between those two cuts." Of a small ridge: "I don't really worry about that. It's still going to look nice."
In Roman Acanthus 16, part 3, maybe I can "just get little nicer edge," I said, and then it was "supposed to look sharper, nicer." Next, a warning: "Please don't overdo it. You can always overdo." In this case I was "doing about 1/32 of an inch on this leaf," about 0.8 mm. And "I can always attack on inside if something bugs me."

"I don't like the edge, the point of this cut right here. I need to make it sharper." That is Furniture Panel 22, part 9, where I said "Just slight cut like this," and "Just gives a really, really nice pop." "That's too big," I said, and my plan was "a different tool," number five. Then: "So now it's sharp."

When did I say it does not have to be sharp?
The Tray of Blessing 5 has a plan in part 2: "number seven," and "create a cut." A "more sharper separation" was possible, I said. But "those big subdivisions, they don't have to be sharp," and "it looks more natural." A warning came first, about carving from both sides with a flatter tool: "do the relief, cut first."

With sandpaper in Lily Box 12, part 7, I'm "able to bring everything to the sharper edge." It's "not really going to be a really sharp edge, but it's going to just blend better with the edge itself." I was using "just a 320," and beforehand I said "And maybe just give some waviness. Not much, a little bit."

A knife came up in Curly Kitchen Cutting Board 4, part 2. I could "even do sharper angle, but then this section would be really deep." The angle came down, "lowering my angle as low as possible," and "easier for me to come back, place my knife again straight down."
One more leaf, from Carving Plate with Butterflies 6, part 2: "Now let me do this side of that leaf. Maybe slightly a sharper cut." And then "a little deeper cut inside of the wood."
Which lessons are in the table?
Each row below is a lesson, what I wanted sharper, and the tool I named near it.
| Part (Venice Room unless named) | What I wanted sharper, in a few words of mine | Tool named |
|---|---|---|
| 73.1 | My tool, after I said a main body blocks the other direction | Skew, number 11 |
| Onlay 12.2 | Tools, for a better result on an undercut | No tool named |
| Butterflies 10.2 | A tiny gouge, before a couple of strokes | Small gouge |
| Lily 11.12 | Tools I said are probably as sharp as surgery tools | Tool not named |
| 15.6 | Two separations, with a smaller tool for whatever is left | Number 11 |
| 90.2 | A separation, from small, tiny ones, not big | Not stated |
| Lily 4.11 | A separation, so it is more distinguishable from above | Number 11 |
| 90.5 | A transition, with a half millimeter and a beautiful shadow | A half millimeter |
| 111.1 | A shadow, with a little deeper concave planned | Number three |
| Hashemi 43.4 | More sphere in one spot, sharper on this side | None given |
| Roman 16.3 | An edge, plus a warning not to overdo it | Not said |
| Tray 5.2 | Big subdivisions, and why a sharp edge is not needed | Number seven |
Where can you watch the full videos?
Every lesson above sits inside one of my courses, some on the Venice Room panel and one with a knife on a kitchen board. The workshop 73 page holds all twelve parts of that workshop, and workshops 62 to 73 are in Venice Room Part 6. To watch the full videos, start here.
How it's done
- Find the cleaner side. In part 1 the left side was much cleaner than the right.
- Sharpen for a better result. Grape Onlay 12 has it: the sharper tools better result.
- Try one millimeter. Part 7 of workshop 90 has me saying I can use a one millimeter to make a sharper line, with a little cleaning.
- Go smaller for a shadow. In part 5 I said I need a half a millimeter, and it is going to give me a beautiful shadow.
- Mind the edge. Roman Acanthus 16 has a warning to not overdo it, and I was doing about 1/32 in (0.8 mm) on that leaf.
Frequently asked questions
Could I get at that spot from another direction?
A main body was in the way, so that direction was closed to me. A sharper tool was my answer, and a skew would help as well. The left side had already come out much cleaner.
Which cut did I plan at the end of part 1?
Part 1 ends on a plan. I said I have to hit again using the number 11, at 7 millimeters (0.28 in), for a slightly deeper cut that I might lean toward the right side.
Why choose a sharper transition in Lily Box 6?
Part 11 gave me two ways. One was a really smooth transition. The other was a number 11 concave cut made even lower for the shadow's sake, and I called that a sharper transition.
What to carve next