

Alexander Grabovetskiy, woodcarver, School of Woodcarving · Published 2020
What does a wood carver mean by "every little detail helps"?
Quick answer: My line about a tiny notch comes from Venice Room 73.6, where I planned a micro tool, 1/8 inch (3 mm), for small notches. I added that maybe it was overkill, and that I would know about it, even if people did not notice. The Furniture Panel and Hashemi lessons carry the same line.
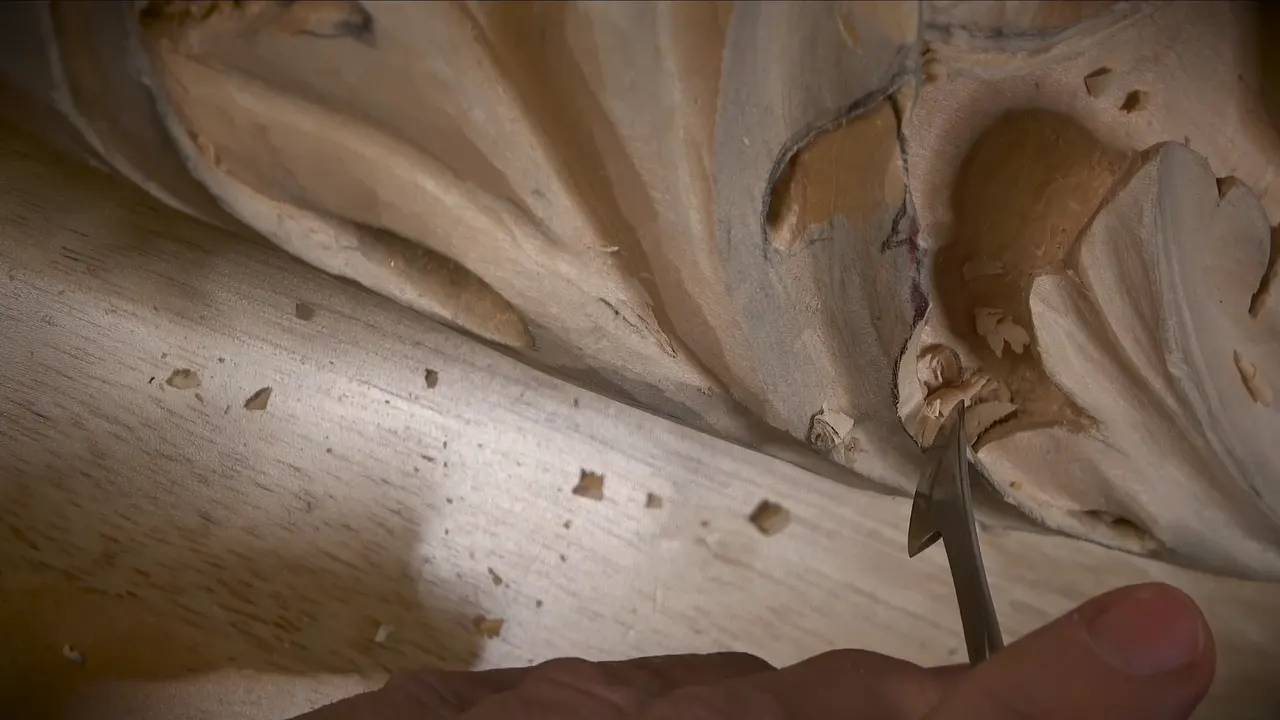

My line about a tiny notch is one I said in Venice Room 73.6: "I know it's a really tiny notch, but every little detail helps." It came right after I planned a 1/8 inch (about 3 mm) micro tool, a number 3, for it. Below you get the whole moment, and the same kind of line from my Furniture Panel, Hashemi Flowers and Roman Acanthus lessons.
What does the line say in plain words?
- A notch got called really tiny, and the line followed.
- Maybe it was overkill, I added.
- Knowing it was there mattered most to me, whether or not anyone notices.
- In other lessons, my reason was shadow and light.
- Some of those lessons show a detail with no room left to undercut.
Where in 73.6 did I say it?
The first cues are about the movement of my hand: "I'm slicing almost like bread. I'm not pushing. And little by little, attacking from two sides." Slicing like bread is how I put it.

The wall was the trouble: "now it doesn't look too good. I really don't want to see this wall, and that is actually this section called wall." Removing it was the plan, then: "I think it looks much better."
I planned the same for another spot: "exactly the same, but in this section right here." The way, again: "Without forcing."
My hand was covering it, and I told you what I was doing: "I'm actually almost like cutting bread." The other picture was "a hand saw, if you wish." Upside down might work, I said, if I just attack it that way: "It's not really convenient for me, but at least you can see what is going on."

Why was the wall worth slow work?
The reason I gave: "this wall on the inside is going to be visible from below, so I don't want to mess up." Then: "it's supposed to be really clean undercut." The care in that area was my word, and after "let me create this cut," I kept going slowly: "I'm not forcing it, okay?"

"Maybe I'll just use number five," I said, "and just hit from above." Cleaning up might come a little later, "probably off-camera with no problem."
Do small separations earn their place?
I was not sure. "I don't know if I'm going to do extra separation in a couple more areas. Maybe right there, one, and maybe right here." My reason was "just to give a little more interest." Maybe I could do it right then and not off-camera, though I needed to make sure it looked good.
One spot had to change: "it looks like this one needs to be a little longer." Another one was "not looking too good too, so I need to actually chop this way." A question to myself followed: "Should I do a couple of them? Which I could."

The shell is huge, I explained, so these are small details: "It will work out really good. It's going to serve like a frame, like I said before." For the tools, I had a plan: "Just small micro tools, and I have to be careful how I approach that and wiggle that slightly and go in." And: "Just wiggle and go in without damaging this part of a shell."

What did I plan for the tiny notches?
I was unsure: "I'm not sure if I should do or not those two separations. Although maybe I should." Then my plan: "Let me use a smaller tool," "probably just 1/8 of an inch number three micro tool," to "create those small notches." The line from the top of this page follows, and then: "And yes, maybe it's overkill. I don't know. But at least I'm going to know about that, and that's the most important, even if people are not going to notice it."

The final cues are plans too: "Let me relief this section," and a final cut planned "with the number 11 and the 1 millimeter" (0.04 in), after a relief. "And again, I'll just use a really small, tiny number three."

What did the parts around 73.6 say about shadow?
In part 5, I was inside a hole: "Clean little bit on inside. It's already giving me beautiful shadow." The seventh part has a small triangle: "I think it gives beautiful shadow. Extra small triangle, but huge difference." There I also said, "It's going to give me an extra shadow."
Part 7 also names a tool for the roughness on the inside: "I'm using sometimes, not always, but I'm using sometimes tool for the leather carving." About it: "that tool is also a really good tool for getting inside of those cavities and kind of push that down a little bit." The goal was to "make that cavity or excavation much cleaner."

What do I say in my Furniture Panel lessons?
The Furniture Panel course is full of tiny spots, and its design part has some of my lines. Design lesson 12 has "those tiny small details, they make the whole world of a difference." Drawing time in lesson 14, part 1, brought: "But every detail matters." Then comes my reason for the complicated movements, in part 2: "I try to stay authentic to the original." A detail there "makes it look really, really nice," and later: "like I mentioned many times, every little movement" and a detail "makes huge impact on the overall feel of the design."
My slow pace gets explained in lesson 17, part 6: "why I'm spending so much time on those little details, going around and so careful," because the small ones "fly out faster than the big details." A word for it: "Almost like jewelry work." Another spot I did not want to mess up, lesson 18, part 10: "the small details, they make the whole of the world difference. It's huge."
A number 11 was my plan in lesson 18, part 4, "carefully just across the grain." The spot was "a really important tiny spot not to mess up," and a detail "in this type of carving counts." Earlier in that part came a number 3, an eighth of an inch (3 mm): "Easy to remember, three three." Too deep was not what I wanted, because "a little later we're going to undercut." Then came "pretty close to the final depth," and "Let me check with the router plane."

No room at all in lesson 19, part 15: "I really don't have any space for undercutting because it's a really tiny detail. But every little bit will help. Let me use a knife. A small knife," I said, and my tool would go "on an angle a little bit toward inside." And: "Almost no pressure whatsoever."

Flower corner time, lesson 20, part 4, gives a number: "I really don't have too much material to undercut," because "it's only 1.0 millimeter wide detail" (0.04 in). Then: "every little cut helps." A spot got messy before that, and forcing it with the 1.0 tool was not what I wanted. A half-millimeter tool (0.02 inch) was the plan to clean that little bit "from the opposite side."
The cost is a fact I gave you too. Say a small undercut takes too long for furniture, and my answer was "yep, that's true." Later in part 4 I said of something "almost invisible, but still," that it helps.

Part 7 of the same lesson has a question and my answer: "if you would ask me if it makes a difference, it absolutely does." The plan was to "gradually start from not undercutting to full undercut," with the tool "not straight down, but lean it." A number 1 double bevel was planned for an undercut in part 8, maybe even rubbing opposite direction for a "Beautiful sharp line." Over some mess: "Not really a mess." Later: "I'm already seeing the shadow."
Shadow came from a number 3 in lesson 19, part 8: "I'm just creating that shadow. And it is important. It's really important." My plan in lesson 21, part 8, was a number 8, one-eighth inch (roughly 3 mm), "to recreate that motion I wanted to see going down and going up again." And later in that part: "Whatever fits the profile to create a really nice, smooth transition." Then: "Everything counts."

Lesson 37, part 3, has a number 8, "about four millimeters or so" (0.16 in), and the words "The scale is kind of small." Later in that part: "I'm not just pushing it, I am kind of slicing almost, almost no material is removed, but that's all I need in this case." Shadow again in lesson 23, part 11: "See how nicely it casts its shadow?" I told myself "Go a little bit in, right to half a millimeter" (about 0.02 in), and said "It's not really undercut, but still," with a little bit helping anyway.
What do I say in my Hashemi Flowers lessons?
The Hashemi Flowers course carries the line in many lessons. Thickness was the topic in lesson 7, part 1, "maybe 16th of an inch" overall (about 1.6 mm), and a warning to myself: "I have to be careful not to overdo it." Later: "I still have to take about eighth of an inch right here" (3.2 mm). The tool could be "just probably number one, or any other gouge will work also." The line: "every little bit helps."

Care is the theme of lesson 9, part 1: "without pressing too much," and checking the thickness "just to look at the light." Then I raised the question: "Why I do those small details, if you would ask me." The answer: "every little shadow will help." I mentioned an even smaller tool next, "maybe even number 11 and only one millimeter" (about 1/25 in).
Over in lesson 11, part 6: "that is all about the shadows and the light." A detail like that "makes big difference." Also: "I am more on the extreme side of wood carving. I know some wood carvers would not approve me," about "ecclesiastical carving": "They don't do extreme undercutting." Before that I had two number 11s. One was "a half a millimeter" (0.02 in).

In lesson 26, part 3, the plan was a V tool laid flat for a small undercut on a backside. "Not much, a little bit, but still, every little helps. For the shadows, of course."
Two parts of lesson 39 carry the idea. Leaves come up in part 3: "around the berries, I could do really tiny leaves," and they would "create a more beautiful look." Further on, a detail like that "creates even more 3D look, more shadows. More design, if you wish." Its fourth part says a detail "creates a beautiful shadow and a light point," and I could "excavate even deeper underneath and create even more three-dimensional look."

Tiny again, lesson 41, part 3: I called it tiny, and said: "every little tiny detail will create a beautiful look." From lesson 44, part 5: "I am happy with this. Really happy, actually. I know it's small," and "those small details make me happy. I'll know about it."
Does light show the notch nobody sees?
I could use "an even smaller, really small gouge," a one-eighth inch (near 3 mm) one, for an "extra notch in inside," in Roman Acanthus 16, part 3. And then: "in the full light, you're not going to be able to catch it. But with the side light or at the evening, you'll see" every little cut like this.

In 73.6 I said I would know about the notch. In the Roman lesson, the evening shows what full light hides. Venice Room 11, part 12, has this for a "tiny detail," with a number 11: "every tiny detail makes big difference."
How do the lessons line up side by side?
| Lesson | What I said about that detail | Tool or light |
|---|---|---|
| Venice 73.6 notches | Tiny notch, maybe overkill, I said | Micro tool |
| Panel lesson 18 | Important tiny spot, not to mess up | Number 11 |
| Furniture Panel 19 | Really tiny detail, no space for undercutting | Small knife |
| Flower corner 20 | Detail just 1.0 mm wide, little material | 0.5 millimeter |
| Hashemi lesson 9 | Small details I do for the shadows | Maybe number 11 |
| Flowers lesson 11 | Shadows and light, extreme side of carving | Two number 11s |
| Hashemi Flowers 39 | Really tiny leaves, more beautiful look | Maybe number 5 |
| Roman Acanthus 16 | Extra notch inside, hard to catch | Side light |
Where can you watch each line in full?
Each line above sits in a course on this site. This part belongs to workshop 73, and the whole panel is in the Venice Room Part 6 course. Flower lessons live in Hashemi Flowers, and the acanthus leaf is in the Roman Acanthus course.
Think of a spot on your wood carving that nobody else would notice. Does it still have a little relief to take? I would want to know it is there, the way I wanted to in 73.6.
How it's done
- Pick the small tool. I would probably take a micro tool, number 3, at one-eighth inch (3.2 mm) for the small notches.
- Go in slowly. I planned to wiggle slightly and go in, careful in how I approach it, without damaging this part of a shell.
- Drop to a smaller size. Lesson 20 did not want to force the 1.0 tool and planned 0.5 mm (0.02 inch) for one spot.
- Let the light show it. The Roman lesson says a notch is hard to catch in full light, and the evening or the side light shows it.
- Know it is there. My closing word on the tiny notch: knowing counts most, whether or not people notice.
Frequently asked questions
What was the tiny notch in 73.6?
Small notches were on my mind in the area of a huge shell, with a number 3, one-eighth inch (about 3 mm). A tiny notch, I called it, maybe overkill. Knowing was what mattered most to me.
How do you handle a detail with no room to undercut?
The flower corner lesson, part 4, had a detail only 1.0 mm wide, so little material was left, and I planned a 0.5 mm tool for one messy spot. Lesson 19 had no space at all, so I planned a small knife.
Why carve a detail that people may not notice?
My reason in 73.6 was knowing, and I called that the most important thing. The Roman acanthus lesson adds a second: full light may hide an extra notch, and the evening, or the side light, lets you see it. In Hashemi 44, small details make me happy.
What to carve next