

Alexander Grabovetskiy, woodcarver, School of Woodcarving · Published 2020
What does a wood carver mean by "solid"?
Quick answer: In workshop 78, part 9, I called a glued piece somewhat solid. By solid I mean a piece of a carving that holds up and stays put while I work on it. Other lessons of mine use the word for a thickness I left, a glue, and a clamp.
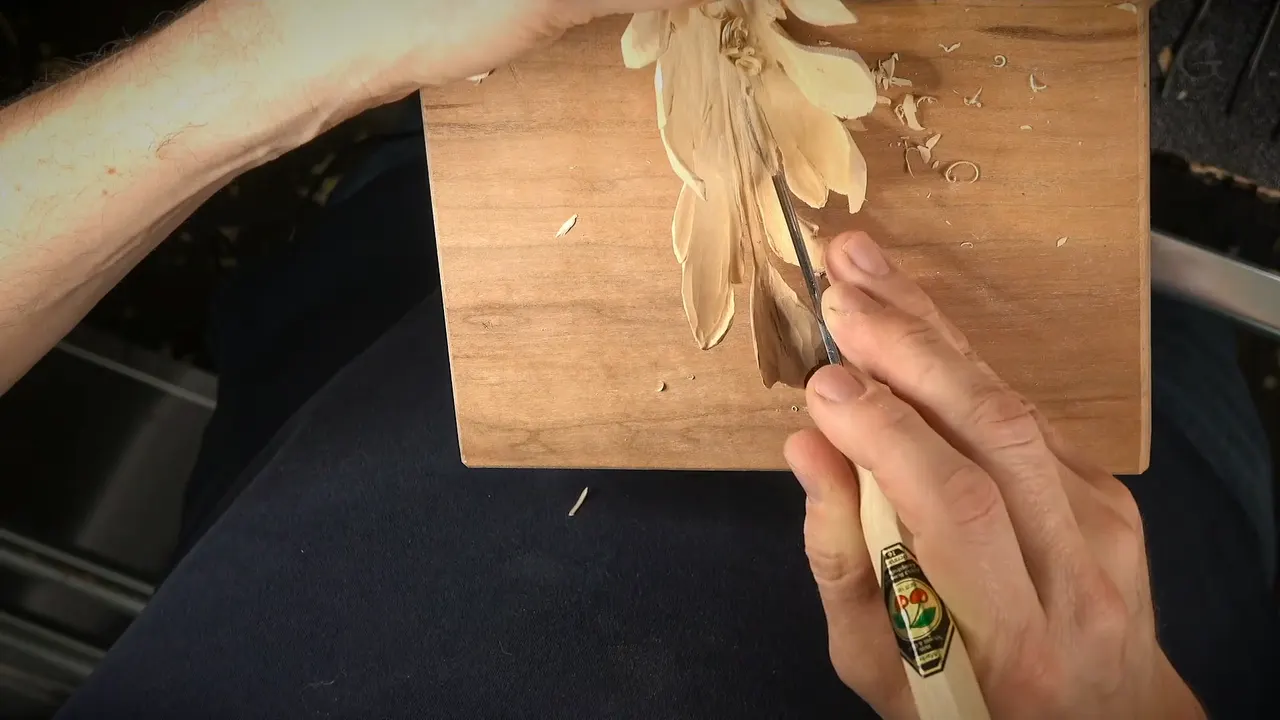

Solid is the word I use when a piece of a carving holds up and stays put while I work on it. The piece I had glued in workshop 78, part 9, came out somewhat solid. My other lessons use it for a thickness I left, for a glue, and for a clamp that held the piece still.
Ever dug a hollow beside a thin part and felt the wood move? Does a loose block shake on your bench while you carve with a gouge? Those are the places where I said this word, and the lines below are mine, lesson by lesson, with the course each one comes from.
What did I say in part 9 about taking a carving to the extreme?
Part 9 opens on a limit, and the limit is time. "I can take it to extreme," I said, "It's all about the time I want to invest." The question was how much time I had, with a lot of stuff still ahead of me for this project. My answer was short. "So at some point, I just have to stop."
I weighed it more than once. About one small section I asked, "What should I do? Should I take it more?" Of a bigger opening I said, "Maybe I'll just leave it like that." On the work: "Again, I really don't have to." I just think it will look really good, I said. Later I added "I could leave it actually like that," and "It would look really nice actually, even that way."
The wood was not easy. "I am carving against the grain right now," I said, "which is not always the best." Then: "Really carefully." My tools, I said, absolutely must be super sharp. A plan followed: maybe a two millimeters, number 11, to excavate a little deeper in that area. Two millimeters is about 5/64 in.

Next came a plan for the other side. I wanted to attack the spot from the opposite side with three millimeters (3 mm is about 1/8 in), and to place my fingers right underneath. Then: "See? I'm all the way through." My next plan was two millimeters again, and after that gouge number five at a quarter inch (about 6 mm) to continue.

Basswood is not always easy, and this piece was one of the hard ones. "Sometimes you get difficult pieces, even basswood," I said. Others are "really piece of cake, really easy to carve." This one gave me "a little bit resistance" even with super sharp tools.
More depth was the next plan. I would get the number 11 in the half a millimeter (0.5 mm is about 1/50 in) for an even deeper cut. Afterward I said "And I think it is good. It is good and it's open."
Where does solid come in during workshop 78?
Late in part 9, beside a small leaf for the inside. A choice came first: "Like I said before, I really didn't have to do this piece at all." I decided to do it anyway, "for just the sake of the school." The plan was a small leaf from the same middle, almost like an extra leaf. One of those leaves would grow from underneath.

I asked myself out loud, "Do I have to do it?" My answer was "No, I don't." My thought was that it would give me a really good idea to hide that, and that I did not have to excavate that area to full depth. The first cut was planned at 2 millimeters, number 11. Then came the line this page is named for: "And yes, I glued that piece, so now it's somewhat solid."

A small trick closes part 9. "It's a little trick to hide those cuts like this, okay, and still keep it really strong," I said.
The reason for keeping a part from going fragile is in part 8. "I don't want frustration later on because it's going to be shipped," I said, and the piece "can be broken if I'm going to make it too fragile." Out loud I put it as a question: "My question is do I want it to or not?" and answered, "And I think I don't want it to." A bit later I said I really need to keep it somewhat strong yet. About the wood: "It's strong, but you have to understand it's a long grain."

One piece did not last in part 10. Partway through that part I said "Don't have too much material left," and "Have to be really careful now." Fragile was the word for what came next, really fragile, and for some reason one side was more fragile for me. "If I'll be able to pull it, I'll keep it," I said. The end of it did not last. "I just chopped the end of it. Here you go. I couldn't keep it." I planned a replacement for that end of the leaf. A really good connecting point was there, I said, and the gluing point still went all the way. Gluing at that point also was an option, just to connect to that movement.

Does solid mean the part is thick?
A kept thickness was one of my reasons. In the Carving Hazelnuts course, workshop 7, part 2, I said to take a normal gouge, maybe a number 3, go right underneath, but still slice it. The thickness was to stay at least 10 millimeters, at least three-eighths of an inch. Why: "I don't want to make it too fragile right now." After that I called it. "Now it's solid. You can do anything with that."

The next part of that workshop, part 3, has a V tool and a leaf that looks as if it is not connected. But it is connected, I said. "You still have to keep some point of connection," I said, since otherwise the leaf gets too fragile. Then: "Right now, it is solid." I added that breaking it is always a possibility.

Hashemi Flowers has a choice for a petal in workshop 45, part 4. I could completely separate it from the rest of those, I said, or I could keep a connecting point, which is sometimes a smart idea. The point is there to "just make it more solid." Otherwise the petal becomes fragile, and you can break it.
An edge that is paper-thin to the eye can still be called solid. The Hashemi Flowers course, workshop 7, part 1, has about maybe 16th of an inch of thickness (1/16 in is about 1.6 mm). With that I could set the final form of an edge, and I said it would look like a paper-thin, although somewhat solid.

A limit on the thin look sits in Venice Room 77, part 10. I wanted an illusion of paper thin, and I called it a mistake to make it paper thin in that case, since it is not just an ornamental piece. "So it has to be somewhat solid, but still, illusion."
The Tray of Blessing course has one more, in workshop 3, part 3. "Obviously you can break anything, but now it's solid." A reason followed right away: I still kept the thickness of it. And I added that you can make a part really fragile, like the flowers you saw.

Does glue make a thin part solid?
Glue was my reason in several lessons. Workshop 77, part 8, has a glue that goes through the wood, and I said what I liked about it. It stabilizes the area, and that is really solid pretty much. Then a warning: probably not for long. I have to find a solution how to reinforce the backside.

A CA glue line sits in part 10 of that lesson. "I've got that CA glue inside, the fibers, and it's just really solid, almost like plastic. I didn't expect that." Next I said, for example, that this side slices really good, but closer to the break point it's like a plastic.

A second way is in that tray course, workshop 5, part 1, for a spot that is soft. I spoke of a product sold to stabilize rotten outside wood. "Because it's soft, you can actually use that right here and it becomes more solid," I said. The look does not change, and it does not darken it. Once dry, I said, it just looks natural.
Venice Room 95, part 6, gives two short lines, and the first is "It's going to be more solid." The second is about glue: "I don't want to put any glue. I mean, I could dilute some glue and penetrate that."

A short Q and A on stabilizing a fragile part says it plainly. The part would sit at shoulder level, so I stabilized it with a thin super glue, and I wanted to make sure it was solid. "It's still really fragile, but still solid." I also said you can still break it, but it is a lot harder.
Does solid mean a piece held still?
In some lessons it did. The vise piece is in Venice Room 76, part 10. A clear glue that does not foam lets me stick whatever I'm working on, I said, and a leather right there helps me not to damage it. "But it's still solid. Okay? Solid." I could hold it, I said, and even apply a little more pressure if I need to.

The same word goes to a clamp in the Hashemi course. Clamping comes first in workshop 15, part 1: I could clamp it like this, then rotate and clamp this way. "Now it's kind of solid." A bit later I said this piece is solid, and this side is solid, so I could attack the area with no problem.

A hole has a reason in workshop 27, part 2, of that course. I drilled the holes but not through, since I didn't want to make it weaker. "Maybe I'm just trying to be overprotective," I added. My next question was what the best way to clamp it was. After the clamp I said "it's solid enough."

A shape I wanted to hold is in workshop 42, part 1. One clamp could do it, pretty much. Solid, I called it, and I thought I might reinforce it with two of them. Last: "that's just really solid, so you can't really move it."

My clamp could go on again, I said in Venice Room 125, part 2. Next I called the area solid, and I could bring it closer to me and take out the clamp. "It is not going to go anywhere," I said. Another clamp could come off too.

The workbench is the place in workshop 154, part 1. I planned to refasten my piece more solidly, since it was kind of loose and vibrating. My guess was that it was more solid now, because I fastened it and got my clamp in place. I hoped for a lot less vibration.

Lily Box workshop 11, part 4, has a hold on the piece. There were a couple of ways to hold it. "It's pretty solid. I checked." In my clamps I should be safe, I said, and if you don't feel comfortable, you can place a piece of carpet or some kind of pad.

Can a solid part still break?
A solid part can break, and I said so. In Floral and Molding lesson 13, part 3, I planned to get even smaller, maybe one and a half millimeters again (1.5 mm is close to 0.06 in), but really carefully, because this can become fragile. Solid at that moment, I said: "I can just beat on it." Even so, I said I still have to be really careful. Not going too close to the middle part was the plan, and attacking from two sides, little by little, was an option.

Flipping is a check I gave in the same tray course, workshop 6, part 3. Carving from one side, I said, you don't really see what is going on on the other side, so "it is always better just to flip and check what is going on." Then: "it feels like it's solid enough, it should not fall."
Do I always want a part to be solid?
A connection can be the wrong choice, and workshop 148, part 1, shows it. Wood is wood, I said, and it expands and shrinks with the moisture and humidity in the air. If I'm not going to make it solid connected to the crown molding, I said, it would be a lot easier for the wood movement. I was okay if it moved slightly. That part would not be connected at all, I said. I was okay if it moved slightly.
A little shakiness can be fine too. Over in workshop 1, part 2, of the Hashemi course, I said "Let me fasten it," and that I could rotate it and work from different angles. "It's really solid." Then: "Of course, you're still going to see some shakiness, but that's solid enough for me." Workshop 4, part 1, of the Hazelnuts course has a bench I called "a really good bench." Then: "So it is solid and I can probably start."
One word, eighteen places, and what held each time
| Where | What held and why |
|---|---|
| Small leaf, 78 | A leaf glued, and called somewhat solid |
| Hazelnut block, 7-2 | Ten millimeters of thickness left, then solid |
| Joined leaf, 7-3 | One joined spot kept, and the leaf solid |
| Petal point, Hashemi 45 | A connecting point kept to make a petal solid |
| Paper-thin edge, Hashemi 7 | A thin look on a part still solid |
| Thin illusion, 77 | A thin look that still has to hold |
| Soaked fibers, 77 | Glue in the fibers, solid almost like plastic |
| Kept thickness, Tray 3 | Thickness kept, and the part called solid |
| Soft spot, Tray 5 | A soft spot made firm without darkening |
| Handle in a vise, 76 | Held in a vise with a leather, still solid |
| Rotated clamp, Hashemi 15 | A clamp moved around, and the piece steady |
| Shape in clamps, Hashemi 42 | Clamps on a shape, so it cannot move |
| Clamp removed, 125 | A clamp that could come off once solid |
| Loose piece, 154 | A loose piece fastened to lessen the vibration |
| Beaten part, Floral 13 | A part firm enough to hit, with care |
| Flipped piece, Tray 6 | A flipped piece checked, solid enough not to fall |
| Unjoined part, 148 | Left unconnected so the wood can move |
| Fastened piece, Hashemi 1 | A fastened piece, solid enough with some shakiness |
One word, and a different reason beside it in every row.
Which lessons can you open?
The leaf lives in Venice Room 78, and Venice Room Part 7 holds workshops 74 through 85. The other courses open from their own pages: Carving Hazelnuts, Hashemi Flowers, the Tray of Blessing, Floral and Molding for the Panel and the Lily Box. Wikipedia has pages on the strength of materials, on brittle and on how a fracture starts, if you want the engineering side of wood carving.
Do you want to watch a thin part get tested with a thumb before the gouge goes in again? Looking for lessons where I say out loud what I trust and what I do not? Start here.
How it's done
- Say what you left. In Hazelnuts 7 my plan was a thickness of at least 10 mm, three-eighths of an inch, before I called it solid.
- Keep one joined spot. A leaf that looks as if it is not connected still needs some point of connection, or it gets too fragile, I said.
- Fasten the piece. Workshop 154 had me plan to refasten a loose piece to the workbench because it was vibrating.
- Test with care. In lesson 13 of the panel course I said I can just beat on it, and that care is still needed.
- Know the limit. You can break anything, I said. In a short Q and A I said glue makes a fragile part a lot harder to break.
Frequently asked questions
What made the small leaf somewhat solid in this part?
Glue. The line came right after my plan for the first cut of the small leaf, a 2 mm number 11.
Can a paper-thin look still be solid?
Hashemi Flowers 7, part 1, has about a sixteenth of an inch of thickness, and I said the edge would look paper-thin although somewhat solid.
Does a clamp make a piece solid?
Workshop 125, part 2, has me saying I can take a clamp out once the area is solid. Workshop 154 has a loose piece, and I hoped fastening it would lessen the vibration.
Can you still break a part you call solid?
What to carve next