

Alexander Grabovetskiy, woodcarver, School of Woodcarving · Published 2020
What does a wood carver mean by "paper-thin"?
Quick answer: Paper-thin is what I said in Venice Room workshop 78, part 4, about the edge of a leaf, and I added that I had to take care. Other lessons use the word for a look, for a limit and for a spot the light shows.
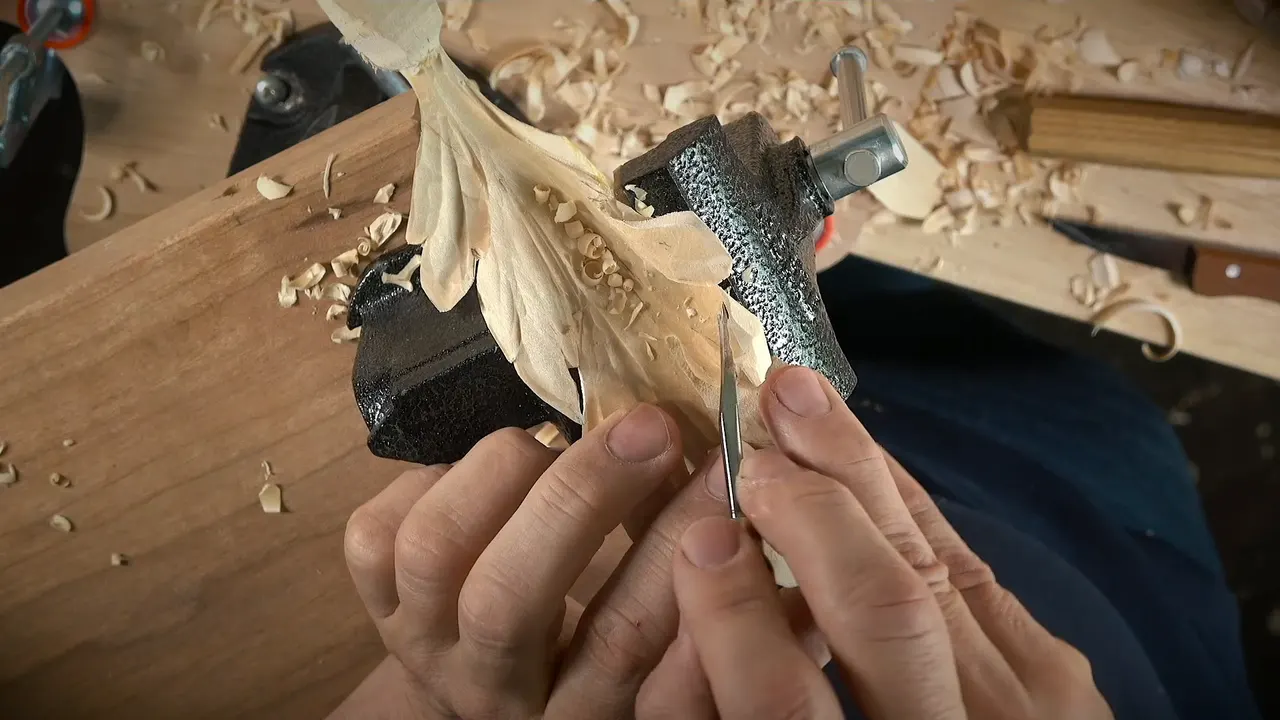

Paper-thin came up in Venice Room workshop 78, part 4, when I reached the edge of a leaf. That word turns up in my Lily box, Hashemi, Roman acanthus, Byzantine acanthus and Maine lessons.
Ever held a thin carved leaf up to the light? Did you wonder how far you can go before the wood gives up? These are my own lines on it, lesson by lesson, with the course each one comes from.
What did I say about paper-thin in workshop 78?
Refining an edge, I said so: "Let me refine this edge too." Then: "This is already like a paper-thin right here, so I kind of have to be careful."
The extra wood was my next job: I would work on that from the backside as well and take off material I don't need. That wood will stay hidden, and I don't really need to take all of it off.

A part I had broken came up. I could glue it, I said, but it was less than a 16th of an inch (1.6 mm) thick, and I wasn't sure gluing it was a good idea or not. Maybe I would just glue it back. For now I would leave it alone, and glue it off camera.
Another piece, I said, would go the opposite direction. I had to be careful how I did it, and I would use number seven.

Then I said I could probably just leave it like that. It was actually really nice, and I could just remove wood from the back. Maybe that was what I should do, since I thought it was already giving that depth. But what I wanted to do was a little more carving closer to the middle line, the center line. At one moment I said "Oops, don't want to lose it." Then it was going up and going down like this, I said, and I thought it was really good.
Now I needed to flip it upside down and remove the mess from both sides. Across the grain was my plan, I guess I could, and I wanted to see how it would behave. Then came "along the grain, I should say." My hope, I added, was that it wouldn't destroy my work.

What did I keep thick in the middle?
I set a limit too. I didn't want to do too much, and I still wanted it somewhat thick right in the middle, and I would bring it from the middle all the way to the edges.
My probable tool for that was a knife, with a small gouge again, and I said let's remove that waste.

One spot on the back was next. I said I would clean a little bit there, and that it would be invisible, by the way. All of that is a hidden side, the back side.
How close to the edge did I go in the other parts?
In part 3 I thought I was all the way to the edge, so I said I should not do more than that. I checked, and yes, I was. Any knife will work for the refining, I said.

Part 5 had concaves coming, the small kind. I planned to clean a piece with the knife and finish it with them. They didn't have to be really deep, I said. It was just for the shadow.
In part 5 I also planned to get across the grain and see how that worked out. My fingers went right underneath to support the piece. It still moved around a little, but it was along the grain and I had that handle, so I stayed pretty stable.

Is paper-thin the real thickness or only a look?
Byzantine acanthus lesson 5, part 3: you really have to get to the edge if you want a leaf to look light and almost airy. The leaf is thick, I said, but people are going to think it's paper thin. For that edge I gave a number: you could leave about one millimeter or one and a half mil (0.04 in or 0.06 in), and later we could attack that from the opposite side and make it like a knife cut.
In the same stretch I gave a warning: "Don't take too much material in the middle of the leaf."

Byzantine acanthus lesson 10, part 2, brings the knife back. You can do that operation with the knife, I said, just to take everything to the edge. It will look really, really light, and then: "It looks paper thin, but it's solid."
Part 1 of Hashemi lesson 7 gave a figure of its own. I had only about maybe a 16th of an inch of thickness overall (1.6 mm). So I could easily set the final form of my edge. It would look paper-thin, I said, although it would be somewhat solid.
Venice Room 77, part 10, was a plan for an illusion of a paper thin part. A real one would be a mistake in this case, I said. The piece is not just ornamental, so it needs to be somewhat solid, but still an illusion.

The Tray of Blessing, lesson 6, part 3, puts it short: "it's illusioned like a paper thin, but it's not." Lesson 3 tells the same story with other words. It's more illusion because of the thickness, I said, and "a lot thicker than you think." Part of my carving can really be paper thin, and then it is obviously more fragile. How you use it matters. On a wall, I said, it's not going to be broken like glass.
The Maine class, lesson 17, part 1, has me saying the carving is still solid, and yet when you look at it, I said, it feels like it's becoming lighter and lighter.
Place comes into it. In the Venetian flowers rosette, lesson 2, part 2, I was mindful of the location, so the piece needed to be solid: if you knock on it, it won't break, but still looking like paper-thin.

When did I stop short of paper-thin?
Lily box lesson 12, part 6: I always have to stop myself, I said, because I have a tendency to make it paper thin. That piece would be an everyday use piece, and I can't make it too fragile. A wall decoration would be another story, and I'd have no problem going thin on that.
Then: "Again, just got too extreme. Destroyed my edge." But it's okay, I said. That still gave me a really nice natural movement.

One spot in part 8 left me unsure. Maybe I would have to do paper thin there, I said. I really didn't want to, since I needed a strong connection, but we would see.
Acanthus over Moldings, lesson 6, part 3, says I could go to the extreme and make it paper thin, yet in that case I could not. The piece was to be on a panel, with "a lot of traffic" on it. Lesson 8 of that course, part 2, says it from the other side. A decoration piece on the wall can be paper thin, I said, but I can't do that.
Workshop 69 of the Venice Room, part 11, put a number on it. I was leaving about 10 millimeters (about 3/8 in) between the upper point and the lower, like the ceiling of my future dome. Everything still had to work out before I got close. Strong, too, I said, so not on every carving would I go paper-thin.
Over in Grape Onlay lesson 13, part 3, I said later on I wanted to make it like paper thin, almost. For that day I put the thickness at approximately five millimeters (about 3/16 in).

How do I tell that a spot has gone paper-thin?
Back in Lily box lesson 12, part 7, I said if I dig deeper I'm going to create a hole, and I could already see a paper-thin spot right there. You probably couldn't see it, I said, but I did. "The light hits through."
I planned to hit the edge with a knife, no more than a knife. Really close now, and not wanting to do damage, I said let me stop.

Hashemi lesson 8, part 5, has the light again. The light was lighting through, I said, and that meant I had less than a sixteenth of an inch (1.59 mm). Probably paper-thin there, but still solid, and I had to take real care not to overdo it.

In Roman acanthus 6, part 1, I was talking about cutting myself, and some days I remember I cut myself over 100 times. Complicated carving, though. I did some flowers, beautiful flowers, and you could actually see through wood. Just paper-thin leaves and everything, I said, and that is dangerous.
Fingers read something else. Over in Venice Room 36, part 5, a finger can detect a lot more than your eye, I said. A slight movement, even a paper-thin movement, shows up under the finger and not to the eye. The Furniture Panel course, lesson 19, part 4, says it in fewer words: your finger is one of the best gauging systems, so you can detect really paper-thin movements.

What do I reach for at a paper-thin edge?
Acanthus over Moldings, lesson 7, part 3: make a paper thin look, I said. You can see it's already establishing beautiful shape. My aim in Hashemi lesson 7, part 5, was every cut taken to the edge, really, really, really fragile and paper-thin.

Chamomile and Bow Rosette, lesson 4, part 3: you can go right down to the paper-thin if you're not going to force it. A knife came up there too, and I said amazing work is possible with just the knives.
The Maine class, lesson 16, part 1, had a flower going right underneath. I could use just the chisel, starting my undercutting process little by little and making it almost paper thin. Getting close to the flower called for care.

In lesson 9, part 3, of that class: "that's paper thin okay, so that's it." And then: "That's what I want to see."

What can I do for a part that fragile?
Roman acanthus lesson 11, part 5, is about glue in a fragile part. More water than glue, I said, diluted really good, to penetrate the fragile parts. The kind was yellow glue, which has some resins in it. Treated that way, you can work more safely without it breaking.
Then you can reach a really unique thinness, I said, and still be safe. A warning came with it. Break it you still can if you overdo it, but the glue gives you some ability to do some nicer stuff.
The Venetian flowers rosette, lesson 1 had a piece in paint grade, and I did not take it to the extreme. A really paper thin part there needed stabilizing, which I wouldn't do if the piece weren't painted. My choice was a super glue, a really thin one, because that edge is fragile and like a knife edge.

Venice Room 5, part 1, is where I said I really like to take it to the extreme, so sometimes my leaves come out almost paper thin. The look is "almost like someone said airy." Airy is light like air.
That work has a cost. Undercut that extremely, I said, and you really have to control your tools and feel what you do. Mistakes made when the piece becomes really fragile you mostly can't fix, and those words sit in Roman lesson 10, part 2.
Where did I say paper-thin, in one table?
| Where | What I said | Result |
|---|---|---|
| 78-4 | An edge already thin enough to need care | Careful work |
| Lily 12-7 | A spot where the light hits through | Knife only, nothing more |
| Hashemi 8-5 | Light lighting through, and the wood still solid | Under a sixteenth |
| Byzantine 5-3 | A thick leaf that people will take for thin paper | One to one and a half millimeters |
| 77-10 | An illusion, because the real thing would be a mistake there | Somewhat solid |
| Lily 12-6 | A habit I have to stop myself on | Everyday use piece |
| Moldings 6-3 | The extreme, which I could not use on that piece | A panel with heavy traffic |
| Venice 36-5 | A slight movement a finger detects and the eye does not | Felt by hand |
| Roman 11-5 | A thin part kept safe by glue in the fibers | Diluted glue |
| Rosette 1-1 | A thin part on a painted piece | Super glue, a thin one |
One word, and a different job in each row.
Where can you watch these lessons?
The leaf lesson is Venice Room 78, and Venice Room Part 7 holds workshops 74 through 85. Each lesson above has its own page, linked where I named it, and each opens with school access. A plain workshop number means the Venice Room. Thin as paper, a furniture panel, a wall piece: the answer changed with the piece.
Do you want to see a translucent edge take shape under a gouge? Looking for wood carving you can follow at the bench, or relief carving that has to stay strong? Start here.
How it's done
- Look for light coming through. Light lighting through the wood told me how little was left, and I took care not to overdo it.
- Slow down at the edge. At the thin edge in workshop 78 I said care was needed.
- Keep the middle thick. I wanted some thickness right in the middle, with the work brought from the middle out to the edges.
- Bring the edge in with a knife. The plan for one thin edge was a knife, no more than a knife.
- Stop where the piece needs strength. A piece for daily use could not go too fragile, I said.
- Feel the surface by hand. A finger picks up a slight movement that the eye does not, I said.
Frequently asked questions
How thin did I mean by paper-thin?
My figures were small. In Hashemi 7 I had about maybe a 16th overall (1.59 mm). At a Byzantine acanthus edge I said to leave about a millimeter or a millimeter and a half (0.04 or 0.06 in). The broken bit in workshop 78 was thinner than that 16th.
Can a carved part look paper-thin and still be solid?
In lesson 10 of the Byzantine course I said the leaf looks paper thin yet is solid. For Venice Room 77 I planned an illusion of that look, since a real one would be an error in that case.
Why not make every piece paper-thin?
A piece for everyday use got a stop in Lily lesson 12, and a panel with heavy traffic got one in the moldings course, lesson 6. Workshop 69 added that the piece has to be strong, so not on every carving would I go that thin.
What to carve next