

Alexander Grabovetskiy, woodcarver, School of Woodcarving · Published 2020
What does a wood carver mean by "the backside"?
Quick answer: In Venice Room workshop 78, part 3, I called one spot "a really thick part" and planned to work on its far side with a tool I had used before. The word returns in the Hashemi, Chamomile, Lily Box and Floral lessons for waste I take off from behind, and in the Furniture Panel for a tool.
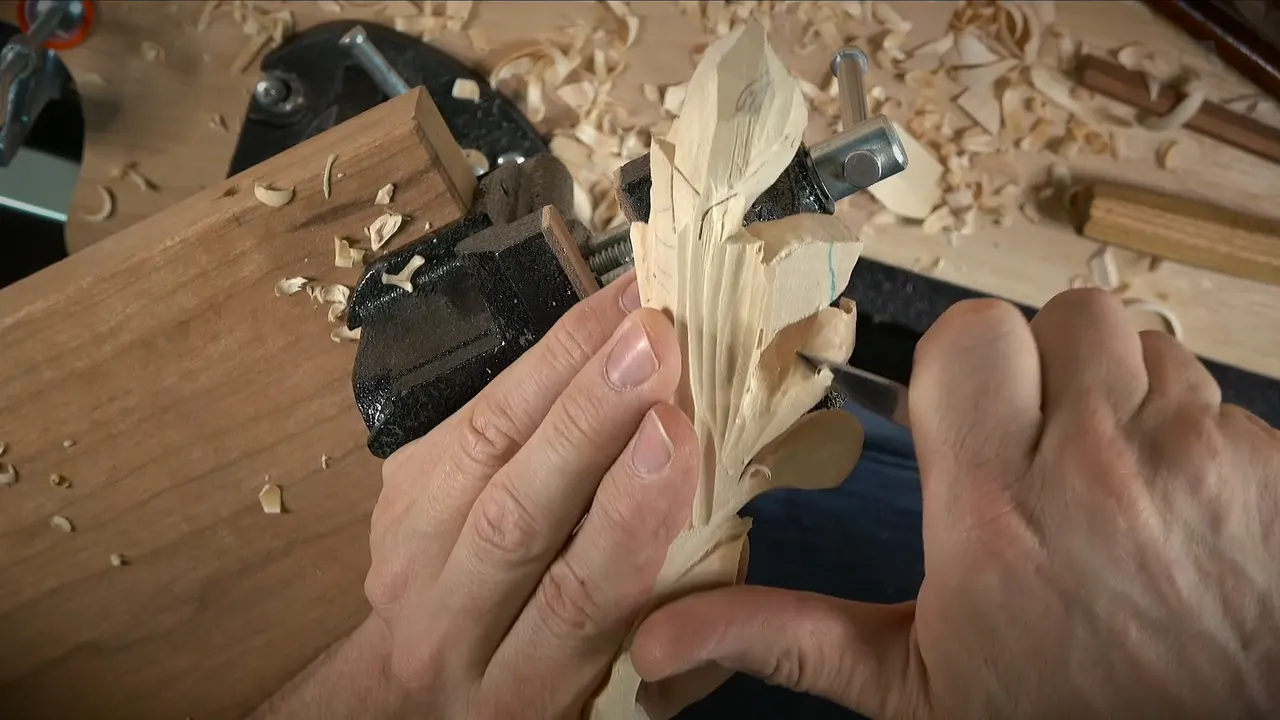

In Venice Room workshop 78, part 3, my words were "And I'll take number eight again and carefully attack that from the backside." It comes back in my Hashemi, Chamomile, Lily Box and Floral lessons for waste I take off from behind, and in the Furniture Panel for a tool.
Ever turned a wood carving piece over and wondered how much work its far side deserves? I walk through part 3 first, then through the lessons where I said the same word, and you read what I said around it.
What did I say about the backside in part 3?
It opens on a verdict about a part of the leaf carving, "This needs to be gone, I think." My plan was a tool I had used before, with care, working on the far side. About that spot I said "That is a really thick part. I really don't need that much right here, so I can probably get rid of lots of it."

The leaf sits in a vise here. Another tool came next, "Use number seven now, and maybe upside down." Then a look at the edge: "I am all the way, I think, to the edge, so I should not do more than that." I looked again, "Let me check," and found "Yep, I am."

A knife came into the plan. "I can probably just take a knife right now. Any knife will work." The refinement, "whatever needs to be cleaned and so on," was for later: "That I'll do a little later, that I'll clean up." With the knife I would "bring it right to the edge," and I said "Let me refine the shape right here."
Next, the curl. "See how it curls up? Beautiful. It goes all the way up like this." And "now I can probably just attack and clean a little more."

A division was next on my list. "I need to make the division, which is going to happen right here." One more stayed open, "Or maybe not." The first I called sure: "at least this one is going to happen." Next: "I'm going to leave it first," and "get my small micro tool."
The last stretch holds a plan for the inside. It looked like I could do "a really nice concave" running "to the centerline just like that." It would "give me even more depth, if you wish." For the tool, "probably the same number eight and a quarter inch, or seven millimeters to be exact." A quarter inch is 6.35 mm, and 7 mm is about 0.28 in.

Where does the backside turn up in parts 2, 4 and 5?
In part 2 comes a plan for the side. "Let me chop a little more from this side also. Make a little bigger, deeper excavation." My reason to feel easy about it: "We do have a lot of material on the backside right in the middle, so I'm safe there."

The edge came first in part 4. "This is already like a paper-thin right here, so I kind of have to be careful." The far side needed a visit as well, to "remove excess material I don't need," and the word "hidden" comes in the same breath. I added "I don't really need to remove all of it."
A broken piece got a doubt. "I can glue it, but it's less than a 16th of an inch thick." Whether gluing was a good idea, I was not sure. That is under 1.6 mm.

The end of part 4 returns to the side nobody sees. I called for cleaning there, "Let me clean little bit this moment right here," a spot "invisible, by the way." Then, with a plain label: "This is going to be all hidden side. That's the back side."
The same word shows in part 5. Of one spot I said "I'm not going to do too much to it except just remove the backside of it." Later came a flip: "I'm going to flip it upside down and remove whatever chunk on the backside I have." Then "we are well on the way, so it doesn't look too bad."
How do I take waste from behind a carving?
The first thought in Hashemi Flowers 15, part 4, was "Logically, I could actually just excavate" behind it. Then: "That would be much easier." Then the other route: "But I could do it with pretty much any tool, so from this side." Right then it was "just number three," and "smaller one will work better."
A short report sits in Hashemi Flowers 27, part 1: "whatever the wall I found on the carving, I under-carved" it from behind. My comment: "I don't think you need instruction for that." About the look: "It does look a little rough on the backside, which is absolutely fine." And a taste of mine, "I do like this project to leave a little rougher."
In Floral and Molding for the Panel 8, part 1, I picked a "really small, tiny gouge," which I "would say 2 millimeters, number eight," to "excavate right on inside." A smaller one was a maybe, "maybe 1 millimeter," to "excavate even deeper." Two millimeters is about 0.08 in, and one is 0.04 in. The back was for later: "I going to have a chance later on to undercut that." Then: "But see how deep shadow it creates?"

A question you may hold gets its answer in Hashemi Flowers 7, part 1. "Now, you probably would ask me why I do that, okay, if it's a backside, and most of it you're never going to be able to see," I said, and a wall was the case I named. The undercut was "no more than maybe 16th of an inch deep," so 1.6 millimeters at most. My thought: "I think I could actually go even more extreme right here." The answer: "Well, easy answer. It's all about lights and the shadows, okay? That's the simplified version of my answer."

Care comes with the word in Venice Room 74, part 10. The back would be "all undercut," I said. "But what I have to do, I have to be careful. I don't have too much space to work around." A doubt followed: "maybe I just have to probably leave it like that, okay?" Pushing too far would be "a mistake."

A plan sits in Venice Room 156, part 3: an undercut that would be "just preliminary for establishing the form," with the edge for later, "to the knife edge later on." My tool: "let me take probably about 10 millimeters," about 0.39 in, to "undercut just to the knife edge."

Safety is the reason in Grape Onlay 8, part 3. "don't forget, you always gonna be able to get" there from the other side, "so you don't have to break the tool," which I tied to undercuts: "possible when you do an undercut." And: "So if you can get it from the other side, it's probably gonna be much safer."

How does the backside help me measure and mark?
calipers come up in Venice Room 86, part 3, with "couple spots right here, one, and right there, one." "So pretty much, I just referenced from the backside, and I got my depth." My limit: "I cannot go farther than that," with "extra material left, maybe about half an inch or so." Half an inch is 12.7 mm. The marks came the same way: "and I placed that mark, and that goes all around, which you don't see."

Measuring from the far side is a need in Venice Room 79, part 10. One tool I like is "a pointing machine." Then: "Once I got the depth of certain points," then "I can actually measure from out since it's laying flat on my workbench."

Over in Venice Room 85, part 3, a line reads "I already marked whatever the wastes I need to remove." Then: "I marked the backside, I marked the front, the whole drop." Of the far side: "you don't see on the backside, which I don't want to put the camera right there. And that's what I want to do. So you can see the waste lines I marked."

Drawings turn up in Venice Room 101, part 12: "So now I've partially can see the backside of my carving, and that's what I was talking about previously. I have some drawings on the backside that I translated that on another side." A piece glued on top in Byzantine Acanthus 6, part 2, gets this line: "there's a backside, there's this side. Again, the backside is only for the shadow's sake."

How careful is work on the backside?
Chamomile and Bow Rosette 4, part 3, puts it in plain words. "And sometimes it's a good idea to use even smaller tools," I said, and those tools are "safer" for work from behind. Another point is the risk: "And yes, you can break it after hours of work. If you make mistake on the backside, you can break it. Don't press it, okay? Don't place your hand on it."

The hold: "So really, really hold it pretty much on your fingers." Then "Check the grain" and "the direction how you have to make a cut." Also: "But again, don't take the big cuts. Little by little. All right?" A little further on: "I worked on the backside."
The Lily Box 11 lesson, part 4, has "I cut my backside," and I "left approximately about one sixteenth of an inch." That is about 1.6 mm. Next: "I didn't want to go too close to the surface."
Thickness is the topic of part 9. "this side is a little too thick, but on the other hand, it is on the backside." On thickness there I said "really don't worry about being too thick on the backside." I called it "a good thing that it's going to support better."
The other way shows in part 10. "Even if it's the backside, see, right here is too rough, I've got saw marks," I said, and "They are tiny, but they don't look too appealing." Next: "maybe I need to switch to even smaller tool," and I picked "1/16 of an inch, number one," about 0.06 in. Later in that part came a reminder, "we are working on the backside, okay?"

A finished piece raises the same question. In Carving Plate with Butterflies, final assessment, I said "Now, what about the backside? The backside, like I said, if it's on the wall, you can leave it like that. So it's not going to bug anyone." Also: "you can apply the shellac, you can put wax on it."
What is the backside of a tool?
My lessons use the word a second way, for a tool. In Carving Furniture Panel 19, part 9, I said "And I'm using just the backside of the tool, by the way." Result: "that gives me a really clean cut." Later: "it's a really, really, really nice finish. And of course, that all depends on the direction of the grain, how you're using your tool."

Lily Box 13, part 1, says it of a knife: "the heel side of the knife." On some of my knives, "I actually reshaped that heel." On the one I held up: "I took out just slightly on the backside," I said, and "I created a bigger heel." Then: "I can easily just use the backside, and my front doesn't do anything at this point."

A danger shows in Venice Room 77, part 6: "there is a danger, so really have to control myself how deep I'm carving." Pretty much only the back of a big skew was in use, and I added "Maybe it's not the best idea."

Roman Acanthus 10, part 3, warns about a gouge. "you're always pressing with the backside of the gouge in this area, and you're kind of smashing it." It was "okay in this case, because we still have to create some other movement on the pipes later on." But: "just try not to press too hard."

How do the lessons line up?
Each lesson, the words I used, and the line that came next.
| Lesson | My words | Next |
|---|---|---|
| This part, 78.3 | Eight, carefully, to attack the thick part | Use seven |
| The fourth part of this lesson | Backside also, hidden | Remove the excess material I don't need |
| Hashemi 15.4 | Just excavate there, that's much easier | Or this side |
| Hashemi Flowers 27, part 1, the walls | Under-carved them | Looks a little rough, absolutely fine |
| Hashemi Flowers 7 | It's all about lights and the shadows | Undercut extremely |
| Lesson 74, tenth part, Venice Room | Backside, all undercut | Not too much room to work around |
| Venice 156 | A preliminary undercut, establishing the form | Knife edge later |
| Grape Onlay 8, third part, the undercut | Other side | Much safer than breaking the tool |
| Venice Room 86 | I just referenced there and got depth | Extra material |
| Venice Room 79, the tenth video | Measure from behind | Pointing machine, laying flat on my workbench |
| Room 85 | Marked the backside and the front | Waste lines marked |
| Chamomile and Bow Rosette 4, part 3 | Smaller tools | Safer, when you work from behind |
| Furniture Panel 19.9 | Using just the back of the tool | Clean cut |
| Lily Box 13, part 1, olives | Knife heel side | Reshaped it slightly for a bigger heel |
| Lesson 77 | I'm using only the skew's back | Maybe not best |
| Roman Acanthus 10, third part, a step | Not hard | Always pressing on the gouge back |
Where can you watch part 3 and the lessons on this page?
You can watch part 3 in Venice Room 78. The course page, Venice Room Part 7, holds workshops 74 to 85. The other lessons named here are linked where the page is public, and a workshop number means the Venice Room.
Want to hear me say it in my own voice? Start here.
How it's done
- Name the tool and the side. In part 3 I said I would take number eight again and work on a thick part from behind, with care.
- Check how far you can go. I thought I had reached the edge, so I should not do more. Let me check, I said, and found I had.
- Bring the refinement to a knife. A knife would do for the refinement, I said, and the cleaning would come a little later.
- Plan the division. The division still had to be made, I said, with a nice concave inside it, running to the centerline.
Frequently asked questions
Which tool did I name for the far side in part 3?
Number eight, I said, with care. Number seven came up next, maybe upside down, and a knife for the refinement. Those were plans for later in the part, not finished work.
Does a hidden back need a perfect finish?
My lessons differ. In Hashemi 27 a little rough was absolutely fine, and I like that project rougher. One spot in the Lily Box 11 lesson was too rough, with tiny saw marks, even if it's the backside.
How deep was the undercut in Hashemi 7?
Maybe a 16th, about 1.6 millimeters at most, and I thought I could go even more extreme. My reason for undercutting there was lights and shadows.
What to carve next