

Alexander Grabovetskiy, woodcarver, School of Woodcarving · Published 2020
What does a wood carver mean by "keep it strong"?
Quick answer: In workshop 78, part 8, I said the piece would be shipped and could break if I made it too fragile. Then I said I really need to keep it somewhat strong yet. My other lessons put strong beside undercuts, walls and edges.
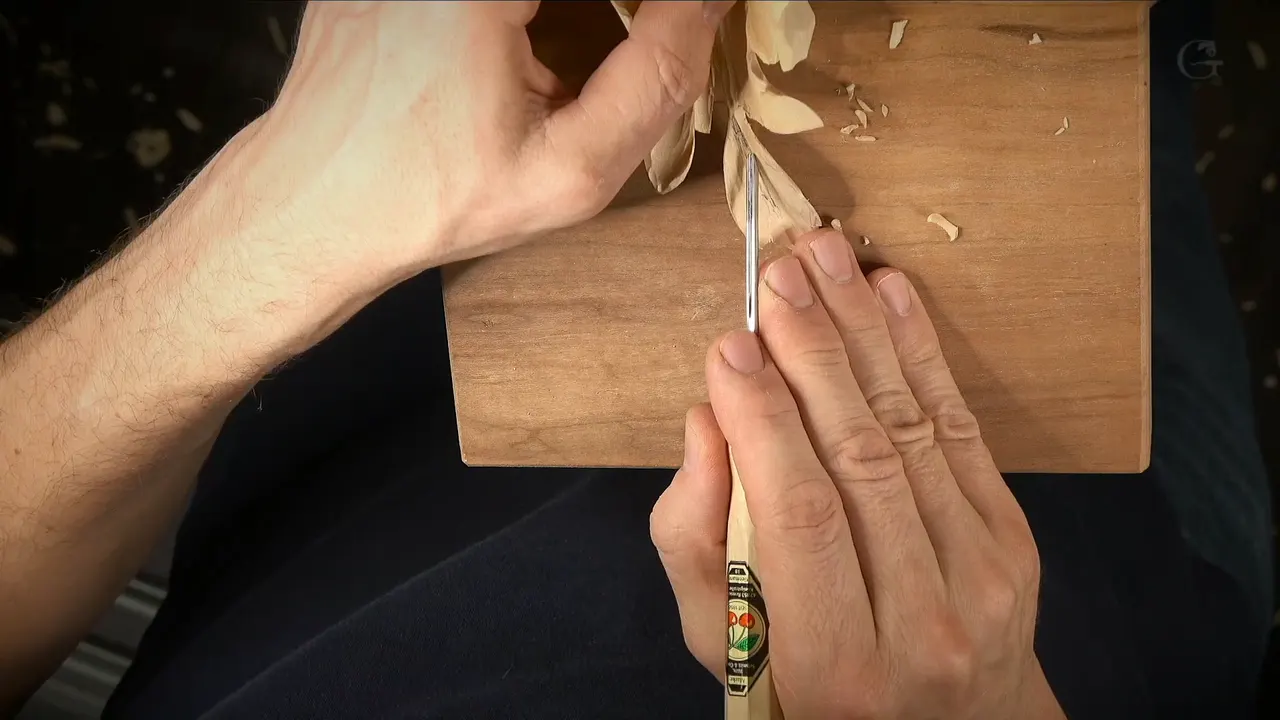

Strong is the word I use when I dig under a part of a carving and want that part to hold. In the Venice Room, workshop 78, part 8, I said it about a leaf. Other lessons of mine put it beside undercuts, walls and edges.
Ever dug under a small detail and wondered how much wood it still has? Does a thin wall beside your groove make you slow down? Those are the places in wood carving where I say it. The lines below are my own words, lesson by lesson, with the course each one comes from.
What did I say about strength in this part?
One plan is for the middle of a leaf. "Let me continue this middle stem, which is going to go right in the middle of this leaf, which means I need to take a small gouge and start excavating little by little." Then comes the line I want you to hear. "But the more I take out, more fragile it becomes, okay?"

Tool sizes came next. "I'll use one millimeter number 11" (1 mm is about 1/25 in), and "I'm going to create a concave cut right inside of the middle part." A bit later came "I'll use a half a millimeter number 11 and try to create a small U cut" (0.5 mm, roughly 1/50 in).
A choice about a separation came next. "Again, of course, I could completely separate that like I did right here. So I really don't need to." And later: "it's going to be shipped, and it can be broken if I'm going to make it too fragile."
"But here you go. See? It's already through all the way," I said, and then "I've got my separation." Next came a question out loud, "My question is do I want it to or not?" My answer followed right after. "And I think I don't want it to." A moment later: "So I really need to keep it somewhat strong yet."
More of the part. "And yes, it becomes really, really, really fragile." I planned to clean, "let me clean a little bit on inside." Another idea, "I could get an extra concave. Maybe about five millimeters or so, like 3/16 of an inch" (5 mm is about 0.2 in, and 3/16 in is 4.8 mm), with a warning, "But I got to be careful how I do it."

The piece itself: "See? It's moving." On the wood itself: "It's strong, but you have to understand it's a long grain. It's pretty strong." Then: "So I have no problem with that. But still have to be really mindful how I approach it."
Two small back bents closed the part. "Oh, you know what? I probably should use back bent, really tiny, small back bent right here, which in this case would be equal to number five and two millimeters" (2 mm, close to 5/64 in). A change followed: "Change the position because of the grain and go opposite direction. Use a different back bent. A little, little bigger. I would use probably three millimeters" (3 mm, near 1/8 in).

What happens in part 9 of this lesson?
Part 9 brings a small leaf for the inside, and a question about it. "Do I have to do it? No, I don't," I said. Another line is about the piece itself: "And yes, I glued that piece, so now it's somewhat solid."
Near its end I said "It's a little trick to hide those cuts like this, okay, and still keep it really strong."

Where else do I say it while I dig under a detail?
Venice Room 11, part 8, has lines like it. I said "I can actually access even deeper with the number 11 spoon gouge and excavate even deeper right there underneath, but still keep that one really strong." A cleaning plan came next. "That is good, except I need to clean a little bit on inside. Stuff you don't see, but I need to make it smooth." In a second spot of that video I weighed the different ways to take one small element down. "I could just chop from the side, but I don't want to make it, like I said before, too weak." Right after: "So I'll just make it a little more roundy."

A back bend comes up in workshop 8, part 8. "With the back bend, I can go really deep and nothing is in my way." My limit had a reason behind it: "because I can go to the extreme and make this too weak, and that is not what I want to do."
A way to go on followed. "But I can attack that from both sides and connect those two cuts." About the inside, I said "lots of stuff that you see right now inside, it is waste, which is controllable now." Next, a tool: "Okay, number 11 and maybe five millimeters" (5 mm, about 0.2 in).

The undercut can stay shallow, I said in Venice Room 38, part 7. "I don't really have to undercut really deep those details. It's still going to give me the right feel without even doing extra undercutting." Next: "It's still going to keep strong also."
Later in that part came a plan for a tool. "I could use even a really small number eight" and "excavate a little more underneath." Then came "But I'll do that later."

Depth was the question in part 5 of workshop 14, and the reason for not going really deep sat in one short phrase, "visible from the bottom." Right then: "And I still want to keep that detail really, really strong." A second thought followed. "I want to keep that detail strong, but I still don't like that."

What do I say about edges and walls?
A groove is the subject of workshop 24, part 2. "There is a lot of movements in the grain, and one mistake, and you can forget about this edge." So the goal was clear: "to make strong both of those walls." Of a groove that comes out uneven: "somewhere wider, somewhere less wide, that is absolutely okay."

Later in that part I said "keep it really strong, not to weaken the edges. I really don't want to do my edges weak." I added a word on my tool, "that's why I'm controlling my tool and doing slowly, really slowly."
Part 8 of the same lesson has a plan, "I can probably go a little deeper right here." The mallet came up as a thought, "maybe actually, I could use mallet for that." And then "When I'm pushing in it, it's moving the whole thing." And right after: "So that's why I'm saying I have to be careful how I do it."

The walls come up again in part 3 of workshop 30. Of the wall: "I can take it all the way to the edge and still maintain a really strong wall." As for the work itself: "you don't really see what I'm doing, but it's just little undercut and a cleaning. That's it."

Furniture Panel lesson 16, part 8, names a tool and a spot. "Let me use number seven." With a line about the opposite direction, I said "But be careful. Don't make that spot too weak." A little later I said "Try to stay away from the wall. Okay, so we need that detail strong. Okay."
How do I check that a part is still strong?
Bumping the wood was my test in workshop 22, part 8, and a short line came before it, "I don't need to go too deep." Next I said "Right now it's really strong. I can bump on it and no problem." The next line kept the other side in view, "But it's always possibility to make the detail too weak."
Feeling counts as a check too. A detail near my limit is in part 2 of workshop 23. "It is already kind of scary, that part." Then: "But it's still strong, but I'm kind of afraid to do more than that." A plan followed for a separation: "Let me use a 3 millimeters, 1/8 of an inch, number three" (3 mm is 0.12 in, and 1/8 in is 3.2 mm).

Before the doubt in workshop 13, part 6, came a plan: "I can continue this cut with the 1 millimeter and get excavation even deeper underneath like that" (1 mm, about 1/25 in). The doubt came after it. "And I want to make sure that detail is strong enough." Next: "Which doesn't look like it's strong." A plan for a tool came after it, "Use number three and hit that edge slightly." And then "And now it looks good."

The limit comes with a plan to undercut more, in part 12 of workshop 59. "And yes, I can undercut even more. But I still have to make sure it's strong enough, so I do not make it too weak." The motion got a line, "it just gives me really nice flipping motion." As for the cleanup: "I've got so much to clean up because I used the marker."

One piece stayed attached, and part 2 of workshop 65 says so. "It's still connecting, by the way. This connects that piece." After that: "It doesn't have to, but I think it just gives me extra strength." And, of the part: "it's okay, too. It's strong enough."

Something almost broke in part 8 of workshop 42. "Like I said, I did not completely break it. It's strong." About my tool: "But with the tool, of course, I can feel it moves."

The word comes with shadow in part 12 of workshop 81. "Beautiful shadow, but it's still strong. Okay, so that's what I'm after."

A hole is the topic of part 9 of workshop 61. "I'm not going to take it that extreme." Then: "But still keep it strong, okay?" My plan after it was "Use the same tool, but carefully enlarge, make my hole bigger."
A thought about a tool followed. "Maybe I can use this number nine around, but not too deep because I still have a development going underneath. So that would be a big mistake for me if I were just to rush it."

Does the grain change what I call strong?
Grape onlay lesson 5, part 3, has a part that is not. "This part is somewhat weak." Of the grain: "it's twisting already slightly toward, you know, to the left and that there's gonna be a too short grain." And: "you gotta be careful."

The grain runs through Floral and Molding lesson 14, part 1, too. "So that connecting point to my shell, it has to have some meat. Otherwise, it's going to be too weak." And: "the grain runs that direction, and it creates a really, really weak point."
Back on the grapes, lesson 14, part 2, I said "In this case, I think it's a strong enough." The tool was a number three, "a quarter of an inch, about, uh, six millimeters" (1/4 inch is 6.4 mm).

A relief cut did the job on the antique rosette, workshop 2. "And you can see because I made my relief cut, so this side is really strong. So it's not going to snap nowhere."

One word, fifteen lessons, and what I kept strong each time
| Where | What I kept strong and why |
|---|---|
| Workshop 78 | A leaf middle, a separation, then a question |
| Spoon gouge, 11 | A deeper reach beneath one part, left strong |
| Back bend, 8 | A reach to the extreme, with a limit |
| Details, 38 | Small parts left without extra undercutting |
| Bottom view, 14 | Not wanting to dig deep under one detail |
| Groove, 24 | Two walls and the edges of a groove |
| Wall, 30 | A wall kept strong right to the edge |
| Scary part, 23 | Close to the limit, and still strong |
| Doubt, 13 | Whether a small detail was strong enough |
| Piece, 65 | One piece left attached for extra strength |
| Grapes, lesson 5 | A part that is weak, with a short grain |
| Rosette 2 | A side made strong by a relief cut |
| Test, 22 | Bumping on the wood to find out |
| Furniture 16 | A spot beside a wall, kept strong |
| Floral 14 | A joint to a shell, given some meat |
One word, and a different part of the wood beside it in every row.
Which lessons can you open?
The home of the leaf is Venice Room 78, and Venice Room Part 7 holds workshops 74 through 85. Each lesson above opens with school access, and each has its own page. Wikipedia has pages on the strength of materials and on how a fracture starts, if you want the engineering side.
Do you want to see how far a small gouge goes into a leaf you can hold in one hand? Looking for lessons where I say out loud what I leave standing? Start here.
How it's done
- Say what you take out. The line was "the more I take out, more fragile it becomes."
- Ask if you want it. I asked out loud if I wanted the separation, and said I thought I did not.
- Leave some wood. I wanted the part somewhat strong, and I said so out loud.
- Watch the grain. I said it is strong, but it is a long grain, and I had to be mindful.
- Change the tool. I named a back bent at 2 mm, and then a different one at 3 mm after I changed position for the grain.
Frequently asked questions
How did I settle the separation in this part?
I asked whether I wanted it to separate, and said I thought I did not. A few lines later I named the strength I wanted.
Which lesson ties strong to the edges?
Workshop 24, part 2, has me say the edges must not weaken, and that I wanted them really strong.
How did I treat a part that was weak?
A part somewhat weak, with a too short grain, is in grape onlay lesson 5, part 3. I told you to be careful.
When did a cut make a side strong?
What to carve next