

Alexander Grabovetskiy, woodcarver, School of Woodcarving · Published 2020
What does a wood carver mean by "much lower"?
Quick answer: Much lower is a phrase I use for a part of a carving that has to sit well under the part beside it. In part 1 of workshop 81 one section was to "go much lower," and other lessons use it for a flower's center, a roll, petals and a background.
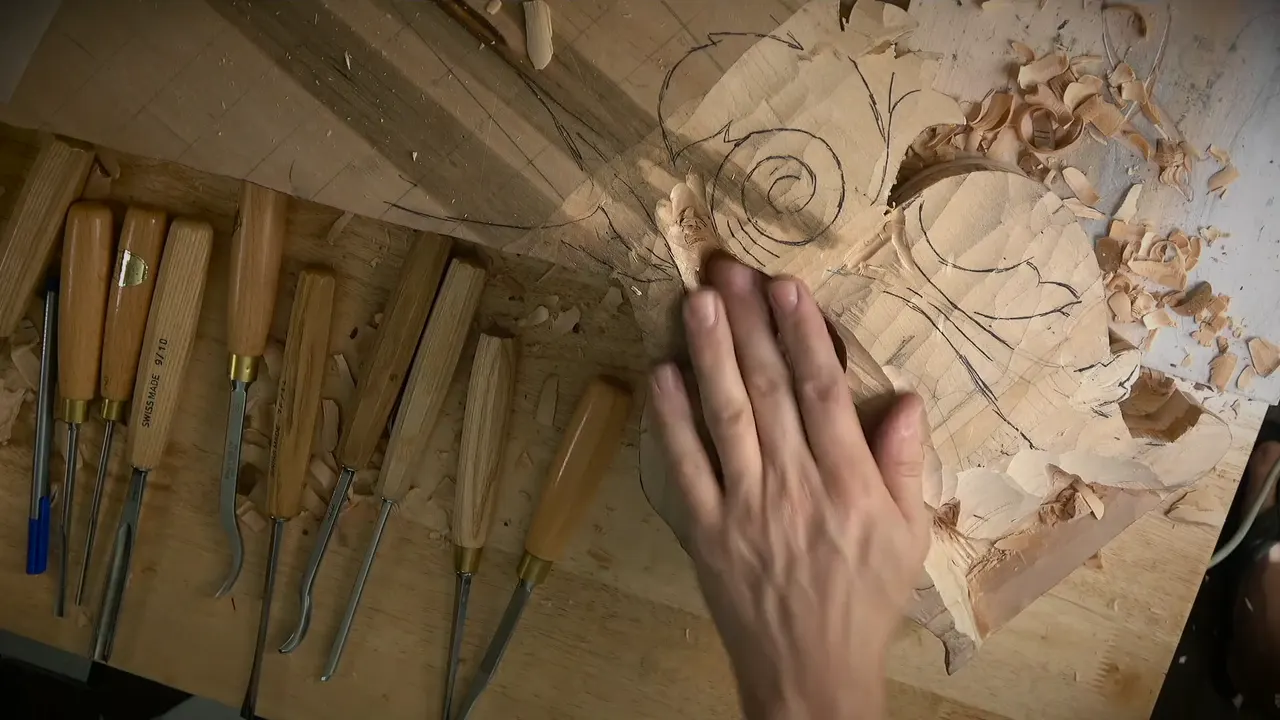

Much lower is my way of saying that one part of a carving has to sit well under the one next to it. Workshop 81, part 1 is where I used the words, a little under two minutes after I went around a volute with a number 11. Other lessons of mine use them for petals, the middle of a flower, a roll and a background.
Have you ever stood over a piece and known one spot had to drop, but not known how far? Can you point at the part that stays high and the part that falls away? Here are the places I said it, in my own lines, with the lesson each one comes from.
What did I say in part 1 of workshop 81?
I started with the tool. "Although probably safer would be just to use a number seven," I said, and not quite a minute later, "Well, I need to use probably a big gouge." Those are the first lines of the video.

The first number came next. "Lower that down like this," I said. "I still have to go down in this section about to the 5/8, 16 millimeters." At 3:25 came a plan to lower another section.

Then the volute. "So now I'll just go around this volute with, let me think, number 11, but I need the bigger one," I said. The size followed: "I could go with probably 12 millimeters" (a little under 1/2 in). The volute pass went on: "And this way, too."
At 6:16 I said "Well," and six seconds later came the line this page is named for: "that is going to go much lower." The line does not name the part. I turned to its neighbor next, and I said "I also need to make sure this part is also low, but not as low. I still have to figure out the right position of this section."

Two parts, two depths: one to drop far, the other to follow by a smaller drop.
How did part 2 handle measuring?
Part 2 opens with a plan. "What I want to do, I want to just lower down a little bit this section. So just around this, that way." I would use a big gouge. Around 1:14 I started on another section, and said "I'm going to measure again those spots, whatever I marked."

The idea was to carry whatever I got low on one section over to the other. It would get lowered there too. A check came next: "let me double-check" and then "I'm actually missing some stuff," a line I said twice. Then I said all of that would be repeating that section.

At 2:04: "let me get my pointing machine." More checks followed, and I said "Well, I need to re-measure it, I need to make sure," then "That doesn't work that way." At 3:57 came "And yes, now I got to the point right here."

A depth came after that. "Okay, and I have to drill approximately at three-quarter of an inch." The figure came twice (about 19 mm). From there I went to "double-check if I messed up. And yes, I did mess up."

At 5:01: "And yes, I'm right there. Really close. That's good." My next job: "now I have to just remove that section and just repeat whatever I've got right here, this section. I think one hole should be enough. I hope so, at least."

One more need came last: "And I also need to lower down, blend kind of this side also." Part 3 holds only a few words. "I'm also going to lower down this side to a quarter inch" (about 6 mm), "but let me first get a little closer to the design."

Is much lower a number or a guess?
In my lessons it is both, and I put a number on it when I can. On Floral and Molding, lesson 6, I said "let me mark that with a red marker" about the high spots. The middle of a flower came next. It was "lower and much lower pretty much. I have to measure it."
Then I took the words back a step, and the numbers moved while I talked: "Not much lower, but still lower, okay?" I put it near a quarter inch as far as I could see, then "maybe less, maybe about five millimeters," and then "No, it's actually a quarter inch" (6.35 mm). I closed with "So I'm safe to slope it."
The Chamomile and Bow Rosette lesson gives a number too: "let me get this high spot," then "that way I'll know exactly how much I have to remove." The answer was "about 10 millimeters, about three-eighths of an inch I need to remove." I added that this was "how much lower that thing" would be.

The waste was to be marked "all around," and I would take a "bigger tool." The tool was a number eight "and about 20 millimeters or so, about three-quarters of an inch," attacking "across the grain" to remove the waste.
The Lily Box, lesson 4 has two heights in one breath. I would "give about three-eighths of an inch above the surface," because I had a couple of movements in that section. The second part would run "much lower," at one-eighth of an inch (roughly 3 mm; three-eighths is about 9.5 mm).

Why stop short of the bottom?
Four lessons gave me four reasons. Workshop 89, part 4, has the first: I said one part would drop "much lower underneath." The next line took half of it back: "Not much lower, but lower."
My plan there was a number 11 at 3 millimeters (roughly 1/8 in), and "in this section, I don't want to go too deep." The feel I wanted was "just barely overlapping it." A number three came next in the plan, worked toward my previous pass and blended.

The flower in workshop 136, part 3, got this line: "I cannot be too deep in this section because you've got the high spot." Of another side I said "I can be as low as I wish," and added "but not too low." And then: "But much lower. I'll take 30 millimeters" (about 1 3/16 in).
Soon after, I said that part could stay "much lower." Another option came up: I "could probably go somewhat low right here, too, since I do have approximately half an inch on the opposite side." The figure I gave was "almost half an inch. Maybe about 12 millimeters." I ended on "that's probably the lowest I can go."

The lily box gives a different reason. "If you would ask me why I don't go all the way right here," I said, "that's a weak spot, and I'm not sure if there's glue even underneath because I placed the glue only right in the center line." Digging that far, I said, "I can break it."
A worry came up on the Furniture Panel. After I separated a flower from a small stem, I said I wanted to be sure that part was "much lower"; the next words were "But I don't want to lose overall feel." The height I named was "only about 16th of an inch high" (about 1.6 mm). Last, "But I'm not sure. There's a couple of ways I could approach it."

What is a lower part for?
A lower part makes room for the one that stays up. At the end of that 136 stretch I said that side of the flower would sit much lower; I also said "we're going to reveal the middle part. And I need the depth."
Workshop 148, part 2, puts it as a choice. "Do I want to keep it high," I asked, or drop it far? Most likely I would have to go much, much lower, I said, since the detail would now be "raised above." A second aim was "the head of acanthus, also more 3D," with a point kept "higher, I would say, than that molding."

That left one number: "maybe 10 millimeters from that surface" (about 3/8 in). My words for what it would give: my "future shell" was "going to look awesome."
Workshop 149, part 3, caught me changing my mind out loud. I said that section would sit at the same level as that part, "Or actually, no, it's going to be much lower." Then "But let me start. I'll use number 11 and 7 millimeters" (a bit over 1/4 in).

Toward one end I said the part would sink further, and that it would throw "a beautiful shadow." The spot right there could go lower too, since the next part would drop with it.
On Acanthus over Moldings, lesson 6, the petals were the low part. "I'm not gonna touch my volute," I said, and I planned to take the area around it first. The petals around it were to stay "much lower." For those I took a number nine.

The Furniture Panel, lesson 14 has a lower part that wraps. "I'm going to make this part as low as my background," I said, and it would be that background and "wrap around."

When does much lower mean a roll?
On workshop 53, part 4, it did. The "preliminary blending," as I called it, came first, and I asked out loud why it was preliminary. "Because it has to roll, and I have to make it lower, much lower." Moments later I said it would roll down, "which means I have to make it much lower."
Next came a hedge, "Maybe yes, maybe no," and then a word that I might roll it. Nothing was settled yet.

Workshop 62, part 4 has it early: "And make it much lower." Then "maybe I can actually go below that. But I'll use the number 11 right there, so it would make more sense." For the concave I said "I need to create the concave, and I'll use number 11 for that."
I also said I had kept "the extra thickness of this upper layer" and had not hit the glue. "Maybe I will, I don't know." It did not matter in this case, I said, because the piece would be "paint grade."

Workshop 70, part 10 gives a depth. "I went almost an inch deep. You don't see that, but it's almost one inch deep, like around 25 millimeters or so." Next I asked how I would do the undercut. I had to make sure, I said, that this part is "much lower."

Where did part 5 of workshop 81 land?
Part 5 goes back to the volute. "Around this volute, just to get with my number 11 and 7 millimeters," I said, and "carefully going to create a smooth transition down here like this. So all of that is going to be much lower." More care was part of it, too: I would be "more careful."
After that came a number, roughly a quarter inch (a bit over 6 mm), which I gave as "I've got about the quarter inch to that point." The pass would give "a really smooth transition," I said. Straight down with the number three was the plan.

Part 5 ends on a goal. "I want to make sure it's actually really looking clean and nice."
Which tool did I name beside it?
The rows below set the lessons side by side. Each one says where I said it and the tool I named. Where I gave a size, it is in the row.
| Lesson and part | The tool and the size that I named | My words |
|---|---|---|
| Workshop 81, part 1 | Big gouge first; then an 11, 12 millimeters, around the volute | "I need the bigger one" |
| Workshop 62, part 4 | An 11 at the lowered area; the same 11 again for the concave | "go below that" |
| Workshop 89, part 4 | Eleven and 3 millimeters first, with a number three after it | "lower underneath" |
| Workshop 149, part 3 | Eleven at 7 millimeters, working that section | "right here" |
| Floral and Molding 10 | Seven millimeters around the line, a little bigger than a quarter inch | "two millimeters" |
| Chamomile and Bow Rosette | Number eight at about 20 millimeters, across the grain, for the waste | "how much lower" |
| Acanthus over Moldings 6 | Nine for the petals around the volute, said as I took the area around it first | "which is around it" |
| Furniture Panel 19 | Eleven for the separation, then three at six millimeters | "about 16th of an inch" |

Lesson 10 of that molding course, part 2, has this: I said "7 millimeters," then "A little bigger than quarter of an inch." My path was "just go around the line," at "maybe couple millimeters deep, I would say." For the side next to it I said "much lower than two millimeters" (about 0.08 in).
Space was short there: "I do have a lower acanthus movement." Then, as I worked it, "so there is multiple ways of how you can work that side."
Where does this sit in the Venice Room?
This is one workshop of Part 7 of the Venice Room, and the lesson page is workshop 81. Workshop 80 comes right before it, and workshop 82 right after. The other workshops named here are 53, 62, 70, 89, 136, 148 and 149.
The molding course has its own course page, and so does Part 13 of the room. Does one part on your piece have to drop well past the rest? Can you tell how far, with a tool you trust? Then watch me take the first step, and the whole room sits behind one tuition plan.
How it's done
- Name the tool. A number seven would be safer, I said, and then I needed a big gouge, before I gave any depth.
- Give the first depth. About 5/8 of an inch, 16 millimeters, was the first depth I gave for one section.
- Check against my marks. Measuring the marked spots again was the plan, and I said I was missing some stuff.
- Name the neighbor. The next part would be low too, by less, with its position still to figure out.
- Plan one hole. I thought one hole should be enough, and said I hoped so, at least.
Frequently asked questions
Which part came right after that line in part 1?
Its neighbor. That part had to be low too, though by less than the first one, and its position was still open: I still had to figure it out, I said.
How deep did I plan to go in part 2?
"I have to drill approximately at three-quarter of an inch," I said, about 19 mm. Later I thought one hole would do, and hoped so.
Is the phrase a big number?
Sometimes it is small. For one part in workshop 89 I planned a number 11 at 3 millimeters (roughly 1/8 in), and in lesson 6 of the panel course the center of a flower came to about a quarter inch (6.35 mm).
What to carve next