

Alexander Grabovetskiy, woodcarver, School of Woodcarving · Published 2020
What does a wood carver mean by "more control"?
Quick answer: I picked a smaller tool in part 9 of workshop 81, for an area I called dense, and I said the smaller tool will give me more control. That same reason turns up in my Hashemi, Lily Box, Furniture Panel and Venice Room lessons, beside a one millimeter number 11, a close hand and a mallet.
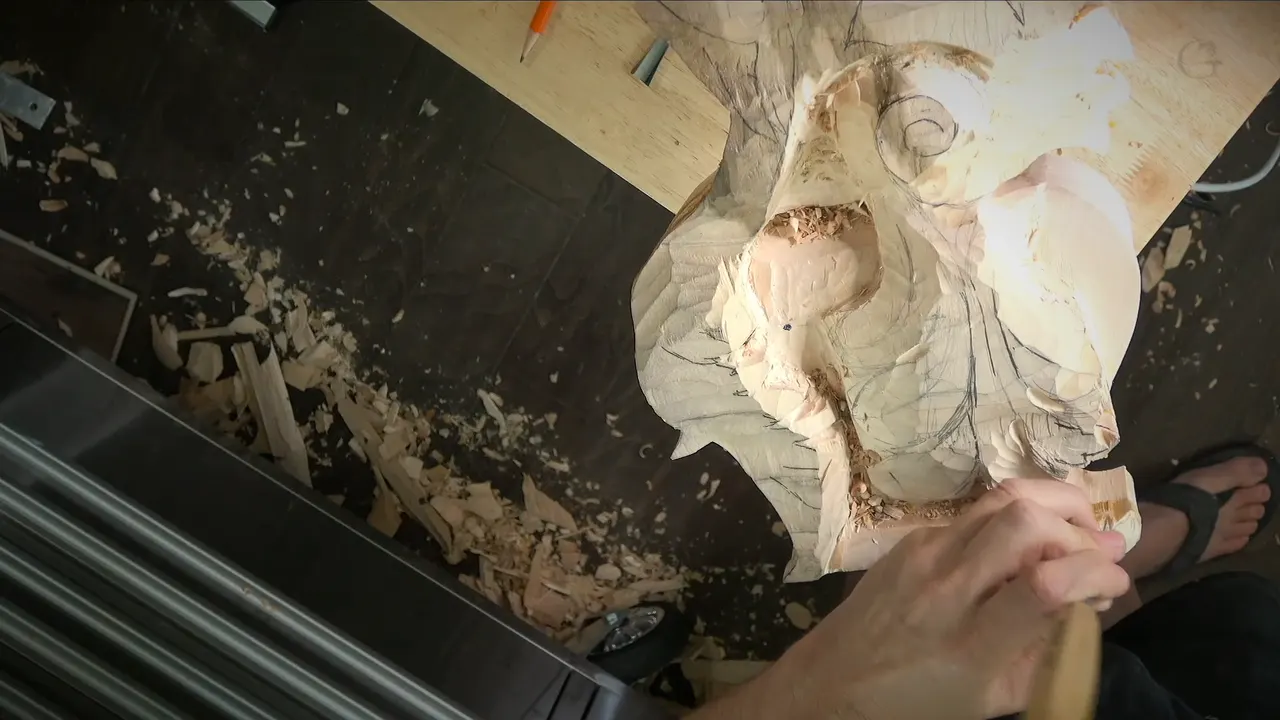

In part 9 of workshop 81 I move to a smaller tool, then tell you why. The same reason comes back in my other wood carving lessons, beside a very small gouge, a hand held near the blade, a short palm tool and a mallet. Every lesson I use is named below, with a link, so you can watch what I did each time.
What did I say in workshop 81, part 9?
The part opens on a plan. "Yes, there's going to be a separation." I told you I can relieve it, and "create pretty much right away the main shape of it." My first move was a plan as well: "Let me relieve that with a straight-down cut."

The piece was super huge and super heavy, and I held it in the vise only at the thickest part, which is really thick. About half an inch (13 mm) of stem held the rest. "It's not so stable," I said, but it was fine with me: "I have no problem with that whatsoever. I've done a lot of work with that."
Next came the shape. "I also going to probably roll it little bit this way, slightly." A little later, "let me get that separation." What I wanted from it: "let me refine that curvature. So we really want to see it really looking beautiful and like a really good flow."

Then the tool changed. Number 11 was my first thought, and I changed my mind in the same breath: "Well, actually, you know what? I'll use smaller one." The area was "kind of dense." Here is what I said about the smaller tool: "And smaller tool will give me a lot more control."
Then I pointed to the sound. "See? Even the way it cuts, you can hear it." Depth had a limit. "I cannot go too deep because I don't want to destroy the movement. It still has to be feeling like it's laying right on top of this movement." Another way in: "And I can attack from opposite side also."

Later in the part: "I'm probably going to need a spoon." My plan was a number 11 spoon of maybe seven millimeters (0.28 in), and I would work from there. "That is enough for now," I said, and "Later I'll get in and clean it little better." One more plan closes the part. I have to undercut underneath right here "and make appearance like it's just rolling, going that direction," with "number 11 and five millimeters" (0.2 in).
What did the other two videos of workshop 81 add?
Part 8 names a number nine of 14 millimeters (0.55 in) for a pass across the grain. Later in that video comes "just a number three and about 16 millimeters, five-eighths of an inch" (0.63 in). Part 10 has "I'm going to need smaller one, like maybe even two millimeters" (0.08 in), and further on, "probably three millimeters veiner, number 11," for a nicer transition downhill.


Does a smaller tool really give me more control?
Both sides show up in Hashemi Flowers 5. "Okay, I need to get a smaller tool to get on inside," I said, and I named the micro tool number three, "only about eighth of an inch" (about 3 mm). The price of a small tool, I said plainly: your process is "really slowing down." I explained it this way: "Because with the smaller tools, you are taking a lot less material out."
The other side came next in that same lesson: "But on the other hand, you do have a bunch more control." If time is not the biggest concern, I said, "sometimes with the smaller tools, you can get more accurate results." Then came my limit, and it has two parts: "Not in every case, though, okay? Because smaller tools leave much more marks." "You're going to see much more ridges."
In Hashemi Flowers 49 I planned to take the petal underneath another one. A V tool was one choice: "I could use actually a V tool," and it "will do exactly the same idea." Then: "But this one is just one millimeter, and I do have much more control." That tool, a number 11 gouge of one millimeter (0.04 in), came with "one millimeter and half millimeter. Same sequence." Half of that is 0.02 inch.

The half is optional, I said: "You don't have to have, by the way, a half a mil, but, in my opinion, if you do have it, it just creates beautiful deep cut."
The V tool comes back in part 2 of that lesson: "So it's possible to do the V tool cuts also." My choice there, I said, is "just number 11," for the control it gives at that point.
For Lily Box 10 I said, "Let me use probably 2 millimeters" (5/64 in), then "2 millimeters number 11," next "start digging underneath." "And I am wiggling," I told you. Next: "It just gives me much more control in area like this." A plan follows: "But I also need to check the backside."
A small knife turns up in Hashemi Flowers 7, part 5: "this small knife helps me actually a lot right now." In the next breath I named the control.
Over in Hashemi Flowers 12 comes a number five. The idea was "to make it round, I mean, like undercut underneath." "I'll take number seven again. Well, actually, no, I'll take number five." And then: "It's going to give me a little less sweep, and I can have more control."
The Furniture Panel 19 lesson, part 16, has a micro tool. chamfers come one by one, I said, "until I reach my fillet," which I called "like rounding corners." I began, "And why I'm using that micro tool," and gave the reason as control. An undercut was my next plan, and then: "A lot more control with the micro tool."

There is a limit in Furniture Panel 29. A little earlier I had named "number 11 and two millimeters" (0.079 in). My own movement with that tool, as I put it, is "more like a jewelry technique when you're doing a metal work with a jewelry," and it will give you control. I held myself back, too: "So sometimes it works with small tools," and "sometimes, not always, okay, just sometimes."

Where does my hand go to get more control?
My hands covered the work in Venice Room 7, part 5, and I said so: "I understand that I am covering some of it with my hands when I'm carving." Then the rule: "Usually you have to hold it closer to the blade." I was talking about the position of that hand. "So the closer you get, the more control you get."

The Roman Acanthus 7 lesson says the same, as I worked along the side of a pipe. "I'm always holding my hand really close to the edge of the tool. That way, I can control that more accurately." The closer I hold it to the edge, I said, the more control I get, and "I can actually do really long, continuous cuts all the way if I need to." Then, "And that is good."

My Woodcarving Techniques Q and A course has a video on swapping hands. On swapping hands: "I just rotate the tool," and "You can practice that." A really fun trick, I called it. The point about control: "the closer to the blade you hold your second hand, more cleaner cut is going to be, more control."
In Lily Box 12, part 4, the tool is short. "This number seven is actually just a palmar tool with a short handle. Really handy to use on the flowers like this." Held "upside down," it "just fits my hand perfectly." "I can get really close to the edge of the tool, and I can work really tiny details," I said.

The flowers were fragile. Full-size tools work on them, I said: "Absolutely no problem." Still, with fragile flowers I said it is better to work near the detail, for more control, and I asked you to see how close my finger can get.
The Dining Table Apron course, workshop 11, has a palm V-tool: "I get a little more control with the palm one." You're "not supposed to hit that with the mallet," I said. With the mallet "barely touching," I get control of the tool that way.

When does a mallet add control?
Another video of that lesson, part 11, had me decide where to outline first. "And maybe it is safer if I would do it with the help of a mallet. Because mallet is always more control."

A small mallet appears in Hashemi Flowers 21, part 2: "I probably even could use a small mallet." And "Okay, just carefully, barely hitting." The gain, in my words, is "I can actually control better my cut."
Venice Room 105 says it in more words. At one spot I was going a little deeper, and "even by hand, it's still doable." Still: "But I kind of like a mallet." "I can control my tool" with it, I said, and "I think it's much quicker." And "At least for me." The tool does not have to match mine: "Whatever you have, you can do with any type of tool."

In Venice Room 149 I planned a number nine of 20 millimeters (0.79 in). "Although I need probably to use a mallet." And "I'm going to just do across the grain. It is always safer." The gain I named was control.

The grain comes up again in Greek Acanthus 15. I took my V tool and said, "Just go around carefully, like I said, without forcing," and "try to hold your gouge parallel to the true surface which you want to achieve." About the pass: "So I feel much more safer that way, much more controlled that way."
Small tool and mallet meet in Lily Box 7. "Now I can get probably one millimeter first," I said, one millimeter on the number 11 (1/25 in). Then: "Maybe I can use a mallet," and "carefully I can start undercutting." Next, "I could actually use even two millimeters, I think, right here" (0.079 in).
What else helps with control besides the tool in my hand?
Part of it is a way of carving. In Furniture Panel 36 I said, "I'm gonna place it straight down and I'm gonna create multiple plug cuts." A limit: "But there is limitation when I'm using that technique." Still, I found the plug cut brings more control, and it shows in "how sharp the edge is gonna look."

Drawing with a pencil counts as well. At Venice Room 101: "On the paper, it's a lot more forgiving." I added that "I can actually just continue that line with no problem all the way." I feel more control comes "if I'm doing a lot shorter strokes when I'm drawing like this." On older pictures, I said, "they would just use a bunch of small strokes like that and then they would connect that."

Going against the grain is the last case. In Greek Acanthus 11 a line was "not too even," and "somewhat wavy." I reached for "just the number three," worked "little by little," and said, "although I'm doing against the grain, which I'm not supposed to, but I have more control on a flow."

Which lessons say it?
Here is each lesson in one place, with the tool or the hold and what I was doing.
| Lesson and part | What I was holding or doing | Kind of control |
|---|---|---|
| Workshop 81.9 | A smaller tool for a spot that felt kind of dense | Tool size |
| Hashemi 49.1 | A number 11 of one millimeter under a petal | Tiny tool |
| Lily Box 10.12 | A two millimeter number 11 digging underneath | Small tool, wiggling |
| Hashemi 12.6 | A number five with a little less sweep | A smaller sweep |
| Panel 19.16 | A micro tool taking chamfers toward a rounded edge | Micro tool |
| Venice 7.5 | A hand brought in closer | Hand position |
| Roman Acanthus 7.1 | A hand close by the tool edge, along a pipe | Hand placement |
| Lily Box 12.4 | A short palm tool on fragile flowers | Short handle |
| Dining Apron 11 | A palm V-tool with a mallet barely touching | Palm tool and mallet |
| Venice 105.1 | A mallet, at a spot going a little deeper | Mallet |
| Panel 36.2 | Plug cuts made with the tool placed straight down | Technique |
| Venice 101.6 | Pencil strokes kept short while drawing | Drawing |
Where does this sit in the Venice Room?
This is one workshop of Venice Room Part 7, a course on Venetian style wood carving. Its lesson page is workshop 81. Workshop 80 comes before it and workshop 82 after it.
Have you ever put a gouge on a spot and felt the tool run ahead of you? Where was your other hand? Then watch me do it, and the whole room sits behind one tuition plan.
How it's done
- Pick the smaller tool. In this part I went for a smaller tool where the wood felt dense.
- Watch the depth. "I cannot go too deep because I don't want to destroy the movement," I said. It still has to feel like it is laying right on top.
- Move your hand to the blade. "So the closer you get, the more control you get," I said in the first Venice Room course.
- Try a palm tool on fragile flowers. The number seven with the short handle, in the flower lesson of the Lily Box course, I called "really handy to use on the flowers like this."
- Ask about a mallet. "And maybe it is safer if I would do it with the help of a mallet," I said in part 11 of the Furniture Panel lesson.
Frequently asked questions
Which tool did I plan after the smaller one in workshop 81?
I planned a number 11 spoon of maybe seven millimeters (0.28 in), and later a number 11, five millimeters (0.2 in), to undercut underneath. Before that I chose a smaller one.
How close do I hold my second hand to the blade?
Near the blade, the way I said it in Venice Room 7. The Techniques Q and A video on swapping hands adds that the closer you hold the second hand, the cleaner the cut.
How small a tool did I name for control?
One millimeter (0.04 in) in Hashemi Flowers 49, on a number 11, with a half millimeter (0.02 in) after it. In Lily Box lesson 10 it was 2 millimeters (about 0.08 in) on a number 11. The micro tool number three in lesson 5 of the Hashemi course is "only about eighth of an inch" (about 3 mm).
What to carve next