

Alexander Grabovetskiy, woodcarver, School of Woodcarving · Published 2020
What does a wood carver mean by "clean and nice"?
Quick answer: In workshop 81, part 5, I named the goal for one area: a look I call really clean, topped with nice. Before it I planned a little more cleaning, then the overall shape. The same words come back in my Venice Room, Furniture Panel, Lily Box, Hashemi and grape leaf lessons.
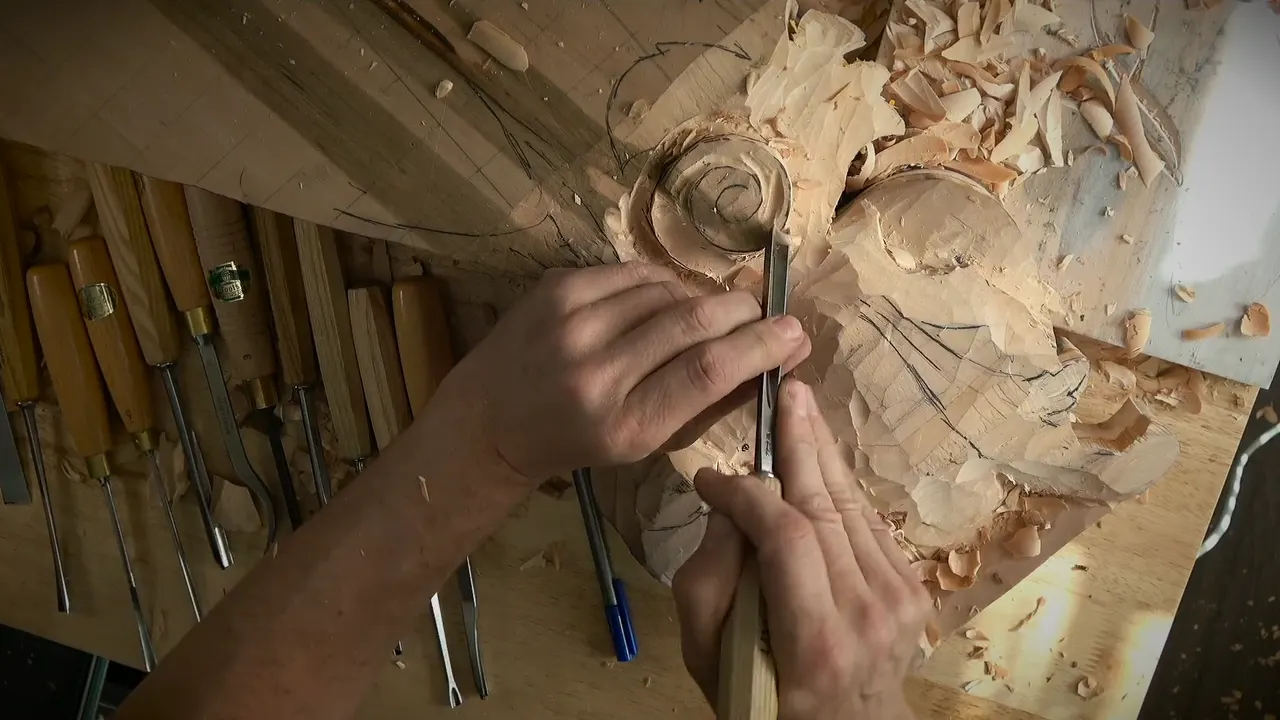

In part 5 of workshop 81 I say what I want from one area: "I want to make sure it's actually really looking clean and nice." I said it about a spot I was still working on. Those words turn up in other lessons of mine, and each lesson I draw on is named below.
Does a carving need sandpaper to look finished? Can anyone tell a clean cut from across the room, or only the carver holding the tool? My own lines on both are below.
What did I say about the area in workshop 81?
The part is short. My plan is to go "around this volute" with "my number 11 and 7 millimeters" (0.28 in), a gouge size. I am "carefully going to create a smooth transition down here like this." Of the whole area, "all of that is going to be much lower."

More care is coming. Further on, "I've got about the quarter inch to that point" (6.35 mm). Its effect, "it's going to create a really smooth transition."
The number three has a plan of its own, "I'm going to just make it straight down cut with the number three."

Now the piece itself. "I remounted my piece." In my carver's vice, "I can rotate really easily." The view is another matter, "a little wobbly" and "hard to watch, probably, on TV." But for me, "it's a lot more convenient to work around."

Then the area itself. "I'm still working on this area. I'm still going to clean a little bit, and then we're going to develop overall shape." For me, "the goal right now" is the area "really looking clean." The words "and nice" end the line. Last, "So that is my goal." Here ends my part, and everything below comes from other lessons, where I wanted a surface to look that way.
How do I get a cut that comes out clean?
The grape leaf vase course, lesson 2, part 3, starts with the grain, "the grain runs toward that concave cut." Hence "that's why I attack from both sides." The cut comes out "really clean." Add "nice cut." Soon after, I plan to "speed up the video," since the work is the same on each side.

Part 9 of workshop 59 carries the same idea with an angle. You "just change the side or angle from which you attack, and go that direction, opposite direction." That way the cut is "really clean." Closing the sentence is "nice cut." A thumb helps, "with my finger, with my thumb." The shadow "should give you an idea that development is becoming more and more beautiful."

A plan sits in workshop 34, part 9. "Let me use spoon, number seven, and clean this way." It leaves "a really clean" cut. After that, "beautiful spot."

Lily Box lesson 4, part 8, has a line about polish. "I can use that to make that surface really clean," the same line ends "nice, almost polished." Then the camera comes up, "I do understand on a camera, it's not always the same like in real life." Also "Sometimes even photo shows better than a video I'm doing."
Of the surface itself, I say it "is really nice and clean," and then I hold myself back, "don't want to overdo it."

Edge work appears in workshop 6, part 12. "Be careful," I say. "I'm using only edge of my tool." The surface "just becomes really, really clean." A little later, "Becomes really nice and clean," with "Both sides."
Sharp tools come up in workshop 19, part 7, where I mention the cuts I made before I sharpened. "When I'm using that tool, it doesn't leave any marks." The finish is "nice shiny finish." A check by hand follows, "I'm always checking with the finger." You "can detect if it needs to be sharpened," and a dull tool "develops some kind of wire sometimes, wire edge."

Does a clean surface need sandpaper?
Sandpaper gets its answer in workshop 54, part 12, for one cut. "And I don't need to use any sandpaper or anything." About that cut I say "really clean" first, and "nice out of the chisel" follows. Next, "now I need to recreate my divisions and my point."

Workshop 33, part 5, goes the same way. It starts "Okay, really clean." On sanding, "I even don't need to sand or do anything to it. I probably will, but I really don't have to."
A tool choice follows, "I could actually use a short bend in this case." Then "Short bend number 11," "use it sideways," and "Maybe number 11 and 10 millimeters" (0.39 in).
In the curly kitchen cutting board course, workshop 5, part 3, I say "just clean it until your cut is clean." After it comes "nice without any sanding." I also say I will "clean that nicely."
Air is the test. "That is the reason why I'm actually blowing." And "when I'm just blowing on a piece of carving and everything flies out, that means the cut is clean if nothing stays right there."

Chips are the subject in workshop 23, part 3. "All just chips. Now it's all clean." What it takes is "just probably blow that a little bit with the compressor."

Furniture Panel 19, part 4, adds a check by hand. "Now there is no heel." Then "Now it's all clean." Asked how I know, "I can see it." And "I know camera doesn't show it, but you really can see it."
Eye and finger both count. "Your eye can detect, and especially your finger can detect." The finger, I say, is "actually one of the best gauging system," and "you can detect really paper-thin movements." At last, "there was a bump, and now there is no bump."

What about the spots nobody sees?
Deep underneath is where workshop 48, part 2, goes. "Just because I had that plug removed, for me, it's easy right now to get really deep underneath." The surface I create is "really clean." "Even if you don't see it," I say, it will be clean. Next, "Let me attack it from this side," and "remove all that junk out."

Inside a curve, workshop 67, part 9, has this. "You don't see it, but it's looking really clean." The same sentence ends with "nice on inside," and then comes the next move. Then "let me get little higher and do exactly the same right here."
For the inside I say "create that roundness on inside," because "I don't really want to see that mess on the side, and I don't need sharp points." My verdict, "just gorgeous, actually."

A vacuum cleaner appears in workshop 71, part 10. "I'm not sure if you're able to see that or not, but it is really clean." Next, "I need to get all that junk out," and "I'll take it out a little later with the vacuum cleaner."
From workshop 162, part 2, comes a line about who looks. The spot is "visible from that point of view," and "nobody's going to look inside." I grant the clean look, "nice, but it's going to be safer for me."

The tool is named too, "Seven millimeters, that's what I'm using" (about 9/32 in), "Number 11, of course." After that, "I'll take number two and about 5/8 of an inch" (about 16 mm).
Workshop 82, part 8, has a plan. "I'm just after really smooth form." I mean to work my way in "with the flatter tool" and "clean that surface." It ends "Clean" with "nice right underneath" after it. In a spot like that, "I can do only with the really small, tiny tools."

Over in workshop 70, part 9, the spot stays visible. So "I have to make sure" it is clean, with "nice" joining it. The number 11s get a mention, "That's why I like those number 11s. It gives me beautiful transition."
Two cuts appear in workshop 89, part 11, where I am "doing both sides on this side." "I'll attack that with the grounding tool, 16th of an inch between those two cuts" (1.6 mm). The point between them gets "really clean" first, then "nice transition point." Then "Beautiful transition point." My next tool is "just the number 11," sized "two millimeters" (0.08 in).

Lily Box 8, part 10, has a line close to the one in workshop 81. "Inner wall of this one, okay? I want to make sure it looks really clean." Right behind it is "nice." Next I weigh a change, "what I could do, I could attack that from this side and create a opening."

When do I leave a spot for later?
The other side of the same job turns up in workshop 16, part 8, where I say what I am after. "What I need is just semi-clean surface movement." About the shape, "I really don't have to worry about how clean," then the sentence runs on, "nice in shape that is." Then "Just get rid of the high spots."

Panel lesson 15, part 12, warns me off, "don't try to get too clean, okay?" "Because we still have to work on those details." There is "plenty of time to make it absolutely clean," then "nice" last. "Just get as close as possible, but don't overdo it."

Furniture Panel 20, part 9, has this. I do not have to worry too much about this area as of now, "because we still have to develop that part." I will have "a chance to make it look really clean," plus "nice" at the finish.
A leaf "taking shape" is the subject of part 7 in workshop 25. "I know it's not the final form because it doesn't look too clean." The words after it are "nice, but I will clean it," and then my plan, "I'll make it to the perfection."

Hashemi Flowers 17, part 2, puts the final pass off. "I will need to clean that to make it look clean." Then comes "nice." The final cleaning waits "once I establish this piece right here."
What comes first, "I want to develop another leaf on the inside curling out, and then I'll clean everything." For now, "I just pre-establish my form," and the cleaning waits.

When does a whole carving look this way?
Finished pieces get there in workshop 21, part 11. "When almost everything is done, I'm spending a few days, actually, just to clean everything and just refine everything and get to the edge, and so on."
So my pictures "look all clean," "nice" sits on the end. Cleaning itself is plain work, "there's nothing special." "All you do, just clean," the word repeats, "and clean again. That's it."
"Make it perfect." Then I correct myself, "Or I shouldn't say that." "Almost perfect, I should say." "Because it's never perfect." And "At least my work is never perfect."

Panel lesson 22, part 3, holds a cut that is "supposed to be really clean," followed by "nice cut." I left "barely a half a millimeter of paper right on the ridge" (0.02 in). "That way I know I did not mess up."

In the April 2020 livestream questions and answers I say "off-camera, of course, I'm going to spend a little more time and clean inside and stuff like this and get rid of all those facets." Later the inside will be "really clean," then "nice" on top.
Which lessons say it?
Some of the lessons are in the table below, each with the lesson and part, what I was doing, and a few of my own words.
| Lesson and part | What I was doing in that part | Words |
|---|---|---|
| This part, 81.5 | A number 11 around a volute with a smooth drop | "around this volute" |
| Venice Room 59, ninth part | Changing the side or the angle I attack from | "opposite direction" |
| Vase lesson 2, third part | Attacking a concave cut from either side | "that concave cut" |
| Fifth part of workshop 33 | A surface that needs no sanding unless I choose it | "or do anything to it" |
| The fourth part of panel lesson 19 | Checking a spot with the eye and then a finger | "paper-thin movements" |
| Seventh part, Venice Room 25 | A leaf that is not yet in its final form | "the perfection" |
| Hashemi lesson 17, second part | Final cleaning kept for after the form is set | "pre-establish my form" |
| Venice Room 71, tenth part | Chips inside a carving and a vacuum cleaner to pull them out | "vacuum cleaner" |
Where does this sit in the Venice Room?
This is one workshop of Part 7 of the Venice Room, and the lesson page is workshop 81. Right before it sits workshop 80.
The Furniture Panel lessons named here are 15, 19, 20 and 22. The Venice Room lessons are 6, 16, 19, 21, 23 and 25.
Do you have a surface you call clean? Could you check it with your finger, then with a puff of compressed air, before you reach for sandpaper? Then watch me do it, and the whole room sits behind one tuition plan.
How it's done
- Change the side you attack from. Workshop 59 gives the direction. You go at the cut from the opposite side.
- Attack from both sides. The vase lesson does it when the grain runs toward a concave cut.
- Check with the finger. Workshop 19 has me checking by touch whether a tool needs sharpening.
- Blow on it. Everything flies out and nothing stays, and that is my test in the board course.
- Leave the last clean for later. The Hashemi lesson holds the final cleaning back until the piece is established.
Frequently asked questions
Is my vice wobbly in the fifth part?
I said I remounted the piece and can turn it with ease, though it is a little wobbly and hard to watch on TV. For me, I said, it is more convenient to work around.
When is sanding skipped on a clean cut?
Workshop 54 had one cut that needed none. In workshop 33 I said I probably would sand but did not have to.
How can you check that a surface is clean?
The panel course, lesson 19, names the eye and the finger. The board course has me blowing on the carving, and if nothing stays behind, I call it clean.
What do I say when a spot is not ready yet?
What to carve next