

Alexander Grabovetskiy, woodcarver, School of Woodcarving · Published 2020
What is a number 11 gouge at seven millimeters used for?
Quick answer: In part 6 of workshop 81 I name some cleaning, a number 11, a sorry and the width: seven millimeters. Across other lessons the same tool outlines, excavates, starts an eye, undercuts and cleans. I also say when it is too big.
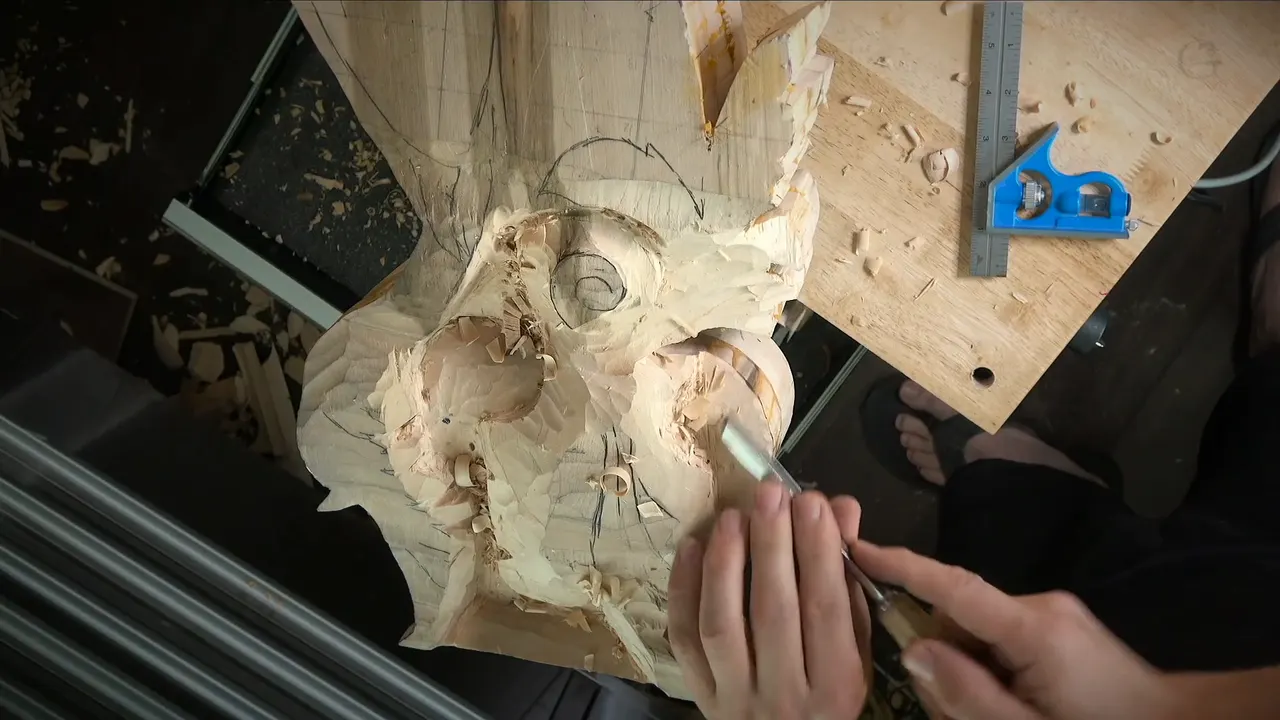

"I need to clean it a little bit with number 11, I'm sorry, seven millimeters." That is the whole of part 6 in workshop 81. The number 11 comes first, then a sorry, then the width. The width, 7 millimeters (0.28 in), names the tool this page follows through the Venice Room.
Where does a number 11 of that width earn its place? Is it a gouge for the first outline, or for the last clean-up? Below are my own words from the Venice Room, the Lily Box and the Acanthus over Moldings course, each one linked so you can watch it happen.
What did I say about it in workshop 81?
My part runs two lines. The first one is about cleaning, just a little, and I do not say what "it" is. The second says sorry, gives the width, and the part ends.

The parts on both sides carry the same tool. Around a volute, part 5 plans a smooth transition and names the tool "my number 11 and 7 millimeters." Next to it, part 7 plans the eyes: "I'll take number 11 and the 7 millimeters" to "preliminary excavate the position of the eyes."

How big is seven millimeters?
My round figure sits in workshop 57, part 1: "just about 1 millimeter bigger than a quarter inch," with "to be exact" right before it. The arithmetic is short. One millimeter is 0.04 in, a quarter inch is 6.35 mm, and 7 mm (0.28 in) stands 0.65 mm above that quarter inch.
Fractions are my second way. Over in workshop 53, part 5, I say "32nds of an inch" and add "if it's easier for you that way." One 32nd of an inch is 0.79 mm.
Readers in the United States get a third line, in workshop 49 (part 8): slightly bigger than a quarter inch "if you are in the United States."
What jobs did I give a number 11 at seven millimeters?
Outlining is one job. In the fourth part of workshop 49 I say "I'm actually just outlining first" and then once more, "Just outlining."

After a "by the way" I name the width in workshop 148, part 3, and add "Of course, number 11." The part I plan to outline "is going to go all the way down."
A careful outline sits in workshop 62 (part 9). The outline is planned "but carefully," along "just the sides of it."
A better line is the aim in workshop 116, part 2: "Let me use seven millimeters," and then "little nicer outline cut."
Excavating is another job. Lily Box 8, part 1, starts with a "bigger number 11, let's say about seven millimeters." Next is a test: "Let's see if seven millimeters will work," I say, and then "excavate like this."

A veiner of this width does the same in workshop 70, part 4. The plan is "little deeper excavation right here," and the verdict is "perfect."
The eyes of an acanthus leaf are a third. My reason for picking it in workshop 50, part 2, is "to create those eyes." I stop to call it a veiner, and the first step is a "preliminary cut."
An eye shows up in a plan in workshop 117, part 3: this width goes first, to "get that eye a little bigger."
The concave is on the list, and there I hedge. Workshop 118, part 1, says "probably seven millimeters," then gives a doubt, "I don't know, maybe 10." A test with 10 millimeters (0.39 in) is next, to "see if it is going to work or not."
No hedge appears in workshop 155, part 2. The plan is to start my first concave and "bring that concave kind of low."
The side of the tool counts too, and workshop 26, part 6, has "just the side of the tool" for "little cleaner on inside," and for "little deeper."

Over in workshop 25, part 6, the side is used again, to "shape slightly" ahead of "a subdivision," with "a really nice transition to it" as the aim.
The pick for workshop 37, part 3, is "a spoon, a short bend," held "just sideways." A chance to "excavate underneath this shelf" comes later.
A convex middle is on it as well: workshop 23, part 1, has me "able to create just convex in the middle" with this tool.

Veins belong here. Look at workshop 52, part 8: "movements to create the veins in acanthus," and a plan to "relieve those triangles."
Undercutting is a job for it, and workshop 71, part 10, calls the tool "bigger" before softening it, "it's not really big." The line ends on a plan, "it's going to be undercut this way."
Cleaning is one more. "I can clean it," I say in workshop 66, part 6, "Otherwise, it's just a little too messy." Workshop 31 (part 4) pairs a "maybe" at this width with "clean inside."
Side cuts are on the list: workshop 140, part 1, plans a smaller tool and names the job, "get right on the side cuts."
A boundary also fits. I plan to get in carefully in workshop 33 (part 8), and I call the result "my main preliminary boundary."

Separations fit too: workshop 53, part 4, plans "preliminary separations" with "a smaller tool, about seven millimeters, I would say." After that I count, "Okay, one."
Slope is listed as well. Try workshop 21, part 5: the width "will work really good," with "or even bigger one" added, and a chance to "create a little more slope" after it.
A ridge is a reason too. About the ridge I want, workshop 57, part 12, has "I'm going to roll it little later," and for that I am "creating little deeper concave."
When is seven millimeters too big?
At times I doubt it before the first pass, as in workshop 70, part 6: "Maybe seven millimeters is too big. We'll see." Undercutting follows, and I ask you to "just watch what I'm doing."

A swap shows in workshop 39, part 5. The tool "looks like it's a little too big at this point," so my plan is five millimeters (0.20 in), a number 11 as well, "of course."

Short and plain, workshop 42, part 1, says "it's too big" and ends on a need, to "switch to smaller one."
Both sides show up in workshop 54, part 2. "Seven millimeters was little too big. But five millimeters is perfect." I also have to go "all the way to the hole," and it "creates beautiful shadow around this main element."

Narrow spots decide it too, and workshop 64, part 3, has me saying "I can't get underneath of here" with the 7. Four millimeters (0.16 in) is "little bigger than eighth of an inch," and "I'm able to." An eighth of an inch is 3.2 mm.

The swap runs downward as well. Workshop 69, part 8, has "That's too big right now," and then I take the 7 to "take out whatever I don't need."
Depth has a limit, too: in workshop 59, part 6, I say "not too deep" and give the reason, "I have a development yet to do, another leaf."
Why did I choose it in the first place?
Marks are one reason, and that same lesson says it plainly: "I don't want to create extra marks with a smaller tool."
A pair of lines to save is another: workshop 124, part 2, has "I don't want to lose that line and that line." A plan to "dig out little more" follows, and the verdict comes after: "Now I've got my line."

Reuse is a third reason. The Acanthus over Moldings course, lesson 4, part 1, has "exactly the same what I used previously," and lesson 1, part 3, has "Seven millimeters is also going to work."

A veiner and a spoon gouge can share a job; workshop 22, part 5, says "Spoon gouge or spoon veiner will work the same," and I take the veiner to "create my cut."
Checking out loud in workshop 31, part 1, I ask "Did I use seven millimeters" and find a "seven-millimeter spoon" that I do have, with a plan to "match the profile."
A deeper pass is a reason as well. A "smaller spoon" in workshop 143, part 1, will "go deeper even more," and I say "Attack from two sides." The shadow I expect is "really awesome."

A mallet comes up in workshop 24, part 8: "maybe actually, I could use mallet for that." A warning follows, "it's moving the whole thing," and I say "I have to be careful how I do it."
Leverage matters too, as workshop 66, part 10, shows. "Maybe seven millimeters will work," I say, then add "I do have a leverage on this point" and give a rule, "it's always better to protect with the other piece of wood if you do have it."
A camera has a say in workshop 162, part 2, where I admit "it's not the best way to do it." Walking around the piece would mean "I'm going to cover my cameras."
What if my seven millimeters goes dull?
Out loud, I say so. In workshop 158, part 1, the tool is there to "get rid of some of that mess." The next line is "It looks like my seven millimeters needs to be sharpened."

The options come in workshop 159, part 2: "sharpened or buffed or stropped." "I'll just strop it," I say, which is a plan, and a strop sits at the end of sharpening.
The reason is in workshop 61, part 4. Of my tools I say "they really must be sharp," and a dull one fails me.
Buffing gets its word in workshop 59, part 5, where I say "I will need to sharpen it" and fix that to buffing in the next breath.
What does "I'm sorry" do in that line?
Workshop 56, part 8, runs "I'll use number seven" and then "I'm sorry, seven millimeters, number 11 veiner." After it I plan to "chop little by little" and to be "really careful."

The same turn comes in workshop 68, part 7: "number 11, seven millimeters, like a quarter inch." Next I say "let me start," with "a little more accurate" cuts promised.
So in my own part the sorry sits where it sits in these two. A number comes, a sorry follows, and then the size. I give no reason.
A smaller tool is the other thing I ask for, and in workshop 29 (part 8) I say "I need smaller" and mention seven millimeters as a maybe.
Which lessons say it?
Some of the lessons are in the table below, each with the lesson and part, what I was doing, and a few of my own words.
| Lesson and part | What I was doing with it | Words |
|---|---|---|
| This part, 81.6 | Some cleaning, a number 11, then a sorry and the width | "I'm sorry" |
| Fourth part of Venice Room 49 | Outlining first with the same tool | "just outlining" |
| Second part, Venice Room 54 | Too big once, then a smaller tool | "five millimeters is perfect" |
| Venice Room 56, eighth part | A number first, a sorry, then the width again | "number 11 veiner" |
| The third part of Venice Room 64 | A narrow spot where the tool does not fit | "get underneath" |
| Venice Room 124 (part 2) | Digging out a little more while keeping both of two lines | "Now I've got my line" |
| From Venice Room 143 | A spoon for a deeper pass from two sides | "awesome shadow" |
| Eighth part, Venice Room 33 | Naming the first careful line a boundary | "main preliminary boundary" |
| In Venice Room 66, the tenth part | A strong hold on a big chunk, and a spare block of wood to protect it | "protect with the other piece" |
| Part 1 of Venice Room 158 | A dull edge that needs sharpening before the next pass | "needs to be sharpened" |
Where does this sit in the Venice Room?
This is one workshop of Part 7 of the Venice Room, and the lesson page is workshop 81. Right before it sits workshop 80, and right after it workshop 82.
The Venice Room lessons named here are 21, 22, 24, 25, 26, 29, 31, 33, 37, 39, 42, 49, 50, 52, 53, 54, 56, 59, 61, 62, 64, 66, 68, 69, 70, 71, 116, 117, 118, 124, 140, 143, 148, 155, 158, 159, 162.
Do you own a number 11 near this width? Could you try it on an outline, then on an eye, before you decide the size is wrong? Then watch me do it, and the whole room sits behind one tuition plan.
How it's done
- Name the tool and its width. Say number 11 first and the width after it, the order my part uses.
- Try it on the outline. Workshop 49 starts there, and I call it "just outlining."
- Switch when it is too big. Workshop 39 plans five millimeters, and workshop 64 reaches four.
- Keep the lines you want. Workshop 124 uses it so two lines stay.
- Sharpen it when it drags. Workshops 158 and 159 say the tool needs sharpening.
Frequently asked questions
What does the sorry in part 6 do?
I name a number 11, say sorry, and give the width. I do not say why.
How big is seven millimeters in inches?
It is 0.276 in. In workshop 57 I put it just about 1 millimeter over a quarter inch (6.35 mm).
When is seven millimeters too big?
Workshop 39 swaps to five millimeters (0.20 in). Workshop 64 reaches four (0.16 in) where this width cannot get underneath.
Does this tool only outline?
What to carve next