

Alexander Grabovetskiy, woodcarver, School of Woodcarving · Published 2020
What does a wood carver mean by "a shallow cut"?
Quick answer: A shallow cut is what I planned first in part 11 of workshop 81, right after I spoke of a wrong cut, in the Venice Room. The same words turn up in my Furniture Panel, Butterflies, Tray of Blessing and Modern Acanthus lessons, each with its link below.
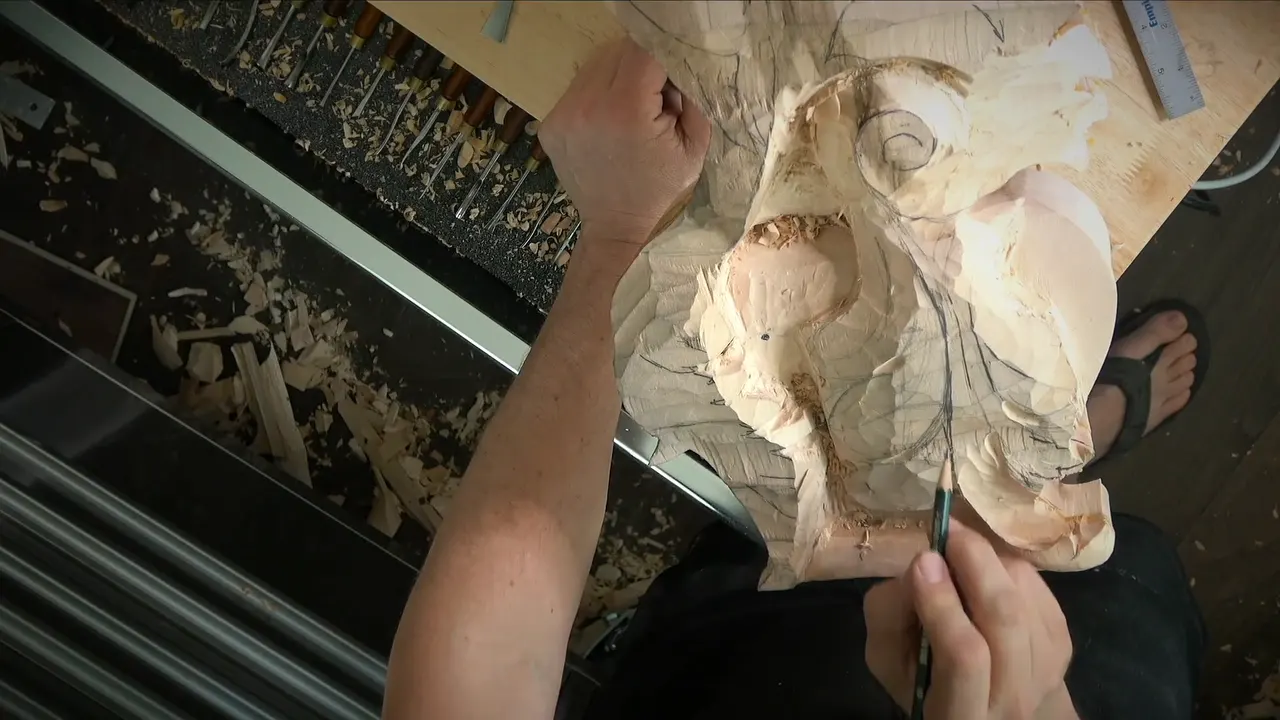
A shallow cut was the first thing I planned in workshop 81, part 11. This kind of cut comes up in my wood carving lessons on the Furniture Panel, the Butterflies plate, the Tray and the Modern Acanthus. Each lesson is named below with a link, so you can watch the cut yourself.

What did I say before the shallow cut in workshop 81, part 11?
It starts with "That's going to be gone." Next: "But let me jump right now on this movement." A cut came first. "So what I want to do, I want to create somewhat like a cut with the veiner and create the feel." I was not sure of it. "Although, I don't know, maybe yes, maybe no. More yes than no."
Next, in my words: "I apologize, I have to think before I cut. So it's an art of deduction pretty much. And if I'll make a cut and it's a wrong cut, that would not be nice."

What came with the shallow cut in part 11?
"I'll create a shallow cut first, not that deep." A job followed. "And I need to find some high spots. Make it kind of smooth and nice. All right. So that is the cut which separates sections."
From there the part turns to a pipe and an eye, and I said this about it: "It's a really interesting detail, but it's authentic." I added: "I looked at some of the pictures of ancient, not ancient, but medieval designs and so on, some rooms in palaces and so on."

A plan for the pipe followed. "But to create that pipe, I need to create the concaves. All right?" Next: "Even if I have to lower down a little bit the middle section, I'm okay with that."
How deep did the part go after the shallow cut?
My tool was a plan too. "But I'll take preliminary tool, which is going to be, again, just number 11. And I'll carry that all the way down like that." A remark about the area came next. "Very interesting. This area is kind of dense." The depth changed too: "And in this section, I can actually get a little deeper."

The view was a problem. "Maybe I have to change the position how I carve it because it's not really convenient for me. I'm just covering with my hands and you don't see what I'm doing." The next words were "And yes, I'll get much deeper."

On the pipe: "I can blend that, but I still really want to see exaggerated pipe in this case." Later: "Okay. That's good. It's deep enough so I can work my pipe out."

A second cut was next. "Let me create the second cut on another side of the pipe." A limit followed. "Okay, but not too far because I can't exceed the depth of cut this section." A tool was part of it: "But I need to use a smaller number 11 veiner if I want to create a really beautiful pipe."

Of an uphill cut: "Again, uphill cut. Not the best, but what can you do?" A blend followed: "All right. So now let me blend a little bit." The convex "is supposed to flip this way, okay?" And a tool: "I'll use just a number three, whatever I have on my workbench." At the end: "Actually, I can roll it a little better."

What do the parts next to part 11 say about depth?
The part before it, part 10 of the same workshop, has a limit on undercutting. "I'm not undercutting really deep yet." Then "Not yet, at least." A promise follows: "But later on, I absolutely will fix this shape." It also names a small cut for a line. I planned "a really tiny cut, maybe about one millimeter even, more than one millimeter, just to create that separation look" (0.039 in).
Part 12 goes deep. "I'm using number nine, by the way, one-eighth of an inch, three millimeters." The depth came next: "And go in, and I can go as deep as I want to, but still have to be mindful how deep am I going." A little later I said "So I've got really deep cut, about 25 millimeters or so. About one inch deep right there." Earlier in that part: "So let me actually right away to create my plug cut. I can remove that center part. I hope I'm not too early doing it." About the eye: "And I used seven millimeters," and then I planned to "switch to three millimeters." In inches, 0.28 and 0.12. Later: "It's going to give me a beautiful shadow. Beautiful shadow, but it's still strong."
What depth did a shallow cut have in the Furniture Panel lessons?
In Furniture Panel 19, part 1, I gave numbers. "First of all, if as you remember, I have a depth of approximately 1/16 of an inch, in that area right here" (about 1.6 mm). I also said "I actually went a little deeper, just a slightly deeper." That was about 1/32 in (0.79 mm) more, which made about 3/32 in (2.4 mm) as of then, and I named the final depth for those areas as one sixteenth of an inch.

Furniture Panel 19, part 1, goes on to a choice of ways, and I said this about them: "There's no right or wrong way. Both of them are actually right. What you could do, you could take number 11 again, and 1 millimeter, and first of all, just kind of outline, but not as deep. Okay?" The tool in that choice is 1 mm (0.04 in). Next came a limit and a warning: "Just try not to go deeper than 1/32 of an inch. Okay, don't go really, really deep. So that would be big, big mistake. So really shallow cut, just like that, about 1/32 of an inch" (about 0.8 mm).
That part names an effect: "And you could create a heel effect, so not touching the middle part and gradually lowering down both sides." I added that you would notice it less than you might think. Later in that part: "it's just slightly angled." I went on: "So probably I'm still able to use it, okay? Yes, and I am. On a deeper cut, I wouldn't. Okay? Because it's almost impossible to get there, but on a shallow cut, should be able to."
Over in Furniture Panel 17, part 2, the shallow cut was a plan. "And if you would ask me if I'm afraid to lose the depth I did, the deeper spots, I can always reference whatever I have right there. Okay? But for now, I'm going to do really shallow cuts." Earlier in that part I had said "And now I can probably take my router plane and start removing more." Next: "Let me take out some of the tools and see if it's a little too deep." The cut itself would be only 1/16 in (1.6 mm). "I don't want to be too aggressive with the shallow cut," I said.

Furniture Panel 20, part 6, starts with the same words. "Really shallow cuts. Okay? So it's not really deep cuts, but I want to make sure my slope is consistent all the way." My words on it: "Okay, that is good. It is not final form yet, but it is looking good, I think."

The edge shows up in Furniture Panel 38, part 1. "It's much cleaner. So you can get pretty close to the edge." Next: "Maybe I'm going to leave less than one millimeter in this area. I mean all around." In inches, less than 0.04 in. Then I said I did not have to be right on the line, "although I could, since it's kinda shallow cut," and finished with "So it should not be a problem that way." Over in part 2 of that lesson, depths came up: "So, which means I have to do three different depth, I mean three different depth cuts." In my words, the first of the three was "deeper cut." Another: "Then it's gonna be a shallower cut. I mean little higher than that." And for the last one, the words were these: "And that is gonna be really shallow."

What does a shallow cut mean with a knife?
Butterflies 9, part 2, has "And I'm creating my cut" and then "not as deep." After it came a plan for another cut, shallow again, "with my knife almost laying flat."

Butterflies 13, part 2, goes after a curly line, and the words fit it: "Especially, we do have really curly movement." A gouge would make that easier, I said, but "if you don't, it's still possible to do it with the knife." My plan for the cut was a shallow one, "about the same depth." And a word for the work: "Carefully, carefully, carefully."

A size comes in part 1 of the same lesson. I planned "a small channel," about 1/16 in, "maybe about 1.5mm, just like that." A second cut was to be "which is only, like I said, no more than" that size. A reminder: "Take your time."

Part 3 of the first Modern Acanthus lesson gives a safety reason, and it starts with a warning: "Also, I have to mention do not. Create the deep cut like that. Don't raise your tool." Next: "So try to make sure try to do as a shallow cuts as possible without raising too high. Okay, so that's gonna be safer." I went on with a warning: "So keep an eye don't do that. Don't do like I do."

When is a shallow cut enough, and when do I go deeper?
The first Tray lesson, part 2, has "Now at certain point my cuts are becoming shallower and shallower. Okay? So I don't excavate too much." Then a plan: "Later on I'll do probably deeper."
The light decided it in the second Tray lesson, part 1. "It depends how the light gonna hit." I said: "Now, since that is not gonna be on the wall and the light source gonna be either from the window, if it's gonna be in your dining room, it's not gonna be placed like this. So for me to create the shadow, I have to excavate somewhat deeper in this area because the light is hitting from the side, okay?" Then the other case: "The shadow, it's much easier when you take that piece on the wall and the light source above. You can just get by with a shallower cut and you're still gonna cast the shadow. But in this case, I gotta do extreme excavation."

Tray 7, part 1, ties the cut to the sharpness of the tool. "But it's also depends on the sharpness of your tool. So if the tool is not too sharp, it's better to attack like what I did, you know, the first time and clean it." Then: "And the main idea is not to push too hard, not to take too much material at once. Just to get small tiny cuts. Okay? Really shallow, really shallow cut. You will be able to, you know, kind of blend that little later. But please don't dig too deep." Then: "Now I'm gonna look where I have to take out those high spots."

Which lessons use the words, and what was I doing?
Here are ten of them side by side, with what I said next to the cut and how I named it.
| What I said next to it | Lesson and part | How I named the cut in that lesson |
|---|---|---|
| Separating sections with the veiner before going deeper | Venice 81.11 | Shallow, first |
| Outlining with a number 11 of 1 mm (0.039 in) | Panel lesson 19.1 | Under a set limit |
| Holding back on a cut of a small depth | Lesson 17.2 (Furniture Panel) | Not too aggressive |
| Keeping my slope consistent while the form is not final yet | Panel 20.6 | Shallow cuts |
| Working close to the edge of a line | In Furniture Panel 38.1 | Kinda shallow |
| A knife almost laying flat, planned for the next cut | Butterflies 9.2 | Shallow again |
| A curly movement, where a gouge would make it easier | Knife lesson 13.2 | Same depth |
| A small channel to separate one element from another | Lesson 13.1 (Butterflies) | A size limit |
| Small tiny cuts, not too much material at once | Tray 7.1 | To blend later |
| Do not raise your tool, and keep an eye on it | Modern Acanthus 1.3 | As shallow as possible |
Where does this sit in the Venice Room?
This is one workshop of Venice Room Part 7, a course on Venetian style wood carving. Its lesson page is workshop 81. Workshop 80 comes before it and workshop 82 after it. The other lessons are in the Furniture Panel course, the Butterflies course, the Tray of Blessing course and the Modern Acanthus course. For the plain background, Wikipedia has short pages on woodworking, chisels, gouges, knives, relief carving, millimeters and inches.
Have you ever started a cut and wondered how deep it should go? Then watch me work through it, and the whole room sits behind one tuition plan.
How it's done
- Think before the cut. In part 11 I said a wrong cut "would not be nice."
- Plan a shallow cut for the start. In that part the shallow cut came before the deeper ones, with the words "not that deep."
- Look for the high spots. Next I said "I need to find some high spots."
- Go deeper where the spot allows it. One section could go a little deeper, in my words. Later, of one hollow: "It's deep enough so I can work my pipe out."
- Stay inside the depth of the section. Going past the depth of the section, I said, "would be mistake."
Frequently asked questions
What came right before the shallow cut?
"I apologize, I have to think before I cut." That was the line just ahead of the cut, from part 11 of workshop 81.
Which tool did I name for the part?
"Just number 11," I said. Later I named "a smaller number 11 veiner."
Did part 11 stay shallow?
No. One section could go deeper, I said, and then "And yes, I'll get much deeper." The second cut had a limit of its own: "not too far."
What depth did I give in the Furniture Panel lessons?
What to carve next
- Venice Room 81
- Venice Room Part 7
- Venice Room 80
- Venice Room 82
- Furniture Panel 17
- Furniture Panel 19
- Furniture Panel 20
- Furniture Panel 38
- Butterflies 9
- Butterflies 13
- Modern Acanthus 1
- Tray of Blessing 1
- Tray of Blessing 2
- Tray of Blessing 7
- Furniture Panel course
- Carving Plate with Butterflies
- Tray of Blessing course
- Modern Acanthus course