

Alexander Grabovetskiy, woodcarver, School of Woodcarving · Published 2020
What does a wood carver mean by "really cool"?
Quick answer: In workshop 81, part 7, I said I can curl one piece of an acanthus, and I think the curl is going to look really cool. Right after it, I said that part would go underneath. The same words come back in my Lily Box, Furniture Panel, Hashemi and Venice Room lessons, beside a shape, a tool or a technique.
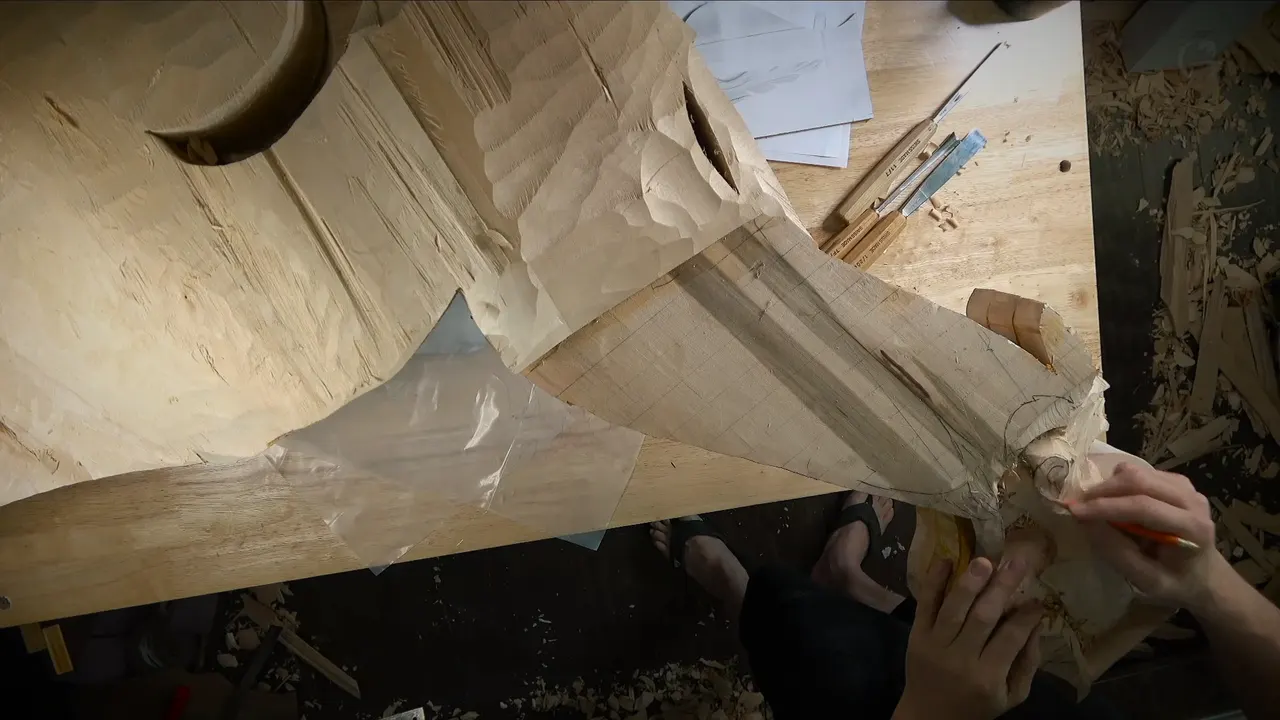

In part 7 of workshop 81 I say, "So I can curl it, and I think it's going to look really cool." That is about one piece of an acanthus on a big block. Those words turn up in other lessons of mine too, and each time they sit beside a different shape, tool or idea. Every lesson I draw on is named below, with a link.
Which shapes, tools and ideas got those words from me? Here are my own lines, one lesson at a time, and what came next each time.
What did I say in workshop 81, part 7?
Most of this short part is a plan. I will "develop right now the movement of this acanthus, which starts from this volute," and "change little bit the idea" from the original design. The main movements stay, "of course." Next comes a count of the pieces, "So one, two, three." That makes three main parts for this movement, and the other side is to get three as well.

Now the line itself. I have "that piece, and I can actually curl it like that," and then "create something really nice." The sentence in bold comes next. After it, "just that part going to go underneath."
One more piece will be "a separate movement," and it has to start "somewhere in my volute." Widths are another choice. I explain that I do not want them "exactly the same," and "I'm talking about how wide they are." My plan has one part as the widest, one as the smallest and one as medium.

Eyes and pipes come next. I "really want to do some eyes and pipes," and they are "logically supposed to go this way." "Two eyes on this side." Later, "I need to get the eye also," with "another eye somewhere right here."
Then "I'm not sure. Maybe I still have to make it little lower." But "I'm going to start." The plan is "just to create those eyes first," with "number 11 and the 7 millimeters" (0.28 in) to "preliminary excavate the position of the eyes."

An apology follows, "Please accept my apology." It will be "a little wobbly," yet it is "really convenient for me to work with that" vise, "because I can rotate with no problem any direction." Some of you may find it hard: "if you're not used to wobbly workstation," it is "kind of hard," but "for me, it's okay."
Last, "For me, result matters a lot more." And a question, "So what kind of result am I going to be able to get?" The part closes with "Okay, wonderful."

The rest of this page comes from my other lessons, where those words sat beside a shape, a tool or an idea. Shapes first.
Which shapes got the words?
In Lily Box lesson 8, part 10, "I could stop it, like originally I drew just above and get all the separations." Then "I think it would be really nice if I could give a flipping motion, just the flips an inward and inside, underneath of the first layer."
"Again, you really don't have to do that," I add, and then "if I have real estate or meat material and ability." Later, "if I can create something really nice and cool." I need "something flatter and bigger. Number six." And "Create overall movement."

Venice Room 29, part 1, is about a leaf that rises. "I still want to raise this up," and about that leaf, "looks really cool," I think. My goal is "to get inside right here, okay? Which you don't probably even see."
For that spot I need "something smaller," and "I'll use 20 millimeters" (0.79 in). A straight tool is out. A spoon is what I "probably should use." Then a plan, "Let me sharpen it, and I can give an even nicer concave."

A letter shows up in Venice Room 47, part 11. I "need to create the letter S movement," which I think is "really cool right here." Then "that's a little too pointy for my taste," and I plan to do "something about it."
The plan is a number seven to "bring this movement to more nicer shape." For the S itself I need "a smaller tool," and it will be "number five." Later, "That really beautiful letter S." And "I know it doesn't look clean yet. It doesn't have to."

Hashemi Flowers 10, part 10, starts with a flip, and the first words are "Now let me also make a really cool thing right here." "Let me make a return flip back like this." Then "I'll just place a line, and then what I'll do, I'll use number nine." You "can do those flips pretty much everywhere."
Then "that is too small," and "I use the number eight," "about half an inch" (12.7 mm). It "becomes fragile," and "You can see it moves." The sharp tools "make the biggest difference." Across the grain, it is "Not the smartest way to do that," but "with the sharp tools, it's still possible."

My Hazelnuts course, workshop 7, part 3, holds a hope. I am not sure I can do it, but it "will be really cool if one of the edges lay almost flat and connecting somewhere." The reason is "because otherwise," it is "too fragile."
Then "airborne on a side, and you can see the light travel from both sides." That "would be really nice." I also "have to keep an eye how thin the husk of that bunch is," and I do not want to "overdo."

Which tools and techniques got them?
Panel lesson 23, part 6, begins at a dome. "I could leave this dome just like how it looks right now." But there is "another technique, which I think is a really cool technique."
That technique is "a small excavation on one of the sides that's going to give me a feel where that flower pointing." For it, "smaller gouge, like one millimeter, number eight" (0.04 in). With it I "can excavate a small spot and see what I just did." Of the spot, "It's a small detail, but it's a really nice detail," and it "just gives me extra movement, I would say." Around it comes more work, "excavate and lower down," but "we can do that later, next time probably."

Levels are the subject of Panel lesson 18, part 3. "I really like the idea of multi-level carving, okay? So there is multiple levels, even if it's a relief furniture style carving." Then "just the idea of multi-level, just really, really nice, I think. Really cool."
The next spot is a "small section," yet one that will go deep. For it I plan "same number 11." Then "Because it's a little too big for this area, I'm going to need a smaller" tool, and "Let me use a 1 millimeter to get inside of this pass" (about 1/25 in).

Over in Acanthus over Moldings 2, part 1, a mallet gets attention. I was "blessed" with "the teeny tiny Mallet," and "that is the Mallet this time really cool." Yet "I'm not gonna use it really because I don't want to damage it."
Another way gets a word, "the technique of just knocking which is actually excellent." Then "Let's go back to work," and the plan is "just a straight down cut with the mallet."

The skew bent gouge sharpening lesson, part 1, has a side note about a light. "Oh, by the way, also," it is probably "really cool to know this light is actually attachable and detachable." It works on "different tools," and "I can take this light to another machine." Plus "I kind of like that thing."
The wheel is coarse, "that's 80 grit." My aim there is "I just want to make sure I'm taking as much material as possible at once."

Modern Acanthus 8, part 2, has a tool corner. "I'm gonna take number seven and I'm gonna attack just with the corner," and the size is "number seven and 14 millimeters" (0.55 in). It will "round that," and "It's going to be cool."
Next up, "the ladybug has a unique thing, okay." A plan follows, "I'm gonna separate the head from the wings and I'm gonna put line right in the middle."

Which styles and ideas got them?
Floral and Molding lesson 13, part 3, turns to a style. I mention "18th century furniture," and "that design reached Northern Europe." It was "developed first in Italy, in Venice, but then it's just moved up north and that style was really cool style for a long time."
The work itself. "from the backside, I actually carved to the edge." The method is "just back carve it," with "under carving, undercut," and "once you're going to take it out from the paper, it's much easier." My tool is "just a chisel or gouge," and you "crank and remove it." "It's really, really easy, so no complications whatsoever." My advice, "be creative, do something with that."

Tray of Blessing lesson 6, part 1, goes back to older work. A "more gothic approach," where "they would just curl this way and then curl backward" like the "15th century, 14th century guys." Then "it looks really cool," and "I gotta be careful." Also "I don't wanna break it."
Two lines meet in Panel lesson 9, part 3. I look for "the closest one," and "Maybe this one is really good." Then "really cool," I say, followed by "Remember what I said about the T-stops?" That "would be the T-stop if I wouldn't connect those two lines, but now this goes underneath of that one," I add, and "it still doesn't feel like it."

The leaf in Floral lesson 10, part 3, gets an explanation. The feel is that "it's laying flat." "I'm not trying to dance and show you some really cool moves. No, not that." Instead, "please understand, I'm trying to explain how it's supposed to look." The leaf will "grow from underneath."

Which close lines sound the same?
Some of my lines use other words with the same feeling. Venice Room 20, part 12, is one. Of a separation, it will create "some curly look. Curliness." And it is "exactly what I'm after in this project, by the way, not on all projects."
Then I admit "I really like curliness in wood carving. I think it just looks super cool." A plan comes after it, "I can probably round that little more inside. Anyway, it needs to be undercut later on."
Lily Box lesson 10, part 7, has a flip. "I'm done with this side." I plan to flip it, and it "does have a kind of curl," and it "just goes downhill." From the side, "it's actually looking cool. Really, really interesting and cool." Then "let me work on the opposite side." Also, "I left really thick walls," and "I'm able to actually clamp it with no problem."
Two flowers meet in Floral and Molding 7, part 2. "I can bring that petal right underneath," which makes "pretty much two flowers together." After it comes "also really nice and cool." Yet "right now it looks like a straight line." My advice, "some kind of wave, some kind of arc or whatever."
Which lessons say it?
The table below lists the lessons, each with the part, what I was talking about, and a few of my own words.
| Lesson and part | The subject of that part | Words |
|---|---|---|
| Workshop 81.7 | A piece of the acanthus that I can curl, and a wobbly vise I like to work with | "curl it like that" |
| Lily Box 8.10 | A flip that goes inward, underneath the first layer | "flipping motion" |
| Venice 29.1 | A leaf that I still want to raise up, and a spot inside it | "raise this up" |
| Venice 47.11 | The letter S movement, with two tools planned for it, a seven and a five | "too pointy" |
| Hashemi 10.10 | A flip back that I plan to mark with a line first | "sharp tools" |
| Hazelnuts 7.3 | An edge that I hope will lay almost flat, because otherwise it is too fragile | "light travel" |
| Furniture Panel 23.6 | Digging a small spot on one side of a dome, which gives the flower a feel of where it points | "extra movement" |
| Carving Panel 18.3 | Carving on multiple levels, even in a relief furniture style carving | "multi-level" |
| Moldings 2.1 | A teeny tiny mallet, and the technique of knocking | "excellent" |
| Skew sharpening 1 | A light that attaches to one machine and detaches to go on another one | "attachable and detachable" |
| Modern Acanthus 8.2 | The corner of a number seven at 14 millimeters (0.55 in), used to round a spot | "round that" |
| Floral 13.3 | A style that came from Italy and Venice, and went north | "up north" |
| Tray 6.1 | Curls that go one way, then curl backward, like the 14th century guys | "gothic approach" |
| Panel course 9.3 | A line that goes underneath another one, and the T-stops I told you about | "closest one" |
| Floral 10.3 | How a leaf looks when it lays flat and grows from underneath | "laying flat" |
Where does this sit in the Venice Room?
This is one workshop of Venice Room Part 7. Its lesson page is workshop 81, with workshop 80 before it and workshop 82 after it.
Have you ever looked at your own piece and wished one part would curl? What would that part have to do first? Then watch me do it, and the whole room sits behind one tuition plan.
How it's done
- Curl one piece and send it underneath. That piece can be curled, I said, and just that part will go underneath.
- Keep the widths different. I said I don't want to make them exactly the same, so I plan one part as the widest, one as the smallest and one as medium.
- Make a return flip. In Hashemi Flowers 10 I planned a return flip back, and said you can do those flips pretty much everywhere.
- Excavate one side. In Furniture Panel 23 I said I can create a small excavation on a side to give a feel where the flower is pointing.
- Carve from the backside. In Floral lesson 13 I carved the back side to the edge, and once you take it out from the paper, it is much easier.
Frequently asked questions
Where does the curl go in the seventh part?
That piece can be curled, I said, and right after it that part would go underneath.
Is the vise in the seventh part steady?
A little wobbly, I said, and I asked you to accept my apology. It is really convenient for me because I can rotate it any direction, and for me the result matters a lot more.
Which tool did I plan for the eyes?
My plan for the eyes is number 11 and the 7 millimeters (0.28 in), to preliminary excavate their position.
Which Furniture Panel technique got the same words?
What to carve next