

Alexander Grabovetskiy, woodcarver, School of Woodcarving · Published 2020
Can you carve by ear, cleaning deep under a leaf you cannot see?
Quick answer: Carving by ear is judging a pass you cannot see by the sound of your tool. In the eighth part of Venice Room workshop 18, my eyes had run out of angles under a leaf. The pass was still clean, I told you, and the sound was how I knew.
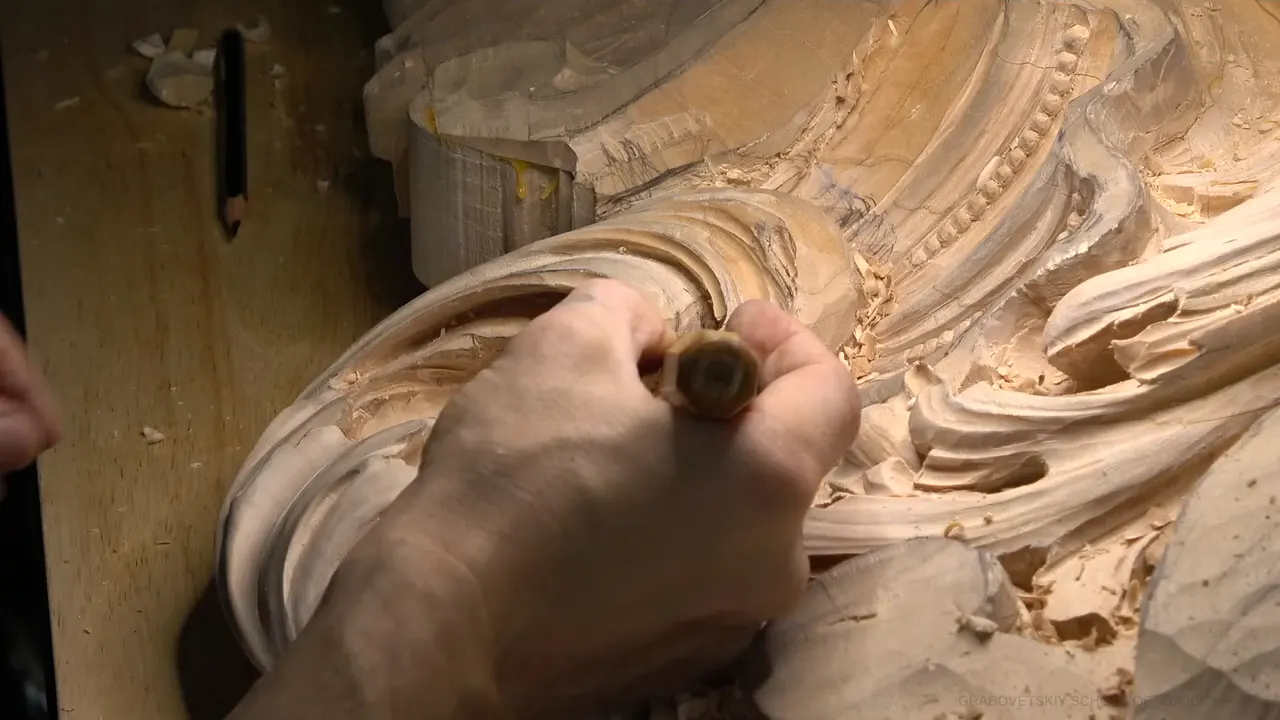
A pass you cannot see can still be checked, with your ears. In Venice Room workshop 18, part 8, I was deep beneath a leaf, and at 07:46 I said I couldn't see it anymore, no matter how I looked. I knew it was clean, I said, because I could hear it. Eleven seconds later came the line this page is named for, said plainly at 07:57.
The video runs about eight minutes and it is mostly digging. To fill the page, I pulled in what I said in other lessons about work nobody sees, sharp tools and sound. Each lesson I borrow from has its link.
Ever pushed a gouge beneath a leaf until you lost sight of the tip? Did you keep going anyway, because the only way out was through? Then this page is for your bench.

Part 8 in plain words
- My eyes gave out near the end, and my ears took over.
- Before that I named a limit, set by how hard the waste would be to remove.
- A number 11 lying on its side did the clearing under the leaf, and I explained why I like it.
- A side that no one looks at got finished anyway, because it matters to me.
- Chips piled up and looked messy, yet they still left clean work behind.
- Other lessons carry the same habit, once with love in it and once with a sharp tool.
What did I say at 07:46 in part 8?
Here is the stretch, close to how it went. Around 07:35 I told you I was going in underneath a part of the leaf, and that I could get really deep. Then came 07:46: "And even I can't see that anymore, no matter how I look. But I know it's clean because I can hear my cut."
Eleven seconds on, at 07:57, I put a name to it. "I'm carving by ear now." My last words in the video, at 08:06, are two: go in.
I gave no words to the sound itself. What you get is the result, a pass I trusted without seeing it, and my ears as the way I knew.

A few things sit around that line. A bigger number 11 had been at work since about 06:23, lying on its side. Chips lay about, and I had just called the place messy. Right after that came the words about going in underneath a part and getting really deep.
What was I carving when I lost sight of it?
A bowl, to start. The first words in the video, at 00:11, are about junk I wanted gone, and by 00:44 I was excavating a little deeper right there. Get underneath, I said, and create a bowl, going in like that. Again at 01:33, from all of the sides, for that feel of a bowl. I warned you I was repeating myself. I was.
I was using smaller tools, I said, and I could always attack the bigger ones later on. By 02:15 I wanted the junk gone with the number 11, probably 5 mm (about 3/16 in) first. That is a plan, so I leave it a plan.

A second side came next, around 02:39. That one needs work as well, I said, because it also has to look finished. I will come back to that line, because it is the reason I gave for that side.
The underside of the leaf itself followed at 03:57. I wanted a spot for the light to travel, and by 04:13 I was right underneath, excavating. Maybe deeper, I said, with a more extreme excavation right there. Really want to see that shadow, I said at 04:49.
For that job I said I'd use a number 9 and the quarter inch (about 6 mm), and that I go right inside, even deeper. The plug would come out next, I told you, just like drilling in. Then the same words three times: go in, and go in, and go in.

Around 05:15 came the limit. Go too deep, I said, and the hollow turns hard to clean later. Until I was able to, I would, which was approximately to that point. It is the one stopping point the video gives for depth, and more a clean-up rule than a depth rule.
The tool number is loose here. The number 11 again, I said at 05:34, or the number 9 would do the trick too. I just like the 11 because I can use the sides of my tool, lay on one of the sides, and get more flexibility in how I use it. The 9 works okay, I added, and even an 8 will do.

At 06:10 I changed sides. You can't see it, I said, but I needed to attack this side now, and I really needed that wing extended. The U shape helps me a lot, I said. A bigger number 11 now made sense, and I used just the side of it, only the corner of my tool, which is a really good thing.
With the bigger one I could also clean and get even deeper underneath the leaf. Really deep, I said at 06:57, with a beautiful shadow.

What does the U shape have to do with a hidden transition?
Workshop 72, part 8, explains the same word. I could see what I was cutting, I said at 07:35, and you could not. By 07:56 I was ready to remove wood and create a beautiful transition that again you couldn't see.
That part had to go on my word, because you understand the property of the tool, and that tool is obviously U-shape. My transition on the inside follows that curvature, I said at 08:14. A smooth transition is an idea I really love, I added.

Workshop 18 gives only a few words to the U shape and the side of the 11. From the video alone I cannot tell you that both lines mean the same tool. Both videos hide the work from the camera, though, and in both I pointed to the shape of the tool as something that helps.
Why did I finish a side that nobody will see?
I wanted it finished. Around 02:39 I said I needed to go under that side too, since it has to look finished. It is not going to be visible at all, I told you, so it is not that important here. But it was important for me.
The habit shows up elsewhere. Over in workshop 72, part 5, I made an undercut that no human being is ever going to see, I said. Oh no, I said, it's looking good. And if I know it, even if you don't see it, you still will feel it, that it's done with love.

Workshop 67, part 9, has the same habit on a smaller scale. At 00:45 I told you the inside had some mess, and some stuff still had to be taken out. A spoon number 11, 5 millimeters (about 3/16 in), would do it, I said, and maybe I could dig in from both sides. A moment later I showed you what I had removed and called it a beautiful cut.
I came back to it at 01:39. Clean and nice on the inside, I said, though it stays hidden. Then I made it round, because I don't really want to see that mess on the side, and I don't need sharp points.

How deep is too deep when you still have to clean it?
My part 8 line is a limit set by the cleaning. Around 05:15 I said going too deep would make it hard to clean later on, and I gave no measurement. What I said was, approximately to that point.
Workshop 70, part 10, puts a number on a different spot. At 03:44 I called it really nice and deep, and by 03:47 it was almost an inch down. That stays out of sight, I said, but it's almost one inch deep, like around 25 millimeters or so. Attack that from two sides, I said at 04:08.
Workshop 71, part 9, is the other face of it. Around 05:50 I knew I had a really deep cut, but for some reason I could not grab that waste. Hooking it out somehow was the plan I voiced, and at 06:05 I got it. Then came the lines: here you go, now it's clean, and even out of sight it is beautiful, deep, and clean.

Why do I keep telling you the camera can't show it?
The camera cannot follow the tool, and I know it. In part 7 of workshop 18, at 03:41, I told you the inside doesn't show, and that you probably have to take my word for it. At 05:21 I said it again, and at 05:25 I added two words: just trust.
Workshop 63, part 7, has the same plea. I apologized at 06:00 for what the lens missed, and I asked for your confidence a second time at 06:08. At 07:29 I was sorry if you can't see what I'm doing, and you absolutely can't.
Part 8 adds a reason. Besides the plea, I told you what I was going by, and that was my ears.
Where else did I talk about the sound of the tool?
In a few places, and each one says something different. Workshop 21, part 4, has one. I asked at 02:06 if you could hear that, and at 02:08 I called it the sound of a sharp tool. A really, really sharp tool.
The Greek acanthus course has it too, in lesson 15, part 3. Make sure you got really sharp tools, I said at 00:56, and you can hear how sharp my gouge is by the sound of it. By 01:38 came three more words: just don't force.

Part 9 of this same workshop opens on it. At 00:02 I didn't know if you were able to hear it or not, but see? That gives me a really nice and clean cut. A small line, and it sits right beside part 8, one video later.
Sound can also point at the wood. In the Lily Box course, lesson 4, part 2, I was in some curly spots where the grain changes, and I said that is almost impossible. At 05:04 came the question, can you hear that sound? And that's the spot right here, I said, so I had to carefully attack that spot.

The dining table apron course has a plainer one. Carving oak versus limewood makes an absolutely different sound, I said in workshop 7 at 02:20. It's more crunchy sound, I told you, and then again: just absolutely different sound.
A short record of the work you could not watch
Six lessons, six lines. The last column says what came next.
| Lesson and part | What stayed beyond the camera's reach entirely | Then what |
|---|---|---|
| Eighth video, here | Far inside the curl, beyond my eyes | Heard it |
| Seventy-two, part 5 | An undercut no human being would see | Finished it |
| Sixty-seven, part 9 | Some mess still sat on the inside | Two sides |
| Seventy, part 10 | A hollow almost one inch deep, unseen | Both sides |
| Seventy-one, part 9 | Deep, with waste I could not grab | Hooked out |
| Twenty-one, part 4 | The sound of a really sharp tool | Hear that? |

How did I clear the chips?
I blew them out. Sorry for that, I said at 02:59, but it's the easiest way to clean that stuff out. By 07:14 there was a lot of chips, and I was not talking about potato chips. I meant carving chips. That is why it looks messy, I said, but actually it just gives me really clean cut.
A brush is the other way. Workshop 7, part 2, has an apology for my blowing, because I did not want to be rude or mean. It's better, of course, to use just a brush, I said, and brush out all that waste.

Which later parts carried the same worry?
Part 7 let me get in with the back bend, and because it goes in like that I could even excavate a little bit inside, even undercut underneath. I really don't have to, I said, but I am able to. Careful now, I said at 05:12, because I wanted to keep that sharp edge I had just created.
Part 9 gives a check from the outside. Around 02:45 I said I had to keep an eye from the bottom on how clean my dome is, which I was creating inside, because some of it will be visible. Not much, I said, but some of it.

Enough undercutting right there, I called it at 03:37, since more extreme was possible but that detail would turn too weak. Part 10 carries the worry on, and at 00:19 I did not want to crank against that edge, because it was already becoming too weak.
What would you change on your bench?
Is there a spot on your board that you can reach with a gouge but cannot see? Could you stop for a second and listen to the next pass? Then watch part 8 from 07:35 to 07:57, and decide for your own bench what the sound tells you.
The video I described is one part of a lesson. Workshop 18 holds the rest of it, and the course page is Advanced Carving: Venice Room, Part 2. Some of the lines I quote above live in Part 6 and Part 1 of the same room. The craft is wood carving, a branch of woodworking. Each gouge belongs to the chisel family, and a mallet drives it. A relief is carved on a flat background, and an acanthus leaf has deep spots that hold shadow. Every sound a tool makes reaches you through hearing. The room is in the style of Venice, and my sizes are in millimeters and inches.

Which spot on your bench would you listen to first?
How it's done
- Start with the smaller tools. Little smaller tools went in first, and the bigger ones could wait for later.
- Dig from every side for the bowl. The excavation came from all of the sides, so the hollow would have that feel of a bowl.
- Lay a number 11 on its side. Using the sides of the tool gives me more flexibility, and a bigger 11 reached deeper under the leaf.
- Stop where cleaning gets hard. Past a certain depth the waste turns into a chore, so I held back.
- Let your ears have a turn. By then my eyes were done, yet the pass was clean, and the sound told me.
Frequently asked questions
Can you really carve by ear?
Part 8 of workshop 18 is where I put it into words. With the spot hidden from me, the sound was my proof that the pass was clean. The sound itself got no words from me, so the video holds no recipe for it.
Why finish a side that nobody will see?
A hidden side must look finished too, I said in part 8, even though it is not going to be visible at all, and that matters to me. In workshop 72 I added that even if you don't see it, you still will feel it, that it's done with love.
How deep should you dig a hollow in a carving?
Cleaning sets the limit. Part 8 says too deep makes the waste a chore later, so I would go only as far as I was able, approximately to the point I showed. Workshop 70, part 10, went almost an inch (about 25 mm) and said to attack it from two sides.
What to carve next