

Alexander Grabovetskiy, woodcarver, School of Woodcarving · Published 2020
How sharp does a gouge need to be to carve with almost no pressure?
Quick answer: A gouge sharp enough for a very light hand is one that shaves the wood on its own. In Venice Room workshop 18, part 11, I compared the edge to a doctor's knife, a surgeon knife, and said you really can shave your face with it.
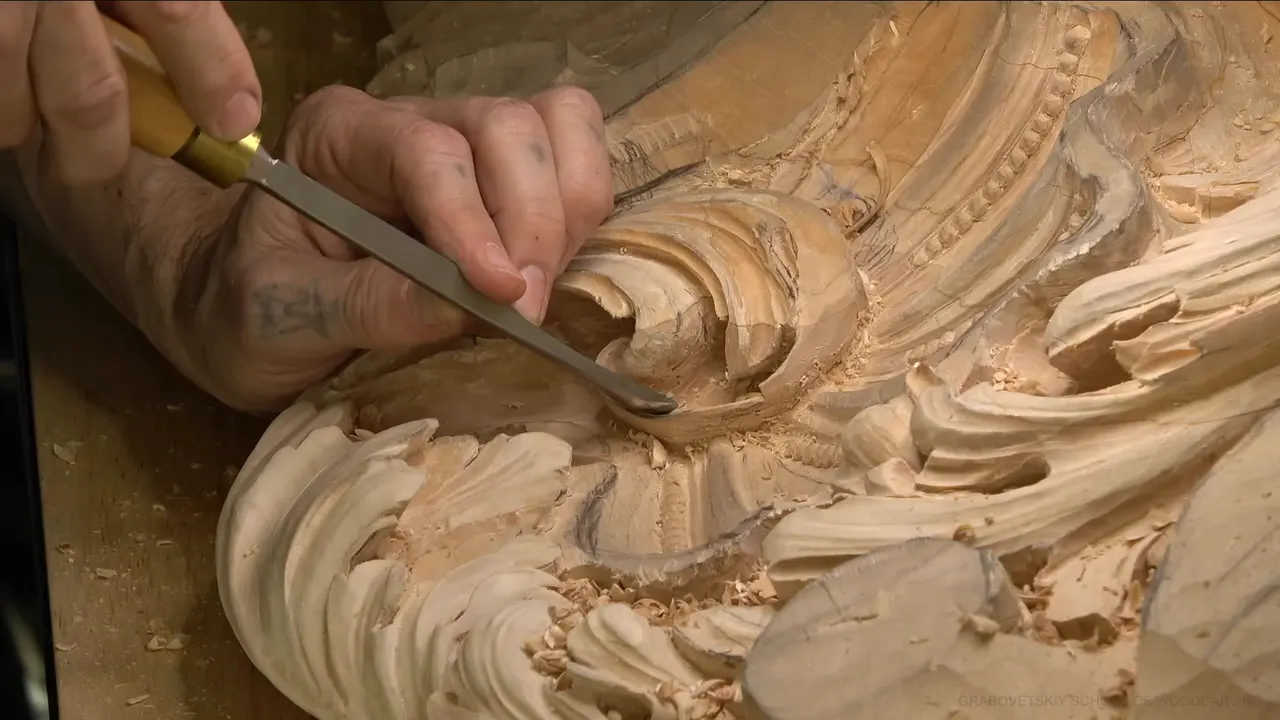
A gouge that is sharp enough to carve with almost no pressure rides on top of the wood and shaves it by itself. In part 11 of workshop 18 in my Venice Room, I put the edge this way: it has to be like a doctor's knife, a surgeon knife. After that I let the tool ride right on top, and it just shaved itself.
The video is short. So I went through my other courses and found where I said the same thing with different lines, each time in a public lesson with its link.
Ever pushed a gouge and felt the wood push back? Your hand tires long before the pass is done. Look at the edge first. Only after that should you start blaming your arm, your wrist or the grain.

What I showed in part 11 about a sharp gouge
- Surgeon knife was my comparison.
- My gouge rode on top of the wood and shaved itself, with no push from me.
- Marks are fine when they steer the eye along the movement.
- I broke one edge, gave it a little roundness, slightly, and held back my force.
- The spoon, half an inch (12.7 mm), needed a sharp edge too, since sanding was out of reach inside.

What does a sharp gouge do to the wood when you barely push?
It rides on top and shaves. Around 00:13 I told you, "It's got to be like a doctor's knife," and seven seconds later I added the same idea again: surgeon knife. The reason came next (00:25): "Because I don't really create any pressure anymore." Three seconds on, the tool was just riding right on top.
I pushed the claim further. It's so sharp, I said, that you really can shave your face with it, and I'm not exaggerating (00:39). My last line in that stretch is the one I'd keep: the tool "just digs in wood itself" (00:53).

What was the edge for? Smoothness, and a nice transition, I said (01:03). Soon after, I told you that at a certain point I would have to switch to a spoon gouge. For now a straight tool gave me a smooth, clean look (01:12 to 01:25).
What did I do with tool marks and edges once the pass was going?
I pointed the marks. For me it was better to move toward that direction, because even if I leave some tool marks, they got to point your eye to the right movement (01:35). Soon after, I said I did not want to make it too thin, which can happen. On camera I said: "See? It gives me really nice and clean cut" (02:10).

Then it went wrong. I needed to fix the overall shape, I said, because I broke this edge (02:24), and at 02:34 it didn't look right. My fix was no extra push. I gave it a little roundness this way, slightly (02:48), and then said, twice in a row, that I did not want to force it (02:56).
Watch that part twice. One edge broke in this video, and nothing in the captions says why. The fix was small, and the force stayed out of it.
Why does a spoon gouge need a sharp edge when nobody sees the inside?
Paper can't reach there. At 03:10 I told you it still didn't look right, and maybe a little concave could run deep into it (03:16). For that I needed a spoon to get inside, number seven, and it also had to be really sharp (03:21).

Carefully, I said, I'd attack that with the spoon (03:36). Half an inch (12.7 mm) was the size. The reason was plain, in my own words: "But inside, I'm not going to be able to sand anyway" (03:48). Afterward it was clean and really nice (04:02). A little later I said I'd probably use a big seven first, and maybe give a little better shape (04:19).
How deep did I go once the edge was that good?
Deep enough that nobody will see it. I needed to dig in, because it should not go all the way (04:42), and I had to be careful how I did it (04:54). I had a word for the camera too. I'm sorry if you can't see what I'm doing, I said, because I'm working on the inside of an acanthus head (05:38 to 05:51). Not really complicated, but it's hard to see (05:51). Near 06:34 I had gone so deep that nobody could see what was going on in there.

After that I wanted a look of separation. Should I do 3 millimeters (about 1/8 in)? I thought I should (07:02), and I'd down cut like that, just like this (07:05). That was going to give me the feel of that separation, as if part of this movement goes underneath (07:17 to 07:21). One more option stayed open: a number seven at a quarter inch (6.4 mm) could do it too (07:29).
How was I introduced to a razor edge as a boy?
Through my grandfather. In the stropping lesson I told the story (00:56). When he was shaving, he had an old style razor, and he took a leather, like a hide, and stropped it. I didn't know what he was doing, but he did it every day pretty much.

That razor was one of the scariest things in his toolbox, because it was so sharp (01:40). Taking it scared me. At four years old I started to realize I do have a talent, and by the age of six I started to carve.
The same lesson has a gouge in it. In video 5 of that lesson I showed on my carving how sharp it was (04:41). Pressure, pretty much none, and still the edge was super sharp. Not even pushing, I said, because it's just that razor sharp, a lot sharper than some doctor's tools, surgeon tools. A couple of seconds did it. Video 6 adds the line that it just shaves so easily because it's already super sharp, right after honing it (05:46). Put those words next to part 11 and the pattern is plain: doctor's, surgeon, razor.
In video 7 I gave one number. It's actually 6,000 grit, and you can go up to 12,000 if you wish, which gives you a razor sharp edge (01:19). My tool sharpening course holds how to make that edge, tool by tool. Here the subject is the feel in the wood.

Where else do I say the tool does the work, not my arm?
Hashemi flowers lesson 9 starts it. It's really important to have sharp, really, really sharp tools (04:51). "And believe me, with the dull tools, you're not going to be able to do what I'm doing right now" (05:10). I called it the biggest secret in the wood carving. Then a line about the camera: you probably don't see it, but I put no pressure on the wood. "Just let the tool do its work" (05:55 to 06:11).
Lesson 22 of the furniture panel puts it in one breath (05:01). That pass needed accuracy, so I made sure my tool was really sharp, since I hardly press at all. I am actually letting the tool do the job. Lesson 16 of that course finds me trying not to force it, and sometimes the camera doesn't really show the pressure I apply. I keep hardly any, I said, but I'm controlling my tool, because I really don't want to dig too deep (17:02 to 17:15). A really sharp blade, I added, and it shaves perfectly (17:31).

A micro tool shows it in furniture panel 19. I said I'd use just a micro tool to give really nice separation, and that they "almost can't create any pressure whatsoever" (22:31 to 22:49). Over in Hashemi lesson 32, those passes are all about how you control your tool (10:24). Almost absolutely none, I said. Then I tightened it: none at all, I should say (10:42). Shortest of all comes from Greek acroterion lesson 5: I barely press (03:52).
When is a light hand a safety rule?
When the part can break. In Hashemi lesson 41 I press barely at all, because if I press it or twist to the wrong side, I understand, it can break easily (02:36). For me, I said, many micro cuts are better.
Two more Hashemi lessons say it about a fragile piece. Lesson 10 says the piece becomes really fragile, and even with the big tools I barely press. It may not look like it on the camera (02:01 to 02:17). Lesson 17 has me taking a quarter inch (6.4 mm) number eight and working my way in with next to nothing on it. Then came the plain line: sharp tools, it's just must (02:46 to 03:09). And in furniture panel 21 I said I could probably lower a side with the knife, and that a lot of pressure right then would be a big mistake (10:20 to 10:46).

The Byzantine acanthus lesson 3 gives the same rule a shape. I'd start from the black line without touching it, with hardly any pressure, and nearer the end of each pass I'd add more. But make sure you don't go too deep (00:42 to 00:57). Over in lesson 8, one hand does almost nothing. It just supports (02:42). Carefully I guide, pretty much without pressure, and I still have to get solid. "Don't air carve" (02:51 to 02:55).
Two more sit in workshop 18 itself. Part 4 had me warning myself against pressing too much on one side, because that could break the edge (06:07). Inside part 1 comes a single pass with the previous tool, just cleaning (04:37), and then a ridge I wanted to soften (05:33).
Workshop 67 of the Venice Room shows a start. I tried 7 millimeters (about 9/32 in), began light, and said I'd increase the depth; that gives extra shadow play (03:07). In workshop 68 I begin at the middle line, just an indication of movement (05:00).

What changes when the edge is not sharp enough?
The result I want is gone. Hashemi lesson 35 has the reason, and I know I said that a million times: the tools must be sharp, really, really sharp (00:47). The grain is the trouble. Working only with its direction is impossible sometimes, so you attack from different angles. The only way, I said, is with tools that are sharp.
I caught it live in part 6 of workshop 65. A tool must be sharp, I said, and mine didn't look super sharp right then (03:12). I changed tools. It slices much better, and I can get a much cleaner result (03:25).

Two other moments in workshop 18 show the same habit. In part 6 I said I needed to sharpen this one, just to get everything smooth inside (03:40). A spoon was going to remove the tool marks I created before, and I didn't really need them. At 08:36 in part 10 comes a half inch for a smoother inside, with a check first that it's really sharp.
Last, part 10 of workshop 85: "It's like a razor right now" (03:10). It doesn't leave any trails anymore. That's what I like about English steel, not too hard and not too soft, and I can easily strop it and bring it to the sharpness I'm after (03:20 to 03:35).
A short record of how I said it
Here is where I said it, and what it did on the wood. The middle column is my own words, shortened to fit.
| Where | What I told you about the edge and the pressure | What it did on the wood |
|---|---|---|
| This video, 18.11 | The tool just shaves itself, riding along the surface | A smooth transition |
| Venice 18.1 | One pass with the previous tool, just cleaning | Softening a ridge |
| Hashemi flowers 9 | Tools must be really sharp, and I just let them work | Fixing the ridges |
| Furniture panel 22 | My tool is really sharp because the pressure is almost nothing | An accurate pass |
| Byzantine acanthus 3 | Hardly any pressure at the beginning of the pass | Start without touching the line |
| Venice 85.10 | It's like a razor right now | No trails left |

What will you check on your gouge before the next pass?
Does it ride on top, or do you have to push it? A light hand is the test. If the tool does the job on its own, the edge is sharp enough for the spot in front of you.
The part I described is one video of the lesson. Workshop 18 holds the rest, and the course page is Advanced Carving: Venice Room, Part 2. The craft behind it is wood carving, a branch of woodworking. The gouge belongs to the chisel family, and a razor edge or a scalpel edge is the kind of sharpening I mean. My grandfather's strop was leather. The grain I mentioned is wood grain, and a relief is carved on a flat background. And sandpaper cannot reach inside a hollow.

Which of your gouges would you test first?
How it's done
- Let the edge shave. Hold back your force and let the edge do the shaving, as I did in part 11.
- Aim the marks. Move toward the side where the marks guide a viewer's eye to the right movement.
- Soften a broken edge. I gave a broken edge a little roundness, slightly, and did not force it.
- Sharpen before you go inside. A number seven spoon went in where sandpaper cannot reach, so I made sure it was sharp first.
- Suggest the overlap. I used 3 millimeters (about 1/8 in) with a down cut, so part of the movement feels like it goes underneath.
Frequently asked questions
How do I know my gouge is sharp enough?
I check how much I have to push. Part 11 of workshop 18 shows almost nothing behind the tool, and it dug into the wood by itself. In workshop 85 I compared my gouge to a razor, and it left no trails, and a strop brought it back to the edge I like.
Does the inside of a hollow need a sharp tool when nobody sees it?
Sanding can't reach inside, I said. So in part 11 I used a number seven spoon and said it needs a really sharp edge. Part 10 repeats the habit, with a check on a half inch tool before a smoother pass.
Does a light hand mean less control?
Control stays with me. In furniture lesson 16 I kept next to none on the tool but still steered it, so I would not dig too deep. In Byzantine lesson 8 my guiding hand worked pretty much without pressure, and I still had to get solid.
What to carve next