

Alexander Grabovetskiy, woodcarver, School of Woodcarving · Published 2020
Why is 15th-century Italian wood carving smooth when German carving of the same time shows its tool marks?
Quick answer: Smooth Italian carving is a matter of culture first and tools second. In Venice Room workshop 18, I said German carvers of the 15th century did not have the idea of sanding or smooth surfaces, so you can see the cuts, but in Italy everything was really smooth.
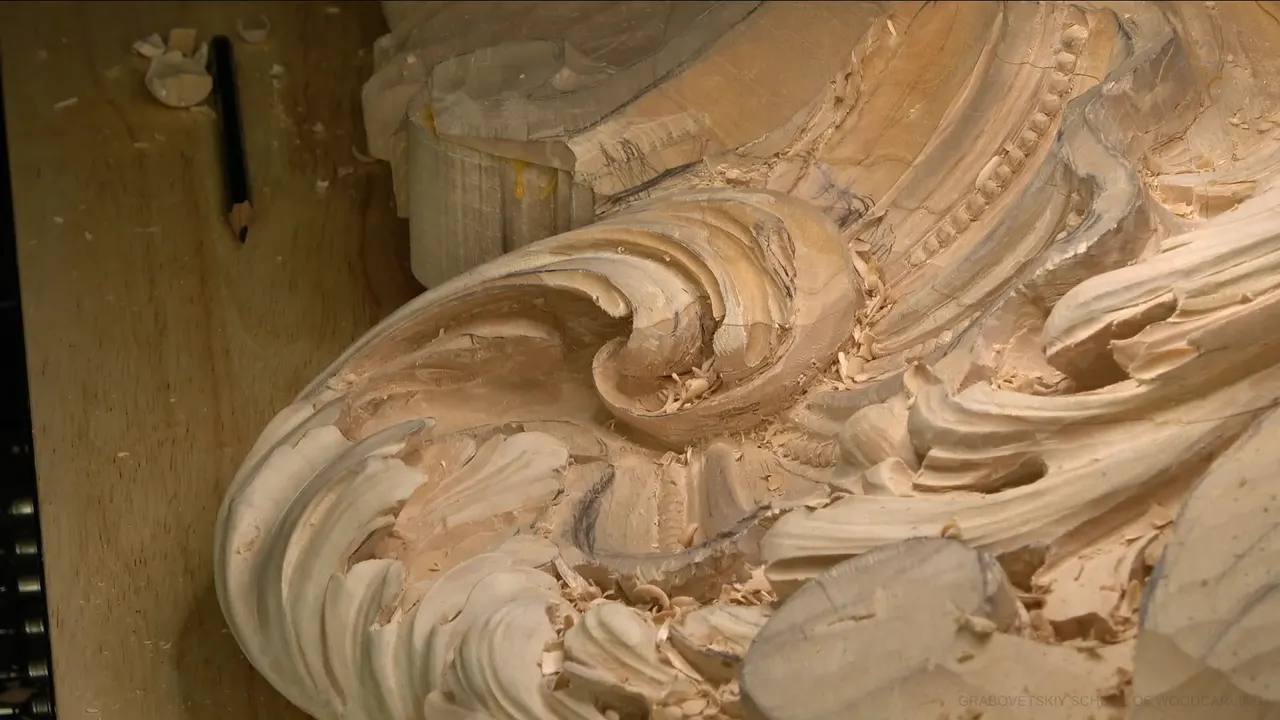
Italian carving is smooth because the culture asked for smooth, while German carvers of the 15th century left their cuts on the wood. I said so in workshop 18 of the Venice Room, part 6. Smooth surfaces were not an idea in their culture, I said at 01:55, and "not the case in Italy."
The video is short and half of it is history. To fill the page out, I pulled in what I said about sanding and tool marks in other lessons, and I tell you where each line comes from. Every course I use has a public page, and I link it.
Ever looked at an old carving and wondered why this one is smooth and the next one shows its cuts? Would you like to know which look you are making before you reach for sandpaper? Then read on.

What the Venice Room says about smooth and rough carving
- German work of the 15th century, as I told it in part 6, was left with the cuts showing.
- Italian work was smooth, and I said the same holds elsewhere in Italy.
- Grinling Gibbons tried stone carving, and in my opinion it looks really terrible.
- Other lessons tie the Italian taste to marble.
- Inside a hollow, the gouge has to do the smoothing.
- The last four minutes of part 6 show a spoon gouge doing that job, one tool after another.
What did I say about German carvers in part 6 of workshop 18?
The first minutes are talk. At 00:08 I told you the same people very often did both, stone and wood. Then I named Grinling Gibbons, a famous wood carver who also tried some stone carving. He did not succeed, I said at 00:24, and his stone carving looks, "in my opinion, really terrible." And right after that, "But he tried."
Germany came next. "They did not have any skilled stone carvers," I said at 01:12, "but they had a lot of skilled wood carvers." That work was done before the Reformation, so before Martin Luther, and much of it went into churches, which were just Catholic churches back then.

The wood was lime, "exactly the same wood which we're using right now." The surface was another matter. They didn't sand anything, I said at 02:06. Look at an original 15th-century carving from Germany, I told you, and they never used any sanding, pretty much. All the cuts show.
Italy was different. Everything was really smooth, I said at 02:26, and that is not just the Venetian style but other parts of Italy too. Then I guessed at a reason, and it was only a guess: "I think it's just probably even in the blood."
Why would an Italian carver want the wood smooth?
Part 6 gives one practical reason. In Italy, I said at 00:43, they had both stone and wood supply, so they worked in both materials. They really like a smooth look, I added at 02:46, and I think it looks beautiful, actually.
The masters were good, too. "They had really good masters in Italy," I said, and Italian furniture makers today still do gorgeous work. If you know a little about Italian style furniture, it is smoother than the rest of the European furniture. It shows today, too. Smoothness.

Other lessons dig under that. Workshop 9 of the Venice Room has me saying the Greek and Roman cultures really like smooth surfaces. They worked with marble and stone, and you never saw rough marks. They invented the idea of a smooth surface, I told you, and they made it with crushed stone. That is the history as I told it. If you want the material itself, read about marble and stone carving.
A shorter version came up on the April 2020 livestream. Up in England, I said, they never use any sandpaper, only a chisel finish. Down in southern Europe, like Italy, they smooth everything because they treat wood the same as marble, and they carved marble before they carved wood. Rome, I would say, is supposed to be really smooth, while the northern parts sit closer to German and French carving. Sanding takes longer, and sometimes it is impossible. I skip it.
The same idea in five lessons
Here are the five. The middle column says what I said, and the right column says what it shows.
| Where I said it | What the line says about the surface | What it shows |
|---|---|---|
| This very video | German work shows cuts, Italian work smooth | Culture first |
| Roman acanthus three | Smooth work was probably sanded, I said | Semi-smooth only |
| Livestream, April 2020 | Italians treat wood the same as marble | Stone habits |
| Venice workshop nine | Crushed stone sanded Greek and Roman work | Older still |
| Modern acanthus seven | An Italian customer wants no tool marks | Buyer decides |

What does the north leave on the wood?
Roman acanthus, lesson 3, has the longest version. Most of European culture, I said at 04:15, except a couple of southern countries like Italy, really likes smooth carvings. Go north to England and Germany and you won't find those surfaces really smooth, because that is in the culture. You leave chisel marks and you use no sandpaper, I said.
Flip it around. Carvers with smooth surfaces probably sanded that completely, I said. A gouge can get you semi-smooth. A really perfect smooth surface, with chisels, is not possible.

Workshop 24 adds a fence. I should not say all European countries leave rough cuts, I told you, because some use sanding a lot. Chinese carving is my other example. Look it up online, and the famous work is sanded completely smooth and looks absolutely nice. If it looks really nice, you can sand it, no problem.
What wood did those German churches use?
Lime, and I said it more than once. In Rosette workshop 2, I told you the church carvings in Germany, of the 15th and 16th century, were done in limewood. Linden, basswood, if you are in the United States. Go see old churches there, I said, and you will be surprised, because it all looks nice and fresh.
Workshop 52 says it again at 00:44. Lime wood is common in Europe, I said, even in the 15th and 16th century in Germany. I have a book about lime wood carvers, and I named a famous one there, Tilman Riemenschneider, a famous wood carver of that period. In Rosette workshop 5 I named another book on German wood carving history, "Sculptors of Limewood."

One tool belongs to that period, the skew gouge. Up in workshop 60, I told you that 15th century work in Germany used skews all over. Gothic work, I said, makes it really easy to join two cuts, skewed from two different positions. For the style itself, read about Gothic art.
Did Gibbons carve stone as well as wood?
He tried. That is all I claim, and the opinion on the result is mine alone. Grinling Gibbons was the carver I named in part 6, and in workshop 52 I said he left lime bare, with no wax and no shellac. Three hundred years later, I said, it still looks beautiful and nice without any finish.

What does a customer want to see on the wood?
Both looks, depending on who pays. In Modern acanthus, lesson 7, I said it is absolutely okay to use sandpaper if you like that look. Customers from different countries want different things. An Italian one loves to sand, and it has to look like marble, not one tool mark. English or German customers want to see the marks, because that shows authentic.
I follow what the customer likes. Before the contract, though, I tell people it looks better without sandpaper, in my opinion. Sandpaper also pushes the fibers in, I said, and then the grain raises under the first coat of finish. A sliced surface puffs slightly but does not raise as much.
How did I handle the Venice panel, which is Italian style?
I argued it out loud. Back in workshop 9, I said I probably could use sanding, because the style is Italian. It would be even more authentic to the original. It isn't required, I said, but I think I can create an even better look that way. Over in workshop 10, I came back to it at 01:28 and said I have to be authentic, and the Italians really liked sanding.
What I held in my hand was a rasp. It leaves no abrasive in the wood, I said, and I was probably going to use it for all my sanding on this project. At 04:36 in that lesson I asked how you would sand the inside. Better to make a really smooth cut from the beginning.

I kept changing my mind. Workshop 12 has me disliking what I saw, and then, "Why use the sandpaper? I can just probably use a gouge and clean it completely." Workshop 15 has the other side at 08:33. I could always use sandpaper later, I said, but every time you use it, the tools become dull.
Workshop 35 settles it for a hollow. Especially inside, I said at 04:02, I am not going to be able to use any sandpaper or rasps. A deep hollow has to come off the gouge smooth.

How do you smooth the inside of a hollow with a spoon gouge?
Part 6 shows it in its second half. I stopped at 03:40 to sharpen the tool. By 03:55 I told you it was a number seven spoon gouge, and the job was to get everything really nice and smooth inside. The tool marks I made earlier had to go, since I did not really need them.
The order was plain. All the way to the edge of that detail, then uphill a little bit to take out some of the ridges. You can't see them on camera, I said, and I know it. Near 04:51 it looked good and clean.

A smaller tool came next, a one millimeter number 11 veiner, about 0.04 in, at 05:03. It went a little inside to outline the edge better. Go in to a certain point, I said, because at some spot you cannot do anything else. Then, at 05:49, the cut stopped working. "Let me think. What tool should I use?" I tried a number seven, found it a little too big, and said, "I'm sorry, too small. I need bigger."

I told you what I was making at 06:37, a full inside edge. A mallet could push a little more inside. And at 07:03, with the cut hidden from the camera and from me, I said, "I am listening the sound of my tool."
The last pass has a rule in it. By 07:27 I had a really sharp edge on the inside, exactly the same as the edge I made on the outside. The tool was a number seven, and pretty much only its corner. Near the end even that tool stops helping, and I said, "we'll see how far I can go."

How smooth can a gouge leave a surface?
Smooth enough, and still a chisel finish. In Byzantine acanthus, lesson 10, I said I still love an out of the chisel finish, without any sandpaper. To make facets smoother, take a flatter gouge, a number three or a number two. A rasp, I said there, does not save me time, since I have to make it a lot smoother after.
Greek acanthus, lesson 15 shows a half step. Semi-sanding is fine if you wish, I said, about 300 to 400 grit, and it cleans an edge without defeating the purpose. The carving stays authentic, with the chisel marks showing, which I like.

The flower rosette has the cleanest line. Smoothing the ridges out is not my recommendation, I said, because true carving should come from the chisel. But if you prefer it, there is nothing wrong with that. It is your preference. In the dining table apron, workshop 16, I used no sandpaper at all. The work just looks really good straight off the chisel.

Workshop 110 gives a clean example. I called one cut beautiful and clean, with nothing to clean after it. Pretty much out of the tool, I said, as some people say.
How did carvers smooth wood before sandpaper?
I answered that in a short question and answer video. Sandpaper was not around for old carvers, I said. Some people say shark skin, but not everybody lived near the ocean. In England, some probably used rush reed, which is about 400 grit, and I said even Gibbons used it. Some 15th century people used a piece of glass to scrape.
In that video I scrape with a carving knife, then burnish with the same species of wood. That gives a really shiny surface, which is needed before gold leaf. I also said it is absolutely okay to sand, and I like a mesh sanding sheet, because it leaves less abrasive in the wood. That video covers water gilding too, which I said needs the surface stabilized first.

What would you try at your bench?
Is there a hollow on your board where sandpaper will never reach? Could you leave that one surface to the gouge and see how it looks? Then do what I did in part 6. Sharpen first, pick the tool for the inside, go right up to the edge, and listen.
Workshop 18 holds the rest of the lesson, and workshop 17 comes before it. The course page is Advanced Carving: Venice Room, Part 2. The craft is wood carving, and its tools are a gouge and a rasp. The paper is sandpaper. Look at the carving first, then decide.

Which look will you make on your next piece, the smooth one or the one with the cuts left on it?
How it's done
- Sharpen the tool. Before a smooth pass inside a hollow, I said I needed to sharpen this one.
- Take the marks out. A number seven spoon gouge got rid of tool marks I had left earlier, up to the edge of that detail.
- Outline with a small tool. A number 11 veiner, 1 mm (about 0.04 in), went a little inside to outline the edge better.
- Make the full edge. I made a really sharp edge on the inside, the same as the edge I had made outside.
- Listen to the tool. When I could not see the cut, I listened to the sound of my tool to tell if I was doing something wrong.
Frequently asked questions
Did 15th-century German carvers sand their work?
Workshop 18 says smooth surfaces were not part of their world. Original 15th-century carving from Germany, I told you, shows no sanding, pretty much, and the cuts are visible. Italy was the opposite, with really smooth work.
Is Italian carving smooth outside Venice too?
Italian work was smooth, I said in part 6, and the same goes beyond the Venetian style. On a livestream I made one split. Rome is supposed to be smooth, and the north sits closer to German and French carving.
Can you sand a carving and still call it good work?
Sanding is fine when the work looks nice enough, workshop 24 says, no problem. With customers, I say I think it looks better without sandpaper, and then I follow what the customer likes.
What to carve next