

Alexander Grabovetskiy, woodcarver, School of Woodcarving · Published 2020
How do you fix a carved area that looks too choppy by bringing it in and breaking it down with a concave?
Quick answer: Fixing a choppy carved area is pulling one spot in a little and breaking it down using a concave. In part 9 of Venice Room workshop 18, I called the area choppy, said it looked wrong to me, and then took a concave to it.
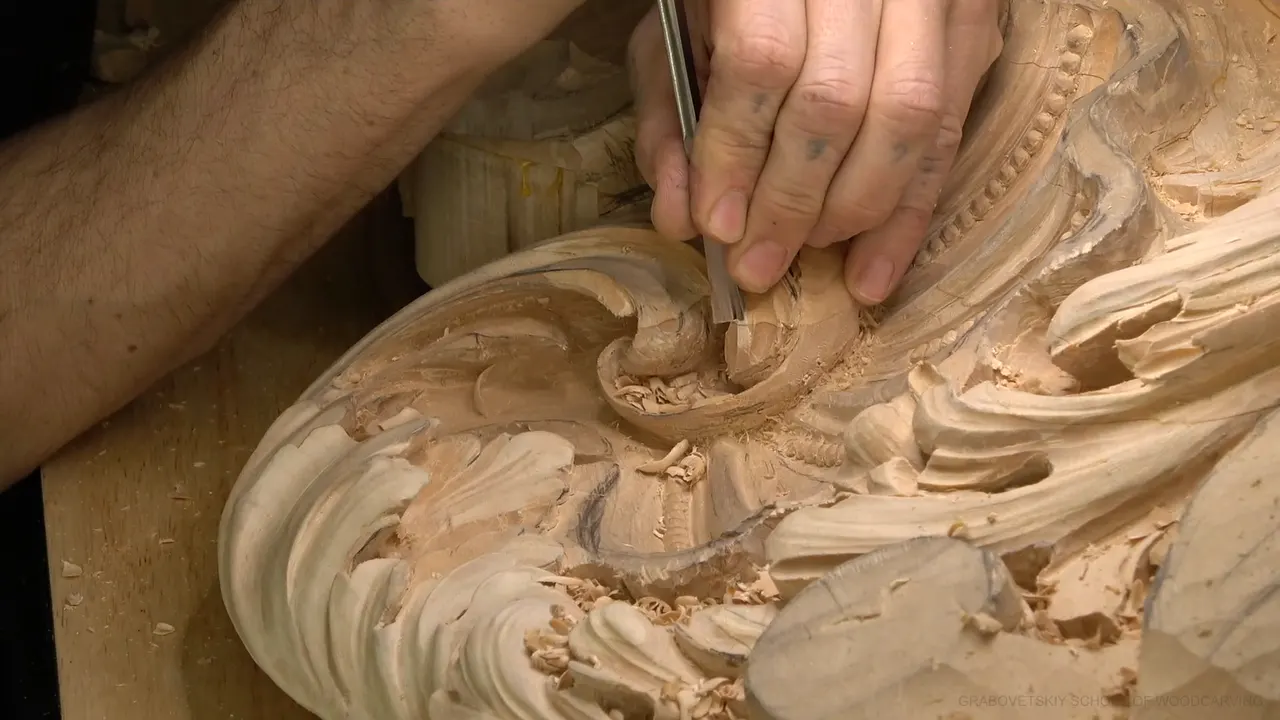
Fixing a choppy spot on a carved acanthus starts with pulling one part in a little and then breaking that area down using a concave. That is what I did in part 9 of Venice Room workshop 18. At 00:36 I said it was just a little too choppy right now, and that it doesn't look right.
The video is short. So I pulled in what I said about rough places in other lessons, some from the Venice Room and some from other courses. Each one says where it comes from, and each one links the lesson page.
Does a spot on your carving look busy, with marks that don't flow into each other? Could one hollow settle it down? This page is for your bench.

The short version of fixing a rough carved spot
- This video pulls the area in, then goes after it with one concave.
- The side needs a lot less cleaning afterward.
- A lesser sweep, a number five, softens the S shape that comes next.
- Workshop 93 leaves a swirl rough for a minute, then fixes it using a number five upside down.
- Workshops 102 and 35 show the blending that follows a concave.
- Some rough work stays on a piece, and other work gets fixed before the digging goes deeper.
What did I say when the spot looked choppy?
There was something I wanted to take care of, and maybe it meant bringing this one in a little bit. That was at 00:27. The reason came a few seconds later, in the words you read at the top of this page. My plan, at 00:44: get a concave and kind of break that down. A "like this" at 00:48 showed it.
Now it looks like it's getting somewhere, I said at 01:04. A lot less for me to clean on the side (01:13), and I could do that cleaning with a number seven, upside down, until a certain point.


What do I do when the S shape looks wrong?
The S came next. Maybe I could give an S shape to this a little bit (01:27). Go on concave, and this side goes convex a little bit. Not much. Maybe some undercutting this way, or cleaning and bringing that to the edge or closer to the edge.
That S did not make me too happy (01:52). My idea was a lesser sweep, like number five, and maybe a bigger number five, to soften the movement a little. Yeah, much better, I said at 02:15.
A lower number is a flatter curve. A number five lies flatter in the wood than a seven or an eleven does.


Why look at a carving from underneath?
Part of the dome shows. I said I could use a back bend again, maybe even a small one, and excavate that way (02:24). A reminder for myself followed: keep an eye on how clean my dome is, the one I am creating inside, because part of it is going to be visible. Not much, but some.
Part 6 of workshop 16 makes this point about a rough inside. I had full movement inside (02:59), but it did not look too appealing yet, because it was a little choppy. From above you can't see how it moves, but it goes in, in, in, and finishes up inside. People would see it from underneath, I said. That is the reason.
Before I fixed the overall movement, I took care of a little bit right there. I wanted it more round on the inside next, a really beautiful transition that almost locks together (04:04). For the step after that, I said, I would need a number, even just a number three, probably.

How does a concave break down a rough area?
Part 4 of workshop 13 has an edge I did not like (03:10). I can always fix my movement, I said. Go that way, get rid of this triangle. It looked much better at 03:39, and then another area bothered me, one I called choppy at 03:49. Okay, much better (04:31).
A few lines later I told you I don't worry about the tool marks I left, because I can always take care of them. The next area still bothered me, so at 05:12 I said maybe a little concave all the way, and I would clean my edge.

Next, workshop 43, part 3, is a short one. I found one of the areas too choppy at 04:44. "It's no good. No bueno." I took care of it, just like that, and by 05:09: "Now it's better."
Over in workshop 35, part 2, I had a different tool in mind. A better cleanup job might help, I said, since it looked all choppy (03:51), and that's not nice. A skew was my thought, number one, which is number two in England. More depth and shadow were possible if I went in a little more.
I had to be careful how I did that (04:28), so I was not pushing too hard. All I was doing was pretty much blending, passes that did not look good to me.

Can a spot wait a minute before you fix it?
A spot can wait if the tool in your hand is the wrong size. In workshop 93, part 10, I described one concave, then a second to the same spot, carried all the way around. That way it was going to look like it was really swirling.
More width was what I needed (03:17), but a small tool would do for now, and then I would switch to a bigger one. Really choppy, and then at 03:50 really, really, really choppy, though okay. We'll fix it in just a moment.
The fix came at 04:00: a number five, a quarter inch (6 mm), used upside down to blend in and make something like a convex on that side. The previous tool came back after that, to get rid of some of the fuzz.

A pipe tells it again in workshop 156, part 2. A tool of maybe 5 millimeters, 3/16 of an inch, started blending a pipe. One side wanted a deeper pass, so I said 3 millimeters (1/8 in), to see if that was sufficient. Kind of choppy at 04:10, but fine for now, since I'll fix it.
One side, and then a second side. That one made me happy by 05:05. Plenty of sharp edges were still there, and I needed to blend them nicer.
The Furniture Panel course, workshop 21, part 7, shows the same patience. I took a number three, about half an inch (13 mm), and began my blending motion. A little choppy right there at 09:10. We can always fix it. From almost nothing, the pass carefully blends into the sloping motion (09:55).
Grapes got the same treatment in the Grape Onlay course, workshop 13, part 1, where I planned to refine a little better the ones in that section. Right now they look choppy (00:53). A lot of rough areas, but that's okay, and we'll work on those. My main tool would probably be a number five, around 15 or 16 millimeters (5/8 in). Another tool I would probably use was a number three, less than half an inch, about 12 millimeters.

A short record of rough spots and what I reached for
Five lessons, five spots. The right column holds the tool I named, or a hedge where I only guessed.
| Lesson | Where it looked rough to me, as I told it | Tool |
|---|---|---|
| Workshop 18, part 9 | One part rough and not right | Concave |
| Workshop 43 | An area I called no good | None named |
| Workshop 93 | A swirl that looked really choppy, fine for now | Number five |
| Workshop 102 | A blend running one direction that was slightly rough | Number three |
| Workshop 35 | A cleanup that looked rough all over | Skew, maybe |

Could the grain be the reason a spot looks choppy?
It can be. In the Hashemi Flowers course, workshop 12, part 2, I took a V tool, a number 16 at 6 millimeters (1/4 in), and made a preliminary pass. Across the grain and also against the grain (01:36), and that is why it came out slightly choppy. It was okay.
A smaller V tool came next, a number 15 at 3 millimeters (1/8 in). I tried to hold my tool as close as possible to the edge, for much better control (02:34), and I was making passes against the grain.
Does the grain run against your tool on one side of the spot? Could that be the whole story?

How do you blend a rough spot after the concave?
The blend shows up in part 3 of workshop 102. The concave goes and dies in (02:17), and that is the back line of our overall movement. Going to that line would let me work my way around it. That left me a really good area for my convex.
Still, it needed blending, nicely and smoothly. The blend direction looked a little choppy at 03:13, and that's not really good. A number three gouge, I said, probably, to blend it going that direction. Really good, actually, I said at 03:49. A spoon came after, maybe a number seven at 10 millimeters (3/8 in), to clean a little of the area.

A slower version sits in workshop 36, part 8. A little choppy on the inside at 07:02, which is no good. Before that I had gone around to double check if something needed to come off on the side. Same tool as before, careful, almost no pressure.
Next comes the Corinthian acanthus course, lesson 5, part 1. My edge was kind of choppy at 06:54, so I picked up a number nine and made my cleaning pass, really carefully. That was not the final step yet, I told you. Get as clean a pass as possible on the way, and it helps later.

Can you feel a ridge before you see it?
Over in the Lily Box course, workshop 4, part 10, I wanted the surface really nice and flowing before I started undercutting. In three dimensions you can see a ridge, I said, and if it's choppy, it's really noticeable. Between that ridge and the inside I had approximately 1/16 of an inch (1.6 mm).
Sometimes it is a good idea to feel it by finger, where the ridges are (20:57), and deal with them. I usually don't use any tools beside my carving tools, but you can sometimes use a rasp for a flowing line, a really fine one. Find those ridges, I told you, before you make the final pass.

When do I leave the rough work alone?
Rough can be fine. The same knife could do the refinement in the Flower Rosette course, workshop 6, part 4, I said, taking off the small facets. It's all about how you see it (04:09). Some carvers just leave it like that, all choppy, and it also looks nice. It's just hand-carved. It doesn't look bad at all, I said at 04:44.
In part 5 of that rosette workshop I said we used mostly just a knife. Workshop 16 had the inside seen from below, and I dealt with it before the overall movement.

How far can you go before the detail gets weak?
Enough undercutting right there, I thought, at 03:34 in part 9. I could go more extreme, but I did not want to create a weak detail. What I had to do next was go around and in from this side (03:48), probably a number seven again.
That tool would probably be the wrong one (05:33), because it had too big of a sweep. I didn't need that big of a sweep right then, and a number five came to mind. Too much stress was the other worry. If I continued to do what I was doing, I told you at 05:55, I would create a lot of stress, and that's not good.

What would you try on your bench?
Is there one area you keep looking at, thinking, not quite? Could a single concave bring it in? Try what I did at 00:44. Bring that part in, break the rest down, and check it from underneath if some of it will show.
This video is one part of workshop 18, and the lesson page tells the rest. The course page is Advanced Carving: Venice Room, Part 2. The craft is wood carving, a branch of woodworking. A gouge belongs to the chisel family, and a rasp and a mallet sit beside it on the bench. A relief is carved on a flat background, and an acanthus leaf has deep spots that hold shadow. The grain matters on every pass. The room is in the style of Venice, and my sizes are in millimeters and inches.

Which spot on your carving would you break down first?
How it's done
- Name what is wrong. At 00:36 I called the spot choppy, and at 00:41 I said it didn't look right.
- Pull the area in. Maybe just bring a little bit this one in (00:30). My plan after that was a concave to break it down.
- Check the side. Less cleaning on the side (01:13), using a number seven upside down until a certain point.
- Soften the S. The S bothered me, so my idea at 01:57 was a lesser sweep, a number five.
- Stop before it gets weak. More extreme was possible at 03:34, I said, but the detail was already too weak for that.
Frequently asked questions
What does choppy mean on a carved surface?
Choppy is my word for marks that don't flow into each other, so the surface looks busy. In this video I called one area too choppy and said it didn't look right. A concave came next.
Is it okay to leave a rough spot for a minute?
Sometimes. A swirl in workshop 93 looked really choppy and I called it okay, because I would fix it in just a moment. A pipe in workshop 156 went the same way, and by 05:05 I was happy with it.
Can the grain make a carved spot look choppy?
In the Hashemi Flowers course I worked across the grain and also against it, and I said that was why the spot looked a little choppy. I held the tool as close as possible to the edge, which gave me much better control.
What to carve next