

Alexander Grabovetskiy, woodcarver, School of Woodcarving · Published 2020
How do you get a deeper hollow by gluing a second layer on top of the carving?
Quick answer: A double layer is an upper part of wood glued over a lower one. In part 5 of Venice room workshop 18, I call it another way to reach the deep excavation inside acanthus heads, and I say Byzantine-style carving used it. Then I carve a dome with a number 7.
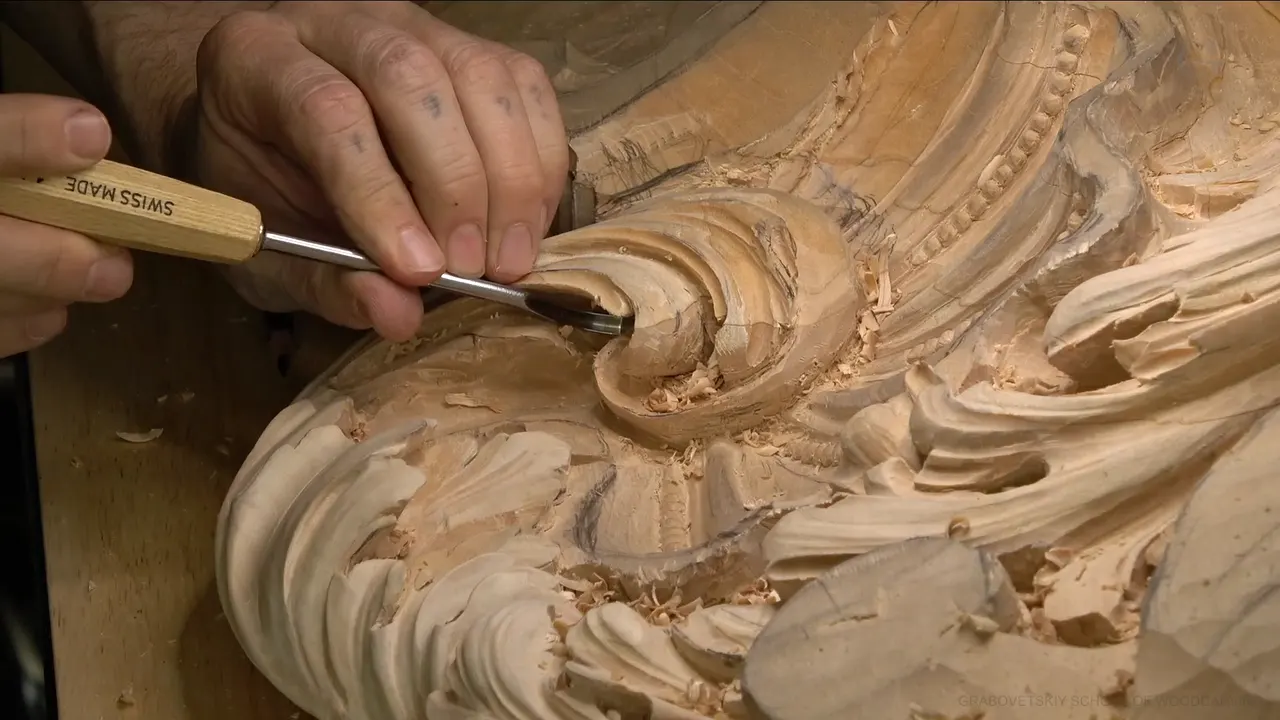
A double layer is a carving built from two pieces of wood, with the upper part glued on top of the lower. In Venice room workshop 18, part 5, I name it as another way to get the deep excavation inside those acanthus heads (00:48). Next a number 7 excavates a dome on the inside.
The part is short, so this page does two jobs. It goes through my words in part 5, one cue at a time. And it borrows my lines on the same trick from my Byzantine class and from other workshops of the panel, each with its public lesson linked beside it.
Ever dug a hollow so deep inside a leaf that you worried about the wall left behind it? Would you like to see another route to that depth, one the Byzantine carvers used? Then read on. My first words on it sit at 00:48.

What is a double layer on an acanthus head?
I start with a small warning. There are other ways to do that, by the way (00:45). Next I name the spot, those heads and the deep excavation on the inside. For that, I say, it is possible to use a double layer, just to glue the upper part onto the lower (00:48).
The whole instruction fits in two breaths. I give you no size for either piece and no name for the glue, and the wood goes unnamed too. The idea comes in a single sentence and the clip moves on, and further down this page I go to lessons where I do give numbers.
Where does it come from? Byzantine-style carving used it, I say (01:00). I call it a really beautiful movement, and I add that I mean the early kind, not late Byzantine (01:09).

Did I promise to carve a double layer for you?
Near the start I say it: someday I'm going to do that just to show it to you (01:09). More than a minute later the plan comes back. One of the acanthus leaves in our project will be Byzantine, I say (02:19).
The promise has a limit, and I say so. More acanthus leaves are coming, I tell you, and I know we've got only a few done, but a lot more will follow (02:27). Then a short line about order: "Just understand my priorities. When I have a project to finish" (02:39).
Here the double layer stays a plan, since I don't show it here and the video holds nothing beyond my words.
How can a hollow be gold leafed on the inside?
This is the line about gold, in my order. You can still see it in some of the Orthodox carvings, which are made for the gold leafing, by the way (01:31). They created a technique, a really nice one, and you can gold leaf it on the inside with no problem (01:42).
Next comes what puzzles some people. They don't even know how it is done, how it is even possible to get gold leafing inside (01:57). Possible, I say, if you know what they did, the approach they used, and nothing complicated at all (02:07).
Part 5 doesn't say what that approach is, and I won't guess. Other lessons say more about gold on a carved inside, and they come after the bench work.

Which gouge excavates the dome in part 5?
The bench work starts at 02:54. I create a little excavation on this side, and I tell you I have to do it carefully. Cleaning it comes next. I'm using number seven, I say, and I excavate like a dome shape on the inside (03:07).
A short check follows. "Okay. So now inside is just like a dome." That is good, I say (03:22). My gouge is a number 7 and the shape is a dome. No width for the gouge and no depth for the dome come with it, so I print none.

Before I dig the dome, I work the other side of the head. Again on this side, little by little, without forcing (00:12). Forcing would be a big mistake, I say (00:22), though I don't name what it would break, so the line stays as I said it.
Why do I brush the chips out before the semi-final cuts?
The chips hide the work from me. The dome is good, but I need to brush out all those chips (03:28). They are distracting the view for me to the point that I can't even see what I'm working on (03:40). A bit later I say it again: look at everywhere, those chips (04:10).
After the brush the work turns. Now I am able to see, and now I am able actually to attack with the semi-final cuts (04:18). My plan for them is hedged. My pick is probably just an upside down number three at first (04:30). The word is probably, so the plan stays a plan.

Cleaning comes next, and I name the goal in plain words. It's like final cleaning, I say (04:45). I don't want to see any cuts, any tool marks, so it should look nice and clean (04:50).

What do I plan for the final form of the head?
I need to finish this a little bit, I say, and also create the final form, which is supposed to look like that (05:06). I ask my own question and answer it with another maybe. How do I do that? I can use probably number seven, I would say (05:19).
Maybe I'll be able to chip like that on the inside, I add, but carefully, without creating too much stress (05:29). The same breath holds one more job. I also need to chip this point, because I don't like leaves that are too pointy (05:46).

A fair note for you follows. Certain designs of acanthus show those sharp points, so mine is not the only way to do it (05:57). The only reason I want to do it my way is that I'm trying to be authentic. Am I going to be successful in my trying? We'll see (06:17). A reason for the old carvers follows right after that (06:47), and this page stays with the double layer.
How did I build a double layer in my Byzantine course?
Here I borrow from lesson 1 of my Byzantine acanthus course, where I do give numbers. Before the second layer goes on, I say, we have to create the first layer (1-1, 04:06). The inside of that first layer gets a concave, like a bowl almost, with some surface left to glue on the second layer (1-3, 03:54).
That leftover surface is a border, and I give its width. A step of approximately three-quarters of an inch (19 mm), I say, or five-eighths of an inch (16 mm), but three-quarters gives a better gluing surface (04:47). No hitting by a gouge or by any tool there. Don't touch it (05:40).

Why leave it? "Because we need gluing surface," I tell the class (06:36). One more thing I mean for you too. I want you to understand why we do what we do, and not just follow along at fifteen miles an hour (06:56).

The top piece can be held on in three ways, and I list them. A few pegs, or screws put in from behind, or just glue (04:07). In Byzantine work they were able to replace the upper piece if somebody knocked it or broke it. In my case I'm just going to glue it, and I'm not going to take it apart (04:35).
The old way was different again. They didn't glue on, they used tacks, and you could pop it off really quickly. Toothpicks work if you wish, I say (1-1, 04:20). Screws came later, not in Byzantine times, when the Orthodox churches used them from the back (04:33).

How deep do I carve the second piece?
Over in lesson 6 the second piece starts on the backside, and I make a dome on the inside there (6-1, 02:03). The caution comes first: don't go too deep in the middle, because we need the meat (03:33). A little less deep than the first layer (03:44).
That piece needs no glue while I scoop it out, I say. The glue goes on afterward, and the result is a really deep shadow (05:45). The question comes up whether the bowl should go deeper on the second layer of a three-layer piece. I wouldn't, I say. We're still just after a shadow, and if you go deeper there's a chance you get through (6-2, 00:13).

In that class the hollow is two bowls that meet, one in the first piece and one in the back of the second. The backside, I say, is only for the shadow's sake (6-2, 06:17).

| Piece | What I do to it | Where |
|---|---|---|
| First layer | Carve a bowl and leave a border to glue | Lesson 1 |
| Border | Keep about three-quarters of an inch, no tool touches it | 1-3 |
| Second piece | Scoop a dome in its back, slightly shallower | Lesson 6 |
| Saved scrap | Glue it on top for the true Byzantine height | 6-1 |
Which glue did I use, and how fast could I carve again?
Any Titebond will do, I say, and Titebond two is fine (6-2, 06:27). I don't like Titebond three for this project. It's good for the outside, but it just takes too long to dry (06:31). With original or Titebond two, half an hour and you can already carve (06:40).
The top piece came from scrap. I told the class not to throw away the cut-out pieces, and if you want, we can add another layer and do the true Byzantine height (6-1, 06:09). The glue goes on top, and then I clamp it (6-2, 06:09).
One small thing from lesson 1. Something can go inside before the second piece goes on, a signature, say, and the time to do it is before that piece goes on (1-3, 07:14). In one class, someone carved a small fly or bee and put it inside. It's nice when people ask how in the world you carved that inside (1-2, 02:30).

Why would anyone ask? The piece will look solid, like it was done from one piece (1-3, 07:31). Gold works the same way in this clip: people can't tell how the gold gets inside.

Why does a smooth hollow matter for gold leaf?
The reason is missing from this video, so I go to other lessons. A number 2 at 12 millimeters, about half an inch, does the job in workshop 28, and I say I don't like a sharp transition on the inside. I still have to clean it with something like number 11 (28.3, 00:13).
It would be okay to leave it, I say, but I like the idea of how they did it originally, and they did not have sharp transitions on the inside, especially on a Byzantine style acanthus (00:37). Then the reason. If you're doing gold leafing, it makes all the sense not to do the sharp transition, because gold sticks a lot better on a smooth transition (01:17).
The same warning comes from the other side in workshop 8. A tool angled under would create a really sharp point inside, which I don't want to see. It's hard for paint (8.1, 06:39). With gold leaf, gold won't stick to those sharp lines. A really nice transition on the inside with the number 11 would be the best choice, I say (07:03).

The dome gets the same treatment in lesson 5 of the Byzantine course. Inside also, we create a dome effect today, so it's really easy to gold leaf (5-2, 01:48). I add in lesson 3 that too many lines won't be as soft, and they're not good for the gold leafing, so it is concave, concave, and a convex right in the middle (3-3, 00:53).
What did the old carvers put under the gold?
Gold gets its own warning in workshop 163. Getting gold leaf onto the side of an undercut is really hard, I say, if it is too deep, so they wanted a simplified version to get the gold leaf underneath (163.1, 00:15). They did not apply gesso. Before the gold they applied clay, red clay, just normal earth red clay (00:38).
The clay was a way to reach inside and make it smooth, I say, since they didn't want to do anything too crazy underneath (00:54). In some old churches that were saved, you can see gold leaf on parts of the carving, and inside the cracks of the gold you can see the red clay (01:02).
The longer telling sits in lesson 5. The clay was burnished, a thin second coat went on, then oil and the gold leaf, and the small cracks show the red (5-2, 02:00). I won't retell all of it here, so go there if the order of those coats is what you came for.

Why are the old pipes so big? In workshop 65 I say the Venetian style inherited those exaggerated pipes from Byzantine style, who developed those really big movements for the gold leafing (65.6, 01:04). Gold is a yellow-brownish color, and they needed the shades and the shadows, and that is why they have exaggerated eyes and pipes (01:23).
I add in workshop 152 that the Orthodox churches of the Byzantine Empire used exaggerated pipes because it is a lot easier to apply gold leafing on them (152.3, 05:23).
What does a glued layer look like once you carve it?
Three glimpses from the panel itself follow. Back in workshop 48 I say there are different approaches to developing the head of acanthus, and this one is not the only approach (48.3, 03:25). There is a double layer, which I'm planning to do in another lesson, on a smaller acanthus, like the Byzantine style (03:40).
Then comes the line that matches part 5. The true Byzantine acanthus is not done in one piece, I say. They are actually a double layer (04:06). It was designed for the gold leaf, I say, with a different technique (03:53).
Something on a pipe puzzles me in workshop 43, and I say I don't know what. Then: "Oh, I know what that is. It's just the glue line." Two pieces glued together right there, and I had a little void, but it all blends in (43.2, 01:29). A glue line turns up again in workshop 44, right between two layers. There was a second layer, and there is a glue, so at least I need to remove that (44.12, 06:20).

Those are two different panels, so I won't call them the same job. What they show is plain. When two layers meet, the glue line can show in the carving, and I either let it blend or take it out.
What does part 5 leave out?
It leaves out sizes: a thickness for either piece, a width for the number 7, a depth for the dome. Glue, wood and the method of putting gold inside a hollow stay unsaid too. For gold I say only that it is possible with the right approach, and that the approach is simple (02:07).
What it keeps is a short list in my words. The upper part goes over the lower, and early Byzantine style used it. A number 7 makes the dome, the brush clears the chips, a number 3 held upside down may do the semi-final cuts, and a number 7 may chip the point.
The panel sits in Advanced Carving: Venice Room, Part 2. The workshop before this one is workshop 17, workshop 19 comes after it, and for the Byzantine build in full I'd start with the whole Byzantine series.
Which head on your bench has a hollow you'd like to make deeper? Shall we carve?
How it's done
- Dig the dome. I make a little excavation on the side, carefully, and with a number 7 I dig a dome shape inside.
- Brush out the chips. The chips distract the view so much that I can't see what I'm working on, so I brush them all out first.
- Plan the semi-final cuts. I plan on probably only an upside down number 3 at first.
- Clean off the tool marks. I want no cuts and no tool marks showing, only a nice, clean surface.
- Chip the point. Probably a number 7 chips the inside and the pointed tip, carefully, without creating too much stress.
- Add the upper piece. For a double layer I leave a border of about 3/4 inch (19 mm) to glue to, scoop a bowl in each piece, and set the upper part on the lower with glue, as in my Byzantine lessons.
Frequently asked questions
Is a double layer the only way to get a deep hollow?
My words in part 5 are that there are other ways to do that. For those heads and the deep inside excavation, you can use a double layer and put the upper part over the lower with glue. The video lists none of the other ways.
Where does the double layer come from?
The early Byzantine style used it, I say, not the late one. Some Orthodox carvings still show it, and they were made for the gold leafing. No dates come with any of it.
Can you gold leaf the inside of a hollow?
Gold leaf goes on the inside with no problem, I say, once you know the approach they used, and that approach is nothing complicated. Part 5 stops there. Workshop 28 adds that gold sticks a lot better on a smooth transition.
What to carve next