
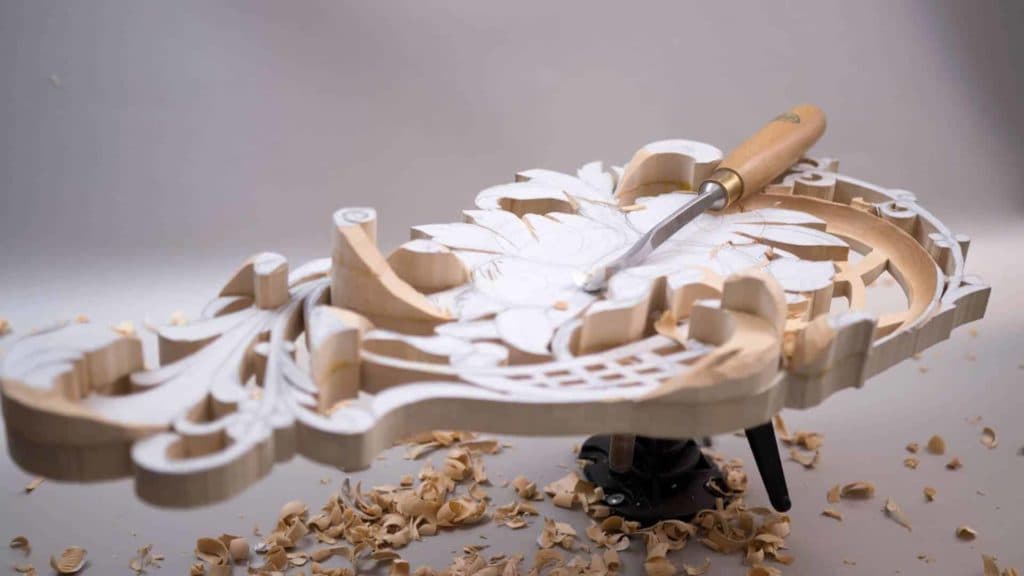
Alexander Grabovetskiy, woodcarver, School of Woodcarving · Published 2018
How do you stop a carving looking like a staircase?
Quick answer: Stepped relief comes from flat levels. Let each surface climb and drop along its own length instead, one end high and the middle falling away, and a panel reads as something that grew. Judge it with your eye down at bench level, because seen from above a flat level always looks correct.
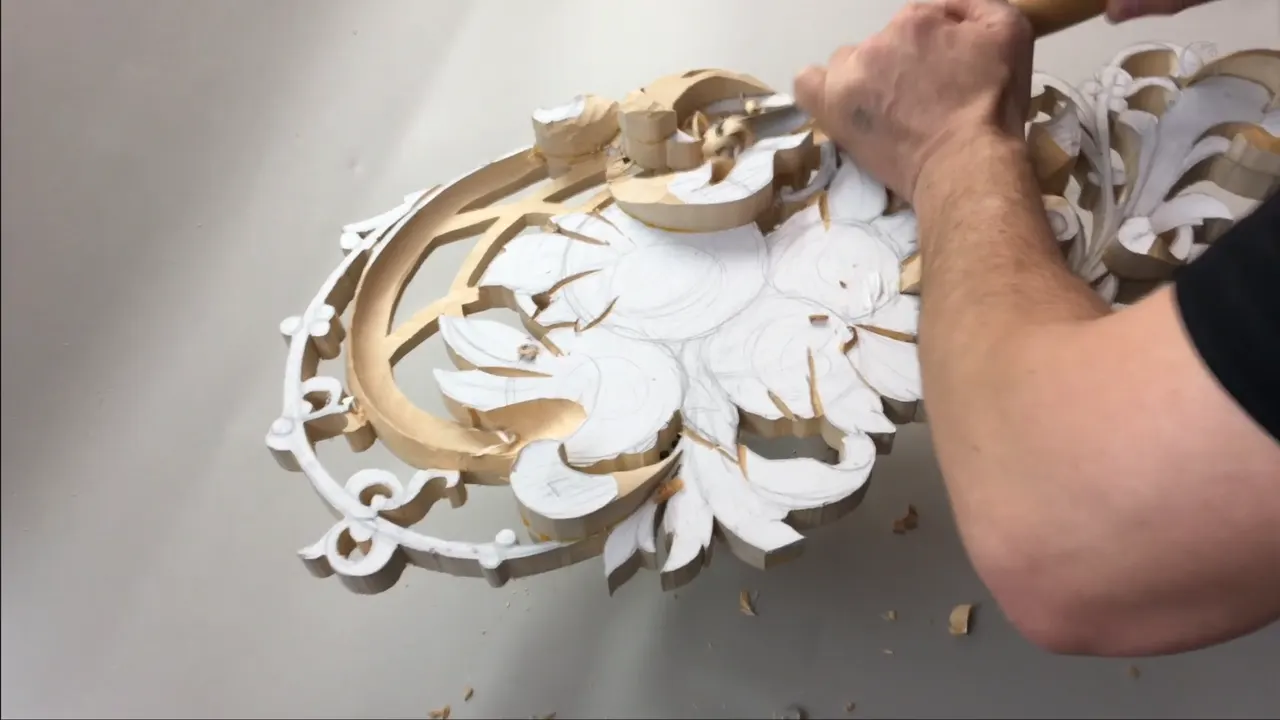
Carved levels read as a staircase when every one of them sits flat, and the cure is to let each level rise and fall along its own length. One end high, the middle dropping away, the far end climbing again. Nothing in a plant is flat, so nothing on the panel should be either.
You cannot see it from above. Drop your eye to the bench and the whole thing becomes obvious in a second.
Most people lower a section by picking a thickness and holding it, which is exactly what a machine would do, and the result looks machined. Every surface lands parallel to the board it came from, every edge meets the next one at a step, and the whole thing goes dead under a lamp. So here is how deep I actually go, why a groove gets cut on the perimeter before any gouge touches the inside, how a leaf gets dropped below its neighbour on purpose, and the odd habit of mine that I still cannot justify.
The short version
- Outline with a V tool first.
- Then lower the whole section with a big gouge, cutting crosswise to the fibres.
- Leave about twelve millimetres of wood, checked constantly against what is already carved.
- Within that thickness, let the surface run high, then low, then high again along its length.
- Judge it from the side, never from above, and judge it before the detail goes in.


Why outline before you lower anything?
The groove gives your waste somewhere to break off. Running a groove round the perimeter of a section means that when the big gouge comes across and lifts a shaving, the shaving ends at your groove instead of tearing on past it into the shape you wanted to keep.

On this panel that matters twice over, because the thing next door is usually a ribbon or a leaf edge with grain running out across it. Lift one careless shaving into that and the repair takes longer than the whole section did.
I go round the ribbon as well, and put a small zipper down each side of it. None of those cuts are final. Call it a fence. I would rather build one than explain to myself later why I did not. The whole design is full of things that pass over and under each other, and each of those crossings is a place a gouge can run away.
How thick do you leave it?
Roughly half an inch stays in the section, matched to the thickness of everything already carved elsewhere on the board.

No background exists here to measure down from. The panel is pierced right through, so the only number that means anything is how much material is still standing, and that measure is what the flowers and the basket sit on. What matters more than the number is that I keep checking it. I set the gouge against a section I finished an hour ago, look at the two together, and adjust. Later some of it comes down again, to three eighths, once the shapes above are settled.
Lose that discipline and the panel develops a slow tilt nobody can point to. One corner ends up an eighth of an inch thinner than the other, no single pass caused it, and the only cure is taking everything else down to the thinnest point you accidentally reached.
| Stage | Tool | What you are actually deciding |
|---|---|---|
| Outline | V tool, 6mm | Where the waste is allowed to stop |
| Bulk removal | Number 9, driven crosswise | Nothing yet, and that is the point of this stage |
| Thickness | Number 3 at 20mm | The measure every other section is judged against |
| Flow | Number 5, or a 7 where the curve opens out | Which end sits high, and the road the surface takes to get there |
| Under and over | Number 8 at a quarter inch | Which element passes behind which, before anything is final |

Why use a gouge that feels too big?
Speed and control, in that order, and most carvers believe only the first half. A wide sweep spans the whole cut, so it cannot dig a trough, and the surface it leaves is even enough that nothing needs fixing afterwards.

My number 9 does nearly all the lowering here. A number 7 three inches across lives on the bench for bigger work, and I use it more often than people expect. Nothing clever about it either, and it moves wood the way a plane moves wood, in one long unbroken shaving. Small tools give you a rippled surface and a long afternoon.
Crosswise rather than lengthwise, most of the time. Lengthwise is quicker and the fibres lift easily; crosswise is safer, because a pass that goes wrong takes a shaving instead of splitting the board. I go against the grain when the shape demands it, and nothing bad happens, as long as the tool is sharp and I am slicing rather than shoving.
What does flow actually mean?
High, then lower, then high again, then higher still. Those four words are the shape I want running through this section, and it is a fact about the surface rather than about the outline.

Picture a real vine on a wall. No part of it sits at one height. A stem dips behind a leaf, comes up over a rib, drops again. When you carve that as a flat plane with shapes drawn on it, the eye reads paper. When the plane itself travels up and down, the eye reads depth, even where the actual change is two or three millimetres. Light does the rest, which is why I care so much about where it falls.
So I carve the movement into the background before I carve any detail onto it. The design course goes through where those rises belong; the short answer on this panel is that the high point sits where the movement starts, and everything downstream of it travels downhill.

Check it from the side. Turn the panel until your eye is level with the bench, look along the surface, and the flow line either reads or it does not. From above it always looks fine, which is why from above is the wrong place to look.
Finding the gouge that already fits the curve
On every panel comes a moment where you pick up a tool, set it against a line, and it lands exactly along the curve you drew. My number 8 does that on the outline of this ribbon. The sweep and the line are the same shape, so one pass follows the whole thing.

Worth hunting for, a fit like that. A gouge whose sweep is wrong for the curve has to be walked along in small bites, and every bite leaves a small facet where the two arcs disagree. Ten bites later you have a line that is nearly right and a surface that needs cleaning. The correct tool does it once and leaves nothing to fix.
Which is the real reason a carver ends up with forty edge tools rather than six. Not because the shapes are exotic, but because ornament is made of arcs, and an arc wants a sweep that matches it. Buy by profile and not by name, and you will get there on a reasonable budget.
Why drop one leaf under the next?
A ribbon has to run behind it, and that is the whole reason. The leaf that sits under the flowers goes lower than the piece beside it, and it disappears a little, and disappearing is exactly what it is for.

Once it is down there, the ribbon can run underneath it and come out the other side. Two elements now occupy different depths in the same square inch of board, and it buys more for the finished carving than any amount of surface detail on either of them. What separates relief work which looks carved from relief work which looks printed.
That decision costs nothing now and cannot be made later. Once the neighbour is shaped and finished, dropping the leaf under it means recutting both.
The hollow down the middle
Most shapes on this panel get a shallow hollow running along their centre, and then the surface twists away on either side. Neither cut is deep. Together they are most of what makes a carved leaf look like a leaf.

The trick is where the hollow starts. Begin it almost flat, where the shape leaves its parent stem, then let it deepen as the form widens. A hollow of one steady depth all the way along reads like a groove somebody cut. A hollow that grows reads as a surface that grew.
Then the twist. From the edge of that hollow the surface rolls over toward the outline, one way on the left and the other way on the right, so no part of the shape presents a flat face to the room. The scroll finishing this element gets the same treatment at a smaller scale, and that one is worked through in the technique library.
When is a level too weak to carve?
When the fibres run the short way across it and the wood flexes under your tool. A few places on this panel are like that. I leave them heavy on purpose.

Those come down to size last of all, once no mallet has any business in that corner of the board. Taking them down now buys nothing and risks everything, because every pass I make on the rest of the panel would be a pass made next to a piece of limewood two millimetres thick with the fibres pointing the wrong way.

Press lightly there. When a section starts to give, stop pressing and change the angle of attack rather than the amount of force. That instinct is most of what the beginner course spends its time building.
What about the knife?
Mine is a number 12 and it cost almost nothing. One of my favourites on the bench, and the reason is the steel, thin enough to flex.

A flexing blade follows a curve that a rigid one would carve straight through, which is also why a knife is what you reach for when something has broken. Where a shape wants a long sweeping cut with a slight bow in it, that knife does in one pass what a gouge does in four, and the surface comes off cleaner. Price and usefulness have very little to do with each other in this trade, which is the argument I make at more length in the tools course.
A habit I cannot defend
I outline the same line twice. Once with the V tool and once with a pencil, and sometimes in the other order, and I have been doing it for years without a reason.

Honestly, I do not have to. The V tool groove is already visible and a pencil mark on carved basswood is nearly useless. Better not to put graphite on wood at all once you have started carving, because the line gets carved half away and what is left confuses you, and because the graphite itself works into the fibres where your hand rubs it.
So do as I say there rather than as I do. Most of the time I keep the pencil off the wood after the first stage. Sometimes I pick it up anyway. Just a habit, and I have stopped trying to explain it.
Rough is fine at this point
The section looks bad when this stage finishes, and correct rather than unfortunate is what it is. Ridges everywhere, tool marks crossing each other, a surface nobody would photograph. Visitors to the shop always ask, around now, whether something has gone wrong.

All of those marks disappear under the passes that come later, and I would rather have a fast rough surface at the right thickness than a beautiful one at the wrong thickness. Work to the shape first. The skin of the carving is the last thing you touch, not the first.

I also leave room for changes, which sounds like an excuse and is a working method. Nothing here is at final thickness yet. The movement is set, the depths are roughly right, and I can still lower any of it by three millimetres when the piece tells me to. The rest of this project runs through the school, and the next one picks up on the scroll. How the board got its height in the first place is the lesson before this one.
One more thing worth saying to anyone starting a piece like this. The basket on the basket here is a woven pattern, and every strap of it has to pass over one neighbour and under the next. Those decisions belong here, while the whole area is still rough, and I make them with a pencil and a long look rather than with a tool. Get them wrong and the weave reads as a grid. A whole lesson on that weave comes further into this course, and the same reasoning shows up again in the one on working from behind.

How it's done
- Cut a groove on the perimeter first. A groove on the perimeter gives every shaving a place to end. Without it the gouge carries on into the ribbon or leaf edge next door and takes a piece of it.
- Take the bulk off across the grain. A number 9, cutting across the run of the wood rather than along it, with the widest sweep the space allows. A pass that goes wrong then lifts a shaving instead of splitting something.
- Bring the section to a matched thickness. About half an inch here, set against what is already carved elsewhere on the board rather than against a ruler. Check it every few minutes.
- Carve the rise and fall into the surface. High at one end, dropping through the middle, climbing again at the far end. Two or three millimetres of travel is enough to change what the eye reads.
- Look along it from bench level. Turn the work until your eye is level with the surface. Flow either reads from there or it does not, and no amount of looking down will tell you.
- Drop one element below its neighbour. Wherever one element must sit behind another, settle it now while both are still rough. After either one is shaped, the change costs you both of them.
- Leave the weak places heavy. Wherever fibres cross a narrow piece the short way, stop above final thickness and return once everything else is done.
Frequently asked questions
How deep should relief carving be?
Variation matters more than depth. A quarter inch of relief that rises and falls throughout reads deeper than three quarters held dead flat, because the eye reads shadow rather than measuring anything.
Why work across the grain instead of along it?
Safety, while the section is still rough. Lengthwise is faster and the fibres lift beautifully, right up until a pass carries on and splits into something you wanted. Crosswise, the worst case is a torn shaving.
Is a bigger gouge really better for roughing?
It spans the whole cut, so it cannot dig a trough, and the surface comes off even enough to need no repair. Small tools at this stage give a rippled surface and a long afternoon.
What to carve next