
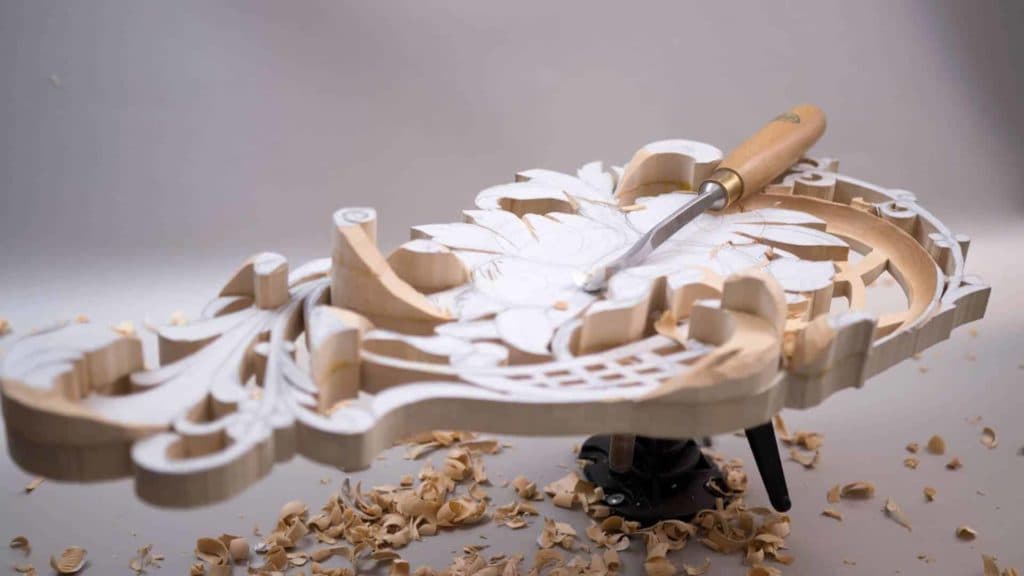
Alexander Grabovetskiy, woodcarver, School of Woodcarving · Published 2018
How do you carve a scroll in wood?
Quick answer: Start outside the drawn line, about a thirty second of an inch clear of it, and work inward. That margin lets the paper pattern come away, leaves room to correct the curve once you can see wood, and keeps the first ragged pass in material you were going to remove anyway.
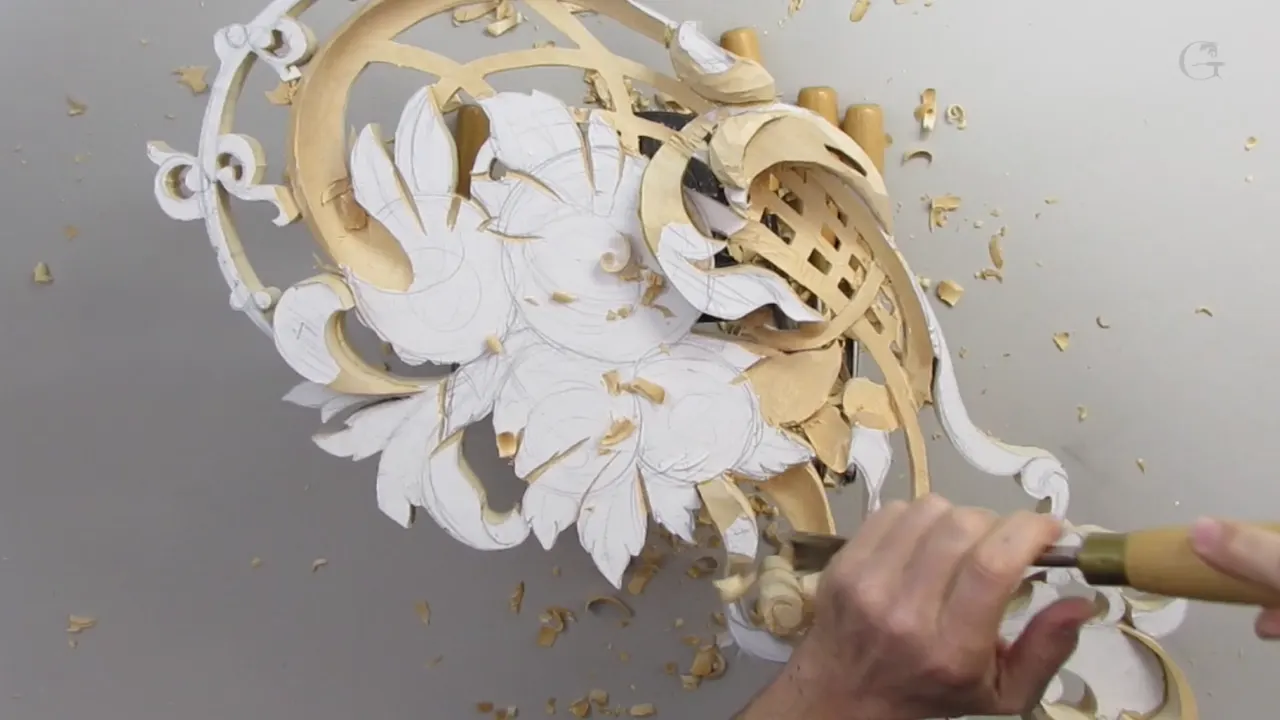
Carve a scroll from the outside in, and start every pass a whisker clear of the line you drew, call it a thirty second of an inch. That sliver of spare wood is what lets you lift the paper pattern off, correct the curve where it needs correcting, and arrive at the finished line with a tool instead of a prayer.
Cut straight to the line and you have already spent the only margin you had.
Of all the small shapes in ornament a scroll is the hardest, and the one that gives a panel its character. It spirals, so its surface never stops turning. It has a focal point, which means one spot on it must be higher than everything else. And it sits at the end of a movement, so it has to look as though the whole design ran into it rather than as though somebody drew a snail there. Here is the order I work in, the tools that do it, and the two mistakes I still make myself.
The whole job, briefly
- Groove it first, clear of your line.
- Peel the pattern away and look at bare wood for the first time.
- Find the gouge that already is that curve.
- Put the summit where the design wants it, then let every other height fall away from there.
- Tiny tools last of all, and only for waste.


Why leave that sliver?
Three reasons, and the first one is the paper. The pattern is glued to the board, and once a V tool groove runs round the shape the paper inside that groove can be lifted away in one piece, leaving you looking at wood rather than at a drawing of wood.

Then there is the correcting. A drawn spiral and a carved one are different animals, and a line that looked right on paper often wants to be a shade fuller on one flank once the wood is cut. Keep a margin and you can give it that. Cut to the drawn line immediately and the shape you get is the shape you drew, faults and all.
The third reason is simple mechanics. Any first pass tears slightly at the edges, and you want that tearing to happen in material already condemned. Everything about this technique is really the same idea as the relief cut, wearing different clothes.
Which gouge carves a spiral?
The one whose sweep already is the curve. I tried a number 8 on this scroll, found it too wide, reached for a different 8 measuring three eighths, and that one lay on the line as though it had been ground for it.

Chase that fit rather than forcing a near miss. A gouge that does not match the arc leaves a small facet at every bite, and a spiral is nothing but arcs, so the facets multiply fast. With the right sweep you walk the tool round in a few passes and the wall comes out true.
Then go in from the sides, not from the front. Working inward from both flanks toward the centre means whatever you cut always has support behind it, and the fragile middle of the spiral is the last thing you touch rather than the first. A wider 8 takes the outer turns where the curve opens up, and I keep both on the bench rather than swapping back and forth to one.
| Step | Tool | Why that one |
|---|---|---|
| Outline | A V tool, mallet driven while thickness allows | Frees the paper, fences the waste |
| Roughing the spiral | A three eighths number 8 | Its arc is the drawn arc, so one pass does it |
| The flow line | Number 7, kept low | Settles where the shape climbs and where it drops, long before any detail exists |
| Shaping | A number 5, plus a 20mm 3 | Flatter |
| Cleaning | A 1mm V tool, then an 11 at half that | The corners nothing larger will ever enter |
| Finishing the eye | A very small knife | Flattens the eye of the scroll and turns it |

Where does the high point go?
At the focal point of the spiral, which on this one sits just off centre, and everything else on the scroll travels downhill from there.

That single decision does more for the finished carving than any amount of refining afterwards. Carved at one height it is a disc with grooves in it. A scroll with a genuine summit reads as something that grew and curled, and it throws a different shadow at every hour of the day.
The wall around it matters as much. Where the spiral drops away to the background, that drop must not be vertical. A straight down wall is what a router leaves. Give it a flowing profile, a slight belly, so the surface turns into the background rather than falling off a cliff into it, and the whole thing softens. I go through where these rises belong in the design course.
Establish the movement before the shape
Before any of the spiral gets its real surface, I take a wide number 7 and rough the movement in, sitting it low, just to see where the thing wants to travel. Not a cut I keep. More a question I am putting to the wood.

Start that lower than feels comfortable. Every carver's instinct is to set the preliminary movement near the top of the available wood, because it looks bolder there, and then there is nothing left to work with when the shape turns out to need more depth on one side. Begin low and you can always come up. You can never come back down through wood you already removed.
Once that line is in I can read the element for the first time. Where it climbs, where it falls, whether the spiral is going to sit comfortably at the end of it. If the answer is no, this is the cheap moment to change it, and cheap moments are the whole reason for working in stages. A mallet and a V tool cut the initial groove while the wood is still thick enough to take a blow.
What is a step cut?
Starting a pass on one side of the shape and finishing it partway across, then beginning the next pass where that one ended, a little deeper. The surface comes down in shallow terraces rather than in one dive.

It buys control. Each terrace is a place to stop and look, and if the depth is going wrong you find out after two millimetres instead of after ten. On a scroll, where the correct depth changes continuously as the spiral turns, that feedback is most of the technique.
The terraces then blend away under a bigger tool. A number 7 laid across them takes the edges off in a couple of passes and leaves one continuous curve, and nobody who sees the finished carving will know the shape was built in layers.

Judge every stage of it edge on. Put your eye at bench level and look along the surface. From above, a scroll always looks finished. Drop your eye and you see that one turn is flat where it should be climbing, and that is a five minute fix now and a serious problem in an hour.
Never lean the tool on the edge
This is the one that ruins work, and it is not about the cut you are making. It is about where the rest of the tool is resting while you make it.

As the spiral takes shape its outer wall gets thin. Lay a gouge across that wall to steady yourself for a cut somewhere else, put any weight on it, and you have used a two millimetre limewood edge as a workbench. It flexes, crushes, sometimes simply goes. Where the fibres run out across that wall the odds get worse still.
Keep your hands and your tools on solid ground. Brace on the thick part of the panel, on the vice, on anything that is not the thing you have just spent an hour shaping. How the hand holds a small tool decides whether that is even possible. The same rule runs through the whole of the beginner course and people still learn it the expensive way.
Which tools clean the corners?
Very small ones, and only once everything else is done. A one millimetre V lifts the waste out of the tight inside angle, and an eleven at half a millimetre goes where even that will not fit. I call what comes out junk, which is not quite fair to it, but it is in my way and I want it gone.

Both of them are for waste rather than for shaping, and the tools course shows what each profile is actually for. The shape was settled by the big tools; these are housekeeping, and reaching for them earlier is how a scroll ends up covered in fine tool marks that nobody asked for.

There is a whole lesson before this one on bringing a whole section down to a consistent thickness, and this scroll only works because the wood around it is already at the right height.
A small knife finishes the eye at the centre. Flatten the very top, then turn it slightly so it tips the way the spiral is going, and the scroll stops being a symmetrical target and starts being a thing in motion. The knife does that better than any gouge because you can see exactly where the bevel is.
The mistake I made on camera
I flattened the top of the scroll, looked at it, and it was wrong. The eye sat too high against the turn beside it, which meant the whole element had to come down further before that top would read.

Nothing was ruined. It cost a few minutes of lowering. But it is a good example of why the summit gets set early and defended, because everything else on the shape is measured against it, and when the summit is wrong every measurement taken from it is wrong too.
Some of this you cannot see on a video, and I am sorry about that. There are spots on this scroll I can barely see myself, working at arm's length in good light with forty years of practice. You feel them through the steel more than you see them.
Not rushing, and failing at it
I tell every student in every workshop not to hurry, and I have a tendency to hurry, because I want the thing finished.

That is the honest position. Knowing the rule does not make you immune to breaking it. What helps is a mechanical habit rather than good intentions: work your way in rather than driving at the finished depth, take the step cuts, put the tool down and look from the side every few minutes. The habit survives impatience. Willpower does not, and the lesson on the woven basket has me admitting the same fault again.

And when a shape refuses, that is information. Against the grain on this scroll there was one angle and only one that would take a clean shaving, and the wood was getting weak enough that a firm pass would have taken the whole turn off. Overdoing it on a shape this size takes about one second, and I have managed it more than once. Sharp steel made it possible; force would have made it firewood.
Everything here grows from one place
The leaves beside this scroll are not separate objects that happen to sit next to it. In the design they grow out of the same swirl, and the carving has to make that visible, which changes how you cut every one of them.

It means each of those elements narrows as it approaches the scroll and runs into it rather than stopping beside it. It means their surfaces tip inward at the junction. And it means I cannot finish any one of them until I know what the others are doing, because they all share wood at the point where they meet.
That is the rule behind the whole of this ornament, and behind classical acanthus too. Growth has a source. Carve the source first, then let everything else leave it, and the panel holds together. Work the pieces independently and you get a collection of good shapes that never becomes a design. There is more on that in the technique library.
What happens to the scroll after this
Undercutting, eventually, with the V tool set on the left of the line and working inward so the spiral lifts away from its background and casts a proper dark line.

Not yet though. The elements that grow out of this same swirl have to be shaped first, because they share wood with it, and undercutting before they exist means undercutting something whose outline is still going to change. Everything in this project is built in that order, main forms before final cuts, and the next lesson goes at the same scroll from behind.

Three thousand lessons sit behind the door, and this scroll is one shape out of a vocabulary that has been carved in limewood for four hundred years.

How it's done
- Groove round the shape with a V tool. Keep the groove clear of your drawn edge by roughly a millimetre. Drive it with a mallet while thickness allows, because later there will be nothing solid to strike against.
- Peel the pattern away. Lift the paper off in one piece. From here on you are shaping timber rather than chasing somebody's drawing, including your own.
- Find the gouge that is already that curve. Try one, try the next. When a blade sits on the drawn arc without walking, you have it, and three passes will do what ten would with a near miss.
- Rough the movement in, sitting it low. A wide number 7, running deeper than instinct suggests, because rising afterwards is easy and returning through removed timber cannot be done at all.
- Cut inward from both flanks. The delicate centre gets touched last, so whatever the blade meets has solid material behind it the whole way.
- Decide the summit, then obey it. One place on a spiral stands above everything else. Every other height gets measured from there, so pick it before refining a thing.
- Bring the depth down in terraces. Begin a pass at one flank, stop halfway, start the next where the last finished and slightly deeper. A wider blade erases the terraces afterwards.
- Leave the corners for last. A one millimetre V and an eleven at half a millimetre clear the tight angles. A very small knife flattens the eye and tips it whichever way the turn is going.
Frequently asked questions
Why not cut straight to the pencil line?
Drawn spirals and carved ones are seldom the same animal, and once your blade reaches that line nothing is left to adjust with. Correcting happens in the sliver you kept.
Which gouge is right for a spiral?
Whichever arc matches the arc in front of you, and you find it by trying. On this one a three eighths number 8 sat perfectly on the drawn curve, while a wider 8 handled the outer turns where things open out.
Why must the wall not drop straight down?
Vertical walls are what machines leave behind. Put a slight belly in the drop so the face rolls into its background, and the shape softens rather than falling off a cliff.
What to carve next