

Alexander Grabovetskiy, woodcarver, School of Woodcarving · Published 2020
What does a wood carver mean when he says a tool is a "friend"?
Quick answer: While I cleaned in Venice Room 53.2 I said I'd use a skew, which was a friend in this case, and that it needed sharpening. In other lessons the word goes to a number 11, a knife, a router plane, a V tool, a back bend, wood and paper.
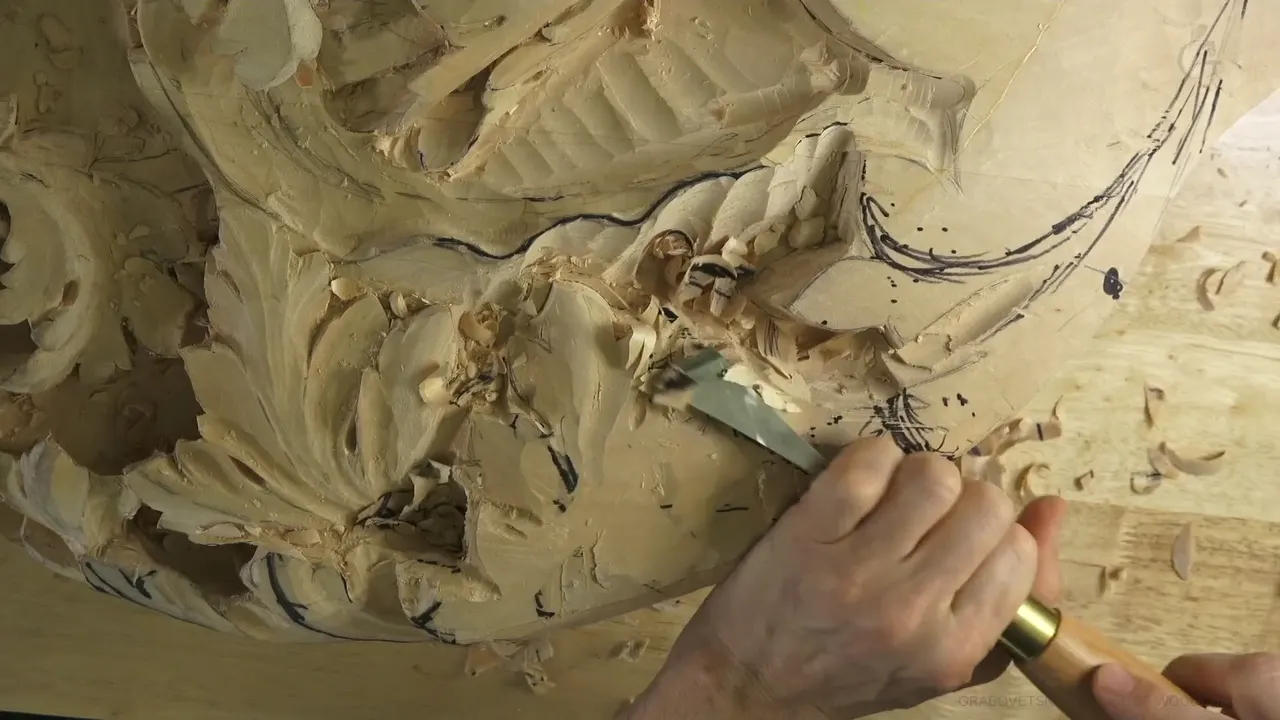

In part 2 of Venice Room 53 I planned to use the skew again to clean a movement, and I called it a friend in this case. The skew, I added, needed to be sharpened. My lessons carry the same word for number 11, for a knife, for a router plane, for a V tool, and for wood and paper.
Is there one tool in your set that your hand finds first? Do you feel a little odd when someone else picks it up? Then you know the word already. Below is where I say it, and what I was doing each time.
Where I call a tool a friend, at a glance
- The skew gets it in workshop 53, and a sharpening sits beside it.
- A tiny number 11 turns up in a rosette course, and a knife gets it in flower and beginner lessons.
- Router plane, V tool, back bend and a wood block get it as well.
- Grain and knots get the opposite: not friendly.
What was I doing when I called the skew a friend?

Part 2 starts with "So preliminary, just clean up." I would not lose the overall thickness, I said, but I would make it much more developed and much nicer. A little cleaning on one side was the plan, along with making sure I was doing the right thing right here, too.
One shape would be the main movement. It needed really good excavation, and for that I would need the space. Later on it would be concave, with the deep excavation, and "you will understand what I mean by that," I told you.

The next step looked like a mess, I warned, but I said it would not be one. I liked one line, and before drawing anything else I wanted to outline it. "Like always," I said, the tool for that was number 11: 16 millimeters (0.63 in), and then 15 millimeters (0.59 in), 5/8 of an inch, approximately.
"Just set that in," I said. "Setting in the main idea." Going too deep was not what I wanted, because two high spots still needed something developed between them, and something inside as well. Otherwise the excavation would leave too much of a void, and that was no bueno.

Two leaves were supposed to sit much lower than the line I was pointing at. Attacking them right away looked like a good idea, with the bigger number 11, 30 millimeters (about 1.2 in). That wouldn't distract my eye, I said. A much better idea of the overall development would follow.
"I'm going to use, again, skew," I said. A friend, I called it, though it needed sharpening, and I had to sharpen it. Then: "I just sharpened that off camera and it always helps to work with the sharp tools, obviously."

"Let me go and gradually establish that movement," I said. Other parts of this workshop bring the tool back. The plan in part 1 was a normal skew, to clean old marks off a section. In part 4 the plan was to take it again and blend a mark. Part 5 has "let me get the skew chisel," and a plan to blend a little better.
What did I do after the skew in part 2?

A part of the movement would go right below the chunk, and I kind of liked that idea. How far below I could determine a little later. "See, that was a good idea not to dig too deep in this area," I said. I wanted to show it closer. It is absolutely a good idea not to dig more than what I need.
One point would be way lower, because I really wanted to show it kind of low. From the bottom it goes up gradually, then down, I said: "So rounding." The right-hand side would roll.

A little nicer marker would let me draw it a little better. I had to establish a lot nicer movement right then, and it had to go all the way. When you look at it, it looks a little bit to the left side. Looking straight at it, that curvature is not that extreme.
Moving slightly this way, right underneath, was better. A double line was left over, which I didn't need, but it was okay. "Anyway, it has to be rolling backward," I said, and at least I would know exactly where I was supposed to stop.
Does a sharp edge make a skew a friend?

Grape Onlay 5 has the same pairing. Even a skew would probably work better, I said, a small one, a quarter inch (6.4 mm) skew in that case. "It's gotta be sharp, obviously." Then: "But the skew is your friend," I said.
I didn't think I would film the cleaning up. A magnifier glass would make it thinner, and thinner, and thinner, with the main motion the same as the one I had done. Attack from different angles, I told you, and see what the tool feels like and what the grain does. Removing from inside and from outside was better for me in that spot, because it would open up the section and make it easier to clean.
Which other tools did I call a friend?

A number 11 got the word in Chamomile and Bow Rosette 3. Working on one side first was the plan, and a model made it much easier for me. I could see where to start with the same tool, whatever was in my hand. Number 11 is what I like to use, "that's always better," but I was all right with the tool I had. Then: "Well, you know what? I'll switch to number 11."
"In this case, I'll just go ahead and just use a really tiny, small number 11." About three millimeters (0.12 in), three and a half millimeters (0.14 in), something like that, a little bigger than one-eighth of an inch. Excavating underneath of this side was the job. Even smaller could work, I said, maybe two millimeters (0.08 in) or so, or two and a half (0.1 in).

A knife got it in Flower Rosette 6. A flower can be done also with just a knife, I said. My plan was an initial pass around the outer ring, and then I said I thought it was deep enough, and that I didn't want to overdo it. Petal lines would be re-established, a deep pass would come first, and the triangle parts would be removed, angled on the inside and moved out. "So you see, knife is your friend."
After that, number 12, a little longer knife, would lower it just slightly, because we need to establish a rounder form. The same knife works for refinement, I told you, to remove the small facets and the material you don't really need. It's all about how you see it, I said. Some carvers leave it all choppy, and that also looks nice.
The first knife in Beginner Carving is the most ancient tool, pretty much, and a basic knife. I own multiple knives, I said, but a number 12 Swiss Made is my favorite. It is somewhat expensive but worth it. That one has been on my shelf 20 years already, and I'm still using it every day: a one-time investment and a lifetime friend.
I did a lot of projects with just one knife, and I'm pretty sure it was this exact knife. My housing got paid because of it. So did my food and clothes.

Removing a background with a gouge is a good approach, I said in Flower Rosette 5, but I found a much quicker way: a small router plane. It works miracles for me. For really nice results in relief carving I said that tool is a must-have, and that this small thing is a friend of yours. Carving by hand, I said, is better without a powered router, so a router plane would be the true hand done. One pass would not do it. Multiple passes were the plan, with a ring as my stopper and my final depth.
Chamomile and Bow Rosette 4 gave the word to paper. With some calipers you could, I said, but when a deep undercut needs measuring, a paper method is much safer, I would say. Lines don't have to be perfect, but try to be accurate if you do that project. Twisting paper is much easier than a ruler, and paper in this case is a friend. Worried about being 100% accurate? Use a paper again. A cutout of just one quarter of the printout, transferred on both sides, gives me a center to reference and puts the picture right on the piece of wood.

The V tool picked up the word in the V tool sharpening lesson. During one class a man brought a brand new set, and his V tool needed to be resharpened. He tried for a couple of hours and ended up really frustrated, because it's really, really hard to sharpen. Many people who try wood carving quit just because of the V tool. I said it is one of the most important tools in wood carving. Looking at the V tool, I call it my biggest friend in wood carving, and you have to treat that tool as a friend. Then you're not going to have a problem.
Dining Table Apron 9 has a short version. A small V tool was needed, "the biggest friend of mine in the shop." "Establish here too," I said, "separation."
In Venice Room 12 a back bend was the one. Roundness was the goal, and the back bend would probably again be my biggest friend, with number 5 and a way in. Why back bend, I asked, and the answer was that everything is on my way and there is no way I can use a straight tool.

Wood itself got the word in Stropping and Compound 4. How do you get inside your tool? With a block of wood you really don't have any limitations. Create your profile, and you don't have to spend money. One block can hold hundreds of different strop profiles if you wish, for micro tools, big tools and huge tools. A piece of wood is your friend. Some carpenters and furniture makers use MDF, and one board, I said, was 10 millimeters (0.39 in), 3/8 of an inch.
What happens when the wood is not a friend?

Grain gets the other word. Rounding a little more from one point in Venice Room 17 needed care, because the grain was not the biggest friend right there, and I didn't want to break my upper thing.
What I could do was start rounding this, and maybe I need to sharpen this one. "We have to attack from this side," I said. Maybe a different tool, probably just number seven. "Let me see if it's going to help me or not. Maybe not." Maybe just a flatter gouge.
One spot in Lily Box 12 was no bueno, I said. Grain in that section was not too friendly, and the goal was not to overdo it.
Knots do it too. A wiggle in Furniture Panel 18 came from a knot. I was not going to risk it anymore with this router plane, I said. I'd clean it across the grain. Be really careful if you have a situation like that, I said. Those knots are not as friendly. Grain sometimes just changes direction and does crazy stuff.
Where did I say each of these lines, and what followed?
Side by side, here are the lessons.
| Where I said it | What I was doing there | What followed |
|---|---|---|
| Venice workshop 53.2 | Cleaning a movement with the skew, then sharpening it | It needs to be sharpened |
| Grape Onlay 5 | Thinning a part with a small quarter inch skew | It has to be sharp |
| Chamomile Rosette 3 | Excavating under one side with a tiny number 11 | Number 11 is always better |
| Chamomile Rosette 4 | Marking lines by twisting paper, not using a ruler | A paper method is safer |
| Flower Rosette 5 | Taking the background down with a small router plane | Multiple passes, not one pass |
| Flower Rosette 6 | Setting outer ring and petal lines with a knife | Deep enough, don't overdo it |
| V Tool Sharpening | Talking about the V tool before the sharpening starts | It's the hardest to sharpen |
| Venice Room 12.11 | Planning a rounded detail with a back bend gouge | Can't use a straight tool |
| Stropping, lesson 4 | Making a wood block to match the tool's inside | Hundreds of profiles per block |

Where can you watch each of these lessons?
Each one sits inside a course of mine, and Venice Room Part 5 holds workshops 50 to 61. Every course is one click away if you start here.

How it's done
- Clean the spot. Just clean up, I said, and a little of this side.
- Outline with number 11. Number 11 for the outline, 16 millimeters (0.63 in), then 15 millimeters (0.59 in).
- Go bigger on the low leaves. My plan was a bigger number 11, 30 millimeters (about 1.2 in), for the two leaves.
- Take the skew. Skew again, I said, to get that movement tangent three-dimensionally.
- Establish the movement gradually. Gradually, and no digging beyond what I need.
Frequently asked questions
What came up about sharpening the skew?
Sharpening sits in the same stretch where the skew got its name. I said I needed to sharpen it, and that I had just sharpened "that" off camera.
Which tools got that word?
Skew first, then number 11, a knife and paper. Router plane, back bend, V tool and a wood block come after. Those lessons are Venice Room, Chamomile and Flower Rosette, Beginner Carving, Grape Onlay, Dining Table Apron, and the sharpening and stropping lessons.
How did I describe my favorite knife?
Number 12, Swiss Made, 20 years on my shelf already and still used every day. A one-time investment, I said, and a lifetime friend. Housing, food and clothes all got paid because of that one knife.
What to carve next