

Alexander Grabovetskiy, woodcarver, School of Woodcarving · Published 2020
What does a wood carver mean by "not going to fly"?
Quick answer: The saying I explained in part 11 of Venice Room 53 is an English one: something not good does not fly. I said I can make my work acceptable, but I want it to fly higher and farther. In lessons from other courses I use the same expression about a tool, a mallet and a knife.
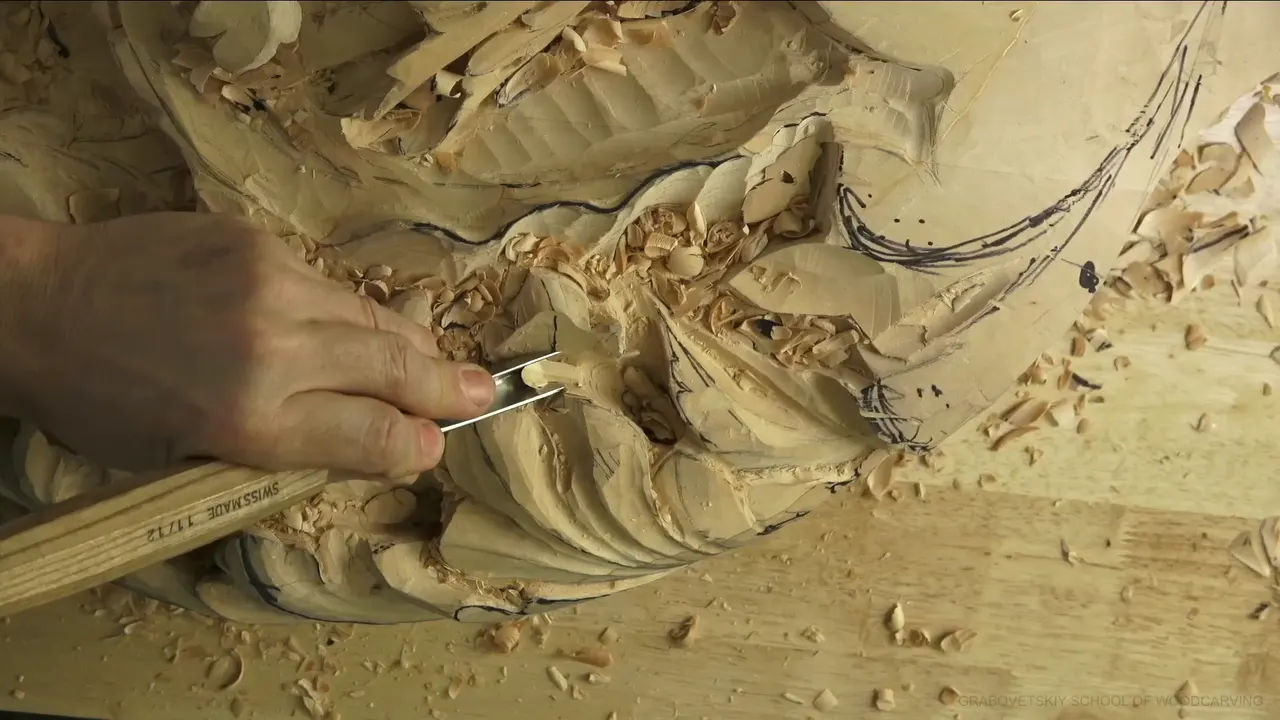

The saying I explained in part 11 of Venice Room 53 is English, and it is about something that will not fly. I use the same expression in lessons from other courses, about a tool, a mallet and a knife.
Ever held a tool over a spot and felt it was the wrong one? Did you put it down and reach for another? Start with workshop 53, then follow the saying through my other lessons, one tool at a time.
Where I use it, at a glance
- The English saying gets my own explanation in part 11.
- It came while I planned to make a rolling detail nicer.
- Right after it I planned separation cuts and an eye with a 5 millimeter number 11.
- Lessons 28, 35, 47, 55, 56 and 138 of the Venice Room carry those words about tools.
- A livestream and a flower rosette lesson use them too.
- Each lesson I name is linked below.
How did I explain the saying in part 11?
"There's a saying in English, it's not going to fly if something not good." People say that. Then my side of it, in plain words: "I can make it fly, I can make it acceptable."
I wanted more than that. I want to be "on another end" of it. My wish was for the work to "fly higher and farther," and I added "If I can use this expression."

What was I doing before the saying came?
"Let me do that right away." The plan was to "make it deeper," on "This side." I was covering that with my hand, and I offered my apology.
An idea followed. "What I can do, I can create this movement which is going to be from underneath," somewhere inside of that hole. It would give me "a lot more three-dimensional look."

"Go all the way." I was happy I had plenty of material. My plan was to undercut underneath of that spot, so the small detail there would get even more shadow, and I said it would be "absolutely beautiful and gorgeous." Then: "At least I think so."
I believed I was ready "to outline nicer this section," and the movement there was rolling.
What would make that rolling detail nicer?
I could make the rolling "even nicer," I said: a movement going "all the way underneath of this small part" that would "kind of wrap inside." That would be "beautiful, beautiful, beautiful detail."
Then this: "I know I really don't have to do it. It's still going to look nice." And the plain line: "Make something nicer."

Which tool came after that saying, and how big was it?
The same tool, 5 millimeters (0.2 in), a number 11. Separation cuts were next in my plan, "even on this piece," and "there's going to be an eye." Leaning it a little to the left was the plan, and then my groove cut.
"And yes, I could go even deeper." Then "Let me check." It looked like the tool needed sharpening a little bit. Still, "let me excavate a little deeper the eye itself."

What about the ridge?
I needed to take care of the ridge I had just created. "Every eye," I said, "and I know I said that many times," is supposed to look like a drop of water. A big tool probably could not fit there.
A smaller version of one of my tools did fit, an excellent tool for an operation like that. "See what I just did?" I blended the ridge in, and "it just goes like the movement." This part of a main movement overlaps that part.

Later on I could use a number 11, 1 or 2 millimeters (0.04 or 0.08 in). We'll see. Right away, for you to understand, an even deeper excavation on the inside: a 3 millimeter number nine (0.12 in), which I called one-eighth of an inch. The plan: the plug cut.
Why do a step that is not necessary?
"Again, it's not necessary what I'm doing." You sometimes don't even see it on acanthus as original. But it gives me extra light and an extra dark spot, "which is I'm after."

From another direction I could also point on the inside, and make that plug cut a little undercutting motion. One-eighth of an inch was what I was using, and smaller tools were possible too, but "this is sufficient also."
Out came the plug: "Oh, that's it. Here's my plug." And it "casts beautiful shadow." Last in the part, I would take a number 11 of about 1.5 millimeters (0.06 in), and "I create that shape of a water drop."

Where else do I say those words?
This wood carving workshop explains the saying in part 11, and the lessons below put it beside a tool I named. A table near the end lists them, and every lesson is linked so you can open it and watch.
What did I switch to in workshop 55?
Cleaning with just the skew to get roundness, a preliminary shape, I reached a section in Venice Room 55, part 8, that looked "kind of not good. Doesn't look too good."
Those words were for "this tool" in part 8. "We're going to need number seven right now." Maybe about half an inch (12.7 mm), a number seven, and clean a little bit. "Not much, okay, because I still have to establish the shape."
All I needed was "just a clean surface to work with" to establish my main movements and main lines. "That's good." Then: "I should say it is enough."

What then, with a straight tool in lesson 56?
The way I was doing it in Venice Room 56, part 7, was "a little too dangerous." I should use "a really long bevel like this tool," I said, to "Create a lot less stress on the fibers."
Of the straight tool I did not think it would fly. A long bent was the need: "I need at least a long bent," a number four long bent of about 10 millimeters (0.39 in), "three-eighths of an inch."
There was "too much junk accumulated." Next I would hit "a little harder underneath of those leaves," still careful how hard, with no wish to deal with the background cleaning later on.
"When you dig your tool too deep in the background, then you have to spend time and clean everything." And cleaning sometimes takes much longer than creating the initial idea. "Unfortunately, but it's true."

What went underneath the ridge in workshop 35?
Venice Room 35, part 2, has a ridge to clean "because I really don't need it," and maybe a little more depth in some areas. Some depth could create extra shadow. Extra movement.
Same words again, for "this tool," and "so I have to use something different." Maybe number three, and "really blend that in." I also have to attack the spot from the right position, and the words after that are "Not too convenient, but it's still doable."
Just 1 millimeter, a number 11 spoon (0.04 in), was the thing to try, to "get underneath." One spot got the words "Place for the shadow, I should say." For undercutting underneath of that ridge, a back bend was the plan, "because it is one of the best tools for this job."

How heavy a mallet did I need in workshop 28?
"I think it's a good idea to give that detail." In Venice Room 28, part 12, it was "kind of messy," yet "we can do something beautiful." Because it was hard to get in, I needed a long bent or a medium bent number 11.
"maybe a little heavier mallet." The same words went to a 12 ounce mallet, about 340 g: "It will, but I can get tired a lot quicker." Then: "So I need 30 ounces and let the mallet do the work." That is about 850 g.
Then "probably number three for the beginning," I said.

Why a spoon in workshop 47?
Two eyes were the plan in Venice Room 47, part 9, maybe a bigger one and the next a little smaller. "Let's start with this one." Then: "And straight number 11."
A reason followed: "because I have stuff on my way." Then: "So spoon is what I'm going to use. Two millimeters in this case." That is about 0.08 inch. Maybe 3 millimeters (0.12 in) or even 4 millimeters (0.16 in). "Let me see if four millimeters will be better because I really need to see this eye a little bigger."

After a straight tool, what next in workshop 138?
A line from Venice Room 138, part 2: "all that needs to be lowered down." The words: "I'll take just a big number 11," 5 millimeters (about 0.2 inch), and "I create a shadow." Then "Even lower."
A straight tool got the words here too, and "I need to get some kind of spoon."

Which tools were missing in the April 2020 livestream?
In the Livestream April 2020, the pipes were what I had to establish. All the pipes are supposed to go to the center, and I really love really thick and big pipes, because I have to be authentic to the Venetian style.
My expression covered the Russian tools, "because I don't have tiny tools yet from those guys." Then, "I'll just use number 11" with "seven millimeters" (0.28 in).
Later: "I need to exaggerate a little more those pipes because it doesn't look good." To do that, much deeper on the sides of those pipes is what I really need.

What about a knife in the flower rosette lesson?
With the knife you can remove a lot of material really, really quickly, I say in Carving Flower Rosette 6, part 3. "So that's why I kind of like to use it a lot."
Then a warning. I would still suggest buying good gouges, because on the more complicated projects my knife gets my expression, "I should say." You are really limited if you have only a knife. For the beginning, a knife is probably the number one tool.

Is there another way a tool can fly?
There is, and two lessons show it. In Carving Corinthian Acanthus Leaf 3, part 4, I talked about working toward yourself with your elbows locking on the work table. That way you can control your cut, and you can always stop.
Then the tool: it will not fly toward you, and "I would say it's safe." As long as you can lock, the movement is of course limited. Then: "small cuts like this."
A hole in Lily Box 2, part 1, needs to be exactly the same as the diameter of the clamp, exactly 20 millimeters (0.79 in), "if I'm not mistaken." Then: "I could put a second tool, so why not?"
"It's stable." The piece stays put. With that setup I can always rotate and attack it from different positions, with no problem.
What flies out of the wood?
In Furniture Panel 16, part 10, I could take number two again and go straight down, and it will fly out. Still, I don't want to see tool marks in my background. "It's not the end of the world, but still."
Number one, single bevel, and "kind of recreate that line" in Venice Room 154, part 1. See, all that waste will fly out. Then 3 millimeters (about an eighth of an inch), and "I could use 2 millimeters now" (a bit under 0.1 inch).
What came right before and right after part 11?
The plug cut came in part 10 of workshop 53. "So the plug cutting, it's actually placing the tool like this downhill and start a rotation movement." Ten millimeters, number 9 (0.39 in), and a mallet were the plan.

Part 12 of workshop 53 began with this: "Again, why am I doing it? Just to create extra shadow." Then: "All about light and the shadow." I wanted to make sure the region was thick enough, about 5 millimeters (3/16 of an inch). I didn't want to create too fragile a piece.

Later in part 12 I had a challenging area, because not every tool going to fit right there. Number 11 again, to start undercutting, and "I need to create the shadow."
How do the lessons line up, side by side?
Here are the tools I named, with my words from each lesson.
| Tool | Lesson and part | The words I said beside it |
|---|---|---|
| Number seven | Workshop 55, part 8 | We're going to need number seven right now |
| Long bent | Lesson 56, part 7 | Number four long bent and about 10 millimeters |
| Number three | Room 35, part 2 | Maybe number three and really blend that in |
| Heavier mallet | Lesson 28 of the Venice Room, part 12 | A little heavier mallet |
| A spoon | Venice Room 47, part 9 | So spoon is what I'm going to use |
| Some spoon | Workshop 138, part 2 | I need to get some kind of spoon |
| Number eleven | Livestream April 2020 | I'll just use number 11 and seven millimeters |
| Good gouges | Flower Rosette 6, part 3 | Buy good gouges |
Where can you watch these lessons?
Every lesson above sits inside a course of mine. Workshops 50 to 61, where workshop 53 lives, are in Venice Room Part 5, and the other courses hold the rest. When you want to ask me about relief carving, a gouge, a chisel or any hand tool, start here and leave your question below a lesson.
How it's done
- Look at what is in the way. In workshop 47 something stood in my way, so the plan was a spoon.
- Pick the next tool. Workshop 55 named number seven, about half an inch (12.7 mm).
- Weigh the mallet. A heavier mallet came into the plan in workshop 28.
- Go smaller where it is tight. In part 11 I named a number 11 of about 1.5 millimeters (about 0.06 inch) for the shape of a water drop.
- Keep the goal high. Acceptable is what I can make, and I want more than that.
Frequently asked questions
Did I say my work can be acceptable?
Acceptable, I said, is something I can make. Still, I want to be on another end of it, and workshop 53, part 11, has the words.
Which mallet weight did I name in workshop 28?
A 12 ounce mallet, about 340 g, got the same words from me. It will fly, I said, but I get tired a lot quicker. So I needed 30 ounces, about 850 g, to let the mallet do the work.
Which tool followed the straight tool in workshop 138?
My need was a spoon of some kind. Before it, with a big number 11, I create a shadow, I said.
What size was the tool for the eye in part 11?
What to carve next