

Alexander Grabovetskiy, woodcarver, School of Woodcarving · Published 2020
What does "main line" mean in wood carving?
Quick answer: In part 3 of Venice Room 53 I called a line "the main line" after weighing two places for a middle line. Elsewhere the words mean a line I connect to, keep clear of, keep tangent to, or keep, as the Lily Box and Venice Room lessons show.
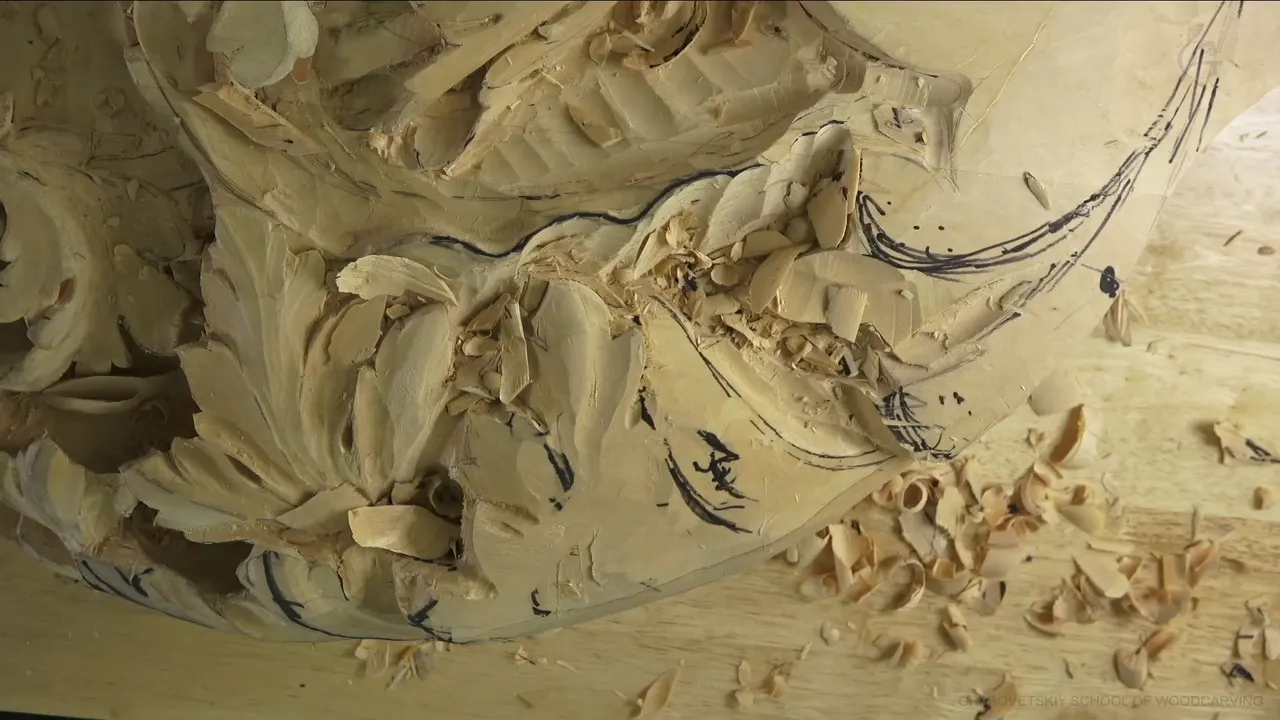

"Okay, so that is going to be the main line," I said in part 3 of Venice Room 53, once I had picked a place for a middle line. The same two words turn up in other lessons of mine. They stand for a line on the carving: one I connect to, keep clear of, stay tangent to, or keep.
Ever drawn a line on a carving and felt it sat in the wrong place? Did you move it, or carve on and hope? That was my spot in this part. Below you can follow what I did, and where else those two words come up in wood carving.
Where I say "main line," at a glance
- In this part it is a choice between two places for one line.
- The cutting board lesson and the second Lily Box lesson treat it as the line every other line flows to.
- Corinthian Acanthus and Dining Table Apron both outline beside it, with room left between.
- Later Lily Box lessons follow it.
- Three more Venice Room workshops each mention a line to keep.
- Hazelnuts and the Furniture Panel course start from lines worked out in a pattern or a design.
What was the choice behind that line?

The part opens with me happy about how a movement ends underneath. Then comes the work: "I have to determine" where "my true point" sits. That meant the detail I was working on, and a place to start my rolling, which I thought I could do easily somewhere right here.
Divisions followed. Maybe a smaller one, a little bigger one, an even bigger one, and an invisible division would go underneath another part I planned to do. That division had to be part of really good curvature. I said "let me fix it," and then "Wonderful."

Then came a correction. Not too happy with how this movement looked, I knew it needed fixing. The middle line had to change, and it had to follow that movement too. "I have to be careful how I develop it." One part was also going to stick out.
What could I do? "Let me think." As of now, it did not make too much sense how it looked, and the chunk, how it looked, was what I meant. So came the decision, and I put it plainly: what would matter more to me? A line going all the way to this point, or a switch, with the main middle line right here?

My answer: "Let me preliminarily put it." Much better that way, I thought. Next I named it, and that sentence gives this page its title. The design needed a small change: the chunk on the left side would become part of one main acanthus movement.
Was it a new design? "Not changing design, it's still same flow," I said, "but I am changing little bit how it's going to feel overall." I really like the idea that I moved my middle line to this direction. It will still be feelable invisibly, and it goes inside below this movement. "I kind of like it so far."

The next chunk was exactly the same idea, just wrapping. It runs all the way underneath and rounds. A part I was drawing there would be a deep concave, the same as that side. Colored permanent markers would have helped, and I had none. "My apologies."
What did I do about the divisions?

For me a good development, but three divisions was not enough. More were needed. "I think I can get one of the middle lines right here." This side, at least, I could definitely do. Probably another division goes like that, and on to the eye you don't see.
A picture would come later, I told you, so you could see how it developed. Meanwhile I wanted it to make sense in the overall design. "I know right now it looks messy, but wait and you will be happy."

Then the tools. "I'm ready to put my tools in work." First job: the main setting in cuts, main groove cuts, concave cuts around this line, which was my main outline. Number 11 was my pick, 12 millimeters (0.47 in). The cut would be deep, so hitting much stronger did not scare me, and neither did chopping.
How did parts 2 and 4 of workshop 53 treat a line?

The second part began with a line I liked. Before I drew anything else, I wanted to outline it, and that job went to a number 11, first named at 16 millimeters, then "15 millimeters, 5/8 of an inch, approximately." Later came a thought: I could probably move slightly this way and go right underneath. "It is better." Then a catch: a double line, which I did not need. "But it's okay."
The fourth part moved a line as well. First I wanted to outline a little bigger and overlap the divisions later. Then: "I need to recreate the line, maybe just shift a little bit." A big separation would sit right there.
Does everything connect to the main line?

One of you had asked me how organic lines are supposed to flow to each other, and I answered in Curly Kitchen Cutting Board 10. At a volute section, I had to connect the main line, "that line is the main line." This curl had to reach it. Everything's supposed to go to the same line, I reminded you, and that is a rule or law of flow.
Where my curl finishes, I am going to start another line and connect it to the main line right here. Follow the original line, or start at the same point and follow the second one: it still flows organically to the main detail. Maybe it did not make sense, I said, but at least for me it felt much better.
Lily Box 2 shows the other side of it. There is not supposed to be any T-stops, and your movement has to have a flow. On all of those leaves we are going to have the same flow, so to the main line. "Then it's going to look organic and nice."

In Hashemi Flowers 21, the plan was to bring it to the line. Cleaning that section could wait, because later we would work on the inside. For the moment, all my attention went to bringing the main line, or main movement, to this line.
A warning sits in Lily Box 5: overdoing it would be a big mistake. Inside came a plan: "Let me reestablish the main line on the inside." One line had to connect right here. It starts somewhere there and ends approximately 10 millimeters (0.39 in) from this ridge, and it has to be tangent.
How close should the tool come to a main line?

That depends on the cut. In Dining Table Apron, workshop 6, a knife or gouge placed to the line meets a lot of tension from both sides. Outline with the V-tool on the outside instead, and leave a little space. That space becomes the waste later on, "and that is your main line, the main design of your carving."
Then a straight chisel or knife can go in, and there will be no more tension. The fibers get destroyed on one side only, and this side remains clean cut.
Corinthian Acanthus 2 gives a distance. Take a V-tool and start outlining, staying away approximately an eighth (3.2 mm) or three-sixteenth (4.8 mm) of an inch from the main line. The second way is a gouge, which does exactly the same. Outlining has another name, setting in.

Close to it works too, as in Lily Box 5. I could get really close to my main line, for a 90 degree down cut. That step was not really necessary, and I did it to keep the main picture. If you feel comfortable to just redraw right on the surface, you really do not have to do this step.
A knife on a stem, from Lily Box 3, brought one aim: "I want to make sure I am keeping my tangency to the main line." Those were extremely small areas, and a half millimeter (0.02 in) would create the channel. "And now I do have separation."
The Flower Rosette 2 line works the same way. I would follow my initial marked line on all four sides, then create a small channel about 1/32 of an inch (0.8 mm) off the main line, where I can see it is a lot easier. A flower got in my way in some spots, and I had to make a little deeper cut there.
A smaller tool comes up in Lily Box 4: a number 5 at a quarter inch (6.4 mm), to chop carefully. Next, I flip it and follow the line, my main design.

The gradual movement of Lily Box 7 pleased me. "Not kind of. I really like it." Number nine again, and I would try to follow the main line. A little later came an honest line of doubt: why it did not look the way I wanted, I could not tell.
What about a main line I want to keep?

Back in Venice Room 46, a second part would grow from the side. "That line is the main line." Next came "I do not want to lose it." Maybe an extra movement could go that direction, and I would figure it out a little later. I also explained why I held off undercutting: "I'm always going back to the same area," and until I am happy with everything, my finalization of the movements starts.
Venice Room 91 has the line "Don't want to lose it, my main line." Still, I had to create a really deep excavation, because those droppings have to look also natural.
In Venice Room 93 I described two interconnecting spheres and a small stem going inside on the sides. "That is the main line which I cannot lose." Those details were really nice, like filling details, and I was looking at my design while changing some of the stuff.
Venice Room 97 puts a plan next to those words: "I'm going to bring my convex number one right here," with the main line named just before it. Number seven for now.
Grape Onlay 5 puts a line to work in an undercut. "Now I can start undercutting," I said, still with a number 11, here 2.5 millimeters (0.1 in). Then: "Now I need to undercut underneath of this main line." Otherwise it would not look good, and you would not see that crazy junction the way you intend it.
How do I find the main lines before the first cut?

Hazelnuts 1 starts with carbon paper, a really old piece, to transfer the main lines. I would also keep an extra copy right beside me on the workbench, where I can just see and draw. It would not be exact, but pretty close.
Furniture Panel 1 starts from a spiral: we can always find the spiral movement in the overall design, somewhere right here, and from the opposite side again somewhere right there. "Okay, we've got the main lines." Happy? Not yet, and I did not know exactly how it would look.
In Furniture Panel 14 I wanted to hit a line, "one of the main lines," and repeat the movement right here and also this one. That meant incorporating two worlds. Maybe it was not a good idea. On the other hand, I really did not like where this division was, and maybe I should start with the same line.
Workshop 55 needed just a clean surface to work with, to establish my main movements, main lines, and so on. I had this line, and I really had to kind of almost repeat it. It has to go with the same flow, and I did have a shell to tie it with, and then: "that is the middle line."
A center line is not always the main line. In Furniture Panel 12, about the center of a petal: "It's not the main line, but you have to understand what I mean by it." The center lines were just for me, for now, to see overall movement.
Chamomile and Bow Rosette 3 has one more use. The plan was a cut perpendicular to the main lines, for a more interesting look.
Where did I say "main line," and what was I doing?
Side by side, here are the lessons.
| Where I said it | What I was doing there | My words |
|---|---|---|
| Venice 53, part 3 | Picking a place for a middle line | I need to make the decision |
| Cutting Board 10 | A curl, and a second line that joins it | connect this curl to the main line |
| Lily 2 | Leaves with one flow | the same flow, okay, so to the main line |
| Apron 6 | A V-tool outline on the outside, then a straight chisel or knife | leave a little space |
| Corinthian 2 | Outlining, with a V-tool first and a gouge second | staying away |
| Lily 3 | A stem, and small cuts with a knife | keeping my tangency |
| Venice 93 | Two spheres and a small stem on the sides | I cannot lose |
| Hazelnuts 1 | Old carbon paper, and an extra copy at hand | transfer the main lines |
Where can you watch each of these lessons?
Each one sits inside a course of mine, and Venice Room Part 5 holds workshops 50 to 61. Every course is one click away if you start here.
How it's done
- Find the line. Part 3 weighs a line running to one point against a switch to the middle line.
- Put it in preliminarily. A light first placement was the plan, and I expected it to look better.
- Send the other lines to it. At the cutting board volute, where my curl finishes, another line starts and joins the main line.
- Leave room. The apron lesson has me outline with the V-tool on the outside, and the room I leave becomes waste.
- Keep the tangency. On a stem, I wanted to stay tangent to the main line.
- Hold on to it. Three Venice Room workshops name a line I want to keep.
Frequently asked questions
What did the part 3 choice come down to?
Which mattered more: a line running to one point, or a switch to the main middle line. I planned to put it in preliminarily, and I thought it would look much better.
Does every line go to the main line?
In the cutting board lesson, everything goes to the same line, a rule or law of flow. The first Lily Box lesson has leaves that share one flow, toward the main line.
How far should an outline sit from it?
The Corinthian lesson names an eighth or three-sixteenth inch (3.2 or 4.8 mm). The apron lesson leaves room that becomes waste later on.
What to carve next