

Alexander Grabovetskiy, woodcarver, School of Woodcarving · Published 2020
What does a wood carver mean by a "really good shadow"?
Quick answer: In part 10 of Venice Room 53 I planned a deep hole for the shadow, and I named a number 9 of 10 millimeters (about 0.39 in) and a mallet for it. Other lessons of mine use the same idea about holes and undercuts.
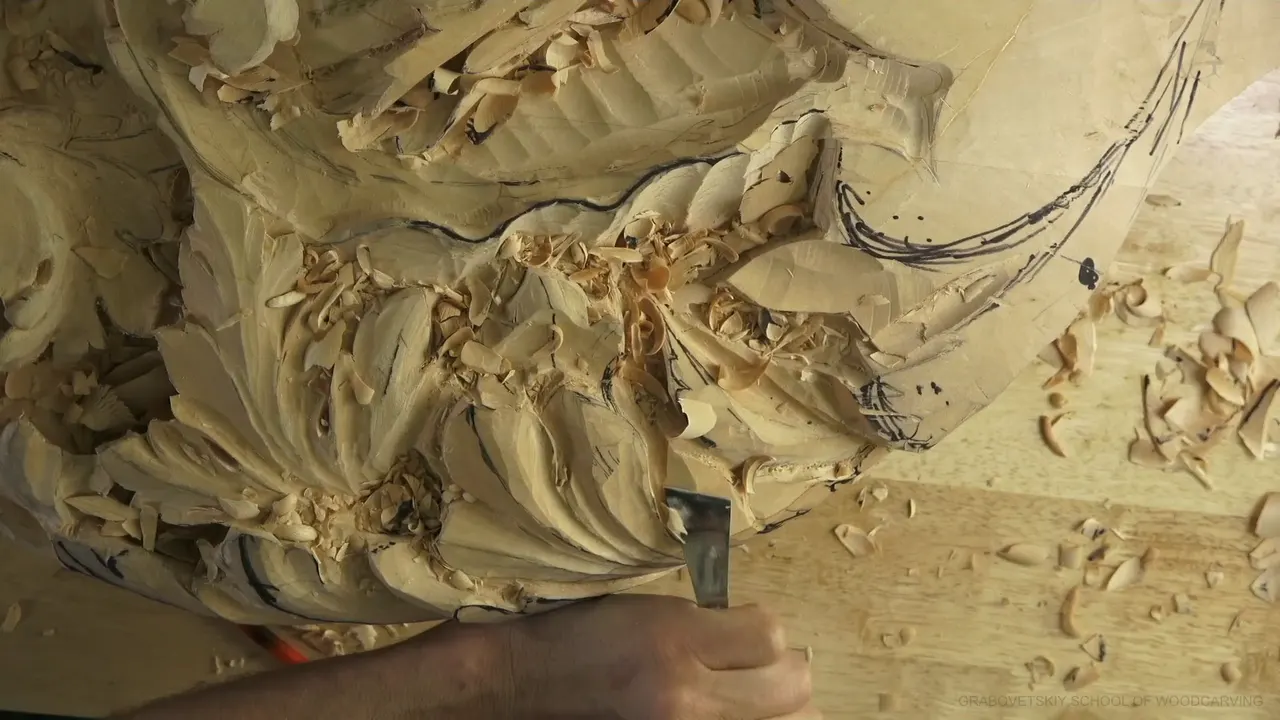

In part 10 of Venice Room 53 I said I really wanted a good shadow. The hole I dug in this part was for that shadow. That idea turns up in lessons of mine from other courses, each with other work around it. Below you can follow it through wood carving.
Ever stood over a deep spot and wondered how far down it should go? Did you ask what the dark side of a carving is there for? Start with part 10. You will hear it in my other lessons too.
The shadow I wanted, at a glance
- The words came while I planned a 5 millimeter tool and a deeper excavation.
- For the hole I named a number 9 and a mallet.
- Smaller tools came next in my plan, down to one millimeter.
- Parts 11 and 12 return to it.
- Other lessons carry the idea over to holes, undercuts and a thin ridge.
- Every lesson I quote is linked on this page.
What stood in the way of the shadow?
A ridge. I needed to get rid of it, because "right now it doesn't help me at all," and "I can't get deeper underneath." Then: "this area is so nice," I said, and I could create a beautiful shadow there.
Doing it would also "reveal some of the movement which is going to be behind a little bit." Then: "Okay. That is good."
Which tool did I name when I said it?
That tool again, 5 millimeters, "3/16th of an inch." The plan: to "clean a little bit" and to "actually excavate even deeper if I wanted to."
Then the words themselves: "I probably should because I really need to get a really good shadow." Maybe I should also do an even deeper excavation on the side using 4 millimeters (near 0.16 in), a number 11, I said.
What did I plan before the hole?
Next in my plan: "I need to reestablish my middle line," going "somewhere right there," a point and a division. This was to be "a part of a really deep excavation of this movement." Then: "let me probably start doing it," so that "you will know exactly what is going on."
My plan was to outline first, a "preliminary outline," and to stay away from a line by "approximately maybe one-eighth of an inch, three millimeters." For the other side I said I should stay away too, and "it's okay. I didn't."

One part is "part of the movement on the right-hand side," I said, "just a rolling leaf going underneath." I added "I hope it makes sense." Next I showed the whole board and called it good: "That is how it looks in overall division, and I think it looks good."

How did I dig for the shadow?
The next thing to do, I said, was to "excavate my plug," which I called "plug cutting." For it I needed "the gouge" and no big one: "just a quarter-inch gouge." A quarter inch is 6.35 mm. Look up the gouge if the word is new to you.
I described the move as "placing the tool like this downhill and start a rotation movement." With it, "I'm removing plugs."
A bigger tool could do the job, I said. "Let me do that." I named 10 millimeters, number 9 (about 0.4 in), and added that "any number 9 or number 8 will work."

The excavation was to be a really deep one, "because I really want to see that shadow."
The move: I said I would "chop straight down" and "start moving toward my future hole." It would be a deep excavation, I said, and a beautiful one.
Why can the hole go so deep?
I was "cutting inside, matching my direction of the movement." Nobody will look inside that spot, I said, and the shadow it casts is "so deep." Then: "Okay, so remove that plug."
"All other cuts are going to go to that hole," I said, and every cut after the plug would head there.
How small would the tools get?
The smaller one is next, I said: a quarter inch, "about six millimeters," same number nine, "and I can get even deeper excavation." Past that, "I'll switch to only one-eighth of an inch, three millimeters."
About those plugs I said "see how beautiful" they are, "about three millimeters at a time." With the three millimeters I could reach "like a needle almost point," and then I would switch to one millimeter (0.04 in), number nine.
Everything goes to "the same hole," I said, and it would be "invisible to the human eye." But "the point is creating this hole just to give that motion, that shadow."

Just because I created that hole, "it's already outlining" something, and there is "another hole, actually." "I did in a live stream, actually, on this side." It is "outlining the main movement," and it is "visually just really nice," I said.
My last words in part 10 are a plan: to make another part deeper, to outline "the main three divisions," so it looks "much better."
What did the next two parts add?
The plug cut returns in part 11, with a 3 millimeter number nine (an eighth of an inch) and a plan to dig even deeper on the inside. It was not necessary, I said, "But it gives me extra light and shadow play." It will give me an "extra dark spot," and out came the plug: "Here's my plug. And it casts beautiful shadow."

Part 12 finds me needing a shadow again, "at least at this area," with the number 11 and the undercutting I planned. Next: "I need to create the shadow."
What if the light hides the shadow?
Still in part 12, a light source stood on the right-hand side. Because of it you may not see the shadow right away. But I said that with the light off, "that's going to be really deep and nice shadow."
The light matters in Venice Room 54, part 2. My light source was "hitting too hard," I said, so "you can't see." But "in real life," the shadow would be there. More would come off that side, for a deeper shadow.

Part 1 of Venice Room 121 has a light plan: "Let me turn one of the lights off and see if it's going to show you what I'm talking about." Then, "See how deep shadow it creates?" My verdict: "I think it's beautiful."
In Furniture Panel 24, part 3, I wanted "much deeper cuts right in those spots," and "I really want to see a good shadow." The lights come in too: "you can see if I'm going to turn one of the lights off."
A ridge can be tiny. Furniture Panel 22, part 6, has one. "Probably you don't see it too much, but it does cast" a shadow, and the ridge is "only like a half a millimeter higher than the background." Half a millimeter is near 0.02 in.

"I really like that shadow again," I said in Grinling Gibbons, Maine class 12, part 3. And from below it works too, as Venice Room 11, part 8, shows: I said "when I look from below" and called the shadow good, "and I am happy with that."
Where else is a hole in my words?
I could "excavate really deep hole in this section," I said in Venice Room 64, part 7. Go in, and that would give me "a really beautiful shadow."

Over in Venice Room 70, part 8, I said "It's already giving me that shadow." "Preliminary, but still."

The plug cut came again in Venice Room 59, part 7. My question was whether I could "fit one quarter of an inch and just do plug cut." And "It gives me really deep shadow," I said.

Venice Room 87, part 10: "let me get with the number nine," I said. Also "I can go deeper than half an inch," which is 12.7 mm. "I need a shadow in this area." Later: "to a whole inch if I wanted to." An inch is 25.4 mm.

It might be "maybe a smaller number nine, like 10 millimeters, 3/8 of an inch," I said in Venice Room 14, part 1. "I want to cast" the shadow, and "this way, I can go underneath."
Part 9 of Venice Room 65 names a bigger gouge. "I can actually go even deeper," I said, and the gouge might be "maybe 12 millimeters" (close to 0.47 in), a number 11 veiner.
Getting a movement "all the way up to here," I told you in Venice Room 60, part 1, makes it "a lot easier for me to excavate." On the other hand, the shadow comes "if I'm going to stop it right here." Then, "maybe a little more on this side."

Digging can also stop, as in Venice Room 9, part 11, where I say "let me do it with the 4 millimeters" (about 5/32 in) and "I don't want to be too deep in." I already had the shadow, I said.
Where did an undercut do the same work?
"I usually like to create a really deep undercut underneath of those leaves." That is Hazelnuts 2, part 1. The undercut was for the shadow.
Knocking too much out was not what I wanted in Lily Box 8, part 8. I could "take advantage of this" and make a deep undercut, and a shadow cast over a detail would give "really nice look."

Vase with Grape Leaves 2, part 11: it was "not necessary," I said, but with number 11 and one millimeter, "I can actually undercut on inside." Later, "Beautiful shadow."

"Really nice undercutting effect right here." That line sits in Furniture Panel 19, part 6.
"Take your time" is the advice in Furniture Panel 25, part 3. I said you can "just get really deep undercut if you wanted to," and that it would "look really nice if you just get a little deeper."
Careful digging has limits. In Furniture Panel 21, part 4, I said "That's probably as deep as I can go without breaking anything," and then said I could "probably grab just number one double bevel and create an even deeper undercut."
Venice Room 10, part 2: the cut would bring the shadow and "really smooth on inside." Then a question about sanding: "how you're going to sand it inside?" It is better, I said, to create "a really smooth cut from the beginning."
After a flatter concave I said "That gave me" the shadow in Venice Room 17, part 4, and I could exaggerate it, because it would be "visible from the bottom" with a light hitting "at night from the top."

Wrong tool: in Venice Room 20, part 5, I said "I used the wrong tool." Three millimeters (roughly 0.12 in) was what I needed, I said, and I wanted to see the shadow underneath, then "excavate even deeper."
Chamomile and Bow Rosette 4, part 3, had me stop short. I would not go "all the way through," I said, "because I still have to have some gluing parts."
Carving Byzantine Acanthus Leaf 4, part 1: I said it is "absolutely okay" to "dig a little deeper," because I was after a shadow effect.

"Continue my undercut this way," I said in Carving Grape Onlay 14, part 2. Even with number 11 that meant "small, small cuts and still slice it."
What if one spot does not give a shadow?
The Tray of Blessing 3, part 2, has this: "This one doesn't give me good shadow, But it will if I'm gonna drop that even more."
"I kinda like that flip," I said in Tray lesson 2, part 3, and the flip gives me a shadow "right there."

How do the lessons line up, side by side?
Here are the lessons from this page, with the words I said in each one.
| Where I carved it | Lesson | What I said while I carved it |
|---|---|---|
| Deep hole | Workshop 53, part 10 | And now I'm actually cutting inside, matching my direction of the movement |
| Plug cut | Workshop 59, part 7 | Fit one quarter of an inch and just do plug cut |
| Deep section | Lesson 64, part 7 | Excavate really deep hole in this section |
| Half inch | Room 87, part 10 | Actually, I can go deeper than half an inch |
| Inside | Vase with Grape Leaves 2 | I can actually undercut on inside, underneath of this golden point |
| Thin ridge | Furniture Panel 22 | Probably you don't see it too much, but it does cast |
| Dropped spot | Tray of Blessing 3 | But it will if I'm gonna drop that even more |
| Undercut | Lily Box 8 | But what I could, I can actually take advantage of this |
Where can you watch all of these lessons yourself, from start to finish, in full?
Every lesson above sits inside a course of mine. Workshops 50 to 61, where workshop 53 sits, are in Venice Room Part 5, and the other courses hold the rest. When you want to ask me about a relief carving or a hand tool, start here and leave your question below a lesson.
How it's done
- Name the shadow you need. Before I dug, I named the shadow I needed, in part 10.
- Match the tool to the job. Start with a quarter-inch gouge (6.35 mm), then, I said, a much bigger tool would work: a 10 mm number 9 (0.4 in) and a mallet.
- Cut inside along the movement. Working that way casts a deep shadow, even where nobody will look.
- Send every cut to one place. Every cut after the first plug would head for that one spot, I said.
- Go smaller to go deeper. The plan: a quarter inch (about 6 mm), then 3 millimeters (0.12 in), then a 1 millimeter (0.04 in) number nine.
Frequently asked questions
Which tools did I name for the hole in part 10?
A 5 millimeter tool (3/16 of an inch), maybe a 4 millimeter (0.16 in) number 11 for the side, then a quarter-inch gouge (about 6 mm) for the plugs. After that I said a much bigger tool would work: number 9, 10 millimeters (0.394 in), and a mallet.
Which lessons turn a light off to show a shadow?
My light source was hitting too hard in Venice Room 54, part 2, so you can't see it, I said, but in real life the shadow would be there. Workshop 53, part 12, adds that with the light off it would be really deep and nice, and Venice Room 121 has me planning to turn one light off.
How deep could the hole go in part 10?
As deep as I want to, I said, because I was cutting inside along the movement. Nobody would look inside right there, I told you.
What to carve next