

Alexander Grabovetskiy, woodcarver, School of Woodcarving · Published 2020
What does a wood carver mean by "the right position"?
Quick answer: The right position turned up in part 1 of Venice Room 53, when I said I would take a skew and clean marks off. Other lessons of mine say it about a slicing cut, a direction toward myself, a line, and the camera.
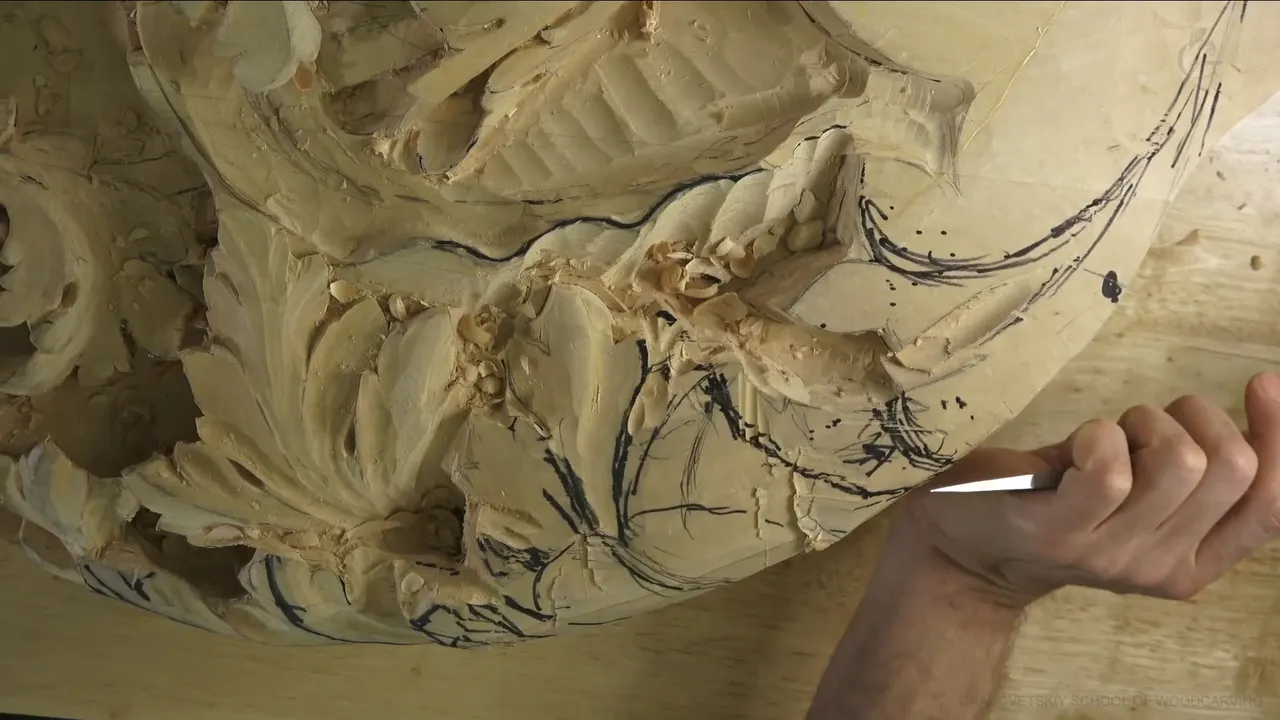

"That would help if I would just attack that from the right position, of course," I said in part 1 of Venice Room 53, right after I said I would take a normal skew and clean those marks off. Other lessons of mine use those words too, and the position changes from spot to spot: how I hold a tool, where I stand, where a line sits, or where the camera goes.
Has a gouge ever fought you on one side of a petal? Did it go easier once you came at the same spot another way? Then you know the feeling, and the lessons below show where I say those words in wood carving.
Where I say it, at a glance
- In the first part of this workshop it's a wish, with a skew and a cleaning still ahead of me.
- Tray 1 gives it a name, the slicing cut.
- Workshop 61 points it toward myself, and workshop 33 ties it to my tool.
- Hazelnuts 4 has me looking for one for myself once the piece was fastened.
- Eyes, a middle ridge and a pipe each had a right position to settle, in three Venice Room lessons.
- The camera needs one too, in workshop 32 and again in a floral panel lesson.
What was I about to do when I said it in part 1?

I was ready to develop the area completely, I said, but I had to be careful what I was doing. A corbel would connect at about that point, and that meant leaving some meat. The plan for connecting corbels on the side was probably really large dominoes, the same on both sides.
Doing the same movement everywhere else was not what I wanted. Something different in every area, I said, with the flow the same and the development a little different.
Then came the drawing. An idea I had drawn before looked good to me. I would place it at the front of myself and draw it. The part nearest the corbel measured about two inches (about 50 mm), and just before the corbel connection I planned to create a detail. I could take it right out to a point, I said, but it needed to be tangent, continuous tangency to the overall movement.

A little bit of that canvas needed cleaning, I said, otherwise I just couldn't see that. And I'd take a normal skew, the one I used before. Right after that came the line at the top of this page.
Probably the whole section would get cleaned. The position of those lines, I said, I kind of didn't like, and no, I wasn't afraid of losing the original lines.

Overall look and overall development mattered more to me, especially since the piece will be seen from the bottom. How it looks from down there was really important.

Another cleaning opens part 2, and the same remark comes along with it, again. For part 4 the plan was a skew again, then a blend, and the same remark came along.
What do the grain and a sharp edge have to do with it?

A number three skew, about half an inch (12.7 mm), comes out in Hashemi Flowers 6. Beautiful thing to have, I said, because it has a skew and I can always attack from the right position.
Later in that video the cuts looked kind of rough. I really didn't like how it looked. My plan was a number 7 spoon gouge, 10 millimeters (0.39 in), working with the grain. I thought the cut would look cleaner, even if I'm not going to see too much of the ridges.
A little more cleaning with a number 5 was next in Hashemi Flowers 16, along the grain, and then a ridge to take out.
A high point stays high in Hashemi Flowers 5, and my second point goes lower. I have to take it this way, I said, but the position needed to be right, and then all the way down. At an edge in Hashemi Flowers 9, I'd take a number 11 again, only 1 millimeter (0.04 in), and undercut even deeper right there. You can barely see that, I said, and it needed the right position.

Rougher work came in Floral and Molding for the Panel 14. I knew I was doing it against the grain, and I told you that's why it was really rough. Always the better way to attack it, I said, is the right position.

Byzantine Acanthus 7 carries the other side of it. Carving against the grain works if the tool is sharp, I said, and I called that breaking the rules. With a tool that isn't sharp, getting the right position is better, and any flatter tool will work.

Sharpness comes up again in Tray of Blessing 7. If the tool is not too sharp, I said, it's better to go at it the way I did the first time and clean it. Change the position to the right one, then, and go again with just the corner of the tool. Not too hard and not too much material at once: small tiny cuts, really shallow.
Roman Acanthus 13 gives a plain reason. My grain went in that direction, I said, so I would just take the right position there.
What does the right position look like in a cut?

My plainest answer sits in Tray of Blessing 1. Your first cut is really important when you place the tool, I said. What I see a lot of times is people placing it with the flute up and pushing like this, and that's not good. Think of the wedge: you push the whole wedge into the fibers, a kind of battle.
We call the right position slicing cut, I said. You place the tool with the flute turned to the left or to the right. You start closer to the edge of the tool, not in the middle and not all the way at the edge, because that's not workable. By the end you make a rotation motion and escape the cut at the other side of the tool. Really important.
Waste to remove came up in Venice Room 61. A mistake from the wrong position was what I didn't want, so the right one was needed, and in that case it was this way, toward myself.

A clean side and a rough one showed up in workshop 33. One side of the cut comes out clean and one does not, I said, and I knew this position was right for my tool to go that direction.
Chopping is another job for it. In Venice Room 56 I said I'd use a mallet and a 7 millimeter (0.28 in) number 11 veiner, and I'd chop little by little. Really careful, I said, about the position for that attack.
How does an upside down tool fit in?
Preliminary was the plan in Furniture Panel 29, and I didn't want to go too much, I told you, because concaves and convexes were still to come on those panels. I'd play with my tool, use it the normal way, then flip it upside down and get to the cut's right position, with about two millimeters (0.08 in) as my depth in those spots.
Roman Acanthus 6 has the same flip. Any number 5 or number 7 would work, I said, and I'd take the number 5, a quarter inch (6.4 mm), and work upside down. Right position around my pipes, because I have to make a smooth transition.
Where do I stand, and how does the work sit?

In Hazelnuts 4 I said, let me actually get that piece fastened. Next came "let me find the right position for myself," because I needed to attack that and blend it the right way. Soon after, I said I thought that would be the one for me.

A working table comes up in Hashemi Flowers 15. I can attack from different angles, I told you, and I do have one. Then I said I definitely had to find one, the right position, with my plan of attack in mind. This piece I could clamp right here and on the backside somewhere.
Later in Hazelnuts, in lesson 7, I kind of liked that this tool gives me a lot of control. Let me think, I said, what's the best way to attack, with the right position.

The sharpening courses use the same words for a machine. On the spoon gouge lesson, with the tool on the bar, I said "let's try to find the right position." I prefer the wheel turning away from me, so I had to jump over. In the back bent gouge lesson I had to find the height of the bar, the right position. Also how far it was supposed to be from the machine itself. I tried to hold that distance without wiggling it much back and forth. For a V-tool, you flip it and rest it on a bar, I said in the V-tool lesson, and you have to be really careful to land on the right position, checking constantly that it grinds the right way.
When is a position wrong, and what do I do?

In Venice Room 54 I could create a really beautiful shadow underneath a rolling back detail and around an eye. I could continue that to the pipe cut, I said, although that is not the right position. I apologize. The pipe will get its own, and I need to fix it later.
Two spots in Venice Room 21 were the wrong places. This is on my way, I said, and that is on my way. A straight tool wasn't going to do it there, so I'd use a spoon, the only way to fix it.
A small number 3, an eighth of an inch (3.2 mm), would go upside down in Lily Box 8, to blend that nicely. The grain came up: I was working against it, I said, and that's not the right position, so I shouldn't do that.

Modern Acanthus 5 has a line about myself. You really need the right position when you attack, not like me. But you should get the point. Do it that way and you're going to have a bulging inside of that leaf.

For a stubborn blending cut, Byzantine Acanthus 4 has my advice. If it fights you, get the tool in the right position and try to blend it nicely.
Not every try works. A small division in Hashemi Flowers 11 needed a slight concave cut, and I needed the right position to approach it. I'd take just a quarter inch (6.4 mm). Oops, I said, that is not going to work. Maybe it will. We'll make it work.
Does a line have a right position too?

Eyes do. In workshop 25 I needed to make sure they were on the right position, so I thought I should raise this one eye. That was not right, I said, and it would sit somewhere right there.
A middle ridge does too. Venice Room 60 has the line: I needed to make sure it sat in the right position. It was kind of hard for me to see that, and that was okay.
A center point in part 5 of this same workshop had to go to the right position, one that would hit about the same point, the same middle line.
Where does the camera go?

My camera was already way above me in part 1, and you don't see the whole thing, I said. A spot came where I couldn't place the camera right there, and later I couldn't place it at that angle. Five cameras were all I had, with no more to connect.
Showing the overall look was the job in workshop 32, and the line was "Get the right position for the camera." Another line there was "that is from a different perspective." In Floral and Molding for the Panel 5 I apologized for a shaky camera, and I had to hold it at the right position and keep the focus, to not blur.
Where did I say it, and what was I doing?
Side by side, here are the lessons.
| Where I said it | What I was doing there | My words |
|---|---|---|
| This workshop, part 1 | Marks to clean off with a skew | that would help |
| Tray 1 | Placing the tool for a first cut | we call the right position slicing cut |
| Part 5, workshop 61 | Waste to take off, going toward myself | this way |
| Hazelnuts 4 | Fastening the piece before blending it | going to be the right position |
| Hashemi 6 | Cleaning rough cuts with a spoon gouge along the grain | with the grain |
| Venice Room 54 | Shadow under a rolling back detail and around an eye | I need to fix it later |
| Part 5, workshop 60 | The middle ridge, and maybe a skew | make sure it's in the right position |
| Workshop 32, Part 3 | Showing the overall look on camera | a different perspective |
Where can you watch each of these lessons?
Each one sits inside a course of mine, and Venice Room Part 5 holds workshops 50 to 61. Every course is one click away if you start here.

How it's done
- Clear what hides the lines. The canvas needed cleaning so I could see.
- Pick up a skew. A normal skew, the one from before, was the plan.
- Turn the flute. Left or right, starting nearer the tool's edge, away from the middle.
- Read the grain. One Roman lesson had my grain running that way, so I would take the right position there.
- Change position when it fights. A Byzantine lesson has the same advice: put the tool in the right position, then blend nicely.
- Check each line. The eyes had to sit in place in one Venice Room lesson, and one might go up.
Frequently asked questions
Why did I clean those marks off?
Without that cleaning I couldn't see, I said. A normal skew was my plan, for probably the entire section, and the original lines didn't scare me.
How does a slicing cut start?
The flute goes left or right, I said in the first Tray lesson. The start sits closer to the tool's edge, not in the middle, and by the end a rotation escapes the cut at the other side.
What did I say about grain and sharpness?
A spoon gouge ran the same way as the grain in Hashemi 6. In Byzantine 7 I called one thing breaking the rules, and it works with a sharp tool. Any flatter tool will work.
What to carve next