

Alexander Grabovetskiy, woodcarver, School of Woodcarving · Published 2020
What does a wood carver mean by "by now"?
Quick answer: Part 3 of Venice Room 59 has me using "by now" while I talked about a number nine gouge for a plug cut. The same two words are in my Furniture Panel, Roman Acanthus, Lily Box, Hashemi and Grape Onlay lessons, and in more Venice Room workshops.
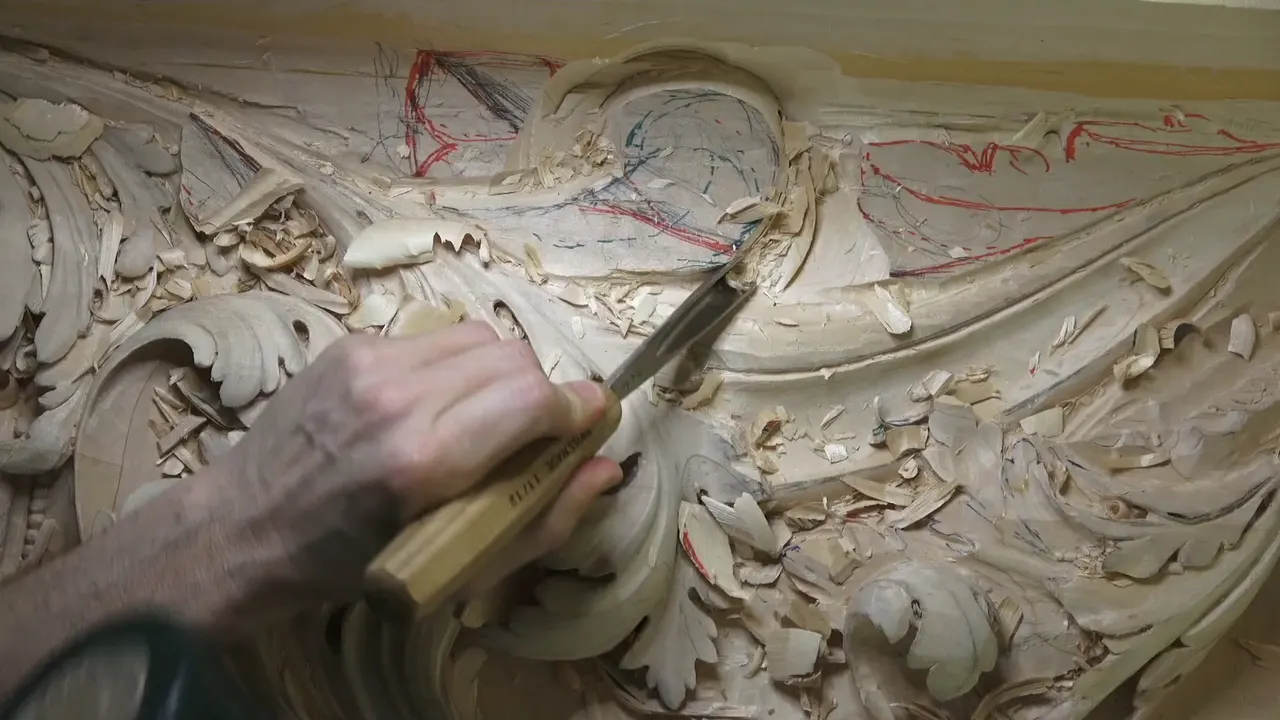

"By now, you probably understand what I mean by plug cut." I said that in part 3 of Venice Room 59, while I talked about a number nine gouge, maybe even 20 millimeters, like three-quarter of an inch (0.79 in). My Furniture Panel 19, Roman Acanthus, Lily Box and Hashemi lessons carry the same two words, and so do more Venice Room workshops.
The Venetian Flowers Rosette course has me saying it about a tool, and the Grape Onlay course has me saying it about my own stem.
What did I say at the start of part 3?

In part 3 I set a limit: "I'm not going to go too deep yet, so we'll see." "I can always go deeper." But too deep, too soon, in my words, "I can be in trouble. And I don't want to be in trouble."
A question for you, by the way: "Do you like that project?" I asked for more comments. "Comment a little more." Begging was not the aim, I said, "but it's going to give me encouragement to film it." "So for me it's important to know, okay?"
Number 11 at 12 millimeters (about 0.47 in) was the gouge I could take again, I said, to "cut in little more and remove some of that waste." A check was in my plan too: "if I've got that deep enough or if it's not deep enough."
"Let me reestablish, actually, the middle line right here before I would lose." The part is going below, and enough depth has to be there, I said, "to create that movement below." Sometimes it's hard to tell, I said. "It's probably better just to show."

"I can always reestablish it with no problem," I said about a lost boundary line. "All I need is just right now the main movement. That is what I worry about, okay?"
My plan was to take part of that out, change the position and attack that from this side. "Lots of chips." "Here you go. So that is the end of the movement."
Part 2 of the same lesson gave the thickness of my ceiling: "a little less than two inches, but like one and 15/16," and, in metric, "about 50 millimeters." Eight quarter material is what I said I'm glad to have.
What was I doing when I said by now?

That section needed excavating, I said: "deep excavation just to give that feel like it is flipping." "It is flipping." Careful was the word, because, like I said, I have lots of limitations.
"Challenging area, but it's not that challenging." Right there I named the move: "I'm going to do a plug cut."

Number nine was my plan, "maybe even 20 millimeters, like three-quarter of an inch" (0.79 in). I'd excavate in "just like that," carefully rotating my tool. "It's kind of big plug, but it's going to give me right away pretty much really good depth."
"Really good depth right there."

About the hole, my words were "Again, I don't want to go too deep inside right here in this hole, but deep enough, okay? Deep, but not too deep." From the sides, I probably attack.

Going deeper later is fine, I said, once I establish the roundness itself, the main movement. "Then I can go back and excavate much deeper with number 11 or so."
Which gouges did I name in parts 3 and 4?

Part 4 names the big gouge, the same number seven, three and one-eighth of an inch (about 80 millimeters), "to clean a little bit, create for myself some canvas, some surface I can draw on and develop a little better."
A section that has to go from underneath is where I would "probably still use the same number three and seven millimeters" (about 0.28 in), because "I really need to get gradual movement." Cleaning a little of this section with number 11 was another thought: "I'm using number 11 and 12 millimeters, half an inch."
| Lesson | The tool and the size I named | For |
|---|---|---|
| Grape Onlay 13 | number two, 2 millimeters (0.08 in) | the connecting point I planned to create |
| Hashemi Flowers 20 | a quarter-inch number 8 (6.4 millimeters) | the idea I wanted you to see |
| Lily Box, lesson 5 | number seven, 14 millimeters (0.55 in) for a start | shape for a flip, my plan |
| Venice Room 72 | number 11, 5 millimeters, 3/16 of an inch | the long separation I planned |
A transition to the ceiling part is a little challenging, I said, "But it doesn't mean it's impossible. I'll just use a back bend." "And see, back bend helps me a lot. Even if I have that molding in the way, I'm still able to actually use that." If you're really serious about wood carving, I said, "you should at least consider to buy it. I'm talking about backbends."
Can you follow my logic by now?

Furniture Panel 19 holds the line "And probably by now, you understand why I did not attack my sides or middle, for I can just travel easily and just take care of those small sections." "Take care of this one right away." "Not sure if I'm going to be able or not, but I should be," I said.
"Attacking from one side and get to the other side," I said. Of the approach I said, "See? It's really, really quick with this approach." Clamps were another matter: "I didn't want to see on a camera my clamps," I said, "so I just clamped them from the bottom up, so I can just flip like that."

Venice Room 72 has the middle line too: "So that is my middle line." "I know by now," I said, "you probably already should know my logic behind why I'm doing what I'm doing, okay?"
For a long separation I would use number 11 with 5 millimeters, 3/16 of an inch. I planned to start it as an open division, which means this leaf will not go underneath of this line.
For Venice Room 57, a number 11 veiner at 12 millimeters, about half an inch, was my tool. "I hope you understand why already by now." For anyone who has not, I said, "please watch all of those videos about this particular carving, okay?" I told you more: "I said maybe hundreds of times."
I really want to raise the right-hand side ridge, I said. I need another concave on that side.
In Furniture Panel 39, "by now" sits in a line to you: "probably already know what I'm gonna do, but at least we gonna touch some of that area that we did not touch before." Depth was the decision I named, how deep I want to get this area excavated.
"Should I follow this depth or should I get much deeper, like in the center?" A big question, I called it. For the center I gave "about quarter of an inch, I would say, little less than quarter" (roughly 6 millimeters). "I didn't measure it," I said, and "let me actually measure it." My calipers were the plan.
Do you know my language by now?

Lily Box 5 has "I hope you do understand my language by now, what I mean by flip." "That one that leaf flips, so that's what I call flip," I said, and a region right here "flips over, which means this section going to go underneath of that side."
Rounding that and undercutting underneath were my needs, and I'd start with number seven at 14 millimeters (0.55 in), with shaping this side as the plan. A sharper tool was a need too: "It looks like I need to sharpen this one. Especially on those harder woods," I said, "it's really important."

In Hashemi Flowers 20 I would take a quarter-inch number 8 (about 6 millimeters). A number 9 gives the same result, I said, if that is what you have. The words "by now" sit in the line "you should be able to see the idea what I'm doing."
Not quite happy yet, I said. I'll take number 7 again, this one 10 millimeters (0.39 in). "And here is going to be just a small volute start. It's how I call it," I said, "a start of a leaf, or volute start."

Within Venice Room 60, I named number 11, one-eighth of an inch (3.2 millimeters), and said "in this area especially, I got to be really careful." "I don't have to use number 11. I could use number 9 and just get a plug hole cut." "And by now," I added, "you know what I'm calling that and why I'm calling it."
Where else do I say it about my own carving?

Venetian Flowers Rosette 3 has me guarding the middle part, "because I want to make sure it goes downhill, then uphill, then downhill, and that then is going to curl up." "I think I should change my tool by now."
Enough movement with this tool, I said. A smaller one is my plan, number nine or number 11, and I'll use number nine at quarter inch (6.4 millimeters) to excavate a little deeper. A spooning effect is what I do not want.

For Venice Room 47, 2 millimeters (0.08 in), a spoon, "was a little too big," and I could probably just use 1 millimeter (0.04 in) and hook out all that mess. I said, "And by now, there is no limit how deep I want to go. I don't really need to."
A little blow "with the fan" was my plan, to clear off chips. "That is wonderful."
Modern Acanthus 6 has "by now we're gonna introduce micro tools," with one millimeter (0.04 in), "Or half a millimeter" (0.02 in), and number 11.

Over in Grape Onlay 13, my stem was "about 16th of an inch" (about 1.6 millimeters). "Now what I'm gonna do, I'm gonna create like a connecting point." Number two was the tool, "a two millimeters, little bigger than 16th of an inch."
Real grapes have a kind of connecting point, I said. I hope it makes sense, I added.

Corinthian Acanthus Leaf 6 has "By now, we've done undercutting all around," plus "you should have the result same like what we have right now right here." Two pipes are there, I said, and "the second one starts at the eye, and it goes all the way to the center." The gouge is number nine, about 10 millimeters (0.39 in), and it "doesn't have to be three-eighths of an inch."
Should you see the effect by now?

Roman Acanthus 16 has "Just about a sixteenth of an inch, no deeper than that" (about 1.6 millimeters). "But by now," in my words, "you should see the effect, what I'm after."
I planned to show that to you from a distance. Different light angles, I said, "so it just creates beautiful shadows. And that's simple to do. It's nothing complicated to know."
This is not the only design you can see in a really ancient acanthus from ancient Rome, I said. There are multiple different ways to make this middle section more beautiful, "but it's just one of them which I kind of like." And "that's not the end. You can actually make this one even more beautiful."

Floral and Molding for the Panel 11 names number 11 with 5 millimeters (0.2 in). My plan was "a couple cuts." One was to go all the way, and the other not as deep on that side of my pipe. "And by now," as I put it, "you probably already know why I'm doing that if you watched other acanthus, not just acanthus, but Venetian-style carving videos."
A little deeper right here, maybe, "Because I want to make sure it is sloping nicer. Or, has more 3D movement in it."

In Lily Box 2 I talk about some of the people who joined the school, who "call themselves beginners, and they never carved before, but they already achieved really good results." "by now, they probably do understand it's not as easy as it looks."
Sometimes, I said, I have a customer who doesn't understand what it takes in wood carving. After I tell the price, the answer is "Oh, for piece of wood?" "For the wood carving, and for the time involvement, for the artistic design and so on. Wood is just a material."
Buying a fine art is different, I said: you're not saying, "Oh, it's just a piece of linen for the canvas." "You are buying artistic abilities, and it takes time sometimes, okay?"
One more line from that lesson fits the back bend: "You can get by with the straight tools. But if you get to complicated shapes and more three-dimensional work," I said, "you have to get all kind of curved tools and so on." I named "Back bent, front bent," and "short bent, medium bent, long bent, all types of bends if you really want to get a serious work done."

Furniture Panel 17 puts "by now" beside a tool: "You either hate that or love it." "If you don't have patience, woodcarving is not for you at all," I said, and sometimes "you spend a long time in just the one small area." "Literally, you spend one day, sometimes just one square inch" (about 6.5 square centimeters).
The full Venice Room workshop 59 and the whole Venice Room Part 5 course are inside the school. Start here to watch the wood carving videos.
How it's done
- Set a limit for the dig. My limit at the start was not too deep yet, so we'll see.
- Check the depth as you go. I'd cut in a little more, remove some waste, and check if I've got that deep enough.
- Keep the main movement. All I need right then is the main movement. The boundary line I can reestablish.
- Plan a plug cut. Number nine, carefully rotating my tool, was the plan for a plug cut.
- Aim for deep enough. Deep enough inside the hole is what I want.
- Move to the sides. I probably attack from sides.
Frequently asked questions
Can a plug cut be too deep?
The hole got a limit in part 3: deep enough. Once the roundness is set, I said, I can go back for a much deeper dig.
Which gouge did I plan for a plug cut?
A number nine is what I planned for the plug cut in part 3. In workshop 60 I said I could use number 9 and just get a plug hole cut.
Do I worry about losing a boundary line?
A boundary line does not really worry me. Reestablishing it is no problem, and the main movement is what I worry about right then.
Should a carver buy a back bend?
What to carve next
- Venice Room workshop 59
- Venice Room Part 5 course
- Furniture Panel 19
- Venice Room 72
- Venice Room 57
- Furniture Panel 39
- Lily Box 5
- Hashemi Flowers 20
- Venice Room 60
- Venetian Flowers Rosette 3
- Venice Room 47
- Modern Acanthus 6
- Grape Onlay 13
- Corinthian Acanthus Leaf 6
- Roman Acanthus 16
- Floral and Molding for the Panel 11
- Lily Box 2