

Alexander Grabovetskiy, woodcarver, School of Woodcarving · Published 2020
What does a wood carver mean by "reveal"?
Quick answer: I said reveal in part 1 of Venice Room 60, as I talked about the size of one eye. The word turns up in other lessons too, next to movements, the final shape, pipes, shadows and a grape leaf, and I kept each of those lines on this page.
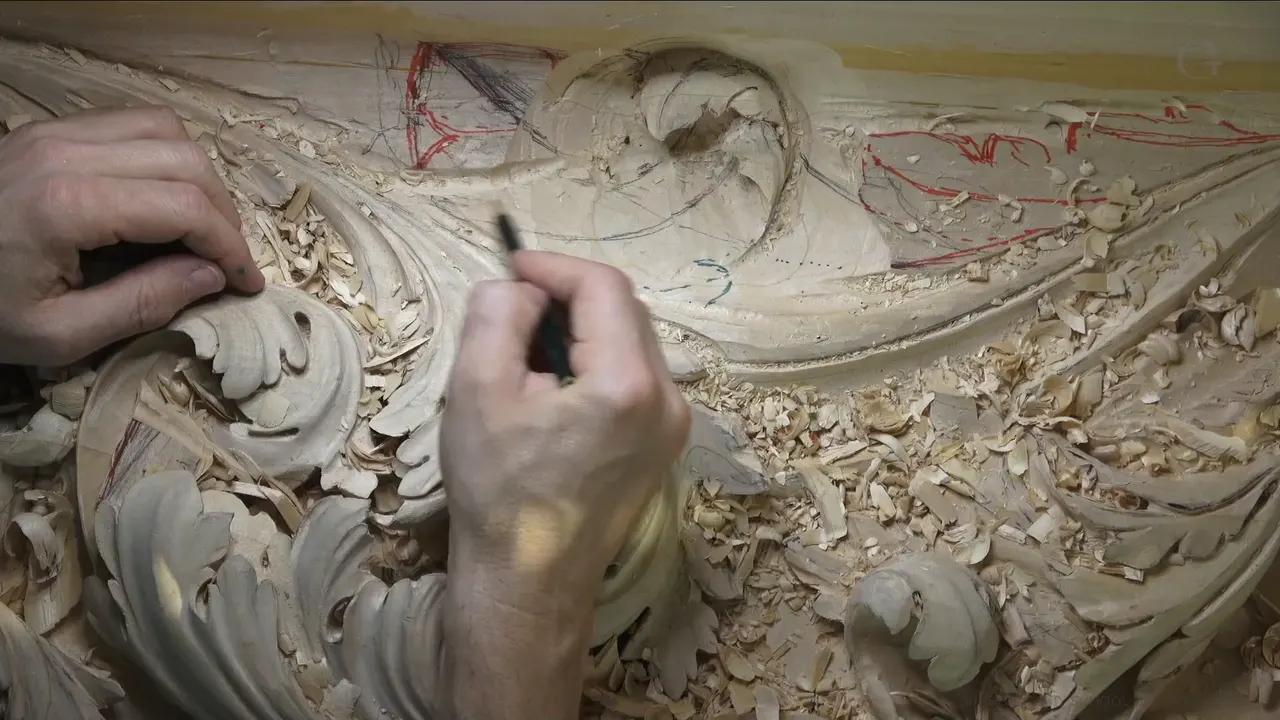

In Venice Room 60, part 1, I used the word reveal while I talked about one eye on a movement. I was still deciding. The same word turns up in other lessons of mine, and this page lists them.
Have you ever stood over a board and asked how far one movement should go? Do you want to hear what I weighed as I asked it? Here is where I said the word in part 1, and then the lessons where I used it again.
Where was I in part 1 when I said reveal?

Early in the part I said, "Here is one of the divisions on this side." I guess I have to just get another division on that side also, to repeat that movement. Then came a question: "But how far I should extend that?" My answer was "It should be probably somewhere right here," and I thought it would look much better.
This, I said, would become part of the main movement. A choice followed. I could get the movement the whole way up to here, and that way would be "a lot easier for me to excavate and create details of this movement." On the other hand, stopping it right there would give me "a really good shadow." I added maybe a little more on this side.

"For me, it's really important not to mess up, especially in this stage." The piece will be visible. How you look at it matters too, and I called that "also really important."
I think I probably should take this one all the way to that point, I said, and with the divisions it will look really good. "That's exactly what I'm going to do." I thanked you for your attention. I'm thinking out loud, I said, "but at least you know my process of why I'm doing what I'm doing."
What was my plan for the outline and the tools?

"I'm going to outline it, set that in," I said, and "Just outline it and set that in." Next I said "Okay. That is good. And let me do this side also."
I would not do too much on this side, because maybe I would change a little bit. On that side, "I'm pretty sure I want to do that big." Let me get rid of some of that extra material I don't need, I added, and I can excavate a little deeper if I wanted to.

The transition to the ceiling looks like an easy decision, I said, "but it was a really hard decision." It would be visible from all of the points, from below, from up and from another point of view. "That was a little challenging. Okay. A little bit, not much." My goal, I said, is not to scare you, but to show you that it's possible, even if it's scary sometimes.
"Clean a little bit on the side, that movement." Underneath, I can actually dive the whole way, since this transition from the bottom would be visible. And "Really awesome. Even if you don't see that on the camera, I think it's going to give me awesome movement."

"Okay, I used number seven by the way," I said, and "that was about half an inch" (12.7 mm). For the gouge, the plan was "Let me use number six and one inch" (25.4 mm) "and give overall shape, the main shape of this movement I should say." And: "That is looking good."
How did the midline lead to the small eye?

"I don't want to get inside of the camera shot, but obviously I got to put a midline which is supposed to go all the way to the center line right here." That space, I said, is "supposed to be like a tapering" and has to be "organic tapering also." The middle line goes to the center as well, which "right now makes sense" and will become a part of this big movement.
"So I've got this chunk, I've got that chunk. Okay, and now I'm able to create some eyes." The trouble, in my words: "the only problem I see, I don't have too much space for the eyes." Too close, I think.

And here is the line this page is about. "If I want to reveal this line, maybe I should just do small on this side, really small eye, which is going to be this one." And again, that will be the line. The part ends on the same word, with "this side."
Parts 2 and 3 carry on from there. In part 2 I spoke about the shadow: "I really need that shadow right here if I want to see beautiful outline of this inner line." Over in part 3: "what I want to do, I want to create bigger eyes right here. Okay, bigger eyes."
Where else did I say reveal about a movement?

A first stop is workshop 62, part 3, where I said, "I can actually take a little bit this edge this way and reveal that movement." Then: "Let me get number five," at about 10 millimeters (0.39 in). And once the line was in: "now you should be able to detect that movement. So now it's good."
The same word shows up in workshop 66, part 2. "Maybe I can actually do an extra small division in this area," I said, plus the same on this side. Nicer, and it would open up the space I need. "I need that space for revealing the stuff below." Then: "Not much because I do have an upper ridge, and that would be a mistake if I would just go too deep."

Part 10 of workshop 53 has a ridge in the way. "I need to get rid of this ridge because right now it doesn't help me at all, and I can't get deeper underneath." Then: "But this area is so nice. I can create a beautiful shadow. And also by doing it, I can reveal some of the movement which is going to be behind a little bit." 5 millimeters (about 3/16 in), the same tool, was the plan for cleaning a little bit.
In my Venice Room, in workshop 10, part 9: "I don't want to go too much in. So I want to still reveal this bottom part." "I want to make sure everything just flows together," I said, and I want that invisible line to go the whole way to the shelf, which means "this leaf can stop somewhere like that."

A concave comes into part 11 of that lesson: "let me dig a little deeper and inside. That way, we can reveal this part a lot more, the lower part." I thought it would be really good.
What did I say about the final shape?

"I am actually little by little revealing the final shape, although I'm not too happy about it," I said in lesson 70, part 3, and added, "I have to be honest with you. I'm not too happy yet. I want to make it nicer." The way to do that was to "just chop a little bit this side, because otherwise, it's just too much curvature."
Part 4 has the word too. "With the same back bend, I'll just remove the main chunk. And here you go. It is revealing itself." "I could add an extra separation later on," I said, and then "I don't need to do it right away."

"Maybe another movement. Maybe even bigger, just like that," I said in lesson 82, part 7. And: "another one right here, and I can expose this and make it look really, really, really, really nice. And that way, I will reveal that main body form." Number 11 again, 7 millimeters (0.28 in), I said: "I have a mark below how far I can go."

In lesson 86, part 8, I said "that is actually a really good movement. I like it. So it's already revealing." Then the order of work: "first I have to establish the main movement, and then we're going to work on details."
Over in lesson 93, part 8: "I hope you can already see. It reveals the details. Although it's kind of not clean yet, but it should be all right." Then came a plan: a tool upside down, like number five, to round this part a little.
Does reveal go with pipes and shadows too?

A pipe gets the word in workshop 20, part 4: "I exaggerated that pipe with the number seven. Yes, I know. It's kind of buried, but you'll see." My words after that: I would reveal it in just a second, and I would use three millimeters, number eight, and excavate right on the side (3 mm is 0.12 in).

A walk shows up in lesson 128, part 1. "I have to change the position. Walk around." Later in that part: "I am already able to see the pipe. Revealing pipe."

Shadow gets the word in lesson 131, part 3. "And maybe 2 millimeters right away here" (0.08 in). Then: "See? You can see shadow revealing." The shadow was "really, really deep," I said, and "Beautiful. That's what I'm after."
Which lessons used it for the middle part?

A shell sits in workshop 129, part 3. One part will go above it, I said, "and another part going to just hide underneath of the shell." "I don't know if it makes sense or not, but it will make sense little later." The plan was "just like revealing from underneath and flip on top." I guess it will be more visible this way, I said, and I planned to go from underneath and reveal on top of it.
In lesson 134, part 2, I said "I also could lower down completely this side." It makes a big difference, I said, how much of that middle part is revealed and how it looks. The plan called for number seven. Earlier in that part: "I cannot be too deep on this side, but I can be much deeper on that side."

One more sentence sits in lesson 136, part 3. Before it came "Maybe about 12 millimeters or so" (0.47 in). Then: "that's probably the lowest I can go." This side of the flower will be much lower, I said, and we will reveal the middle part. "And I need the depth."
What about grapes, grain and marble?

The Grape Leaves vase course, lesson 2, part 12, has a leaf: "By now, you should be able to see a grape leaf almost revealed, but it's not the final detail yet." For the notch I said "I call it relief cut, with the number 11 in this case. And four millimeters, three millimeters will work" (0.16 in, 0.12 in).
In the Lily Box course, lesson 13, part 3, the word goes with wood: "Again, grain is so amazing right here. Every time I make a cut and the grain reveals, oh man, it's just so gorgeous and beautiful."

A matching line sits in workshop 55, part 6. Because it will be visible from the bottom, I said, I need to reveal this part.
Wood sits next to stone in part 5 of that lesson. "You're not adding stuff on, you chopping out," I said, and "you actually taking away what not supposed to be in that particular piece." The Michelangelo example followed, a big marble stone he would chop "to create the form, reveal what is inside."
In part 7 I told you about a live stream question that day on art versus craft, and I added trade. The artistic approach, as I understood the person who asked, "is when you look at the piece of wood and try to reveal what is already hidden in that form." "It's exactly what I'm doing right now," I said. I was looking at the chunk of wood, and it "looks one thing when you look at that development on a piece of paper, and in real life, it looks little different." A red marker was the plan.

And in lesson 87, part 11: "So we're pretty much revealing multiple sides. It's already one side, two side, three side," I said, and it will still be visible for four sides, "wrapping around, almost 360, if you wish."
Which lesson gave me which line?
| Line I said | What I was working on at the time | Lesson |
|---|---|---|
| reveal that movement | A bit of this edge, this way | Workshop 62 |
| revealing the stuff below | An extra small division to open the space | Workshop 66 |
| reveal some of the movement | A ridge that does not help me | Lesson 53 |
| revealing the final shape | The main chunk and a back bend | Lesson 70 |
| reveal that main body form | Another movement, maybe even bigger | Venice 82 |
| Revealing pipe | Walk around, then continue on this side | Venice 128 |
| You can see shadow revealing | Deeper underneath that long leaf | Room 131 |
| reveal the middle part | One side of the flower much lower | Room 136 |
Where can you watch every lesson named here?
Each one sits inside a course of my wood carving school. The Venice Room Part 5 course holds workshops 50 to 61, and workshop 60 is the lesson for this page. The reveal lines come from Venice Room workshops, and from two other courses of mine: the Grape Leaves vase and the Lily Box. If you want to see where to begin, start here.
How it's done
- Ask how far the movement runs. I asked how far to extend it and said probably somewhere right here, then weighed a higher finish against stopping it there.
- Say how it will be seen. How you look at it matters, I said, and the piece is visible.
- Outline the shape. My plan: outline it, then do this side also, with less on the side where I might change a little bit.
- Pick the gouge for the main shape. The seven came first, then a six was my plan for the overall shape.
- Put in the midline. A midline: I said I got to put one in, with a tapering that has to be organic.
- Check the room for eyes. Room was short for eyes, I said. Then I said maybe I should just do small on this side.
Frequently asked questions
Which gouge sizes came up in part 1?
A number seven, which I said I used, and a number six, which I planned next. I gave half an inch (12.7 mm) to the seven and one inch (25.4 mm) to the six, in that order.
Which spots did I name as visible in part 1?
The piece itself, I said, and the transition to the ceiling, from every point I named: below, above and another point of view. Of that transition I also said it looked like an easy decision, but it was a really hard one.
How far did I plan to extend the movement?
A higher finish would make details easier to excavate, while stopping right there would give a really good shadow. After that I said I probably should take this one to that point, and that with the divisions it would look really good.
What to carve next