

Alexander Grabovetskiy, woodcarver, School of Woodcarving · Published 2020
What does a wood carver mean by "multiple cuts"?
Quick answer: In part 2 of Venice Room 60, I said "multiple cuts" about the plug cuts I was making on the side, under a leaf. I say the same words in Hashemi Flowers, Lily Box and other lessons, beside a thin part, the grain, a knife and a thin tool.
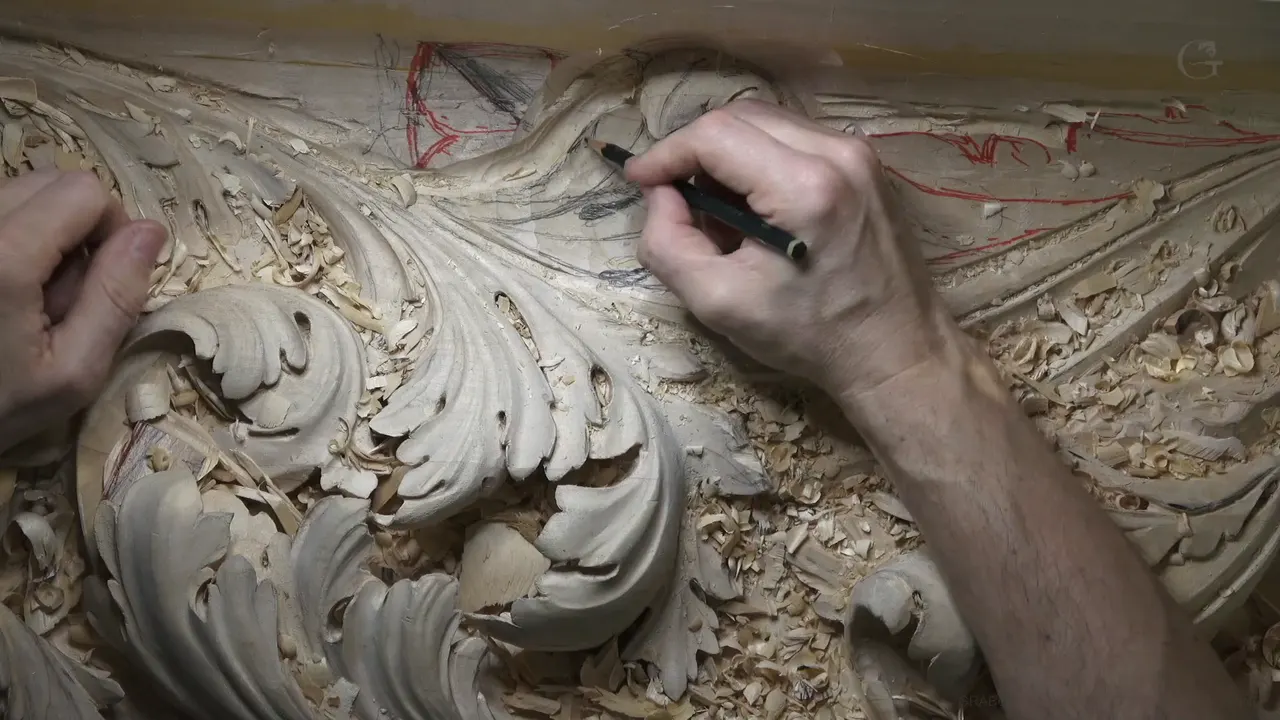

In Venice Room 60, part 2, I said "multiple plug cuts straight down," about the cuts I was making under a leaf. The same two words are in other lessons of mine, and this page lists them.
Why take wood out in several cuts, and not in one? This page answers from my own lessons, with the lesson named each time so you can open it and watch.
What was I doing in part 2 when I said multiple cuts?

About the layout I said "a division going up like this" and "S movement, letter S movement like that." My verdict on it was "It is almost okay. Okay, but not okay." Of the waste I said "Not mess, but waste."
The gouge, in my words: "Okay, number 11," and "a spoon gouge, of course, again." The outline: "Let me outline a little farther this way." The size: "I'm using 4 millimeters right now," which is 4 millimeters (0.16 in).
A shadow that stands out was the aim for the spot under one leaf: "I really want to see a really deep shadow for it would be really distinguishable." My favorite way to get one, I said, is "just to get my plug cut."

"I can't go in underneath of this leaf with a straight tool" was my trouble with the angle. The start: "I'm going to start straight cut down. At least I'll start." A mallet was a maybe too: "yes, I could probably use a mallet a little bit." Why all this: "I really need that shadow right here if I want to see beautiful outline of this inner line."
"Like I said, sometimes it's really challenging." "this is the case, actually, how I excavate without damaging anything because I'm limited from what angles I can attack it," was my explanation.
Where did I say multiple cuts under the leaf?

Underneath the line, my plan was to "excavate opposite direction underneath of this line, which you probably don't see." The cut itself: "go that direction and create the plug cut. Rotate." The aim was the same shadow, and the limit was "don't want to go all the way through. So have to be really careful how I do it."
The line this page is named for: "Next cut right on the side. It's going to be multiple cuts like that. I'll clean it later, but I'll just go on the side and little by little, create those extra plugs." I questioned the word "extra" out loud: "I mean, why I'm saying what I'm saying? I'm creating plugs, not extra plugs." That was my fix.

"See? I'm excavating and creating really deep shadow. Don't pay attention that is not looking good yet." And: "It will look really good." What it would take: "pretty much a couple cuts with the number five," and "go like that toward the cuts." On the edge I said "I've got really, really sharp edge."
The opposite side of the movement still needed work, and I said so: "It's not the end yet because I still have to create opposite side of my movement." My caution: "I don't want to mess up with the line." The method would stay the same: "multiple plug cuts straight down like that."

What did I hold back?
The undercut: "I'm not undercutting yet" because the part is "a little lower than that part." What I needed, I said, was "the main framework."
For that I said "Let me use number six right now and get some of that stuff out." The size: "Number six, and that was a quarter inch." The metric: "6 millimeters, okay?" The quarter inch is 6.35 mm, and 6 mm is 0.24 in. The brake: "keep in mind that this is going to become a part of this movement on inside."
What do I say when a spot is fragile?

A setup with no support on the bottom is in Hashemi Flowers 22, part 1: "just be careful. Don't press too hard. You can easily break it." My advice for that situation was "Just make multiple cuts." My promise there: "much safer." About the gouge: "a number seven and one inch. Or 25 millimeters if you are not in the United States." One inch is 25.4 mm.

A second spot in that same part, on another leaf: "it's the same quarter inch," with a smaller one possible, "just an eighth of an inch." That is 6.35 mm, with 3.18 mm for the smaller one. My caution: "This is fragile."

In Hashemi Flowers 12, part 5, about prying: "That's what I shouldn't do. So when I'm trying to pry too much, I can break it. So don't create too much pressure." The trade: "it's much better to do multiple cuts and to get the result slower than to rush it and make mistakes."

The Hashemi Flowers 41 lesson, part 1, is about how little force I use. I barely create any pressure at all, I said, because a press or a twist to the wrong side can break it easily. My choice: "multiple cuts, micro cuts, if you wish." My other words there: "I can use number 11 again" and "Let's create even deeper shadow."
How does the grain change my cuts?

The grain gets its own part in Hashemi Flowers 33, part 2: "you're working with the direction of the grain and against that grain." My words on that: "you can't always make all the cuts with the grain. So you must just fight and attack from different positions." My rule: "just don't force it. Make multiple cuts, it's better." One more thing to watch: "constantly check if your tool is sharp, and if you need to buff it, if you need to strop it, just do it."

In the Lily Box first layer lesson, part 11, I said "Be careful in those tiny spots." Cutting in several passes is better "than make one cut and make a big mistake." It was against the grain, "against all the rules," and I gave the depth as "Half a millimeter again," which is 0.02 in.

Grape Onlay 5, part 2: "If I can't remove it at one cut, I'll just go back" and "Then go back and again create the cut." In the same stretch: "Excavate like so." Part 1 of that lesson has a related line, where I call several cuts better for me because "along the grain I can catch it and break it."
Does a knife change multiple cuts?

The Carving Plate with Butterflies 10 lesson, part 3, has a butterfly head to separate from the body: "separate our head of the butterfly from the body." We would do "rounds in little bit of the head. With the knife, of course." My rule: "Just multiple cuts until you're happy. And blended from all those positions."

The beginner course has multiple cuts with a knife too. In Curly Kitchen Cutting Board, workshop 9, part 2: "make sure you're controlling your knife, that your knife is not digging to that one. Just control how deep your edge travels." If it takes more than one cut: "like I'm doing right now, just do that." The picture of it: "Just chipping away little chips multiple times." In workshop 5, part 3, I said that if I need extra cuts, I'll do it, "Until it just flies like that, and just clean it until your cut is clean and nice without any sanding."
Do small tools need multiple cuts?

Venice Room 14 has a small tool in part 2: "back bend, and I'll use a small one, like number five," and "only 3 millimeters" (0.12 in). I gave 1/8 in too, which is 3.2 mm. "multiple cuts" is there as well. And: "the goal is not to force it too much. All I want is just to create a shadow."

Over in Venice Room 18, part 10, I read a warning sign: "if I'm going to crank too much, see, it's already breaking, so that's not good. So got to stop." My reading of it was "if you see the movement like that, so that means that's it. You're pushing it too far." My fix: "I'll just use a micro tool like a number three and one-eighth of an inch" with "multiple cuts," going "inward." The eighth is 3.175 mm. Why it is safe: "It does not create a lot of stress because that's a really thin tool."
How do I use multiple cuts near a line?

Furniture Panel 15, part 4: "sometimes it's a good idea to remove chunks of wood with just probably number eight or number nine." My method: "Let me show straight down like this, get closer to the line," and "multiple cuts just like that, without touching the line." The payoff: "That makes it much easier to clean later." And: "So it just flies out."

In Floral and Molding for the Panel 13, part 1, I said "since we do have a center plug removed," and "we're going to take multiple cuts toward the center." The condition: "really, really important to have sharp tools." With a tool that is not sharp I said you see "a lot of tear outs," you "catch the grain" and you "get frustrated."
Does a ridge or a high spot change multiple cuts?
On Greek Acroterion 3, part 5, I said "Of course, I could probably just try one, but I feel more safe about my ridge, about my line, when I'm doing multiple cuts." My reason was "damage my high point or high spot, there is no way I can add that." And: "in this case, I have to keep it. So for me, it's critical."
In Furniture Panel 39, part 1, I said "I don't wanna lose my picture though." And: "I'm gonna excavate multiple cuts." Going all the way to the design is a no: "That will be a big mistake."
From Flower Rosette 2, part 4: "I could take my background tool right away, but I think it would be easier for me just to create multiple cuts first."
Does the size of the tool change the cuts?
In Venice Room 96, part 9, I said "carefully" and named "number seven," at 3/4 in (19 mm). My reason for the smaller one: "because the tool is smaller, I can control much better the movement."
The Modern Acanthus 8 lesson, part 3, is about a tool used upside down: "I really just try and be really careful how I create my cut" and "multiple Cuts in multiple spots."
Does multiple cuts keep me on the line?
Think of Venice Room 79, part 3. I had marking on both sides, I said, "I can actually just create multiple cuts" and "that way I'll be dead on the line." Another way was a saw cut: "I could actually cut with the saw." My view of the two: "I can probably do as fast with just the gouges without making any saw cuts."
The Chamomile and Bow Rosette course has a small tool: "a half a millimeter number 11," which is 0.02 in. My words: "multiple cuts toward the center."
The Grinling Gibbons class in Maine, lesson 6, part 2, gives two ways: "multiple cuts" for "like a grid look," or "like a cross cut."
Why not take every cut as fast as I can?

One more line, from Hashemi Flowers 20, part 1, about "a small, tiny gouge": "without forcing. Just don't create too much pressure on that, okay?" On speed I said "sometimes it's tempting to make all the cuts as quickly as possible and to get to the result as quickly as possible. But believe me, it's not the best idea." The better way: "take your time and little by little, even if it takes extra amount of time."
Which lesson gave me which line?
| My point | The situation | Lesson |
|---|---|---|
| Much safer in several cuts | A setup with no support on the bottom, with a warning not to press too hard | Hashemi 22 |
| Slower, but no rushed mistakes | Prying a part too much, with a slower result than a rush | Workshop 12 of Hashemi |
| Micro cuts, not a mistake | A press or a twist to the wrong side, with almost no force from me | Hashemi 41 |
| Do not force it | Resistance in the grain, where I said to check that the tool is sharp | Lesson 33 of Hashemi |
| Better than a single cut and a mistake | Tiny spots, working against the grain, against all the rules | Lily Box 2 |
| Until you are happy | The head of a butterfly, with the knife | Butterflies 10 |
| Inward, with a really thin tool | Cranking too much, where it was already breaking | Venice Room 18 |
Where can you watch every lesson named here?
Each one sits inside a course of my school. The Venice Room Part 5 course holds workshops 50 to 61, and workshop 60 is the lesson for this page. The lines above come from Venice Room workshops, and from the Hashemi Flowers, Lily Box, Grape Onlay, Plate with Butterflies, Furniture Panel, Floral and Molding for the Panel and beginner courses. Their projects include flowers, grapes and butterflies. If you are looking for a place to begin wood carving, start here.
How it's done
- Name the shadow. I wanted a shadow I could tell apart from the wood around it.
- Start straight down. A plan, not a done thing: a straight cut down, at least to start.
- Come in from the other direction. Another plan: dig the opposite way under the line, make the plug cut and rotate.
- Go on the side. Cut beside it in small bits, and clean it later.
- Stay off the line. Plug cuts go straight down, right beside the line and not on it.
- Hold the undercut. One part sits lower than the other, so the undercut waits.
Frequently asked questions
Which gouge did I name for the outline in part 2?
A number 11 spoon gouge, at 4 millimeters (0.16 in).
What did I say I needed?
Only the main framework, I said.
How big was the number six, in inches and in millimeters?
A quarter inch (6.4 mm), which I also called 6 millimeters (0.24 in).
Was a mallet an option in part 2?
What to carve next