

Alexander Grabovetskiy, woodcarver, School of Woodcarving · Published 2020
What does a wood carver mean by "follow with"?
Quick answer: In part 2 of Venice Room workshop 76 the words "follow with" came up in my plans for the two eyes. In my plan, number seven came first, a small veiner second. My second plan named a number four upside down, then a spoon gouge. Other lessons use the words after a number 11.
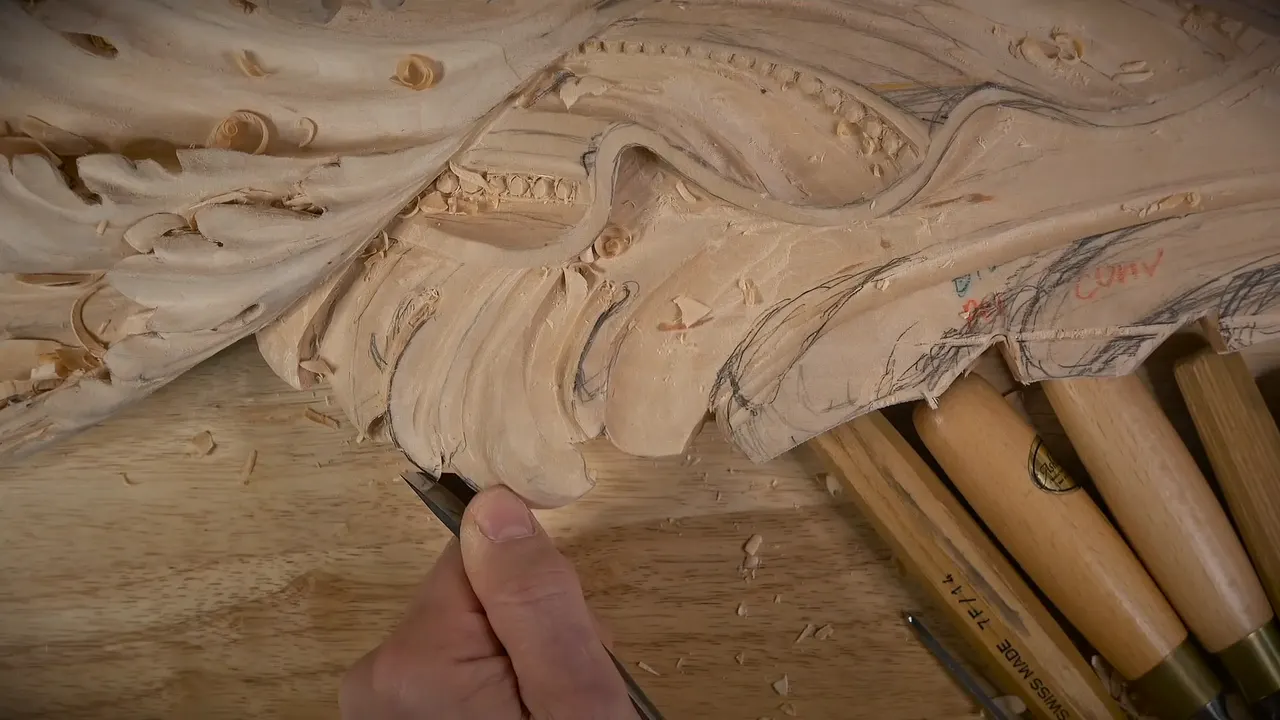

In Venice Room workshop 76, part 2, I said "I'll just follow with 2 millimeters number 11 veiner" (about 0.08 inch) right after naming number seven. Near the end of my plan came a number five spoon gouge. Those same words turn up in my Hashemi, Furniture Panel, Lily Box and Roman acanthus lessons, and in many other Venice Room workshops.
Ever stood at the bench with two gouges in reach and wondered which one goes first in wood carving? Does a deep spot ask for one pass, or for two? Walk through part 2 with me, then through the lessons where I said it, and see what each second tool was for.
What was I doing before I named the second tool?
Part 2 opens on "I think it's possible," I said, "or even roll it a little bit." Then "Let me see how it's going to look," and "Let me chop first."
The rolling was a maybe. "I'm not sure if the rolling going to help or not." And "Maybe not, but at least I'll try." Later came "It's actually not bad at all. It actually looking good," and "I can roll it underneath like this."

After that came "So that is looking much better," and "So let me work this eye." The eye got both tools in my plan. "I'll use number seven right now just to pre-establish that motion, and I'll just follow with 2 millimeters number 11 veiner. Okay. And remove that part."
In my plan, seven comes first, then a veiner of 2 millimeters (about 0.08 inch). Next in the captions, "Here you go. There is another shadow I created, and now easily I can create that separation which is going to go kind of underneath."

How did I decide which part goes underneath?
My question was how I should do it, said out loud. "How should I do that? Should I take this part underneath and get the main body overlapping? Or I should do opposite direction."
A separation came first in my plan, with the number 11 spoon gouge. I fixed the word as I said it, "or spoon veiner, I should say number 11, and that will be 2 millimeters, but it's a spoon." That is about 5/64 inch. My first cut was planned for next.
My answer came as "I think it more logical to take this part, going to go underneath that way." Then "But that's kind of challenging area." For the tool, "I'll use just number four, and I'll go remove it, whatever I don't need to."

That clean-up was a plan. "I can work my details probably. But I'm going to use different tools to clean that." Then a size, "I'm using number three and 3 millimeters," which is about 0.12 inch.
What did I do when the movement did not look right?
"Now I'm really not too happy with this movement, so I need to do maybe an extra separation right here because it just doesn't look too good, and it doesn't make too much sense." I added "Maybe an extra separation at this point."

The tool for it was the same one, I said, "small tool, just micro tool pretty much." A size came next, "Micro tool number 3, one-eighth of an inch, 3 millimeters." Then "Yeah, that looks better. It looks much better."
I left it there for the moment. Later on I would clean it a little more, I said, "but now I'm going to leave it like that. Okay. So it does look approximately what I want to see."

What was my plan for the second eye?
On to the next spot, with "So let me move on this eye right here." Then the shape. "Exactly the same idea I need to create. I need to create somewhat like a convex that way. Okay. Convex feel this way."
"And I could probably use--" I started, and then "But I don't want to do too much because I really like the overall movement." The tools were a maybe. "Maybe use just a number four upside down first, and I'll just go in, create preliminary move. And I'll follow with the number five spoon gouge."

The last line in the captions is "Maybe this one is little too big."

Which sizes did I pair in my other lessons?
Hashemi Flowers 44 is the first stop. In its seventh video I said I needed a cut right there with a number 11 at one millimeter, which is about 0.04 in, and then the half millimeter, about 0.02 in. The fourth video has the pair too, a number 11 first and then "even smaller number 11."
Next I fixed my own size and said sorry. "This one is not 1/32nd" (about 0.8 mm), I said, "actually half a mil, half a millimeter" (0.0197 inch). "And go really deep."

Over in Hashemi Flowers 48, first video, I called a petal "no more than 16th of an inch thick," about 1.6 mm, and worked in with a number 11 at one millimeter, or 0.039 inch. After it, I said, I can always take the half millimeter, which is 0.02 inches, "to create that vanishing line."
Furniture Panel 22, video four, was about an eye. Starting from number 11, I said "Let me establish the eye first." My plan was number 11, one millimeter, close to 1/25 in, with the half millimeter after it (0.0197 in), to "exaggerate that eye even deeper."

Lily Box 3, video nine, has me using one millimeter, 0.039 in, and planning the half, about 0.02 inch, after it. The next line I said was about my lights: "I think I need to bring my lights closer to me because I barely see anything."

In Roman Acanthus 15, video two, a number six at 3 millimeters (about 1/8 in) came first, "to recreate that lip." Next on my list was a number 11 for 1 millimeter (0.04 inches), for an undercut on both sides. The half millimeter would come after that. "If you don't feel comfortable to do those really deep excavations around those lips, you really don't have to." And "This step is not necessary step."

Video one of Venice Room 158 put the spot inside an eye. Number nine with two millimeters, that is 0.079 in, was my plan. A one millimeter, or 0.04 inch, would come after, "and remove all that what I don't need." Then "that's giving me a beautiful shadow."
Does the second tool get smaller each time?
Not in what I said. In lesson 14, third video, I would attack from the opposite direction with number 11 in 4 millimeters (0.16 in), and then use "the 2 millimeters," or 0.08 in. A look at Venice Room 17 shows five millimeters (0.2 inch) to try and four inside (0.16 inch).
Lesson 16 says it the other way round. "And sometimes it's easier to use a smaller tool and then follow with a bigger tool." Before that line I had said "maybe I should use a number 9, and a bigger number 9 because I do have some of the thickness right there."
One more is Venice Room 113, with "smaller number 7, about 10 millimeters at first," about 0.39 inch, and a bigger seven next. "I like overall development," I said. Next, "Let me clean those triangles."

In Venice Room 124, second video, my plan went from a number 11 with 10 millimeters, roughly 0.4 in, to a smaller one, about seven millimeters (0.28 in). My reason was "I don't want to lose that line and that line," and "it's easier just to save some time, so I don't have to refigure out everything."
Video three of Venice Room 160 has a 1.5 millimeter (0.06 in) veiner, and "about 3 millimeters down" (0.12 inches). I can follow with a "slightly bigger tool, maybe just the 2 millimeters," close to 0.079 in, I said. And in lesson 35, "I can remove either with just number seven and follow with probably with the same number 11, just to give a really nice, smooth transition up here."
In video eight of Venice Room 95 I said "Clean up with that number 11." Number three was next. Then "I'll take 2mm, number 11 and remove all that fuss," and 2mm is 0.078 in.

A knife is the second tool in Venice Room 92, video 11. I planned to clean it with number 11, then go on with the knife. Then "And I cannot go deeper than that, that would be a mistake if I go deeper than this."

A wall comes up in Venice Room 131. I planned 3 millimeters (0.12 inches), then 2 millimeters, or 0.0787 inches, "and of course this wall which you see, all of that is going to be gone." Of that wall, "all undercut."

What if the first tool leaves a rough spot?
In the third video of workshop 16 I said "I know I am wiggling and I'm creating really rough cut, which is all right." What I worried about was "just get in," and I called that "the main concern right now." And "I can always cut it again."
Workshop 14 shows me weighing a switch, and a correction of a word of my own. "Maybe I have to switch to one millimeter," I said. "Actually, you know what? I could use just a straight tool." Then "Don't really need to use a spoon gouge or spoon veiner I should say." The size was "So 1 millimeter, number 11," which is roughly 0.04 inches.
Before any second tool, Venice Room 109 has a swap. "Let me try number seven," and then "Well, actually, you know what? Number seven not going to work." After that, "I need something like number eight," at "about 5/8 of an inch," roughly 16 mm.
Second video of Venice Room 149 is a smooth line first, with a smaller tool after. "Perfect line," I said. It would not be wiggly, "because I actually pretty much covered almost the whole surface."
Why bring in a second tool at all?
I gave reasons, and they differ. In workshop 14 I was "wiggling slightly," and I said "I know it doesn't give me a really clean cut, but it is okay, I can always follow with the next cut, and I can make it much cleaner."
In the sixth video of Venice Room 9 a one millimeter, about 1/25 inch, would "excavate even deeper." Then "Just create extra shadow on inside."

The first video of workshop 103 has a plug to remove. My reason was "Want to get really deep shadow spot." And the project, I said, will be painted with the white paint, so lots of details probably will be covered with the paint.

Over in Venice Room 119, video two goes from 2 millimeters (0.079 inches) to 1 millimeter (about 0.04 inch). "Again, that's all for the shadow's sake," I said, and "you can detect that darker spot, which is the goal."
A shadow spot shows up in lesson 109 too, with a 2 millimeter (5/64 inch) tool and a 1 millimeter (about 1/25 in) one after it. "And I'll go and create another shadow spot. It all depends how light going to hit, by the way, but still, extra shadow spot never hurts." Next, "I already can see how it casts shadow."
Venice Room 61, video eight, gives me a choice of order. I could excavate first and "just establish the boundary," or I could "actually create the whole plug cuts first," and take number 11 after that. My call was "it's going to be a better idea just to do that way."

The grain was on my mind in Venice Room 21, video one. "I'm actually cutting inside of the grain, because the grain runs like that, and I got to be really careful how I approach this area." Then I planned number 11 in four millimeters (0.16 inch) to "excavate what I just created right there." Video four of Venice Room 8 has a one millimeter cut next, or 0.0394 in, and then "Challenge because everything is in my way."

Where does each lesson put the first tool, the second tool and the size?
Each lesson on this page, the tool I named first, and what I named after it.
| Lesson | First tool | Second tool and its size |
|---|---|---|
| This part, 76.2 | Seven first, then a small veiner | A plan |
| Workshop 14 of the Venice Room | A number 11 | Then 2 millimeters (0.08 in), wiggling slightly |
| Lesson 16.3 | A smaller tool, then a bigger | Size not said |
| Venice Room 61, video eight, plug cuts | Plug cuts | Then number 11, after plug cuts |
| Hashemi Flowers 44.7 | Veiner number 11, one millimeter (0.04 in) | Half that |
| Furniture Panel 22, video four, eye | Number 11 first | Half millimeter (0.02 in), a deeper eye |
| Roman 15.2 | Number six, 3 mm (0.12 in) | Then number 11 |
| Workshop 92, video 11, using a knife | An 11 | A knife, and not any deeper |
Where can you watch part 2 and the other lessons?
Part 2 is in Venice Room 76, inside Venice Room Part 7, which holds workshops 74 to 85. Every other lesson on this page has its own page, linked above.
Want to hear me say it myself? Start here.
How it's done
- Chop first. Chopping came first in my words, with the rolling still a maybe.
- Seven goes first. Seven was the first tool in my words, right now.
- A veiner goes second. A small veiner of 2 millimeters, roughly 0.0787 in, with a plan to take that part out.
- Check the spot. After the micro tool came a verdict, and my plan was to leave it like that.
Frequently asked questions
Which tool did I name before the 2 millimeter veiner in part 2?
Seven was my first tool, "right now just to pre-establish that motion," I said. The veiner was my next plan, a number 11 for 2 millimeters, that is 0.0787 in, and I told you its job: "remove that part."
How sure was I about the rolling at the start of part 2?
Unsure, in my own words: "I'm not sure if the rolling going to help or not." Then "Maybe not, but at least I'll try." The verdict came later, in the same part, and it was "It's actually not bad at all."
Which tool did I name for the extra separation?
The same tool I already had, I said, "just micro tool pretty much," a number 3 at one-eighth of an inch, 3 millimeters. Later I said it "looks much better."
What to carve next