

Alexander Grabovetskiy, woodcarver, School of Woodcarving · Published 2020
What does a wood carver mean by "that's the question"?
Quick answer: The line in Venice Room 89.1 sits between "But do I want to have that narrow?" and "Or should I keep that wider?" In other lessons it follows a question about a tool, a depth, or which part sits on top.
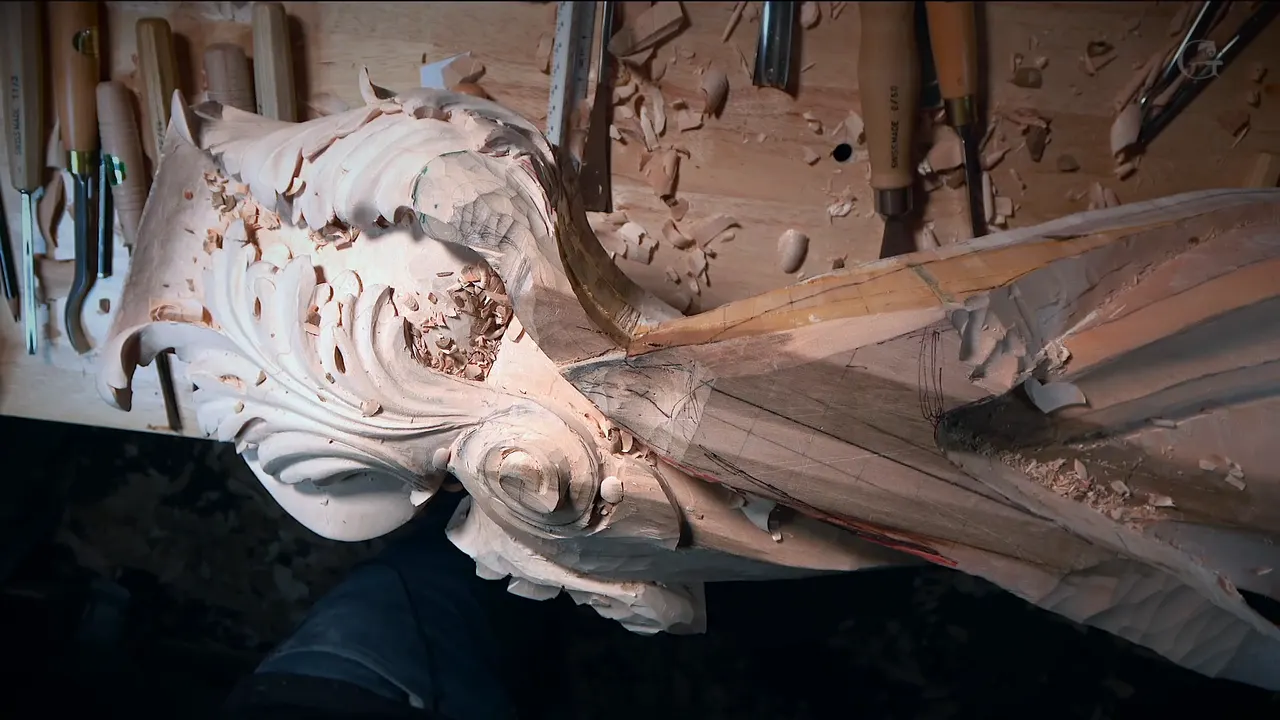

I asked at the end of Venice Room 89.1 whether I wanted my outer rim narrow, or wider just like that. Between the two halves of that question I said a short line, and my other videos have the same words after a choice of a tool, a depth, or which part sits on top.
Have you ever stopped at a rim in a piece of wood and could not tell whether to take it in or keep it wide? Did you reach for a gouge anyway, just to see? Then you know the spot where I stopped in part 1 of workshop 89. Below is that moment, the two videos after it, and the same words in lessons from my other courses, each with its own link.
Six things in part 1
- Number 11 with 3 millimeters (0.12 in) was the undercut plan, little by little.
- The inside would repeat one slope.
- One part of the carving did not make me happy, and I put it off for later.
- I would take the same number seven as before, 14 millimeters (0.55 in), and then blend a little nicer.
- I worried out loud about the look of the whole carving.
- The part ends on a rim.
What question closed part 1?
My question was about the outer rim and how wide to keep it. "So that is going to be my outer rim. But do I want to have that narrow? That's the question. Or should I keep that wider just like that?"
Just before, I told you the rough look did not bother me. It would be cleaned a little later, I said, "So I don't really worry about it doesn't look too good yet." My worry was the look of the whole thing, "because I don't want to make it look dumb, right?"

Width had come up earlier in the part. The slope was costing me overall width, "because we sloped that a lot right here." I added "I think it's okay," and "I hope it's okay." After that, "let me think again," and a plan to undercut first and then move to the next step.
What happened to the slope and the undercut before that?
Near the start I said it "has to be almost undercut underneath of here." The movement would go in. Number 11 and 3 millimeters was the plan for it.

A slope I had right there would be repeated on the inside, and that would give me "the final idea." Even more lowering was possible there, and later came "I think I need more light, even more light."
At one spot the direction was going to change, and I called it the spot. Deeper was possible there, but I was not happy about how that part looked. I'll take care of it a little later.
A flatter gouge came up: "a flatter gouge and straight down, let's create that movement." A number seven was my guess, and then "same number seven what I used before, 14 millimeters." Later came "So now it looks much better."
Late in the part I said "Sorry again. I'm thinking too hard today."
What does part 2 open on?
Part 2 starts with "And then we'll be able to keep it wide just like this, and then it's going to just go all around and create a really nice movement." Then came "So let me try to clean this way."

Further in: "that actually doesn't look too bad at all." I said I would clean it a little later, to give it a really clean look, and then it would transition in this direction.
Then, still not too happy, I had that slope, and "I really don't need an extra one." On the other hand, it could change the direction, and I asked "Why not?" Then a plan: "I'm going to have that one as a little concave."
Close to the end of part 2 comes a transition. Maybe this would be part of it, "but how do I transition to it?" What I wanted was to grow from underneath, and then go right there.
What was still open in part 3?
Part 3 has "a really nice and smooth transition," with the smaller tool still to go around. "That is the idea. I hope you can already catch the idea. Maybe."
A little more cleaning was coming right now, I said, and it was "just developing the main idea." Off camera, I would clean it, because it is inconvenient for me sometimes "not stick my head, that's the goal, inside of the view." Later I told you "I really like it," about the blending point and "all of those movements going from the same movement."

About the 3D look, I said "I want to make sure it looks really good in 3D." The slope was what I meant. Next, a rasp, which "takes out, right away, pretty much the high spots."

After the rasp, I named my outer movement and my inner movement, right there. A distance came next. Whether I would change it was not known yet, but for now I had about half an inch right in that spot, "which I guess is okay." In millimeters, that is 12.7, and I said it might change.
At the end of part 3 I said I could undercut a little more in one area, for a shadow, a "Beautiful shadow." The tool was "Same number 11, what I used before, seven millimeters. A little bigger than a quarter inch." Seven millimeters is 0.28 in, and a quarter inch is 6.4 millimeters. Then "Except right here, I need to use a smaller one again, maybe three millimeters" (about 1/8 in).
Which tool do I pick?
A ridge in Venice Room 66, video 8, was too hard, and I said that was not good. A back bend, probably, was my choice. My question was "which one should I use?" and the same line followed, with "maybe number five or number three."
Next, maybe number five at a half inch (12.7 millimeters). With it we would blend a little bit, because it was too hard.

I should probably take a spoon gouge in Venice Room 74, video 1, since the straight tool "is not working anymore." Which tool should I use? My reason for asking was the shape of the inside, a U, which I wanted to avoid.
Then "Let me think." Number nine at 10 millimeters (0.39 in), maybe. The look had to stay gradual, "three-dimensional, but gradual," with no extreme lines.

What if I cannot see how to carve it yet?
At a pipe in Venice Room 20, video 2, I asked what I should do, and how. Those words came next. A bigger pipe was not what I wanted, and all I could do was probably knock one side.
Later in the video, maybe I could do a pipe in the opposite direction, concave, to create overall movement "which is also common technique even if it doesn't make any sense because usually you want to see that pipe as a convex."

A detail came up in Venice Room 45, video 7, and I asked how to do it. The line came next. One way would give me that detail underneath. I was using a number 11 veiner and 3 millimeters (0.12 in).
I told you that from above you see only part of it, "but don't fool yourself." Next would be 2 millimeters (0.08 in), number 11, underneath, to recreate that separation on this side.

Two things were in place in Venice Room 47, video 2: "a really readable eye," and "a starting point for the pipe." Then I asked how I wanted to do that, and the line came again right after. "Everything's supposed to go to the center, like that."
Then a problem: one of the leaves could go one way, and I would probably have to create another separation. Another way was to move the middle line a little. I needed to check "from all the points of view," and I did not want to overdo it and lose the feel of this detail.

Subdivisions and an eye I might bring closer open Venice Room 54, video 1. The next words were "how am I going to do that?" and the line again right after. A section rolls and sits lower than the next, so each one overlaps a little the one behind.
Then the tool: "Four millimeters, that's what I'm using" (0.16 in). Maybe four millimeters is overkill, "but it's okay."

A ridge I wanted to keep fills Venice Room 40, video 10. I wanted "some kind of convex, but not much," and asked how I would get it. The same words followed. A number three, upside down, was the plan for "a long cut."
I left a pencil mark alone because I really wanted that ridge. It was "almost invisible, but it will be. It will be detectable."

Which part goes on top, and which way does a shape curve?
The choice in Venice Room 29, video 2, was a small separation. One part could go on top of another and the other would go down, or the other way round. That line came right after.
Then: "this question, I have to make the decision," and "logically, I have to go this one higher than that one." Then "it's possible to do both ways, okay?"

A convex stands against a concave in Venice Room 71, video 6: a big one, "not really big, but still convex," or I could leave it concave. The words came, and then "both ways, okay, but one is logical and another one is not."
My plan was to try it, and if I did not like it, "that's a problem." Seven millimeters (0.28 in) was "a little too small of a tool." I probably should use a bigger one, I said, "about 5/8 of an inch, 15 millimeters." Five-eighths of an inch is 15.9 millimeters, and 15 millimeters is 0.59 in.

Divisions are the topic in Venice Room 30, video 1. I still had to decide how it would be divided, "because right now it does not look too good." How to do it came next, then the line. A maybe came after it: carry that right here, and divide a small division right there.
What about depth?
Workshop 8 is in Venice Room Part 1, video 7. "Some point I have to stop excavating because I need to make the decision." Going through was possible "if I wish," and I asked "do I need to?" Right after it came the line.
Number six at three-quarter of an inch (19 millimeters) was an option to "attack my edges." Going deep would be "much harder to clean."
In workshop 25, video 4, I said I could go deeper, and I asked "do I need to?" Then the line. After a stretch I said "that is good, I would say."
The words come with "Am I doing the right thing?" in Venice Room 73, video 10. It is a hard area, I said. Already pretty much on a slope, I would use number nine and "little by little, I'm going to shave my way in."

Venice Room 102, video 1, has the words after "Everything's supposed to flow nicely." Next, how deep I wanted to go, and a number seven would do, at "14 millimeters, half an inch" (0.55 in, and 12.7 mm).
Is the cut needed at all?
An eye is the subject in Venice Room 19, video 2. Doubts about its position were still there, but I liked the idea and wanted to see it somewhere. "Do I have to do it or not?" Next came the words.
The answer was "not," of course, because a flower would cover it. And "Maybe I shouldn't even bother with that at all."

Over in Venice Room 65, video 1, I could create some opening between this side and the inner side. Whether I should came next, and the line followed. After a stretch, I said maybe I did not need to create the opening and could keep that connection point.
Where did I say it, lesson by lesson?
| Lesson and spot | What I asked |
|---|---|
| Over an outer rim I might keep wide, workshop 89.1 | that narrow |
| A spot where everything would blend together, workshop 89.2 | transition to it |
| Workshop 8, video 7, over a deep shadow and a place to paint inside | go all the way through |
| The position of an eye, Venice Room 19, video 2 | have to do it |
| A pipe I wanted no bigger, Venice Room 20, video 2 | what should I do |
| Workshop 25, video 4, when a pass already went the whole way | could go deeper |
| A small separation between two parts, Venice Room 29 | go on top of that part |
| Divisions still unmade in Venice Room 30, video 1, with pencil marks around | how it's going to be divided |
| A pencil mark I left alone, Venice Room 40, video 10 | some kind of convex |
| With a detail waiting underneath it, workshop 45, video 7 | how I want to do it |
| Once I had a readable eye, Venice Room 47 | how I want to do that |
| Before a cut leaning toward the right, Venice Room 54, video 1 | how am I going |
| A connection point and a possible opening, Venice Room 65, video 1 | but should I |
| On a hard ridge, workshop 66, video 8, with a back bend in mind | which one |
| Beside a coming separation, Venice Room 71, video 6 | the big convex |
| Close to a slope in a hard area, Venice Room 73, video 10 | doing the right thing |
| A U shape I wanted kept out of the inside, workshop 74, video 1 | what tool I should use |
| Before a number seven, Venice Room 102, video 1 | how deep I want to go |
Is there a rim in your wood carving that you cannot decide on yet? Could you set your hand tools, your mallet and your chisel down, and check it "from all the points of view" the way I needed to in lesson 47? Workshop 89 waits inside one tuition plan with the rest of the Part 8 workshops, and this page starts at that rim in part 1, with a question I asked out loud.
How it's done
- Plan the undercut first. In part 1 of workshop 89 I planned to undercut first, with 3 millimeters (about 1/8 in) in number 11, before the next step.
- Repeat the slope inside. Still in part 1, the same slope would be repeated on the inside, and I said that was going to give me the final idea.
- Blend with a flatter gouge. Part 1 has a flatter gouge, straight down, and then number seven, 14 millimeters (about 9/16 in), for a nicer transition.
- Say what worries you. Late in part 1 I said I did not really worry about the rough look. I worried about how the carving would look overall.
- Put the choice in two halves. Then I asked if I wanted the rim narrow, and whether I should keep it wider.
- Look at the slope in 3D. Part 3 has me wanting it to look really good in 3D, and I was talking about that slope.
Frequently asked questions
Which question ended workshop 89.1?
A question about the rim, whether it should be narrow or stay wider. I put a short line between its two halves, and the caption text of the part ends right after the second half.
Why did you say you were losing width?
We had sloped that a lot right there, I said, so I was losing overall how wide it would be. I thought it was okay and hoped so. It comes near the start.
What tool did you take for the blend in part 1?
I said maybe number seven, and then the number seven from before, at 14 millimeters (about 9/16 in), to clean that thing. A flatter gouge came a little earlier.
What to carve next