

Alexander Grabovetskiy, woodcarver, School of Woodcarving · Published 2018
What do you do when cleaning rubs out your centre line?
Quick answer: A lost centre line is found by eye rather than redrawn. Graphite sits in the top layer of the wood and a cleaning pass goes deeper, so the mark was never going to last anyway. The proportion behind it is what matters, and that stays in your head.
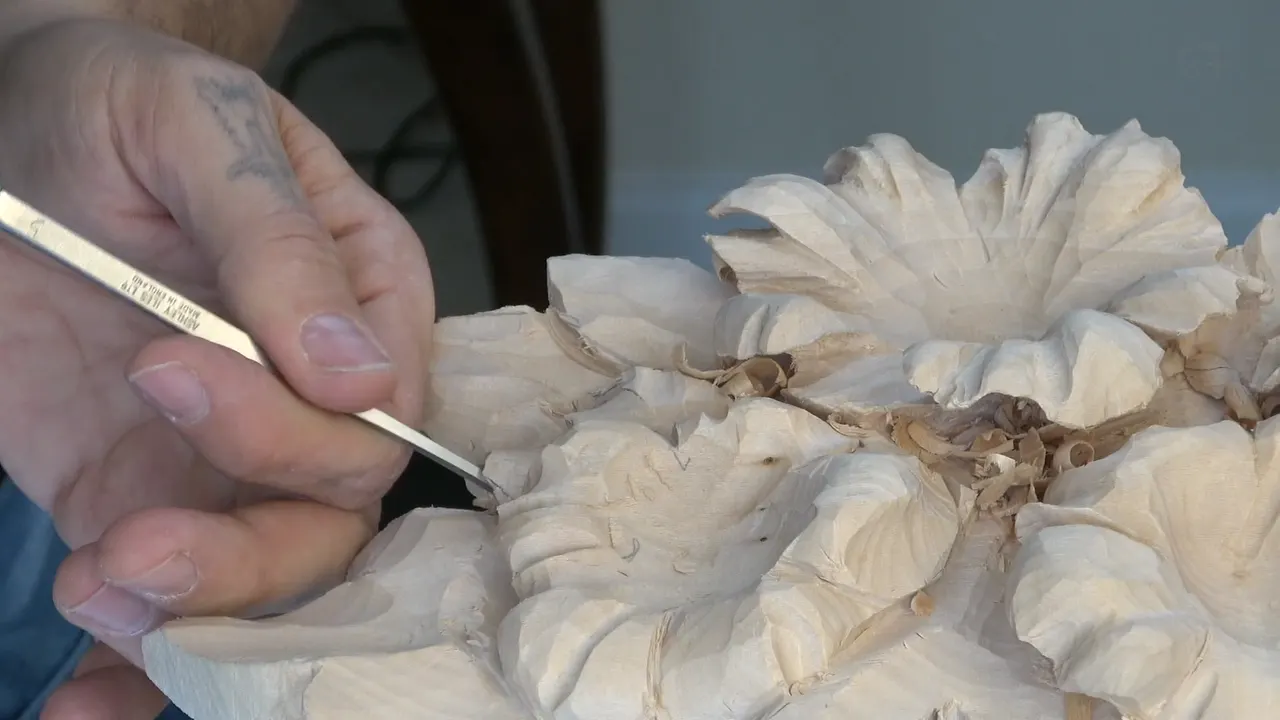
You find it again by eye, and you do not redraw it. Cleaning takes the pencil off with the top layer of wood, which happens every time and catches people out. That mark was never the point. Knowing roughly where it belongs is, and nothing you do with a gouge can take that away.
Have you ever marked a centre line carefully, taken two cleaning passes, and looked down to find it gone? Did you go and fetch the pencil? Most people do. Watch what happens here instead: I say out loud that I lost my line, then say it is going to be right there somewhere, and carry on.
Lesson 38 of the Hashemi flowers panel is leaf work, and the pencil dies early. Grooves running out from a centre, an extra leaf added on a hunch, a parting tool going where the grain says no, and one line that goes missing at the worst possible moment.

What this lesson costs you
- Your pencil line, gone within about two passes.
- Measuring.
- Six in ten, eyeballed, never once with a rule anywhere near the wood.
- Grooves that run out rather than in.
- One deliberate overshoot, kept.
What do you do when cleaning rubs out your line?
Put the pencil down and look. The line is a note to yourself about proportion, and you still have the proportion even after the graphite is in the chip pile.
My exact words in the third part are that I cleaned and lost my line, and that it is going to be right there somewhere. Somewhere is enough, and it always has been on a leaf this size. A centre line on a carved leaf is not a survey mark. A centre line answers one question only, how far off centre the spine sits, and that answer lives in your head and in the leaf you already carved.

Why does the line disappear so fast?
It sits on exactly the material you are removing. Graphite lies in the top few thousandths of the surface, and a cleaning pass goes deeper than that.
No trick saves it, and people waste a surprising amount of time looking for one. Harder pencils sit shallower and vanish sooner. Ink spreads with the fibre, leaving a mark fatter than the one you wanted, and scribing leaves a groove to carve out of a finished surface later. Every option costs something. Stop depending on the mark.

Should you redraw it or find it by eye?
By eye, almost always, and the exception is worth naming.
Redrawing costs you the tool in your hand, a trip to the bench, and about thirty seconds, and you will lose the new line to the next pass as well. Finding it by eye costs a look. The exception is a shape whose proportion you have not settled yet, where the mark is still doing real thinking for you. Once the leaf has a form, the form carries the information and the pencil is decoration.

Where does the centre line of a leaf actually sit?
Off centre. Here is the number I use. About sixty per cent of the way across the leaf, and no closer than that.
Split the width into ten and the spine lands near the sixth mark rather than the fifth. I say on camera that this comes from the Fibonacci sequence and the golden ratio rule, and then immediately that I eyeball it and never measure. Both halves are true. Using the golden ratio in a carving design has the reasoning behind it, and finding the golden centre on a board that is not in golden proportion is the version for a whole panel. At leaf scale the rule collapses to something simpler. Not quite centred usually means it is good.

Which tools were in hand?
Seven, and one of them is a knife the size of a pencil.
| What was being done | Tool | Why that one, at exactly that moment |
|---|---|---|
| the grooves inside a leaf | a 5, though a 7 does the job too | shallow |
| outlines, and all the small details | a small Ashley Iles knife from the Peter Benson collection | gets into spots a gouge cannot reach at all |
| separation, then undercutting | the 16 parting tool, plus a 3 mm one | boundary now, shadow later on |
| undercutting beside work that is already finished | the 5, quarter inch | small enough that it will not bruise a neighbour |
| cleaning | a 4 at 10 mm, three eighths of an inch | it leaves a surface you can read |
| exaggerating | an 8, three millimetres across | this is what makes a shallow groove carry all the way across a room |

Why do veins run out from the middle?
Plants grew them that way, and the eye has seen a million leaves.
The first thing I do in this lesson is put movement inside a leaf, running outward from its middle, and I hedge the word on camera, calling them veins if I can call them veins. The hedge is honest. On a stylised flower panel these are not botanical veins, they are shallow grooves whose job is to catch light along the length of the leaf. They only work when they agree about direction. The veins carved into the peony leaf a few lessons back follow the same rule from the opposite end.

What does exaggerating a vein mean?
Cutting it deeper than a real one so it survives the distance between the panel and the viewer.
Late in the lesson I pick up an 8 at an eighth of an inch and go back over the veins to make them more distinguishable. Something that reads beautifully at arm's length disappears at three metres, because the shadow inside it is too shallow to register. Depth is the only thing that carries. So an eighth of an inch sweep goes back over work a freshly honed small tool had already finished once. This is the same argument as undercutting a place nobody can see, and it is why a panel meant for a wall is never carved the way a piece meant for the hand is carved. Whether a carved flower has to look realistic runs on the same arithmetic of distance.

What fixes a surface that is simply too plain?
Scoop it. My own verdict on one petal here is that it is too plain right now, and the fix is a concave, nothing cleverer than that.
Plain is a real fault and it is easy to miss while you are busy elsewhere. A face with no change of direction returns one flat tone to the eye no matter how the light moves, and beside three neighbours that all turn, it reads as unfinished rather than calm. One shallow hollow gives it two tones, and two is usually enough. Relief carving lives entirely on this, and a gouge with a deep sweep is the cheapest way to buy it.

Where should the small cuts go?
You let the grain tell you. I look at a petal here, note that the grain runs one particular way, and put a few small cuts in because of it rather than in spite of it.
Fine cuts that follow the fibre slice cleanly and leave a bright facet. The same cuts across it crush the fibre and leave a fuzzy trench you then have to pare out. So on any surface where the detail is optional, put it where the wood is willing, and take the awkward direction only when the design genuinely demands it. A few spots, not everywhere, which is the same restraint the veins need.

How do you know how much wood is left underneath?
You keep an eye on it, constantly, and I say so mid undercut.
There is no gauge for this. What you have is the thickness you started with, the depth you have taken off the front, and the depth you are now taking off the back, and the whole calculation happens while a tool is moving. Two things help. Lift the panel and look at it edge on every few minutes, and press the shape gently with a thumb: wood that gives has less left than you think. How thin a carved leaf can safely go is the number this question keeps circling.

When is going too far acceptable?
When the result is better than the plan was. I bring an undercut right out to the edge here, say plainly that I know I was too extreme, and then keep it.
Careless is the wrong word. Too extreme means past what I intended, and what I intended was a guess made before the shape existed. The test is not whether you overshot. What counts is whether the piece is stronger for it and whether the wood can still hold. Both were yes, so the overshoot stayed. Why you cannot undo a mistake in carving is the other half of that coin, and it is the reason the question gets asked at all.

Is there a mark that survives carving?
One, and it is not really a mark at all. The shape itself carries it.
Take the parting tool round a boundary before you need it, and that groove outlasts all the tidying, because it is cut in rather than drawn on. Half of why the V tool goes round everything first on this panel is exactly that. The other half is that a groove tells you where the shadow will fall, which a pencil line never does. The parting tool I use throughout is numbered 16, and I like it because its walls meet at 35 degrees rather than 45, which puts a narrower, deeper line in the wood for the same push. Why the parting tool goes in first is the whole argument.

Should the panel be turned over to clean underneath?
Turn it over. Two seconds, and worth every one of them. Halfway through the second part I flip the whole thing upside down and take the waste out from behind.
Waste packed under an undercut is not cosmetic. It holds moisture against the wood, it hides how much thickness is actually left, and it stops you seeing the shadow line you just spent ten minutes creating. Working from behind also lets a tool approach at an angle the front will never allow. The only rule is to support the fragile side with your free hand while the panel is face down, because that is exactly when a thin leaf meets the bench.

Why blend the ridges at the very end?
Two sweeps meeting will otherwise leave a line the light turns white.
The last thing in this lesson is cleaning cuts whose only job is to soften where one gouge stopped and another started. You can feel those steps with a thumbnail before you can see them, and on a finished panel they read as bright wires running across a soft shape. Blending the ridges a gouge leaves behind is a lesson of its own elsewhere on this site, which tells you how much of carving it really is.

Why not just measure everything?
Measuring makes you slow and it does not make you right.
A leaf that measures correctly can still look wrong, and a leaf that looks right is right, because the only instrument that will ever judge it is somebody's eye. I was born in the Soviet Union into a family that worked wood; my great grandfather was a cabinetmaker who worked mahogany in the Chippendale style, and nobody in that line owned a set of proportional dividers. What they had was an eye trained by looking, and mine has had over forty years of it. That sounds like bragging. It is really a confession, because it means no shortcut exists. That is the instrument this lesson uses, and losing a pencil line does not damage it.

Where this leaves the panel
Two leaves shaped and veined, a tiny one added beside them, one extra leaf put in on a hunch, an undercut taken further than planned, and a pencil line that lasted about two minutes.
All 49 lessons sit behind tuition at the school. The panel is basswood, the American lime every panel course here uses, with Ashley Iles, Pfeil and Henry Taylor on the rack. The Fibonacci sequence behind that ratio is worth an evening of reading, and the sculpture collection at the V and A is full of carvers who used it without ever writing it down. Read where to put a hollow when the detail is already carved beside this one.

How it's done
- Mark the centre before the first cleaning pass. Draw it while the surface is still rough. The line is doing real thinking for you only while the proportion is unsettled.
- Aim for six parts in ten, by eye. Split the width of the leaf into ten and put the spine near the sixth mark rather than the fifth. Not quite centred nearly always looks right.
- Take the parting tool round the boundary. Cut in rather than drawn on, that groove outlasts the tidying, and it also shows where the shadow is going to fall.
- Carve the veins outward from that centre. Shallow grooves from the spine toward the rim, a few at a time. They work only when all of them agree about direction.
- Do not fetch the pencil when it goes. Say where it was, out loud if that helps, and keep carving. Once the leaf has a form, the form carries the proportion for you.
- Exaggerate the veins at the end. Go back over them with an 8 at three millimetres. Whatever reads at arm's length can vanish at three metres, and depth is the only thing that carries.
Frequently asked questions
Can you keep a pencil line from disappearing while carving?
Not for long, no. Graphite lives in the top few thousandths of the surface and a cleaning pass removes more than that. Use the parting tool on it instead, because a groove stays.
Where should the centre line of a carved leaf go?
Nearer one edge than the other, about three fifths across, and I never measure it. A spine slightly to one side reads as a plant. Exactly centred reads as a pattern.
Is it worth marking a carving with a marker instead?
Hardly ever. Ink bleeds along the grain, so the mark comes out fatter than the one you wanted, and the next pass takes it anyway. Scribing leaves a groove you then have to carve away.
What to carve next
- Carving Hashemi Flowers
- Where to put a hollow when the detail is already carved
- Does a carved flower have to look realistic
- The veins on a carved leaf
- Why the parting tool goes in first
- How thin should a carved leaf be
- Why you cannot undo a mistake in carving
- Using the golden ratio in a carving design
- Finding the golden centre on a board
- Blending the ridges a gouge leaves behind
- Tuition at the school