

Alexander Grabovetskiy, woodcarver, School of Woodcarving · Published 2020
Is it normal to change a shape in the middle of carving and fix it right away?
Quick answer: Changing a carved shape midway is normal work for me. I fix it while the wood allows it, and in Venice Room 25.9 I said a stage is coming when I can't, so then I have to be really careful.
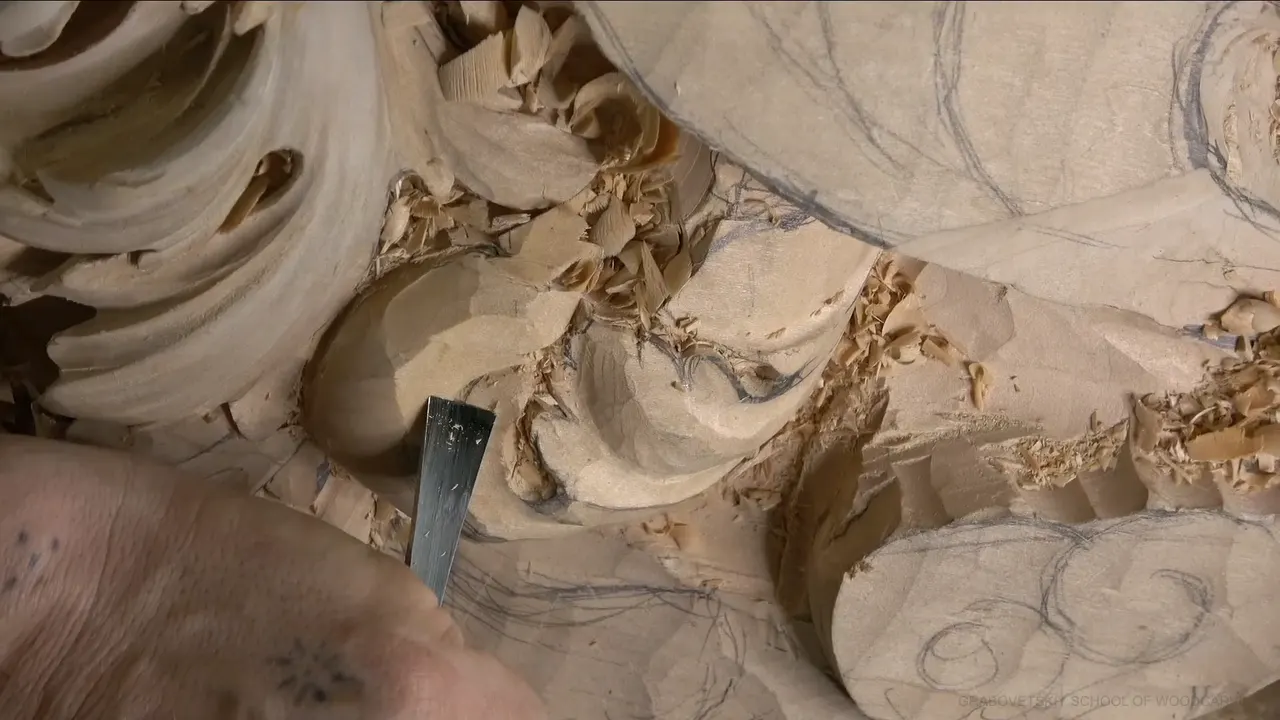
Changing a shape in the middle of carving is normal work for me, and I fix it right away while the wood still has material to give. I said it in Venice Room workshop 25, in the ninth video: I do those changes all the time (06:25).
This part is about eight minutes at the bench on one acanthus section. My other courses hold the same moment again and again, a slip, a change of mind, a broken edge, and I linked each lesson I quote with the minute beside it.
Ever carved a shape, looked at it, and felt it was wrong? Would you rather see how a carver handles that moment than be told it does not happen? Watch what I did in this part first.

What did I change on the acanthus section in part 9?
The video opens on possible extra material. Knocking that whole section out came first, then cleaning it (00:05 to 00:30). At 00:40 what was left became approximately the main movement.
Then came the slip, in my words. I just don't have to do what I don't have to do, and I had gotten some extra stuff I should not do. That's why that stuff happened (00:44, 00:51).

Here is the line this page is built on. Once I get this done, nobody's going to know that thing was even there (00:55, 01:05).
Right after it I told you where the limit sits. At this stage I'm able to make the mistake and fix it, but there's going to be a stage when I'm not able to fix it, and I have to be really careful (01:18, 01:36).
My plan was a concave from one point all the way back to another. I needed to clean a little bit of that side, and I planned a little better shape for another spot (01:36, 02:18). By 03:26 it looked better.

From 02:18 to 03:24 the captions hold no words, more than a full minute.
Then I stopped to think, at 03:31. A concave too big was not what I wanted, since this was exactly the same idea, a shallow one. Maybe number seven, I would say, and no more than that (03:35, 03:45). I print it as a maybe because that is how it came out of my mouth.

The concave was going to run all the way to a point. Before that I planned a relief cut, to see later where my separations would land (03:47, 03:59).
The reason for the concave: I really wanted to raise a little bit the side of that eye opening and go that direction (04:37, 04:50).

A ridge I had just created needed cleaning at 05:25. I really didn't want to see it, and I wanted to blend it (05:27, 05:36). The separation was next (05:42, 05:50). Much better, I thought by 06:05, since it just makes more sense that way (06:05, 06:11).
A line about the camera followed. If I wouldn't film it, you would not even know I had to change (06:16, 06:21). That is the line behind this page's title. I'm just trying to figure out what is going to look better (06:25, 06:36).

A few days later I sometimes go back, find something else, and fix it pretty much right away (06:36, 06:47). That is going to be my separations, I said at 06:51 (06:51, 06:54).
The last minute turned to a plan: I could probably start removing excess material from the inside. My plan was 3 millimeters (about 1/8 inch), like number nine, though a number eight or a number 11 could work. Doesn't really matter, since it's just preliminary anyway (07:09, 07:34).

By 07:39 that tool looked a little too big. Probably 2 millimeters (about 5/64 inch) or a millimeter and a half (about 1/16 inch) would suit better. Let me see, I said, and those are the last words in the captions (07:39, 07:48).
Why does a fix leave nothing to see in the finished carving?
A fix that blends in leaves a clean surface, and I found the same thought again and again in my other courses. The way out was a little different every time.

Back in workshop 65 I admitted a mistake, and yes, I did, I said. It was easy to fix and not too late, since I could bring that slightly downhill and still keep consistency between the two sides (00:05, 00:32). Maybe a number nine and a quarter inch (about 6 mm), and I would scoop out by rotating and going downhill. The consistency stayed, and the movement simply moved downhill. Nobody would see that mistake, only you (00:48, 01:26). Number five was the next pick, smaller this time, like a quarter inch (about 6 mm) (01:35, 01:41).
On Furniture Panel 21 a tool mark from my previous cut still showed. A flatter tool could shape the slope, a number two or even a knife, and I promised to show how I would deal with the mark. The detail was not completely destroyed. I could still save it, and nobody else would know about the mistake, beside me and you (17:11, 18:16). Next I planned to make that part a little lower (18:22, 18:25).

Workshop 41 has a rougher moment. I wasn't too careful, and my tool was not too sharp either. Something was just lost, I didn't like it, and I had to move my eye farther. It was not a complete huge mistake, but something to avoid, and I could have avoided it and didn't (05:35, 06:24). Only you would know it, I said. More care was needed (06:29, 06:48).
On the grape leaf vase I planned a number seven again, with a cut toward the undercut. The hook came out because that part was really weak, so that's why it flew out, but it's okay. I could recreate the movement right there (06:59, 07:34).

Workshop 78 went another way. One side looked fragile. Keeping it was the plan, but then I chopped the end of it and couldn't, maybe just a little too fragile. I left it like that. The new part would be its replacement, brought to the edge, and cleaning was planned for off camera (05:40, 06:42).
In Hazelnuts lesson 3 I admitted to making too many mistakes that day, but it's okay, and I was glad I still had some material (17:42, 18:01). Gibbons class 14 gave the shortest version. I shouldn't use a mallet. The mallet was a big mistake, and I just broke the thing (08:28, 08:55).
The table keeps five of these moments next to the words I used.
| Name | Move | Where | Words |
|---|---|---|---|
| Venice Room 41 | I had to move my eye farther | Workshop 41 | It's not a complete huge mistake |
| Grape vase lesson | A weak part flew out of it | Lesson 3 | It's okay, I can recreate it |
| Gibbons class 12 | Almost no wood left at the center | Class 12 | Change stuff and nobody's gonna know |
| Venice Room 78 | I chopped the end of it off | Workshop 78 | Maybe just a little too fragile |
| Maine class 14 | I broke the thing and said so | Class 14 | The mallet was a big mistake |
Five different causes sit in those rows, and each one comes with a line about who would know.
What can't I fix once the wood is gone?
Wood I carve away does not come back, and I have said so more than once. Art of deduction, I called woodcarving in the Greek acroterion course. If you made a mistake, in some cases it's fixable, but sometimes you can't fix it. Once you deduct, once you minus it, then it becomes a problem (03:22, 03:49).

Thin wood is where it bites. In the grape leaf vase course I worked about a sixteenth of an inch (about 1.6 mm) deep, because I had said there was only 6 millimeters (about 1/4 inch). I did not want a problem I couldn't fix later, unless I did a pierced one later on, which was not for now (01:15, 01:57).
The warning in workshop 5 was about undercutting. You really have to control your tools and feel what you do, because mistakes made when the piece becomes really fragile, most of the time you can't fix (01:42, 02:06).
In Lily Box lesson 5 I said let me take this side a little downhill, and that I wanted to look at the reference first. A mistake I could not fix later on was what I wanted to avoid, and I added that woodcarving is an art of deduction (10:30, 10:53).

Lesson 4 of the same box says it with a trade. A little more time and a little slower pace beat a mistake I can't fix. Some mistakes you really can't fix, though most of it you can. A really tiny part, once lost, can sometimes be impossible to recreate (13:10, 13:49).
Scale matters too. The flower rosette course adds scale: every ridge makes a big difference on a small one. One small mistake on a smaller scale work, and that's it. Smaller carving is a lot harder than big scale carving, though it makes a really good practice piece to polish your skills (12:10, 12:55).
One more choice from that same workshop sat in front of me. I wanted to give a little bit of a shape, and maybe escape a little in one direction. I didn't think I had to, but maybe. Let me try, I said, and if I don't like it, there is a problem because I cannot fix it (04:01, 04:50).

Some rough spots are still fine. An edge turned mushy in workshop 34, which was okay yet. It's not like I lost and can't fix it, so it's not a big deal yet (07:09, 07:41). Part 9 puts the same idea as a stage, and this stage was the one I could still fix (01:18, 01:36).
When is the change my idea and not a slip?
The wood can hand me an idea, and then no slip is involved. In Gibbons class 12 the back of a flower showed almost no material left at the center. Some meat was still on the sides. I was probably going to change the style of that flower, and that is what I like about wood carving in general: you can change stuff and nobody will know it still looks nice (14:40, 15:23).
A different type of flower came next, with that part raised and connected right around (15:25, 15:40).

Workshop 150 has the plainest reason. Later on you look at the design and see exactly what you want to change. One section looked really good on a computer and on the print, but I thought I could make it much better. Nobody required it, and it gives me more satisfaction (01:49, 02:22). Good idea to have extra material (02:35).
My mood in workshop 46 was happy but not 100%. A matching gouge was what I looked for, because I wanted to make sure it looked good. Then came an extra step the carving did not need, since it would still look good. But professional people will know it, I said (00:19, 01:06).
The other way around happens too. Logic in workshop 72 said the pipes should run in the opposite direction, almost concave. I was not going to do it. Some historical work, I had seen, did the opposite direction pipe on some of the works (01:17, 02:01).

Why do I make a relief cut before I separate the parts?
A relief cut comes before a separation in my work, and part 9 gives my reason. I planned one before I could see where my separations would be (03:52, 03:59). Other lessons give more reasons.
Part 5 of workshop 14 had wood to take out, and I could make the relief cut first with the number nine. Wherever I see those triangles, I always try to do the relief cuts, a straight down cut, because I learned my lesson too many times. Rushing is possible, but it's not necessarily the best approach (04:46, 05:34).
Workshop 3 repeats it for every corner that makes a triangle. For those relief cuts I used 16 millimeters (5/8 inch), a number nine, with a rotation cut. Deep, and deep, and deep, I go, and then I remove the plugs. Some people don't get it, I said (01:26, 02:49).
The fibers are the reason in Hashemi Flowers 17. A V cut with a small V tool, 3 millimeters (eighths of an inch), makes a preliminary cut of the fibers. A straight down gouge smashes them, and they stay that way for a little while. Next day, for example, they go back and the cut is more rough. That relief for the fibers makes the rest of the material easier to remove (00:27, 01:06).
Workshop 34 says the same. Big tools used the quick way create pressure on both sides of the fibers, which is not the best. After a couple of days those fibers come back, and the edges get really rough. Relief cuts, just the outline, are better, and that is called setting in (05:37, 07:09).

How often do I do it? On Furniture Panel 18 I make those relief cuts on all my carvings, then I corrected myself: probably most of them, because it depends on material. It helps a lot to save material (13:15, 13:38). The Corinthian course adds that a lack of time sometimes lets you work directly without them, but I try to do as many as possible (05:20, 05:45).
What do I take from all of these lessons?
The same few things show up. I say the slip out loud on camera, and I look at what wood is left behind it. Part 9 shows me calling one tool a little too big and saying I should probably use 2 millimeters or a millimeter and a half (07:39, 07:46).
The acanthus is the leaf this section is built from, and Advanced Carving: Venice Room, Part 2 covers workshops 13 through 25 of it. For background there are pages on the Renaissance and Venice, and for the wider craft on wood carving, the gouge, relief, wood grain, sculpture, the mallet, the chisel, hand tools, ornament and woodworking.
Pick one spot on your own carving that bugs you, and ask how much wood is behind it before you pick up a tool.
How it's done
- Knock out the extra. I said I would knock that whole section out and then clean it (00:08, 00:30).
- Keep the concave shallow. A shallow concave, maybe number seven, running to a point on the leaf (03:35, 03:47).
- Make the relief cut first. First came a relief cut, so the later separations would show (03:52, 03:59).
- Blend the ridge, then separate. I did not want to see that ridge, so I wanted it blended, and the separation was next (05:27, 05:47).
Frequently asked questions
Do you change a carved shape while you are still carving it?
At 06:25 in part 9 I said I do those changes all the time. The goal is to figure out what will look better, and when I go back a few days later, I fix what I find pretty much right away.
When can you no longer fix a mistake in a carving?
At this stage I could make a mistake and fix it, I said at 01:22, but a stage was coming when I could not. In this part I did not say when. In other lessons the limit was thin wood, a fragile piece, or a tiny part that was gone.
Why make a relief cut before a separation?
Part 9 had me plan one first, ahead of the separations that were coming. In the Hashemi lesson the reason was the fibers, which a straight down gouge smashes, and which go back and leave a rougher edge the next day, for example.
What to carve next