

Alexander Grabovetskiy, woodcarver, School of Woodcarving · Published 2020
How do you make one part of a carved leaf flip above its neighbor while the next part tucks under it?
Quick answer: A flip with a tuck is one overlap on a carved leaf, with a piece laid across its partner and a second piece slipped beneath. In part 5 of workshop 25 the choice came at 02:19, the flip was done by 03:45, and a second part was planned for the tuck (04:33).
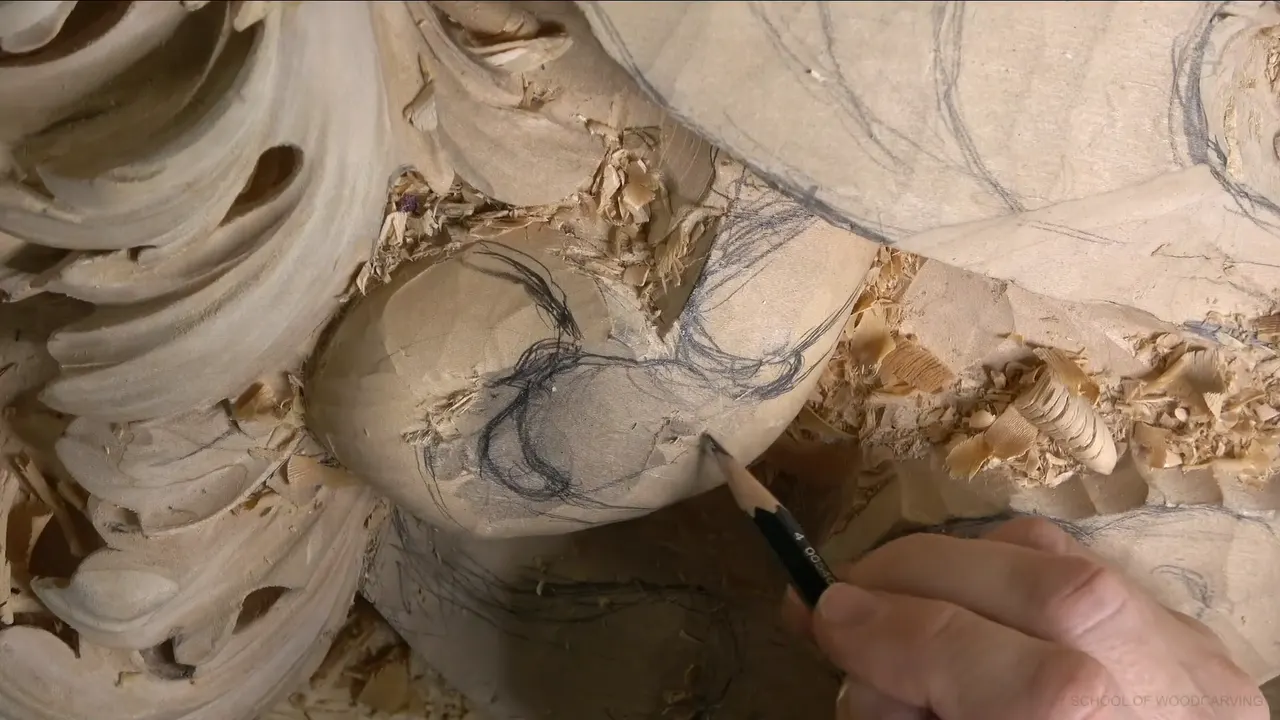
Making one part of an acanthus leaf flip above its neighbor is carving the upper part so it rides on top, while the part next to it goes underneath. In Venice Room workshop 25, part 5, you hear the line: maybe I should flip this part a little bit above that part (02:19 to 02:25). Then, at 03:45, I said the flip was made. After that, a neighbor could slide underneath a little of that one (04:26).
That is a short video. So I went through my other courses for the times I said a part goes above or underneath another one. Each passage names its lesson, and the times in brackets are where you can hear it.
Have you ever stood over two parts of a leaf and could not tell which one belonged on top? Would it help to hear a carver say his doubts out loud? You get that in part 5.

Six lines on the flip and the tuck
- Each eye marks the crossing where a part rides over the one beside it (workshop 7).
- Check the eye position before you go on, and name a new spot when the old one is wrong (00:18 to 01:35).
- Pick the tool for the spot, a number 11 first, then a flatter number 3 for the movement.
- Lower the side that goes under before you judge the flip (workshop 26).
- Look from above, then from where the viewer will stand.
- Keep an overlap shallow where it meets two other parts (Furniture Panel 19).
How did I place the eyes before I flipped anything?
The part starts mid-thought. Something was going all the way down too, I said, and another eye would show up somewhere (00:08 to 00:15). That meant making sure the eyes were on the right position (00:18, 00:21).
One looked wrong, so I thought I should raise it. "So that is not right," and the new spot was "somewhere right there" (00:21 to 00:30). A second check of the movement followed, and a note that I could go a little bit this way (00:30 to 00:37).
What is an eye? In Venice Room workshop 7 I said it for the ones who did not know yet. An eye is the intersection where a part separates from another one, and a part flips over the next one (01:52 to 02:09). The position of the eye, I added, has to be logically right (02:17, 02:19).

I thought I was ready to establish the main movements (00:39 to 00:47). The tool plan had a maybe in it. Start again with "probably number nine and a quarter inch" (00:55 to 01:03), a number 9 at 1/4 inch (6 mm), and set the eyes preliminarily (01:05, 01:07).
Doubt came back. Something might be a little too high, and moving it more in one direction would make the leaf much bigger (01:13 to 01:25). "I will check," I said (01:28). Seconds later, it was okay, and I would just undo the old position (01:31 to 01:35).
How did I choose which part rides on top?
A tool came first, with a maybe in front of it, a number 5 (02:07, 02:09). Then a pause to double-check, to be sure I was doing the right thing (02:13, 02:15).
The plan was short, and I repeated it twice as what I was going to do (02:19 to 02:35). What would follow was also plain. This part would go in just like that, and it could be a little lower right away (02:47 to 03:06).
For the next cut I named a number 11, asked which one to use, and said maybe 5 mm, 3/16 inch (03:08 to 03:28). Work went on quietly from 03:29 to 03:43. At 03:45 came the line "I made this one flipping above."

Half of it was the flip. A flatter gouge, like a number 3, was the plan for recreating that movement (03:52 to 03:59). At 04:19 I said this side would be my main shape of the acanthus. My pick was a number 11, and the flatter gouge came after it.

What happens to the part that goes underneath?
The second part got its place in one sentence. Some subdivisions would come right there, and this one could slide below a little bit of that one (04:26 to 04:37). It would make more sense that way, I thought (04:40).
In workshop 26, part 3, the eye decided it. "Because I do have an eye, this part going to go underneath," so this side had to come down (02:47 to 02:52). Both halves came in one breath in workshop 27, part 1. Part of it goes underneath and is almost invisible, while another piece flips right on top of its partner (04:14 to 04:31). I said I would pre-establish that form next (04:33).

The tuck has a price, and part 4 of that workshop names it. I pointed at how wide one division was and said that is a lot smaller (07:39 to 07:47). For that leaf to go underneath, inside the upper part, the only way is to excavate a really deep undercut (07:47 to 07:58).
A choice sits in workshop 33. Should one movement sit above the other? Letting this one go beneath its neighbor looked "probably wiser" and more logical (04:16 to 04:35). A later part needed another piece underneath, and that called for a narrow pass (03:31, 03:34).

Early in the first course, workshop 2, part 7, put the flip second. One piece was about to go underneath and its partner was supposed to flip above, yet the overall shape did not look too appealing, so it came first (03:43 to 04:01). Rough spots were next, to be cleaned toward a semi-final form (04:03 to 04:13), and even a number 3 was a little too big of a sweep at that point (04:17 to 04:29).
Where did I say which part goes above and which goes under?
This short table lists six places, with the time where you hear the words.
| Source | Words | Time | Result |
|---|---|---|---|
| Venice Room 25.5 | Flip one part a little above another | since 02:19 | Main shape came after the flip |
| Third course 26.3 | With an eye, this part goes under | by 02:47 | That side goes lower, I said |
| First course 12.9 | From below you will not see it | about 08:01 | That one comes down, I said |
| Third course 27.1 | Part goes under, another flips on top | from 04:14 | I announced a preliminary form first |
| Workshop 33.1 itself | Under looked wiser to me than above | around 04:16 | It seemed more logical to me |
| Furniture Panel 19.12 | Even a very shallow overlap casts shadow | close 11:39 | I said it looks much better |
What did I say in workshop 13 when the same flip came up?
Three times, workshop 13 says it. Its part 3 has the line "I think this has to flip above" (02:50, 02:52), then a plan to take a number 5 and indicate my first movement (02:58 to 03:09). Next came an eye. A big one or a small one? "Maybe the big one. Why not?" and then "Quarter inch" (03:27 to 03:38), which is 1/4 inch, about 6 mm.
The eyes matter, and part 10 explained why. They give a really good shadow around the detail, one you cannot see yet, and it is going to flip on top of that (05:25 to 05:49). Then part 11 opened with two parts that both flip over a neighbor (00:13 to 00:18). Outlining the detail took a number 11, 3 mm (1/8 in) (00:26 to 00:47).

A little later I probably should flip one of them a bit higher than its partner, with an extra pass (01:10 to 01:18). It would be another eye (01:23). That stretch of the video paired a flip with an eye and an extra pass.
How do I look at the flip from above and from below?
With the main shape in, I turned the view to show it from a different point of view, because from above it makes more sense how it all looks together (05:28 to 05:43).

Why the viewer matters shows in workshop 17, part 1. You would not normally flip that far unless you look from down (06:20 to 06:24). That was my only reason for flipping there. Otherwise the move serves no purpose, and "if you look straight, it just looks a little choppy" (06:27 to 06:38). The viewer decides it, meaning how the piece will be seen, from what position and what angle (06:43 to 06:53).
Doubt shows in workshop 12, part 9. The original design has lots of overlapping like that (05:42 to 05:53). Later I was not going to overlap this one above that one, or so I said, and asked whether I should (07:39 to 07:48). Continuing the movement and taking this one below would also be good (07:48 to 08:01). Viewers stand low anyway, and you will not see that overlap (08:01 to 08:05). Taking this one down was the plan, as I said when I settled the matter (08:05 to 08:09).

How deep do I dig where one part overlaps another?
On the furniture panel one spot had to be carved really deep, but not too deep at an intersection (09:23 to 09:34). There, a part was set to overlap two others (09:34 to 09:44). Go too deep and it will not look too nice (09:46, 09:50).

Later in that part a number came up. The depth was approximately maybe 1/32 inch (11:39, 11:43), about 0.8 mm. That overlapping movement earns its place, because even a pass that shallow still casts a lot of shadow and just looks much better (11:46 to 12:00).
In workshop 11, part 6, an element was set to flip above my shell, so going too low was out (05:39 to 05:46). Space was plentiful, and still I did not want to be too crazy about it (05:46 to 05:57). Enough shadow, I thought (06:01). Flipping on top, in workshop 19, part 7, meant the area needed to be excavated deeper, and this one would go downhill, which gives the boundary of the upper movement (02:09 to 02:37).
The panel course touches the viewer's brain in part 6. Even when it is invisible, your brain still picks up that something is underneath, and the leaf is just flipping over that something (11:34 to 11:50). Earlier in the same video a double flip won me over, from underneath up, then down, then up again (01:40 to 01:46).

When do I leave one part from flipping above another?
Over in workshop 29, part 4, a part went all the way in so it would feel like it was flipping on top. Doubt hit me, since "not always you should do that. Not every eye and not every pipe" (03:32 to 03:54). Out came a smaller number 11, 1/8 inch (3 mm) (04:17), and I said it would go underneath, and that it looked good (04:30).

Harder still was workshop 16, part 9, where the flip would not look right. First, maybe a part had to be much longer (01:06 to 01:16), and a ridge had to go so the whole movement ran one way (01:36 to 01:46). Flipping something above this one was my wish, but it had to move the right direction (01:46 to 01:54).

It was kind of dangerous, because a mistake could not be glued back (01:59 to 02:10). Better not to make mistakes in that area (02:12 to 02:15). One flip went inward in workshop 26, part 3, and I had not planned it. A beautiful detail, I thought (07:41 to 07:47).
What did I do right after the flip in part 5?
The main shape was in (05:28). Dividing the leaf into its divisions could start (05:43 to 05:49). One would be main and go inside (05:53 to 05:59). I wanted a cleaner look there, and a better idea where I was (05:59 to 06:03).

The next one could go that direction, and I would subdivide it again (06:30 to 06:44). Preliminary concaves were my next stop, I said (06:44, 06:49). A kind of deep concave on one side and on the other raises the ridges a little (06:54 to 07:06). Somewhat deeper ones, with probably the same tool, a number 11, 5 mm, about 3/16 inch (07:12 to 07:23).
One line I would underline. The movement has to be really nice and gradual, and I meant the curvature (07:33 to 07:46). That mattered a lot to me (07:46 to 07:49). A concave could run on in that direction and end somewhere in that section (07:49 to 07:59).

This whole part sits in the lesson page, and Advanced Carving: Venice Room, Part 2 holds workshops 13 through 25. One move in wood carving for relief is the flip, and acanthus leaves ask for it again and again. A gouge is a curved chisel. Gouges are hand tools that bite into wood, the bench is where I decide, and woodworking has used both for a long time.
How it's done
- Check the eyes first. Before carving, I asked whether the eyes sat right, said I should raise one, and planned to undo its old position (00:18 to 01:35).
- Settle the upper part. A pause to double-check came before the decision, and the decision was one flipped part, repeated twice as my plan (02:13 to 02:35).
- Pick a gouge for each job. I named a number 11, maybe 5 mm (3/16 in), for the cut, and a flatter number 3 for the movement (03:08 to 03:59).
- Send the neighbor below. A neighbor could pass a little under the flipped part, and that made more sense to me (04:33, 04:40).
- Step back, then divide. A new viewpoint came next, then divisions and preliminary concaves (05:28 to 06:49).
Frequently asked questions
What is the eye of an acanthus leaf?
I described the eye in workshop 7 for people who did not know it, the crossing where one piece parts from its neighbor and one flips over it. Its position has to make sense, I said, and then I settled on a quarter inch (6 mm) eye (01:56 to 02:52).
Which part of an acanthus leaf should go underneath?
Workshop 33 had me weighing two choices, and underneath looked wiser and more logical than stacking one movement over the other (04:21 to 04:35). Workshop 26 let the eye settle it, so the side below needed lowering, and I said so out loud in that part (02:47).
Should each eye and pipe get a flip?
Workshop 29 answers it. I wanted a part to feel like it flipped on top, then said "not always," and not on each eye or pipe (03:44 to 03:54). A smaller number 11, an eighth of an inch (3 mm), was my tool, and the result looked good (04:17 to 04:33).
What to carve next