

Alexander Grabovetskiy, woodcarver, School of Woodcarving · Published 2020
How do you check that a carved movement is smooth all the way before you move on?
Quick answer: Checking that a carved movement is smooth is a look at it from every side before you start the next step on it. Part 25.12 asks for that look at 06:06. Next on the tape come the pencil marks, at 06:41.
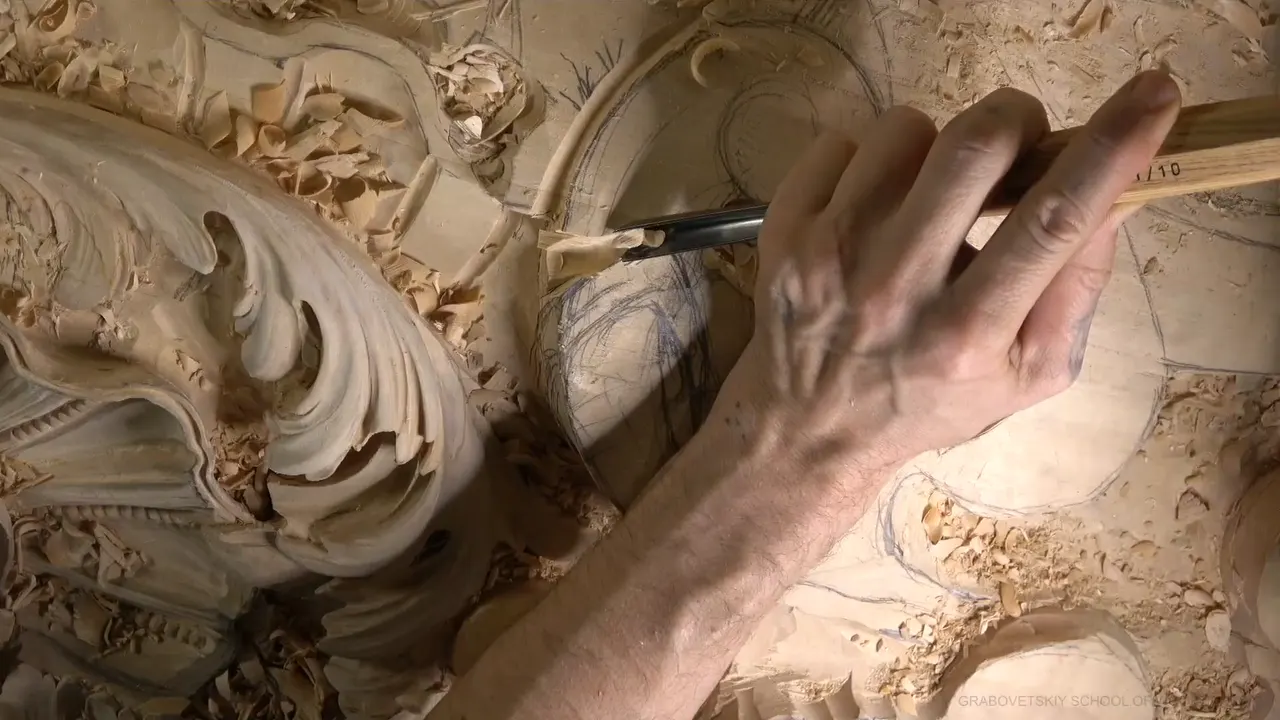
The smooth check is a walk all around the carving before the next step. Venice Room 25.12 puts the test in one plain line: if it doesn't move smoothly all the way, that is no way and no good (06:06, 06:14).
I went through this part first, and then through my other courses, for the same habit. Each lesson I quote is linked where it comes up, with its cue times in brackets. What I find differs every time.
Ever carved a curve that looked fine from your chair and then looked lumpy sideways? Would a quick look from the other end tell you more than one more pass? This part shows where I stopped to look.

What did I check in this part before I moved on?
Two plans open the part. At 00:23 I say I can probably establish this side also right away, and at 00:32 I say I'm going to excavate (00:23, 00:32). I stop to think whether I have plenty of movement between this point and that point, and I add maybe just a little bigger (00:35, 00:48).
Gradual is the word at 00:58. This movement will be gradual too, and I outline it (00:58, 01:05).

Depth comes up at 01:45. I could probably go even deeper if I need to, because this part is going to grow from underneath, and I want to create a really nice and beautiful movement (01:45, 01:59). By 02:21 I think that is enough so far. I cannot go too deep, otherwise it's going to be a problem for me (02:21, 02:32).

A side gets knocked down first. Knock down a little bit this side, I say at 02:39, and at 02:52 I call it good. After that comes the round section and a ridge to knock down (02:56, 03:07).

Then the tape goes quiet for a long stretch, with no words at all between 03:07 and 04:42. I like the overall movement, I say next (04:42, 04:47). I say let me go a little bit this way, also slightly, but right here it's not too gradual, and that is not too good (04:48, 05:03). A caution follows: I have to be careful right here because of the grain (05:08).


The check sits at 06:00. Again I knock down a little bit of this side. Then comes the line this page is built on: I need to take a look from all the sides (06:00, 06:14). My goal is a movement that runs really nicely along its whole length (06:16, 06:23).

Cleaning follows the check. Let me clean a little bit, I say, and now I can see much better what I'm working with. Just get rid of those pencil marks (06:41, 06:54). Good, I say at 07:10, and I can probably start creating the main divisions (07:10, 07:14).

Depth gets one more look at the end. First of all, why I didn't go deeper: I still have to bring it down fully, and I need that extra material (07:18, 07:29). As of now this is going to be my point, and I need to find the right subdivision points (07:31, 07:42). Looks like that is a good position right there, and another good position right here (07:42, 07:47). The caption file ends on that line.

How do I look at a carved movement from every side?
Workshop 2 has the same check. When I look from a side just like that, I see that this bumps too much, and that's just no good (00:04, 00:12). Looking at every side matters a lot to me, and if something needs care, better to do it right away (00:19, 00:28). I then try the opposite direction (00:23).
Stopping matters in Venice Room 69. When I stop and take a moment, it helps me visualize better what's going on (02:13, 02:22). I step away and look at the piece from a different position, since sometimes it looks good at one angle and wrong at another, and then I need to reestablish it (02:24, 02:39). Step away for a couple of seconds. If it makes sense, it's good, and when it doesn't, change it (02:49, 02:56).
A near-perfect ball is the aim in part 69.6. Looked at from another position, it seems to have too much spot right here, and I have to attack that again (00:48, 01:00). The tool is a number seven, about 14 millimeters (about 0.55 inch) (01:00, 01:10). A check follows, and it looks much better (01:28, 01:34).

Constant rechecking is the habit in Venice Room 63. Several angles get checked, and a shape that makes no sense gets redone (00:46, 00:53). It's more sculpture than anything else at that point, and I'm sculpting the main shape (00:39, 00:46). Looks like I can slope a lot more right here (00:57).

Light matters in Venice Room 71. I check the work in every position, and I double-check it from a few more angles (00:43, 00:57). The lights are on from all over, so I can't really see the true shadow it will cast, and I plan to turn them off later and watch it in real life (01:01, 01:17).
A catch the camera misses sits in Venice Room 28. I double-check if something sticks out (01:04, 01:08), and a couple of spots stick out too much, so they need a nice blend (01:08, 01:19). You can't see that on the camera, I tell the viewer, but with different perspectives and positions, I catch it (01:19, 01:30). A blending cut comes next (02:00, 02:05).

What does the side view show that the top view hides?
The clearest version is in Venice Room 127. Different points of view show how a line flows in 3D, and the top view alone doesn't (00:27, 00:42). Above, it could look okay. From the side, it sometimes looks like something has to change (00:42, 00:52). This line needs a small move, I say, so I think it will look much better (00:52, 00:57). Next comes a number 11 at 10 millimeters (0.4 in), and I mention that I moved my workbench a little so you can see the overall development (01:00, 01:10).

The same lesson returns in Acanthus over Moldings 10. From above it looks okay, but sideways it does not look okay (12:00, 12:06). The goal is a nice flow, going really nicely downhill, which I have to make sure of (12:07, 12:19). So a carver working in 3D should check sideways too, I say (12:22, 12:33). After that I work my way in, and I believe it looks much better (12:49, 12:55).

Even the camera can mislead. The view in Venice Room 29 doesn't make much sense right now on camera, because the detail stays hidden, but this other side looks absolutely different (00:08, 00:23). I show it from another angle: still the same element, going down and down, then up (00:27, 00:39). That is the middle line (00:43, 00:47).
Acanthus over Moldings 5 compares the view to a drone flying around the piece (10:09, 10:20).
Two lessons name who will look. The movement in Venice Room 57 will be seen from underneath and from a different place in a room (01:16, 01:31), so I concentrate on placing my lines correctly (01:31, 01:40). A volute on a slope turns up in Venice Room 62, to be seen from below and straight on, and I call that a little challenging (00:14, 00:34). That surface really matters to me (00:42, 00:45).
How gradual does a carved line have to be?
Gradual is a word I come back to in Venice Room 31. I want a really nice, gradual movement (05:31, 05:38), and that's why I check and double-check from different angles (05:41, 05:50). Another attack on the line is fine with me, until I'm really happy with it (05:54, 05:59).
The bottom comes in at 31.6. This is just the preliminary shape, and I check every position, even from the bottom, because it has to look really nice and smooth (05:52, 06:05). It will be visible there, so it must look really good, even when it stays off camera (06:17, 06:26).

Measurement enters in Venice Room 36: 10 millimeters (close to 0.4 inch). If I've got 10 millimeters right here, I keep the same measure off my highest point toward the future ridge on this side (04:49, 05:00). A full walk around follows, since it has to be gradual movement (05:26, 05:30). The edge gets the side of the tool, and a number three, four or two works the same (05:34, 05:50).

In 36.9 the rule repeats: the same everywhere (04:53, 05:02). You don't see me, but I'm rechecking it from other angles (05:20, 05:28). Near this line the concave is less deep, and near that line it is deeper (05:48, 05:58).
The lily box course sets it as a working rule. In Lily Box 8.1 the line should get nicer and gradual coming down from the upper point (08:08, 08:12), and a look at every position lets you detect exactly what is going on (08:25, 08:36). The number five blends it, and a too high spot shows up (08:38, 08:50). I plan to look again and maybe attack a little bit inward. Then it looks much, much better (09:01, 09:20).
The other way round, Lily Box 4.7 has a part that must go downhill toward the main level, otherwise it sticks too high and distracts once you step around it (08:15, 08:36). A straight down cut takes it down, and that's much better (08:43, 09:00).
The bottom view comes first in Venice Room 27 (00:24, 00:29). Good so far, except I probably need to round this a little more for a more three-dimensional look (00:29, 00:35). Later comes the decision whether it's rolling good enough or not (00:56, 01:07).
What do I do when the check finds a bump?
A bump in the main flow is the problem in Hashemi Flowers 9. I don't like how it looks (05:22, 05:29). I make sure I remove this bump, because it just doesn't flow good (05:29, 05:36). A knife is the next tool, I say (05:37). The easiest way, I add, is a look all around, which shows exactly what is going on (05:49, 06:01).

More care shows in 9.7. The flow should look good from all points of view (01:27, 01:37). Sometimes that's impossible, but if I can catch it and there's room to fix it, I'll fix it (01:37, 01:53). I barely remove any material, and now I like how it flows from all sides (01:53, 02:00).
A missing 3D movement starts Byzantine Acanthus 7: I don't see it yet, so the blend has to improve (04:16, 04:32). Now it's much better, I say, and I keep checking from other angles (04:36, 04:43). A three mil veiner (about 0.12 inch), I think, is the next tool, for the seam over there (04:46, 04:52).

A time to fix is named in Modern Acanthus 5: when something doesn't make sense after a look from different directions, that is probably the time to fix it (00:36, 00:47). One section goes backward, so I'm going to excavate it a little more and roll it backward slightly, and I think that gives me more shadow (00:50, 01:06).
Two small moments sit in Venice Room 84. I tell the viewer it's wrapping really good, even if it doesn't look too good right now (06:45, 06:52), and then I show another angle (06:52, 06:58). By 84.12 a few angles help me decide whether I'm making a mistake, and it looks like I'm not (04:58, 05:11). A separation follows, and a second one (05:11, 05:15).
Grape Onlay 14 has it in a quiet moment, where another angle shows whether something needs a fix (12:53, 12:59). My curvature wasn't that nice, I see, but I kind of fixed that, and I'm after a letter S (12:59, 13:12).
Is walking around the work a habit of mine?
I call it a good habit in Venice Room 97. If you don't have a setup like mine, rotate or walk around the piece, and see whether anything fails to add up (00:23, 00:36). It happens once in a while, not a lot (00:36, 00:44). So far it adds up, and I'm ready for the 3D shape, the concaves and convexes (00:49, 01:02).
A quick version sits in Venice Room 95. After a little cleanup I double-check every side and spot areas to address, right here, and here, and here (06:08, 06:35). Maybe I'll give it a rasp job, so we'll see (06:35, 06:40). Lesson 21 says I still have to check every side, because I don't want to lose the overall picture (01:34, 01:42).
What did my checks find, and where?
Here the order on the tape is round, look, clean, then divisions (02:56, 07:14). Five checks from the lessons above sit in the table, each with my words from the cue I gave.
| Name | What I looked at there | Where | My words |
|---|---|---|---|
| The bump check | Spotted a bump from a side view | Early lesson | Better to do it right away |
| The step away | Looked from another position, too much spot | Room 69 | So I have to attack that |
| The downhill check | From above fine, but sideways not okay | Moldings 10 | It just goes really nicely downhill |
| The ridge check | Hold one measure to the future ridge | Room 36 | It has to be gradual movement |
| The underside check | Checked the shape from the bottom too | Lesson 31 | It has to look really nice |
Two of the five concern the side view, another concerns a different position, a fourth the bottom, and the last a measure I hold.
Where else does the same look show up?
The acanthus is the leaf these movements belong to, and Advanced Carving: Venice Room, Part 2 covers workshops 13 through 25. Pages on wood carving, relief, Venice, sculpture, shadow, smoothness and three-dimensional space cover the wider craft. Words like knife, rasp, pencil, workbench, volute and ridge all come up in the lessons above. Pick one curve of your own and look at it sideways.
How it's done
- Round the section and knock down the ridge. I wanted to round the section and knock down the ridge (02:56, 03:07).
- Find where the movement stops being gradual. Going a little this way, I found a spot that is not too gradual (04:48, 05:03).
- Walk around it and look. I said it has to move smoothly along its whole length (06:06, 06:14).
- Clean the pencil marks to see better. To see better, I said let me clean a little and get rid of the pencil marks (06:44, 06:54).
- Look for the subdivision points. I still had to find the right subdivision points (07:36, 07:42).
Frequently asked questions
How did I check for smoothness in this part?
I said I need to take a look from all the sides, and if the movement doesn't move smoothly, that is no way and no good. Next came the pencil marks, which I wanted gone so I can see better (at 06:06 and 06:54).
Why check a carving sideways when the top view looks fine?
In Moldings 10 I said that from above it looks okay, but sideways it does not look okay, and I need to make sure it flows downhill (12:00, 12:10). The same shows in Venice Room 127.1: from the side, sometimes it looks like you have to change something (at 00:42 and 00:48).
What do I do when I find a bump while checking?
In the Hashemi Flowers course I said I had to remove a bump in my main flow, because it just doesn't flow good, and I would take a knife (05:29, 05:37). In the lily box lesson I ran into a too high spot, said I would look again, and maybe attack a little bit inward (08:44, 09:07).
What to carve next