
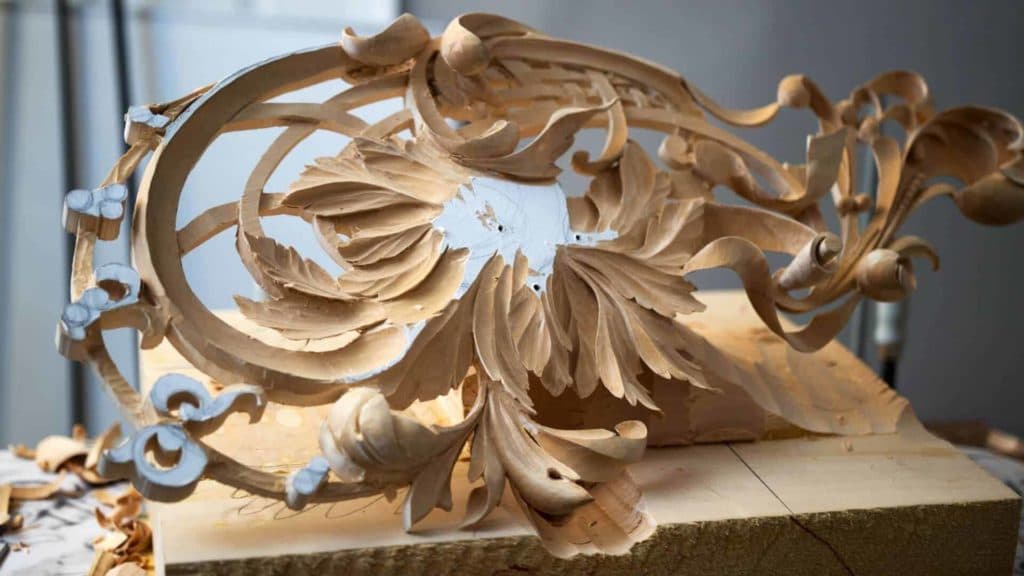
Alexander Grabovetskiy, woodcarver, School of Woodcarving · Published 2018
Do you need a carving post, or will two vises do?
Quick answer: A carving post is a floor stand with an adjustable shelf that brings work up to your eyes. Two carver's vises do the same job and nothing of theirs blocks your feet. Mount one at the edge of the bench, put the second on a loose board, and the work goes anywhere you want it.
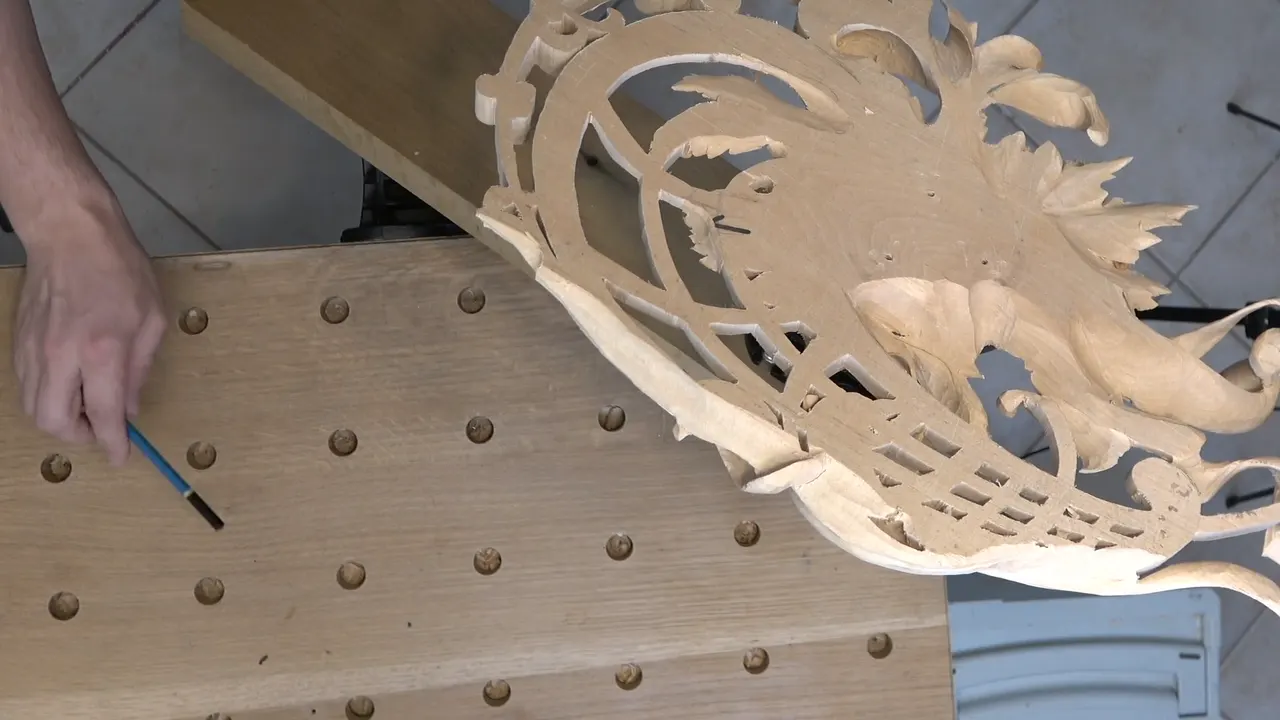
My whole holding system is two carver's vises. One is bolted to the edge of the workbench, the other lives on a loose board, and between them a panel can face any direction I ask for. No floor stand, no shelf, nothing planted between me and the work.
Can you get behind your carving when the grain runs the wrong way? Does the piece come up to your eyes, or do your eyes go down to the piece? Is there a column planted exactly where your feet need to be? Those three questions decide more about your carving than which gouges you own.
Workshop 21 of Carving Hashemi Flowers opens with me saying I want to show a different setup. What follows is four minutes on holding, then an hour of carving that would be impossible without it.

What a holding system has to give you
- Any angle.
- Height you can change in seconds, including up at eye level when the detail gets small.
- Nothing blocking your feet.
- A grip firm enough that both hands go to the tool, and gentle enough that it marks nothing you already carved.
- Somewhere to lay three tools.
What is a carving post, and why do I not use one?
A carving post is a column standing in the middle of the shop with an adjustable shelf clamped to it. Loosen the clamp, slide the shelf up or down, tighten again, and your work sits wherever you like, right up to eye level. Carvers have used them for generations, and the idea behind one is perfectly sound.
My objection is simple and it is about my feet. A post like that always stands between you and the work. I dislike a column planted where my face wants to be, and once it is bolted to the floor you cannot walk round it either. A design that makes you approach from one side has already decided things a carving should decide.

Why does two vises beat one?
One vise holds the work while the second one moves it. Mine are Veritas carver's vises. One is screwed to the side of the workbench. The other sits on a board fixed to nothing, so that board can be clamped anywhere, or simply gripped in the bench vise at whatever tilt the cut wants.
Swapping between them takes seconds, and that matters more than it sounds. Ten seconds of remounting against five minutes of carving uphill into torn grain is not a close contest. Anyone who has fought a leaf tip from the wrong side already knows it.

Brand is not the point and I say so on camera. Any carver's vise will do this, and a couple of decent ones will do miracles. Mine happen to be Veritas, they have held well for years and I have no complaints, but the system is what does the work rather than the label on it.
How high should the work sit?
Bring it to your eyes when the detail gets small, and drop it when you need weight behind the tool. The board on a vise does both without any adjustment beyond loosening a handle. Detail on a pierced edge deserves eye level, because you cannot cut what you cannot see, and squinting down at a bench for an hour makes your shoulders decide things instead of your eyes.

Heavy roughing wants the opposite. Lower the work, get above it, and your body weight does what your arm would otherwise strain for. Floor stands do this too. The difference is that my setup then lets me step round to the far side and take the same cut from the other direction, which a fixed column will not.
Is it safe to work with the piece in mid air?
You can, and half of this workshop happens that way. With the panel gripped only at its centre, most of the carving is unsupported underneath, which trains both hands to feel how much pressure the wood can take. That skill has a name in this course and a whole lesson of its own, air carving.

Where the section feels too weak I bring back a support, an MDF board slid underneath, exactly as in the workshop on holding fragile work. Judging which of the two a given spot needs is not a rule you can write down. Sometimes you just have to feel whether it is too dangerous.
Does mounting change what the V tool does?
Preliminary cuts come first on this panel, and they only work if the piece cannot shift. Before any shaping I run a V tool round the berries and the separations, a number 16 at six millimetres, drawing the boundaries the gouges will later work up to. A groove cut into work that wobbles wanders. Hold it properly and the same groove lands where you drew it.
Something I admit in this workshop rather than hide: I wiggle. You are not supposed to wiggle a gouge sideways as it enters the wood, every book says so, and in a tight corner on hard end grain I do it anyway and think it is all right. Rules in carving are mostly descriptions of what usually works, and the wood on your bench has not read any of them.
What about the screw holes?
Screw holes wear out, and a worn hole is how a panel comes loose mid cut. Every time you drive the same screw into the same hole in the back of your work, the hole gets a little bigger, and sooner or later you are retightening every ten minutes.

My answer is two plates rather than one. Leave a holding plate screwed to the front of the piece and another to the back, and you stop taking the mount apart every time the work has to turn over. Veritas sell plates separately, which is one practical reason I stayed with them.
Tightening is its own small discipline. Between cuts I keep reaching down to nip the vise handle up again, because a panel that has been carved for an hour has lost a little wood and a grip set an hour ago is no longer the grip you set. Nothing about that is interesting, and it is the difference between a clean cut and a slip.
Where do the tools live?
On shelves, not on the bench. When you own a thousand tools there is no bench in the world big enough, and a bench covered in gouges is a bench where you spend your day hunting. My tools sit in racks where I know the number and the position of each one, so my hand goes out and comes back without my eyes leaving the wood.

Two or three at a time on the board beside the vise is another matter. Those are the ones in play for this cut and the next two, and having them within reach is the point of a flat surface next to your work. The rest belong on the wall. Give a bench the chance to hold everything and it will.
That habit has its own workshop in All about tools for Wood Carving, and the same thinking runs through the sharpening course: a tool you cannot find is a tool you do not own.

Does the setup change how you cut?
Being able to rotate the work is what lets you always cut across the grain. Pushing along the grain into a weak section is how edges split, and on this panel I keep turning the piece so the tool travels across the fibres instead. Grain changes direction inside a curve, so the same leaf may need two approaches from two sides.

Mounting also decides whether a mallet is available. With the panel held firm I can tap with a small mallet and gain control rather than force, since a tap gives you the same small increment every time while a hand push varies with how tired you are. Held loose, a mallet is out of the question.
Which tool size belongs in a weak area?
Small. Compare three gouges by speed and you get a picture I use in the workshop: the big one is an airplane, the middle one is a car, and the small one is walking. Speed reads like an argument for the airplane until you notice what else scales with size.
| Tool | How fast it goes | What it costs you in risk |
|---|---|---|
| A wide gouge | an airplane | the most pressure of the three, and the best chance of snapping a thin section clean off |
| Mid size | a car, which is where most panels get roughed out | a fair compromise |
| Small | walking, and you feel every minute of it | gentle, with far less stress on your hands and on the wood itself |

Pressure is the whole reason. A wide edge has to displace more fibre at once, so you lean harder, and leaning harder beside a pierced opening is how a week disappears. Where the area looks weak I take the small tool and accept the extra minutes, the same judgement as in the workshop about speed.
Want the carving rather than the summary of it? Every workshop in this course sits inside tuition at the school, and this page is where people who have never held a gouge begin.

Do the numbers on the handle mean anything?
Treat a stamped width as a rough guide. One of my gouges is marked six millimetres and it plainly is not. Look at the blade and it measures nearer three sixteenths of an inch, about five, so the mark is out by a fifth. Makers are not very accurate about this and it matters less than you would think, because what you actually care about is whether the edge fits the curve in front of you.

Sweep numbers wander between makers too. Pick up a number 7 from Ashley Iles, one from Pfeil and one from Henry Taylor and they will not feel identical in the cut. Learn your own tools by eye. The stamp is a label, the blade is the fact.
One more thing the mounting has to allow for is what the design does next. On this section a leaf grows out of another leaf, and I stop, look, and say out loud that I have to make sure I am doing the right thing before touching it. Being able to turn the work and study it from three angles is part of how that decision gets made. A panel bolted flat to a bench gives you one view and one opinion, and design needs more than one.
None of this is exotic. A bench you already own, a scrap of plank, and vises that will outlast both of us. Mine have held nicely for many years with no trouble at all, which is not something I can say about every piece of equipment in this shop.
What about leaving room to trim?
Leave about 10 mm, three eighths of an inch, all round the outside for now. Cut the outline to its final line too early and you lose the margin that lets you correct a flowing line later, and on a panel this size there is always something to correct. Trimming later is easy, and putting wood back is impossible.

Under all of this sits the wood. The panel is American basswood, and the reason a piece gripped in one small vise survives a mallet at all is that Tilia gives way cleanly instead of tearing. In oak the same setup would need more support.

A last confession about the room. My shop moved during this course, which is why the room behind me changes from one workshop to the next. The tools never changed, only the walls. A holding system you can unbolt and carry is worth something on the day you move.

Two vises, one board, and a bench you can walk all the way round. That is the whole apparatus, and acanthus work of this kind is what it holds all day. If a post suits your shop better, use a post. Just make sure it is not standing where you want to be.

Everything above is a bench problem rather than a carving problem, which is why it gets a whole workshop. Students write to me about gouges constantly and almost never about holding, and then they wonder why a leaf tears on one side of the panel and behaves on the other. Look at the mount before you blame the steel. Then go and study the carved furniture in the collection at the V and A and ask yourself how a man reached the back of those undercuts without turning the work over.
How it's done
- Bolt one vise to the bench. Fix a carver's vise at the edge of your bench, near a corner, so you can reach past it on both sides.
- Put the second on a loose board. Mount another vise on a plank that is not fixed to anything. Long and short boards both earn their keep.
- Screw a plate to each face. Leave one holding plate on the front of the work and a second on the back so the mount never comes apart.
- Set the height by the job. Raise the work to your eyes for detail. Drop it low when you want body weight behind a roughing tool.
- Turn before you push. Rotate the piece until the tool travels across the fibres. Never fight grain you could have turned away from.
- Keep three tools out. Everything else belongs on a rack, filed by number. A bench covered in gouges is a bench you spend the day hunting on.
Frequently asked questions
Is a carver's vise worth the money for a beginner?
One good vise changes more than a new set of gouges will. Both hands reach the tool once the work holds itself, and that single change improves control faster than any tool purchase I know of.
Will an ordinary bench vise do instead of a carver's vise?
For flat work held at one angle, certainly. What you give up is rotation, and rotation is most of the benefit. A board gripped in an ordinary vise plus a carver's vise on top gets you very close.
How do you avoid marking a carving in a vise?
Grip the waste, never the carved face, and keep leather or cork between metal and wood. Most bruises happen when somebody tightens a jaw onto a surface that is already finished.
What to carve next