

Alexander Grabovetskiy, woodcarver, School of Woodcarving · Published 2020
What does a wood carver mean by "the roughness"?
Quick answer: Part 10 of Venice Room workshop 82 has me setting the roughness aside to start on the divisions. My other lessons say the word beside sandpaper, fingers, a rasp, a Dutch reed, scrapers, a number seven, a number three and a spoon gouge.
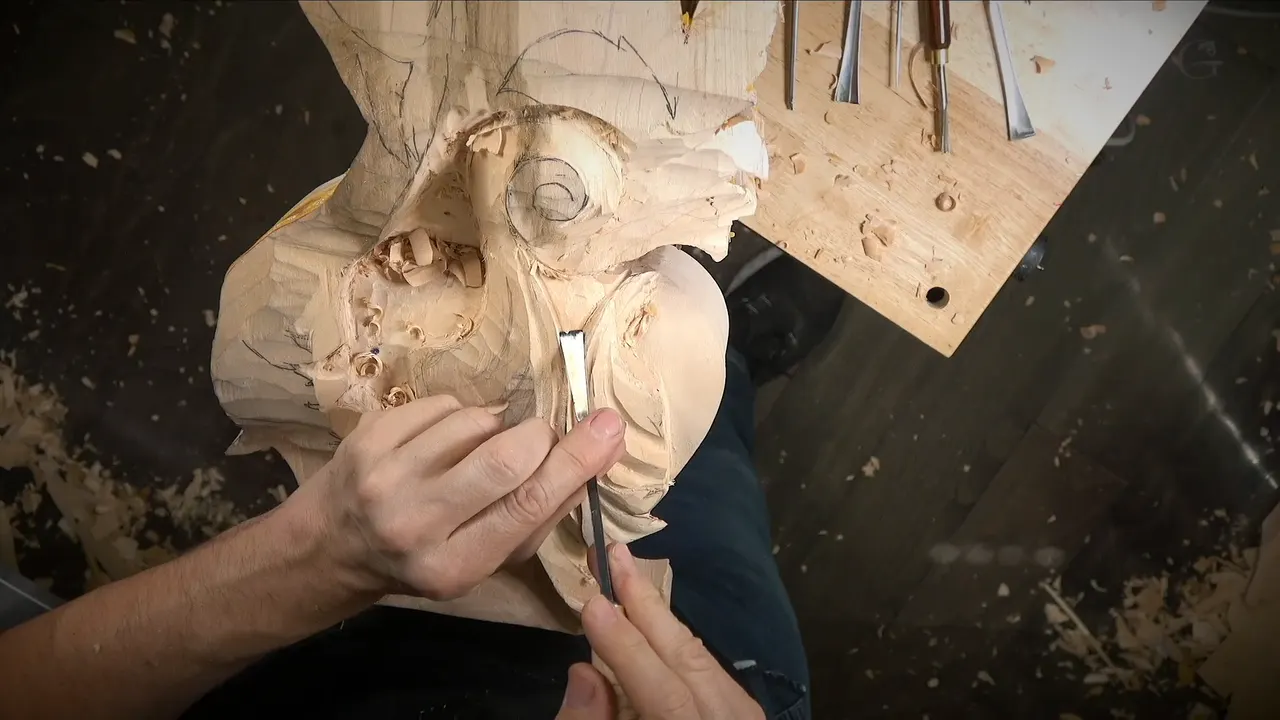

In workshop 82, part 10, I said I would not worry about the roughness for now, and I named the divisions as my next job. My other lessons say the word beside sanding sheet, fingers, a rasp, a Dutch reed, scrapers, a number seven, a number three and a spoon gouge.
Ever run a thumb over a fresh cut and felt a catch your eye could not find? Ever stopped halfway through a wood carving and wondered whether to clean that spot now or let it wait? Come through part 10 with me, then through the lessons where the word comes back, to see where I left it and where I took it out.
Where does the word come up in this part?
It sits between two jobs. Just before it I said "And I also need to roll this way also, create the fillet cut." Then came a short verdict and the line itself, "All right, that is good, I'm not going to worry about the roughness for now, but let me now start on divisions of those ones."

Earlier in the part I had put a cleanup off. My plan was to clean up a little better later on, when I establish the final form of the movements, and then "But for now, it will do." Next to it stands a doubt, "I'm not sure if I'm happy or not about overall what I have to do."
The part opens with a smaller job, "And again, get rid of the ridges, which I don't need." Later came a size, "Yet again, three millimeters" (about 1/8 inch). For one shape I named a way to round it. "I have to probably roll it and create a chamfer cut or a fillet cut or roll this way because it's a part of a pipe."
What did I say about the carbon paper mark?
The mark came up next. "You know what? I probably should get rid of the marker, or not the marker, but whatever the carbon paper mark." Then "I'll just scrape at that." The reason is in my next words, "That way, it's going to be a lot more visible for me, so it's not going to strike my eye, and I can see the movement." Two more lines followed, "And I also could use probably my new tool" and "create somewhat like smoother movements."

The Butterflies course has the same job, with pencil in place of carbon paper. In lesson 9, part 3, I said "just whatever the utility knife, razor blade," and "make sure you see the direction of the grain and you scrape with the direction of the grain."

The pencil marks needed to come off, I said, and "that way you're going to see if we are good or bad, I mean, all the roughness." My verdict on the scraping was short, "it's already giving a really good, nice result."
Which lessons leave roughness for later?
Grape Onlay 12, part 1, is about undercutting, and I said "I would still keep it about quarter of an inch and some of the spots that's gonna be more and some of the spots less." That is about 6 mm. After that I said "it looks rough and I'm not taking care of the roughness until the end when everything is done, and then I'm gonna clean all the facets."

Some spots there were left alone. "I need to keep those high spots because I have to remember, at some point I will have to flip it and it's gonna rest on those spots and it's gonna be pretty solid." Of the spots I would find, I said "it's gonna serve me like legs."
Lily Box 8, part 6, has a plan too. "I'll leave it for now like that, and I'll take care of this roughness a little later." Then I planned a look at the shape, "Let me look from the side view if I can fix overall movement."
Lily Box 12, part 3, moves the cleaning off camera. "I can clean that off camera." Then "I'm talking about all the roughness and stuff," and "Like I said, I can do that off camera."
The tool in part 11 of Venice Room 35 was number 5 and 10 millimeters (0.39 in). "Let me establish that middle part as a convex," I said, and then "And no, I don't worry about that roughness on this side." I added that I would still be able to fix it with no problem.
Roman Acanthus 14, part 5, has a line about it too. I named a small knife and said "if you see some roughness at this stage, don't panic." Then "take your time, and if you need to recut and make that cut nicer, you can always do, but make sure your tools are really sharp, that's probably the key." Later in the part I said "I'm probably going to leave it like that for now, and let's just slightly refine this side."

Which lessons mention roughness showing from below, above or inside?
Inside Venice Room 23, in part 3, I picked the two millimeters (5/64 in) because "I really need the smooth transition from the sides and also the backside of it, okay?" Next I said "I don't want to see any roughness inside because it's going to be visible from the bottom." I followed with "that would be a mistake for me if I would leave rough spots right there."

One pass in part 8 of Lily Box 7 was really important to me, I said, because it would be visible from above. Visitors figure in my next line, "People are going to look from above and they'll see if there is some roughness on inside." So I said "that is why I really like to use number 11 and give a round transition on inside rather than just a V-tool and get a really sharp line."
"Let me jump to one millimeter" (0.04 in) came next in that pass, and half a millimeter (0.02 in) was to be my last pass. About the camera I said "I know on the camera it's hard to see."

The same aim comes back in part 5 of Lily Box 8, this time with a spoon gouge. My line was "I think I could use number seven and excavate even more." Then "my goal is to make a smooth transition inside." I wanted no roughness showing there. My next plan was "I'm going to attack from inside with the spoon gouge." I told the viewer "I apologize, I can't place my camera on inside, but just guess what I'm doing."

The Roman Acanthus course, lesson 16, part 4, gives the aim and a warning. I was cleaning inside and said "just to clean all that mess until you don't see any roughness." The size I gave was "10 millimeters, three-eighths of an inch." My warning was "pay attention not to dig with this corner on inside too deep, otherwise you're going to destroy that nice smooth transition we just created."

Which tools did I name to take it out?
Venice Room 76, part 1, names a number seven, and my words were "Let me clean little bit some roughness of this cut." Then "let's do number seven, four millimeters" (0.16 in). My wish was to see the facets and the tool marks, but not as much, and "I still like those facets."

The number three is the tool in Venice Room 111, part 2. My words there were "I'll just ride right on top of that movement so you can see it's kind of rough." Then "with the number three, I can take care of that roughness and make it look beautiful." Then a stop, "That's enough, that's good."
A spoon gouge is the answer in part 2 of Venice Room 58. "I can use just any spoon gouge and undercut, like that." A smaller one was my next thought, "This is a little too big, I could use a really small number six and go in, even attacking from that side." My warning was "Got to be careful with some spots because the grain, it's easy to break it, so have to be really patient."

For Venice Room 10, part 6, the tool was a rasp. The line was "I can just shave some roughness out and recreate the cut." About the rasp I said "doesn't leave any abrasive on inside." The verdict on the result was "it's not ideal, but it's not that bad at all, I should say."

Sandpaper gets a fair hearing in part 1 of Roman Acanthus 15. The first line is "But you can see on inside, there's some roughness." About sandpaper itself, "I guess it's okay, you could do that, I'm fine with that, but I still would like to see on mine some tool marks, but not as much as I see right now."
For the inside I said "just attack that with a bigger veiner or bigger gouge and just try to make a single cut, but it has to be absolutely sharp." My plan was to try "a number 11 spoon, number 11 veiner spoon."

Another trick sits in part 7 of Venice Room 73. There is a technique for the roughness inside, I said, and the tool is one made for leather carving. "I'm using sometimes, not always, but I'm using sometimes tool for the leather carving, okay?" And "that tool is also a really good tool for getting inside of those cavities and kind of push that down a little bit, okay? And push it down and make that cavity or excavation much cleaner."

Can you feel roughness the eye cannot find?
In part 13 of Lily Box 7, "Number 7 will do, and 6 millimeters" came first (about 1/4 in). Next came "I can feel if there is some roughness." Then "You really can't see, like I said before, sometimes what is going on, especially with the grain like that, you can't see, but you can feel it with the fingers." Then "Now just shave it nicely."
Another passage of that lesson has roughness in the way. "I don't think I can give a concave cut right here, because all that roughness underneath, but what I could do, I could actually curl it inward just like that."
Taking wood away exposed more, as part 12 of that lesson shows. "I just exposed even more roughness." Then "Maybe I have to be creative and create something right there, so we'll see." After the chips were cleared I said "this area is kind of a really rough area, so I have to pay attention what is going on."
Does a dull tool leave the roughness?
Venice Room 9, part 5, has a secret from my teacher. "He told me there is no such a thing as a bad wood." Then "There's just dull tools." Roughness that is catching, I said, "that means absolutely not necessarily the wood is bad, it means tool is not sharp."
I finished the thought with "your tool is supposed to be really sharp that you don't even have to press inside, and it's already starting to cut, so please learn how to sharpen your tools." A similar line sits in Roman Acanthus 14, "make sure your tools are really sharp."
Where does sandpaper fit?
Chamomile and Bow Rosette 4, part 2, brings in numbers. "you can see some roughness on some spots," I said, and "I'm going to get with really small, tiny gouges and chisels, clean it, and until it's perfect." That cleaning could happen off camera, I said. For sandpaper, "I would recommend using 180 grit, I would say, or 240, not lower than that." Grits of 100 and 120 would give "a really, really rough look."

On that project I said "just because this project is for the paint, I'm not afraid of using it." Of the sheet I said "I really like this one because it does not leave as much abrasive inside of the fibers, it's easier for my gouges." The rasp lesson brought up the paint too. The work would be paint grade, I said, and I have to sand my first coat anyway, the base coat.
Greek Acanthus Leaf 12, part 3, names a plant. "you could use a small sandpaper or just a Dutch reed." Then "it's not really sanding, but still, it kind of smooths out the edges of it, and you can kind of take out the roughness." In the Butterflies lesson I said "you could use just sandpaper."

Where do these fixes sit side by side?
Every lesson on this page sits below with the tool or move I named, and my words about it.
| Lesson and part | The tool or move I named for it | My words about it |
|---|---|---|
| Part 10 of workshop 82 | set aside for now, with the divisions as my next job | divisions next |
| Lesson 76, part 1 | a number seven, four millimeters (0.16 in), with fewer tool marks showing | like those facets |
| Venice 111, part 2 | the number three, after a ride on top of the movement | make it look beautiful |
| Workshop 58, part 2 | any spoon gouge, then a really small number six | be really patient |
| Room 10, part 6 | a rasp that leaves no abrasive on inside | shave and recreate the cut |
| Roman acanthus 15, part 1 | a bigger veiner and one absolutely sharp single cut | some tool marks wanted |
| Lesson 7 of Lily Box, part 13 | number seven, 6 millimeters (about 1/4 in), then my fingers | shave it nicely |
| Room 73, part 7 | a tool for leather carving, pushed into a cavity | a much cleaner cavity |
| Part 3 of Greek acanthus 12 | a small sandpaper or just a Dutch reed, to smooth the edges | take out the roughness |
| Butterflies 9, part 3 | a scraper that follows the grain, even a razor blade | see the roughness |
Where can you watch part 10 and the lessons on this page?
You can watch part 10 in Venice Room 82. Workshops 74 to 85 sit together in Venice Room Part 7. The other lessons on this page have pages of their own, linked above, and each one is open to you with school access.
Want to hear the word in my own voice, with the tools in my hands? This page starts you.
How it's done
- Put the roughness off. I set the roughness aside and planned to start on the divisions.
- Remove the pattern mark. On my piece I planned to scrape off the mark.
- Pick a tool for the spot. Across my lessons the tools included a rasp, a spoon gouge and the numbers seven and three.
- Feel for it with a finger. Part 13 of the Lily Box lesson has me saying the eye sometimes cannot see it, but fingers can find it.
- Check the edge of the tool. My teacher's secret was that roughness which catches points to a dull tool.
Frequently asked questions
Which gouge did I name for roughness in workshop 76?
A number seven of four millimeters (about 5/32 in), in part 1. I said I wanted to see the facets and tool marks, only fewer of them, and I added that I still like them.
Why scrape at the mark from the pattern?
Scraping at the mark would make it a lot more visible for me, I said, so it would not strike my eye, and I could see the movement.
Do any lessons mention roughness showing from below or from above?
Part 3 of Venice Room 23 says it would show from the bottom. In the Lily Box course, part 8 of lesson 7, I said people would look from above and see it on inside.
What to carve next