

Alexander Grabovetskiy, woodcarver, School of Woodcarving · Published 2020
What does a wood carver mean by "chunk out"?
Quick answer: Chunk out is what I said in Venice Room 87.1 about wood I really don't need, with the number seven in my plan. Other lessons of mine use the words with a number nine, a knife and a number 11, from the Hashemi flowers to the lily box.
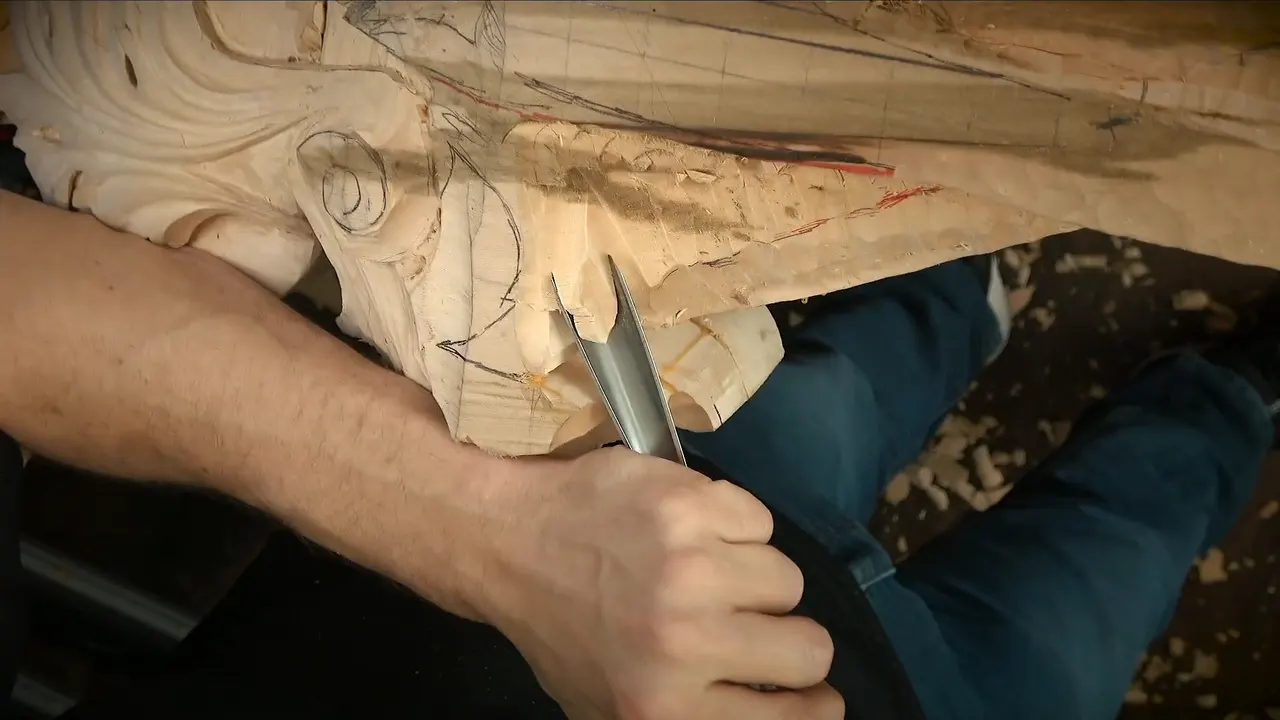

I said "chunk out" while carving Venice Room 87.1, about a piece of wood I did not need, and the number seven, my big tool, was the plan for it. My other lessons use the same words, each with its own tool and its own size.
Have you ever looked at a pencil line on a block and known that one big piece of the wood had to go before the line could show? Did you reach for the largest tool you owned? Then you know the spot where I said it. Below is that moment in workshop 87, and then the same words from my other courses, each with its own link.
What the first video of workshop 87 holds
- A nine for the outline comes first in the plan, and the chunk comes next.
- My big tool goes to that piece in the plan, one I don't need.
- No bueno is what I say about a crack inside.
- An airborne part and a hole stay a maybe, with a "we'll see" after them.
- One section near the end is a part I plan to keep.
Where does the first video here say chunk out?
The part opens on "I am ready to work on this section right now." A spot gets named next, "the lowest point I have right here," and I say this movement has to be lowered down quite a bit. I add that all of that section needs to be "going and flowing and be connected all the way down to this spot."

Next, the tool. I have to be really careful, I say, and I "cannot use too big of tools." What follows is "let me grab, again, just number nine at three-quarter of an inch" (about 19 millimeters), and then "Let's start outlining."
Once the outline is under way, I say "I need to check how it's flowing all the way" and that the line "has to be really nice and flow." A thought about lowering that down trails off at "I kind of..." and what comes next is "let me take this chunk first, and then I'll see exactly how much I have to take it."

The big tool comes next. "I'm going to take this chunk out right away, pretty much, with the big tool, with the number seven and three inches, because I really don't need it." Three inches is about 76 millimeters. It can come off "pretty much right away," I add, and "Less going to be in my way."
A little later I say "Well, actually, a little lower." Then comes a plan to "create a line" and "take a chunk out and just work around, outline it," with "I don't want to lose overall movement" after it.
What tool was my plan for the cut around the chunk?
A smaller tool is next, "either number 11 or number nine will work also." The plan is a number nine, about three-eighths of an inch (about 10 millimeters), and "I'll continue just my cut around."

A narrow spot gets a warning: "I have to keep an eye because that is a narrow spot, and I can always make a mistake." Next comes "Get a little closer to myself," and my explanation is that "one side is always cutting clean, and another is not."
What went wrong in that cut?
I see "I'm just chopping out too much" and call that okay. "Here, I can attack with the bigger tool," I say. I can see "I just created a crack on the inside," which I call no bueno and not good. Next, "let me chop down a little bit."

The tool I name after that is "number three, that's what I'm using," at 20 millimeters (about 0.8 in), and I say I plan to chop down "like this." Then I say "let me get number seven," then "get that chunk out," followed by "Here you go."

What was the open spot underneath?
By the way, there is "going to be an open spot right underneath," and it is "going to hang in the air." "An airborne part" is the plan, and the doubt comes with it: "Maybe, I don't know yet. We'll see." A hole is on the table too, one that would "just penetrate right here so that would look really nice and something different." I am "not sure if I'm going to do it or not yet."
The part closes on the next section, "let me attack this section," then "let me double-check." Looking at my drawing, I find "a section right here, which I do not want to lose," and the last line is "this is safe to remove."

What do the other two videos of workshop 87 show?
Part 2 has an outline, "Let me outline with number three," and a search, "I have to find the right spot." The calipers gave the measure, and the spot is "supposed to be somewhere right here." And "I have to chop out this" follows.

Later in part 2 comes a number seven at 14 millimeters (about 0.55 in), with "little by little, I can create the shape I'm after."

Part 3 opens on a doubt about keeping this part as high, and a way out, "let me establish first form, and I can always lower that down with no problem." Later a number seven shows up, at "3 inches, 80 millimeters," and further on come "let me chop this out, recreate the movement."

Where else does chunk out turn up in my wood carving courses?
Other courses use the same words with other tools. The Hashemi flowers come first, then the furniture panel, the acanthus leaf and the lily box, then more Venice Room lessons, and last some lessons about how fast a chunk should come off.
Which words sit beside a chunk in the Hashemi flowers course?
Hashemi flowers 9, video 4, has a flip on my mind: "that's going to flip over." I say I have to take out "all that material right here" with the nine. The size is "about one inch" (25 millimeters), and a card in the frame reads Gouge #9, 1 in (25 mm). I also plan to remove a chunk of it. Then the grain gets a warning: "I have to be really careful on this piece because the grain goes this direction."

Further in, I am "going really deep," and the reason I give is "just a shadow." The chunk is next to come out, I say, and then "now I have to clean it," with "half an inch number eight" (about 13 millimeters) as the tool I plan to take.

Over in Hashemi flowers 8, video 6, I have a number 12 knife in my plan to reshape a part that "just like bubbles out, and that's not good." I say the chunk has to come out and that it "just should not be there." I can use, I say, "probably a knife." The aim is "more or less final form."

Video 5 of that lesson says "Just remove this chunk," and then "I'll just use my back bent." Further on come "the smaller #9" and "a quarter-inch #9 or six millimeters."
Video 2 of Hashemi flowers 38 puts a plan on the table, to take the chunk out. I add "let me think what I can do." There is "a lot of meat," so I can "take down quite a bit," though "it's better probably to attack from this side."

And in Hashemi flowers 44, video 5, there is "Looks like I have to attack from other side also." The plan is a number 11 to "clean all that chunk out and excavate even deeper until it's impossible to see the end," and I add "End of the cut, what I mean." The whole Hashemi flowers course is in the lesson list.

Which words sit beside a chunk in the furniture panel, the acanthus leaf and the lily box?
Furniture Panel 18, video 8, works around the flowers, the "Filler flowers" in my words: "let me get the number nine," then "number nine and quarter inch" (about 6 millimeters), with a plan to take that chunk off at once. A warning about the grain follows, "be careful if you're working along the grain," and "you can always make that mistake and slip with the tool and dig inside, in the area."

In Corinthian acanthus leaf 2, video 3, the talk is about the line: "any place I can fit my gouge, which is really close to the line, I'll use it." Then "Get this out. This chunk out." After it, "it looks like we almost completely set in place the whole picture."

Lily Box 8, video 4, tries another direction, "attack that from opposite direction," with "maybe I could use the bigger again" and "remove this chunk." Then come "one millimeter" (about 0.04 in), "little by little," and "really small, tiny tools."

A flip comes up in video 6 of that lesson too, and I say "I need to take number nine at first and just to get big chunk out." Back in Lily Box 2, video 5, the plan is "number seven first. Or number five," then "number five will work," and "I'll remove the chunks, and I'll just go across the grain at first."

Where do other Venice Room lessons put a chunk?
Venice Room 11, video 9, comes from Part 1 of the Venice Room. I plan "a big subdivision," and I need to be "getting to the right position, to the right line." Then I say "that's somewhere right there, and I can remove that chunk." Inner subdivisions are a later plan, and "this is good for now."
From this same Part 8, video 8 of Venice Room 86 says "I am safely, safely, safely able to remove that chunk." Next, "let me readjust the camera, and I can start working on that."

Then Venice Room 96, video 1, names a gouge, "three inches to be exact" (about 76 millimeters, and I also say 80), and "the big jump would then be gone from here." Next comes a plan to get the chunk out.

When was a big chunk not my plan?
In video 1 of Greek acanthus leaf 2, I give two ways to start. I could go "outlining" with the V tool, or use "just a big gouge, like big number seven" and "take big chunks out." On that piece the first cut will be with "my number 12 knife, a chip carving knife," to establish the outline "really, really close to my final line."
In Greek acanthus leaf 3, video 4, the knife is back. A first cut goes straight down at 90 degrees and a second "with the bevel," and then "you can see how quickly you can remove big chunk of wood." In my words, "it would be absolutely fine to use a knife."

For Roman acanthus 2, video 1, the line is "number eight again and one inch or 25 millimeters, 25 and a half to be exact, 25.4," to "just remove chunks of wood as much as possible." A big tool, I say, lets you "remove a lot of material at once," and it is better to have bigger tools.

And Lily Box 12, video 6, goes the other way: "Use a small knife," and "I can remove big chunks with the knife," with a warning to be careful near the fingers and a note about micro cuts.

Acanthus over Moldings 1, video 2, has me planning a small mallet, "like 12 ounces" (about 340 grams). My goal is "to my marking, to that height, a little above probably." I am "still going to have some space for cleaning," and I am "not going to take big chunks." A little later I am "still going to leave maybe about 1/16 of an inch" (about 1.6 millimeters).
A straight cut down is the subject in curly kitchen cutting board 5, video 1: "you can always kind of shave it slowly," and "you have to slowly just remove the chunks." After them I say it is "easier for you to make a clean cut."

Which lesson says chunk out, with which tool?
| Where I said it | Tool named |
|---|---|
| The first video of workshop 87 | number seven, three inches, about 76 mm |
| Hashemi 9, video 4 | number nine, with a card on screen |
| Hashemi 8, video 6 | a knife, number 12, to reshape a part that bubbles out |
| Flowers 44, video 5 | an 11, to clean the chunk and go deeper |
| Panel 18, video 8 | nine at a quarter inch (about 6 mm) |
| Lily Box 2, video 5 | seven first, or a five that will work |
| Roman acanthus 2 | number eight at one inch (25 mm) |
| Workshop 96, video 1 | three inches to be exact (76 mm) |
Is there a spot on your piece that you really do not need? Would you like to see the big gouge go at it first? Workshop 87 waits inside one tuition plan with the rest of the Part 8 workshops, and this page starts with a seven and the words chunk out, said among my hand tools.
How it's done
- Name the low spot. In part 1 I call one spot my lowest point, and I say maybe I have to lower the movement there.
- Choose a small tool near the line. Big tools are out for that spot, so a number nine, three-quarter of an inch (about 19 mm), is my plan to outline.
- Plan the big tool for the chunk. The big seven, at three inches (76 mm), is the plan for a chunk that is not needed.
- Keep the movement. To keep overall movement, I plan a line, then a cut that works around it.
- Keep an eye on the narrow spot. A narrow spot needs an eye on it, I say, and later a crack shows up inside.
- Name the seven for the chunk. After the crack I name a number three, and then a number seven is planned for the chunk.
Frequently asked questions
Which tool did I plan for the big chunk in workshop 87, part 1?
Number seven, three inches (about 76 mm), was the big tool. I said I would use that big tool on wood that is not needed, and I planned to take it off at once. My words after the crack named the seven, with "Here you go" after them.
What happened to the wood near the narrow spot?
I noticed I was chopping out too much, and I called that okay. Next I could see a crack inside, which I called no bueno. My next words were about chopping down a little bit, and the tool I named after them was a number three at 20 mm (0.8 in).
Did I decide on the airborne part under the chunk?
I had not decided. My words were that an open spot would hang in the air underneath, that I could make the hole and penetrate right there, and that I was not sure yet whether I would do it.
What to carve next